Remember the time you tossed a crumpled paper ball across the room, and your cat went absolutely nuts chasing it? It’s simple, right? Making homemade cat toys can be a great way to keep your furry friend entertained without emptying your wallet. You might think, what else can I whip up? Well, stick around, and I’ll share some fun and easy DIY ideas that’ll have your kitty purring with joy and maybe even a little mischievous.
DIY Feline Fun Ideas
DIY Feline Fun Ideas can turn a lazy afternoon into an exciting adventure for both you and your kitty. Imagine creating homemade cat toys that capture their attention.
Ever thought about a simple crumpled paper ball? Just ball up scrap paper and toss it—your cat will think they’ve discovered treasure.
Don’t have scraps? A sock filled with catnip can work wonders too. Simply fill a clean sock, tie it off, and watch your feline friend go wild.
If you’re feeling creative, get some yarn or string and thread it through a cardboard tube. Your cat will engage in an epic chase.
With these homemade cat toys, you’re not just entertaining them; you’re bonding, sharing laughs, and maybe even dodging a few accidental claw swipes along the way.
Our Collection
Alright, let’s talk about our collection of homemade cat toys.
You’ll find everything from a feather wand teaser that drives your kitty wild to a simple ball of crumpled paper—trust me, they love it.
Want to see how a sock stuffed with catnip or a toilet paper roll puzzle can keep them entertained for hours?
1. Feather Wand Teaser

Are you ready to make your furry friend something special? This Feather Wand Teaser is an easy DIY project that promises hours of fun and excitement for your cat.
Not only does it save you a few bucks that you’d have spent on store-bought toys, but it also allows you to create a personalized playtime experience for your kitten or adult cat. Plus, who doesn’t love a little crafty fun while bonding with their pet?
Materials Needed:
- A wooden dowel or a stick (about 18 inches long)
- String (any kind will do, but a sturdy one is best)
- Colorful feathers (you can easily find these at craft stores or online)
- Scissors
- Hot glue gun (with glue sticks)
- Optional: beads or small bells for extra pizzazz
Step-by-Step Instructions:
1. Prepare your stick: If you’re using a wooden dowel, give it a gentle sanding to smooth out any rough edges. Trust me, you don’t want your cat snagging a claw on that.
2. Cut the string: Measure out a length of the string about 30 inches long. This way, you have plenty of length to play around with.
3. Attach the string to the dowel: Tie one end of the string tightly around one end of the dowel. You can use a knot or two. A good knot is like a reliable friendship—strong and dependable.
4. Add the feathers: Take your colorful feathers and use the hot glue to secure them to the other end of the string. Use as many feathers as you want; variety is the spice of life.
Just remember, the more feathers you glue, the more dramatic the swoosh when you wave it around!
5. Enhance with beads (optional): If you want to get a little fancy, thread some beads or small bells onto the string before securing everything.
They add a delightful little jingle to the toy. Every cat loves a little extra encouragement to chase.
6. Test it out: Before giving it to your cat, do a little test run. Wave it around a bit. It’s also a great way to test whether your crafting skills are on point or if the feathers might go flying.
7. Let the fun begin: Now, it’s time for your cat to take over. Grab that wand, and prepare for some epic zoomies and delightful pounces.
Optional Add-ons/Variations:
Feeling like the Picasso of cat toys? Grab a variety of colors for your feathers or experiment with different types of string, like a sparkly ribbon or thick yarn.
You could even take it a step further and paint your dowel with non-toxic paint to match your home decor. Why not create a feather wand that’s as unique as your feline friend?
Pro Tip:
Keep a close eye on the string and feathers while your cat plays. Cats are natural hunters, and that string can look like a tempting target.
Safety first, and verify there are no loose ends for your curious kitty to munch on. Bonus points: If your wand starts showing signs of wear, it might just be the paw-fect excuse for a creative upgrade.
Crafting this feather wand not only provides your cat with a new toy, but it also gives you both an exciting bonding moment.
Happy crafting, and may the playtime chaos commence!
2. Ball of Crumpled Paper
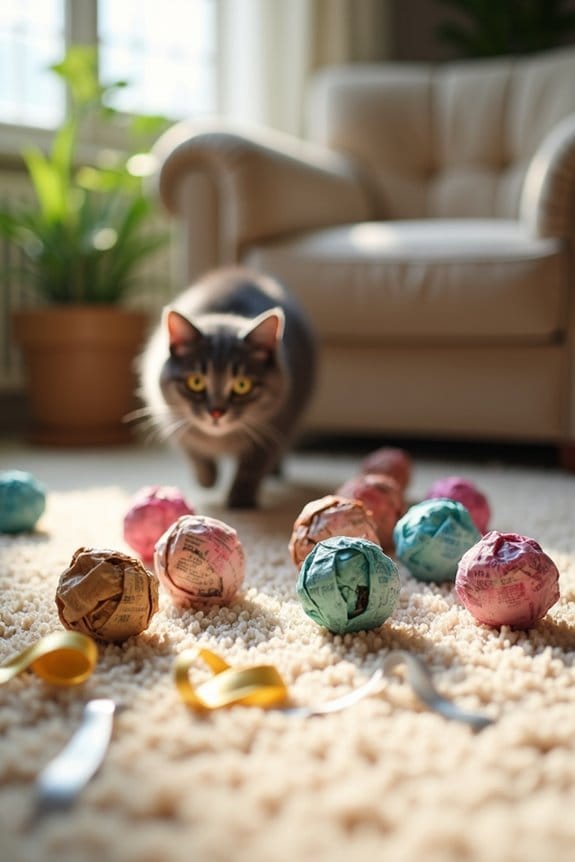
Looking for the ultimate budget-friendly cat toy that can bring endless entertainment to your feline friend? Search no more than the humble Ball of Crumpled Paper. This DIY project is as easy as it gets, and your cat will absolutely love chasing, batting, and pouncing on this simple creation. Plus, you’ll be saving bucks and reducing waste—double win for both kitty and Mother Earth.
Materials Needed:
- Scrap pieces of plain paper (newspapers, printer paper, or old notebooks)
- Optional: catnip (for an extra burst of fun)
- Scissors (only if you need to trim paper)
Step-by-Step Instructions:
- Gather your paper: Find some scrap paper lying around the house. It doesn’t need to be perfect; in fact, the more wrinkled, the better.
- Crumple it up: Grab a handful of the paper and start crumpling. You can make one big ball or several smaller ones—a perfect opportunity for a mini cat toy explosion.
- Add catnip (optional): If you want to take it up a notch, sprinkle some catnip into the middle of the crumpled ball before sealing it up. Your cat will go nuts for that herbal goodness; it’s like cat candy.
- Shape it up: Now that it’s nice and crumpled, roll your crumpled paper into a tight ball shape. Don’t worry about perfection; messy is part of the charm.
- Test it out: Give that ball a little toss across the floor. Does it roll? If so, congratulations—your cat’s new favorite toy is ready for action.
- Let the fun begin: Now sit back and watch the chaos unfold as your cat pounces, batters, and chases that paper ball with the kind of enthusiasm that can only be found in a housecat. Get ready for your feline superstar to put on a show.
Optional Add-ons/Variations:
For a splash of creativity, you could try using colorful scrapbook paper or even wrapping paper for a vibrant twist.
If you’re feeling particularly crafty, consider adding a shiny ribbon around the ball—cats love shiny things, and it gives the toy an extra flair. Each ball could have its own personality!
Pro Tip:
Be sure to supervise your cat during playtime with the crumpled paper ball. If it starts to tear apart, it might be best to replace it. Keeping your kitty safe is the name of the game.
Also, these balls are super easy to make in batches, so you can create a random toy store right in your living room. It’s a great way to keep the playtime fresh and exciting!
3. Sock Filled With Catnip
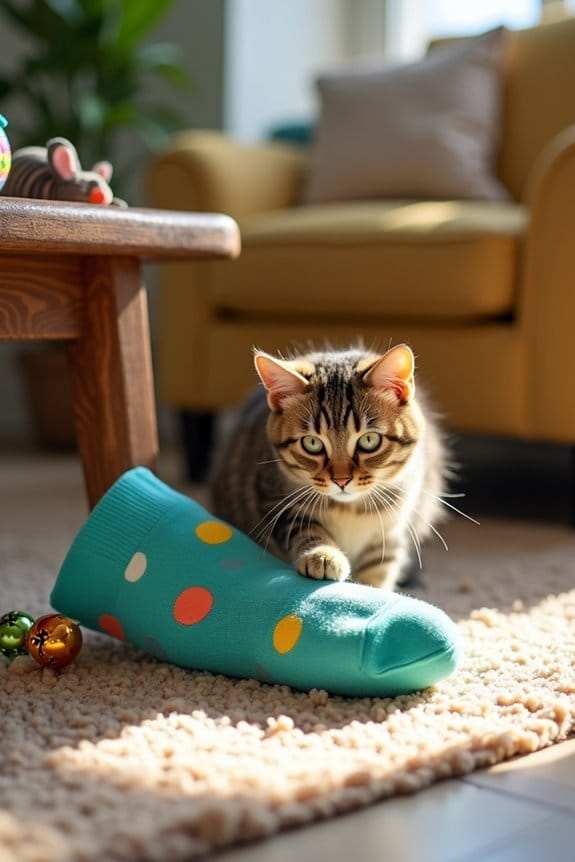
Want to treat your furry friend with something special while keeping it budget-friendly? Say hello to the Sock Filled With Catnip! This DIY project is a whimsical yet straightforward way to engage your cat’s playful instincts. Not only will this homemade toy bring joy and endless fun for your kitty, but it also repurposes old socks that might otherwise end up in the trash. Talk about a conscientious creator saving money and keeping the planet happy. Additionally, creating toys like this can be a great way to enhance your pet’s environment, similar to how premium pitbull dog supplies can enrich your dog’s life.
Materials Needed:
- An old sock (clean, of course)
- Dried catnip (you can find it at pet stores or online)
- Optional: cotton or another soft stuffing (to give it some extra fluff)
- Scissors (if you want to cut the sock)
- Needle and thread (for sewing it shut, if needed)
Step-by-Step Instructions:
- Choose your sock: Dig through your sock drawer for a single sock that has lost its partner or one that’s a bit too worn to wear.
- Fill it up: Grab a handful of dried catnip and carefully stuff it into the toe of the sock. If you’re looking to add a little more softness, fill it with cotton or any soft material along with the catnip.
- Seal it up: Once you’ve filled the sock to your liking, tie a knot at the open end. If you’re feeling crafty and want to guarantee it’s extra secured, use a needle and thread to sew it closed. Just a few stitches will do.
- Test it out: Gently toss your new catnip sock across the floor and watch as your kitty is instantly captivated. The anticipation of pouncing and batting will be more than enough to get the fun started.
- Let the party begin: Now sit back and enjoy the show—your cat will likely engage in some classic pouncing, rolling, and maybe even the famous “crazy cat” zoomies. Remember to capture some hilarious moments, but good luck getting a good photo; cats are like ninjas during playtime.
Optional Add-ons/Variations:
Looking to jazz up your sock toy? You could use a brightly colored sock or even one with fun patterns.
Adding a few small jingling bells inside can heighten your cat’s curiosity, turning the sock into a multi-sensory experience. Personalization is key—why not add a few strips of fabric or ribbons outside to create a unique look?
Pro Tip:
Always supervise your kitty during playtime with the sock. If the sock starts to get torn or if catnip peeks out, it’s time for a replacement.
Keeping playtime safe is as important as keeping it fun! Plus, socks are quick to make in batches, so the more, the merrier!
Happy crafting, and may you enjoy countless hours of kitty fun with your new homemade toy!
4. Toilet Paper Roll Puzzle

If you’re looking for a fun and engaging DIY project that will keep your kitty occupied, the Toilet Paper Roll Puzzle is a fantastic choice. This simple toy not only recycles empty toilet paper rolls—helping the planet a bit—but it also challenges your cat’s mind and keeps their playful instincts sharp. Plus, it’s a budget-friendly way to provide hours of entertainment for your feline friend.
Materials Needed:
- Empty toilet paper rolls (clean, of course)
- Scissors (for cutting the rolls, if desired)
- Treats or dry cat food (to fill the puzzle)
- Optional: tape or glue (to secure the rolls together)
- Optional: decorative materials (like colored paper, washi tape, or fabric) to add flair
Step-by-Step Instructions:
- Gather your rolls: Collect several empty toilet paper rolls. Make sure they’re clean and dry—no one wants a funky smelling cat toy.
- Cut the rolls (optional): If you want to create different lengths, use scissors to cut a few of the rolls into halves or quarters. This will give you a fun variety of sizes for your cat to explore.
- Prepare the puzzle: Take one roll at a time and fill it with treats or dry cat food. Don’t overfill, though—just a handful will do. You want the treats to be hidden but not impossible to get out.
- Assemble the puzzle: If you want to make a more complex structure, you can secure several rolls together by placing them in a fun shape, like a triangle or a tower. Tape or glue the ends together so they stay put during playtime.
- Present the puzzle: Place the finished puzzle on the floor in an area your kitty loves to explore. Watch them as they approach it with that look of curiosity; you can practically see the gears turning in their adorable heads.
- Enjoy the fun: Now you just sit back and enjoy the show! Your cat will likely spend a good amount of time pawing, rolling, and nosing around to find those hidden treats. Just be sure to keep an eye on them to ascertain they don’t chew up any pieces of the roll.
Optional Add-ons/Variations:
Want to get a bit creative? You can wrap the outside of the rolls with colored paper or washi tape for a pop of personality. You could also create a more complicated puzzle by connecting multiple rolls with string or twine to make a more extensive path for treats to follow. Personalize it even further by adding little stickers or your cat’s name on the rolls for some crafty flair.
Pro Tip:
Always supervise your kitty while they play with the puzzle. If any pieces start to crumble or if your cat seems to be tearing them apart, it’s time for a new batch. Keeping playtime safe ascertains that your feline friend stays happy, healthy, and entertained—without ending up with an unfortunate case of “toilet paper munchies.”
5. Tissue Box Surprise Toy
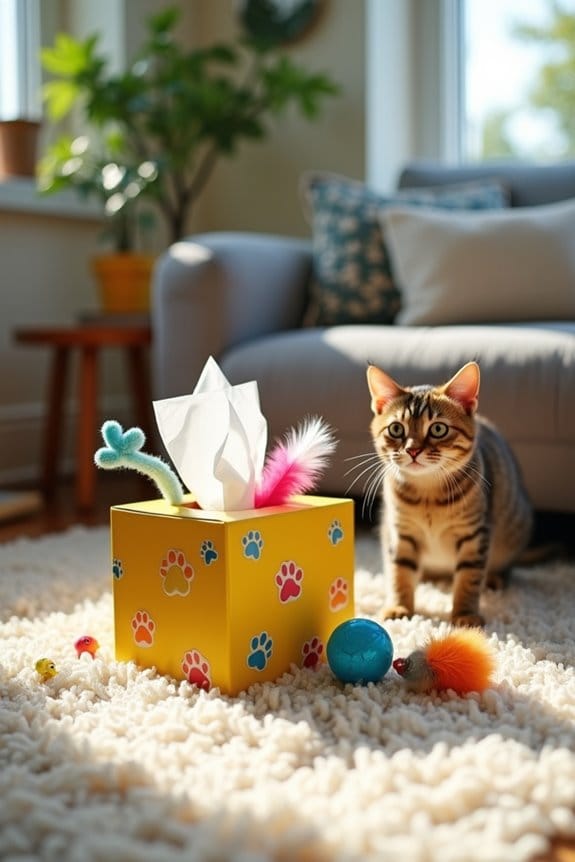
If you’re looking for a delightful way to keep your cat engaged without breaking the bank, the Tissue Box Surprise Toy is a clever DIY project that you won’t want to miss out on. Not only does it make use of an empty tissue box, which is great for the environment, but it also provides your feline companion with hours of fun and stimulation. Plus, it’s so simple to make that you might find yourself creating several of them.
Materials Needed:
- An empty tissue box (make certain it’s clean)
- Cat-friendly toys (like small balls, crinkly toys, or feathers)
- Optional: a pair of scissors (for cutting openings)
- Optional: additional decorations (like stickers or markers for personalization)
Step-by-Step Instructions:
1. Gather your materials: Find an empty tissue box lying around, and make certain it’s squeaky clean. No one wants their cat playing with a gross box, right?
2. Fill the box: Take your selection of cat-friendly toys and toss a few inside the tissue box. You can mix and match them for variety—maybe a small ball, a jingly mouse, or even a little crinkle toy works great.
3. Secure the box (optional): If your cat is the type to get a little too enthusiastic, consider using scissors to cut some small openings on the sides of the box. This will let your kitty see those tantalizing toys inside but keep them just out of paw reach.
If you want to secure the box, you can tape the flaps down to make it sturdier.
4. Personalize it (optional): Grab some stickers or markers and have some fun decorating the outside of the box. Maybe add your cat’s name or a funny saying! They’ll be so proud to show off their new toy.
5. Set the stage: Place the tissue box in an area your cat loves to hang out. Make it enticing by giving it a little shake to let those toys rattle inside. Oh, the suspense!
6. Let the fun unfold**: Now, watch your kitty as they approach their surprise box** with excitement. They’ll bounce, paw, and toss it around as they figure out how to get to those hidden goodies.
Optional Add-ons/Variations:
Feeling a little adventurous? Try filling your tissue box with catnip-filled toys for an extra layer of excitement.
Or create a theme—like a “feathered paradise” by filling it up exclusively with feathers and crinkly toys. Your creativity can run wild here.
Pro Tip:
Keep an eye out for any sneaky bits. If your cat is a demolisher, occasionally check the box to make sure there are no loose pieces or remnants that could become a choking hazard.
And if you want to save even more money, shop for little toys during sales or at dollar stores. A little bit can go a long way when it comes to cat entertainment.
Now, you’re ready to give your cat an entertaining surprise in a tidy, memorable way. Keep the treats coming, and let the festivities roll!
6. Ping Pong Ball Chase

Who knew that a humble ping pong ball could bring so much joy to your furry friend? The Ping Pong Ball Chase is a simple yet highly entertaining DIY project that combines fun and exercise. Forget expensive toys; this lighthearted activity will have your cat pouncing, chasing, and laughing (well, you know what I mean) in no time. Plus, it’s an excellent way to keep them mentally and physically stimulated. Service dog training equipment can also enhance the way we interact with our pets during playtime.
Materials Needed:
- 1 or more ping pong balls
- A shallow cardboard box or a large tray
- Some catnip (optional for extra enticement)
- Tape or a marker (optional for decoration)
Step-by-Step Instructions:
- Gather your materials: Get your hands on some ping pong balls—those little orbs of joy that can be found just about anywhere. Make sure you have a cardboard box or tray that will be the perfect playground for your cat.
- Prep the box: If using a box, you may want to tape the bottom down to prevent any rookie mistakes, like spills. If you like, you can even decorate the outside with a marker or stickers—make it fancy. Your cat will appreciate that.
- Add the balls: Place one or more ping pong balls into the box or tray. If you’re feeling adventurous, sprinkle a little catnip inside to attract your kitty’s attention. They’ll become intrigued, and entice them to join the party.
- Set it up: Position the box or tray in an area your cat loves to hang out. You want it to be easily accessible but also exciting—perhaps near their favorite sunbeam or cozy corner.
- Introduce the chase: Give the box a little shake or nudge to make those ping pong balls roll around. Watch as your cat comes bounding over, eyes wide with curiosity. You might even want to lend a hand and roll the balls a bit to show them how it’s done. This is a bonding moment, after all.
- Enjoy the show: Sit back and watch your cat revel in the excitement of their new toy. They might leap, pounce, and swat those ping pong balls as if they’re in the wild. Isn’t it hilarious how these tiny balls can turn an ordinary day into a fiesta for your feline?
Optional Add-ons/Variations:
Want to get fancy? Try painting the ping pong balls in bright colors—make a rainbow of chasers. You can also create a “hide-and-seek” challenge by placing some toy mice in the box alongside the ping pong balls. Your cat will go wild figuring out which ones to chase.
Pro Tip:
Keep an eye on your ping pong balls. If they get too scratched up or if your cat tries to chew on them, swap them out for a fresh one. Safety first; we want our playful pals to have fun without any mishaps.
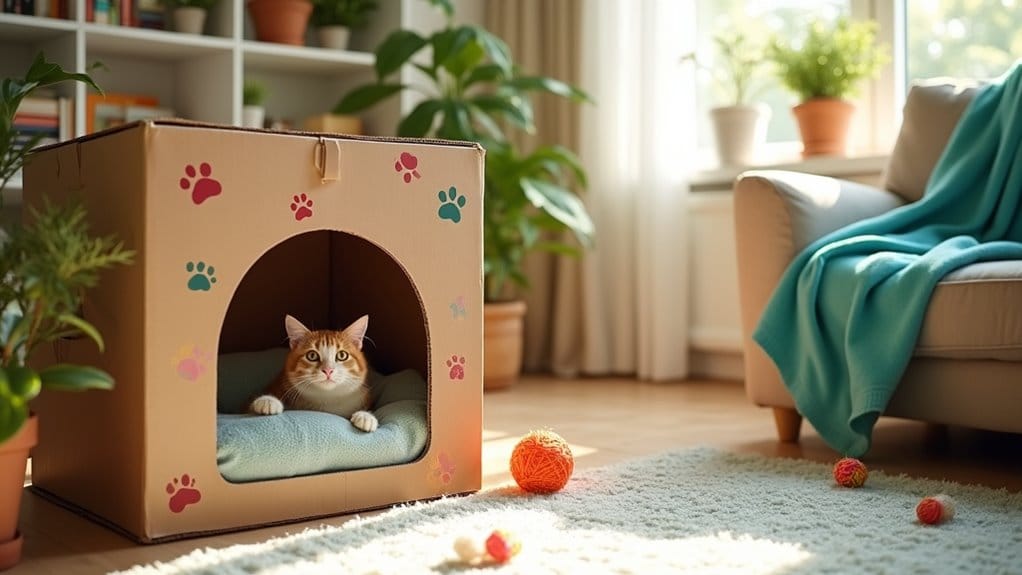
7. Cardboard Box Hideaway
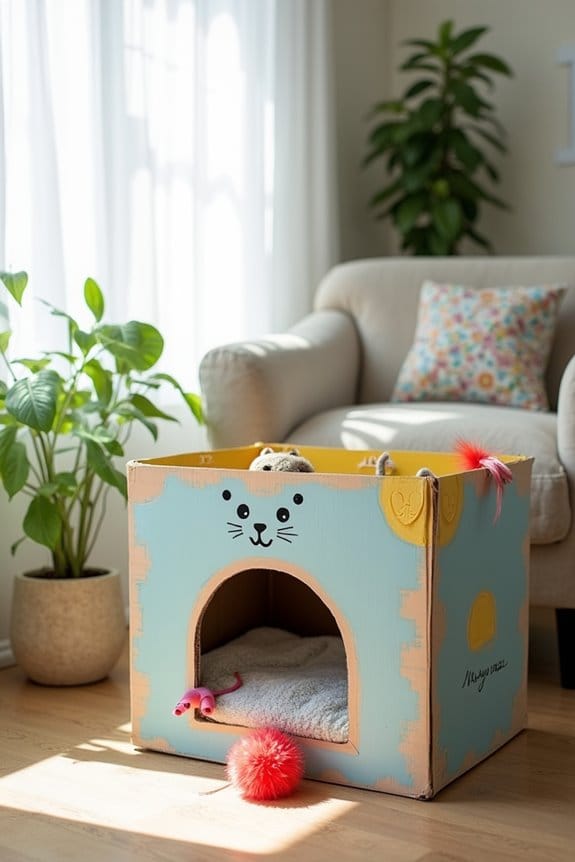
Is your kitty a little shy, or does she just love to play hide-and-seek? The Cardboard Box Hideaway is the perfect DIY project that offers your furry friend a cozy nook to retreat to, while also spicing up your living room decor. Plus, it’s an inexpensive way to craft a fun playground for your cat that keeps them entertained and out of trouble.
Materials Needed:
- 1 large cardboard box (think shipping box or old moving box)
- Scissors or a box cutter
- A cutting mat or thick cardboard underneath for safety
- Markers or paint (optional for decoration)
- Fabric scraps or blankets (for extra comfort and coziness)
- Stickers or other fun art supplies (optional for personal touch)
Step-by-Step Instructions:
- Select your box: Start off with a sturdy cardboard box. Make sure it’s big enough for your cat to fit comfortably inside, but not so massive that it takes over the living room. A little scratching never hurt a box, after all.
- Cut out an entrance: Using your scissors or box cutter, carefully cut a doorway on one side of the box. This should be about the size of your cat’s head so they can easily wiggle in and out. Just don’t go too large—otherwise, you might end up with more cat than box.
- Create a peek-a-boo window (optional): If you want to take it up a notch, you can cut another smaller hole on the opposite side of the box. This gives your kitty a chance to peek out while planning their next ambush. Cats love a good game of spy.
- Add cozy touches: Lay down some fabric scraps, an old t-shirt, or a tiny blanket inside. This way, your cat will have a plush spot to snuggle up. A comfy hideaway is way better than a cold box, right?
- Decorate: Use markers or paint to brighten up the outside of the box. Get creative! Add some funky designs, or even your cat’s name. Just make sure the paint is non-toxic, because, well, cats tend to nibble when they’re bored.
- Show it off: Place the box in a warm, quiet spot that your cat likes. Perhaps near a sunny window or by their favorite napping chair? You want it to feel like a hidden treasure.
- Invite your kitty in: Gently encourage your cat to explore the hideaway by tossing in some toys or treats. With enough coaxing, they’ll be in there, surveying their new kingdom in no time.
Optional Add-ons/Variations:
For an extra flair, consider using patterned gift wrap to cover the box for a more stylish look. You could also create a multi-level hideaway by stacking several boxes on top of each other, giving your cat their very own condo complex. Imagine your cat hosting a feline tea party in the top box.
Pro Tip:
Keep an eye on the box’s condition. Cats love to scratch! So, check for tears or loose pieces regularly.
If things start looking worn out, consider giving it a fresh look with a new coat of paint or simply swapping it out for a new box. After all, your cat does deserve the best in hideaway real estate.
Extra Tips & Ideas
While you might think making cat toys is a straightforward task, there’s room for creativity and personalization.
Ever tried adding catnip to a sock? Trust me, it’s a game changer. Just fill an old sock with catnip, knot it up, and watch your furball go wild.
If you’re feeling crafty, how about weaving tiny pom-poms? Just grab some yarn and really channel your inner art school dropout.
Or, consider using old t-shirts? Cut them into strips, braid them, and voilà—a super chew toy.
Don’t forget, it’s all about trial and error. Some toys will flop, while others will become instant favorites.
Whatever you make, let your kitty lead the way. They’re the real judges of your DIY talents, right?
Frequently Asked Questions
What Materials Are Safe for Homemade Cat Toys?
You can use materials like cardboard, fabric scraps, felt, and non-toxic glue. Avoid small pieces that could be swallowed or toxic items. Always supervise playtime to guarantee your cat’s safety while they enjoy their toys.
How Often Should I Rotate My Cat’s Toys?
You should rotate your cat’s toys every week. This not only keeps them engaged and excited, but it challenges their natural instincts. Remember, variety stimulates their mind and keeps playtime fresh and enjoyable.
Can I Wash Homemade Cat Toys?
Yes, you can wash homemade cat toys. Just check the materials first—soft fabrics usually do fine in the machine, while tougher items might need hand washing. Always dry them completely before giving them back to your cat.
Are There Toys Suitable for Kittens and Seniors?
Absolutely, you can find toys perfect for both kittens and seniors. Think of them like bridges, connecting playful energy with gentle curiosity. Choose soft, lightweight toys that spark joy and cater to all ages.
How Do I Introduce New Toys to My Cat?
To introduce new toys to your cat, present them gradually. Show the toy, engage in play, and let your cat explore it at their own pace. Monitor their interest, and rotate toys to keep things exciting.
Conclusion
Making these homemade toys is a fun way to keep your kitty entertained and engaged, much like a child’s laughter brightens a room. With just a few simple materials, you can craft delightful distractions that’ll have your furry friend pouncing with joy. Don’t be surprised if they suddenly become the star of their own little show. So, roll up your sleeves, get creative, and watch as your cat discovers the magic of your DIY creations. Happy crafting!

Amr Mohsen is a software engineer who traded his keyboard for a leash — at least on weekends. His love for dogs inspired him to share what he learns as a dog owner and enthusiast, bringing a detail-oriented, research-driven perspective to every article he writes. If it’s about dogs, he’s probably already looked it up twice.

