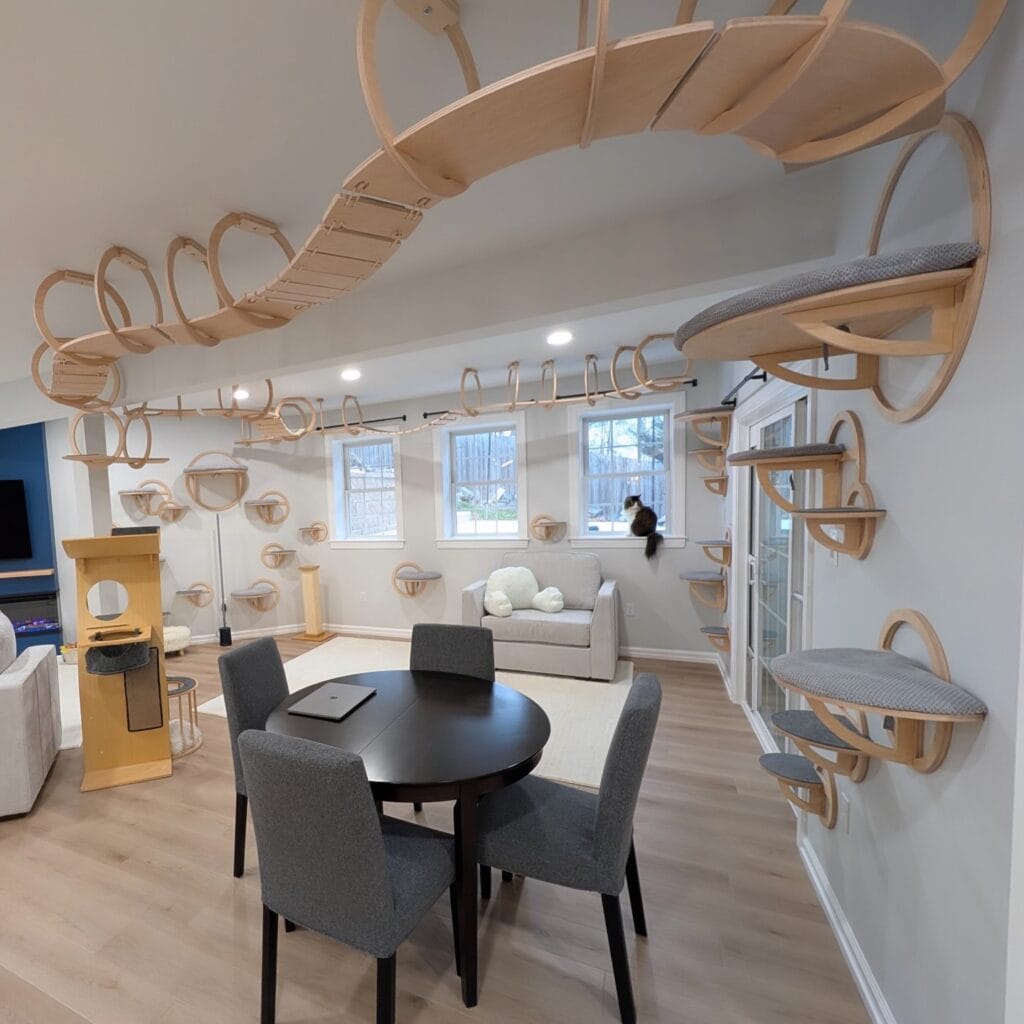
Doesn’t it bother you to have to keep your living room looking chic and to give your furry best friend enough vertical space to rule their kingdom?! Well, it drives me nuts. I finally style my living room just right and a giant, carpet covered monster ruins the look.
When I see ugly pet gear in my home, or when I trip over toys, my eye begins to twitch. My dog probably thinks I’m crazy. He watches me freak out over it all and wonders why I can’t just have nice things.
Take a deep breath, friend. We’re fixing this today. You don’t have to give up your design to keep your pets happy. Check out these sixteen brilliant diy cat wall ideas that blend into your home and keep your space looking gorgeous.
#1: Multi-Level Floating Cat Lounge and Bridge System
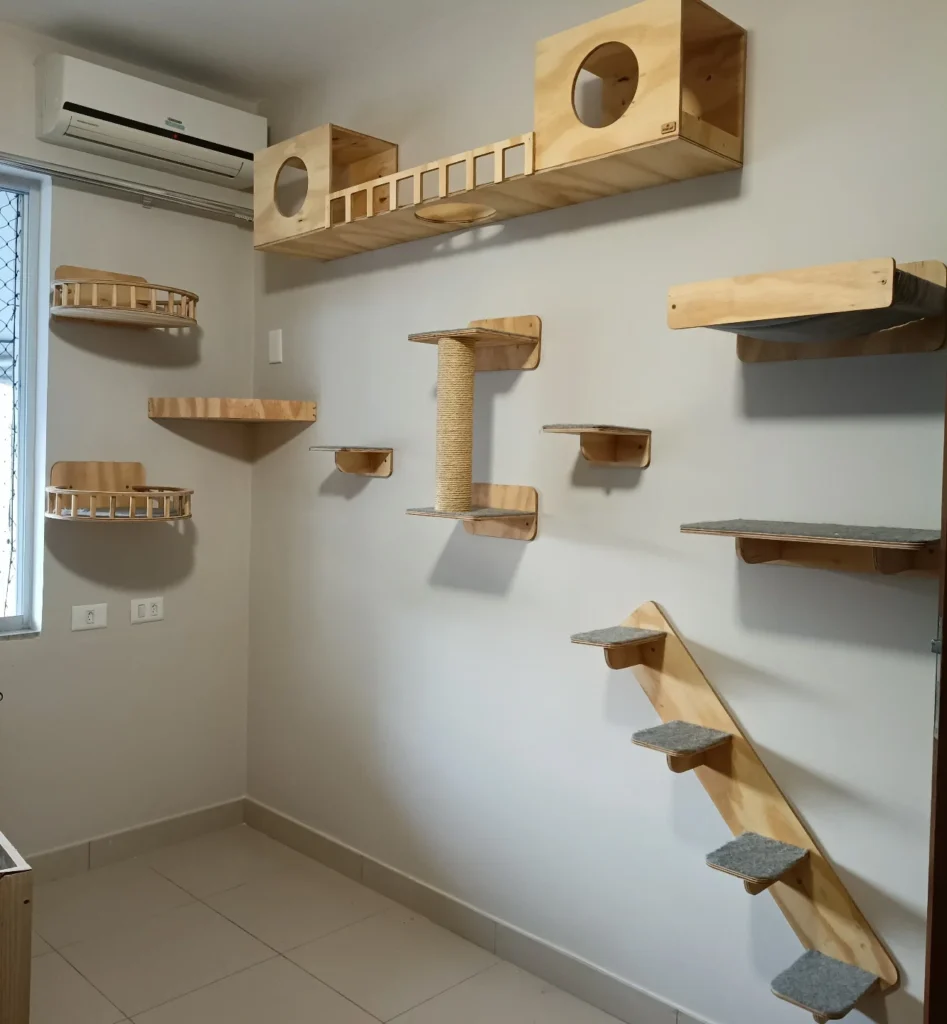
Transform your blank wall into a vertical feline playground. Prep Time: 2 hours | Active Time: 1 hour | Difficulty Level: Intermediate
What You’ll Need:
- Two open-ended wooden boxes with circular cutouts
- Custom wood floating shelves for stepping platforms
- Wood planks and dowels to build a connected bridge
- Heavy-duty wall mounting brackets
- Drill and wood screws
Instructions:
- Locate your wall studs and attach the two wooden box houses at different heights using heavy-duty brackets.
- Build the bridge by attaching vertical wooden slats between two long parallel boards to create a solid walkway.
- Securely mount the bridge connecting the two box houses so your cat can strut across the room safely.
- Add smaller triangular floating shelves underneath the bridge as stepping stairs for easy access.
your dog might be fine on the floor but your cat will rule this kingdom in the air.
📸 Photo credit: Instagram @artespet_es
#2: Build a Multi-Level Wall Playground
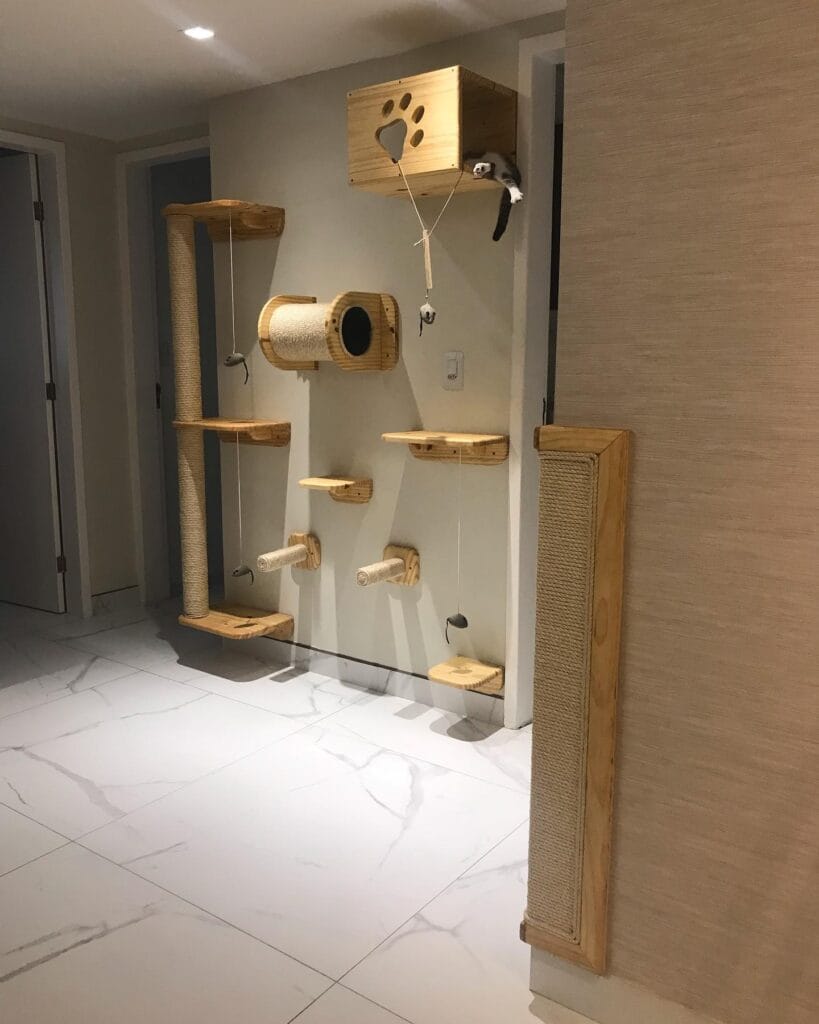
Does your cat stare off into space for hours every day, wishing for a cat jungle gym, an indoor adventure jungle gym? DIY cat wall ideas with natural wood and sisal to bring out the adventurer in your cat.
Prep Time: 45 mins
Active Time: 2 hours
Difficulty Level: Moderate
What You’ll Need:
- Pine boards cut to various shelf lengths
- Industrial sisal rope for scratching posts
- Heavy-duty wall anchors and 3-inch screws
- Cardboard mailing tube wrapped in sisal
- Drill and stud finder
- Wood glue and stain
Instructions:
- Use a stud finder to locate your wall studs. Safety first for your pup’s feline siblings!
- Sand your pine boards smooth and apply a pet-safe finish.
- Wrap the central tube tightly with sisal rope and secure the ends with heavy-duty staples.
- Mount the main paw-print box near the top, directly into at least one stud.
- Stagger the smaller stepping platforms and scratching pegs beneath it so your cat can zigzag down safely.
📸 Photo credit: Instagram @9felinosstore
#3: Multi-Level Wall Climbers for Energetic Climbers
Prep Time: 45 mins
Active Time: 1.5 hours
Difficulty Level: Intermediate
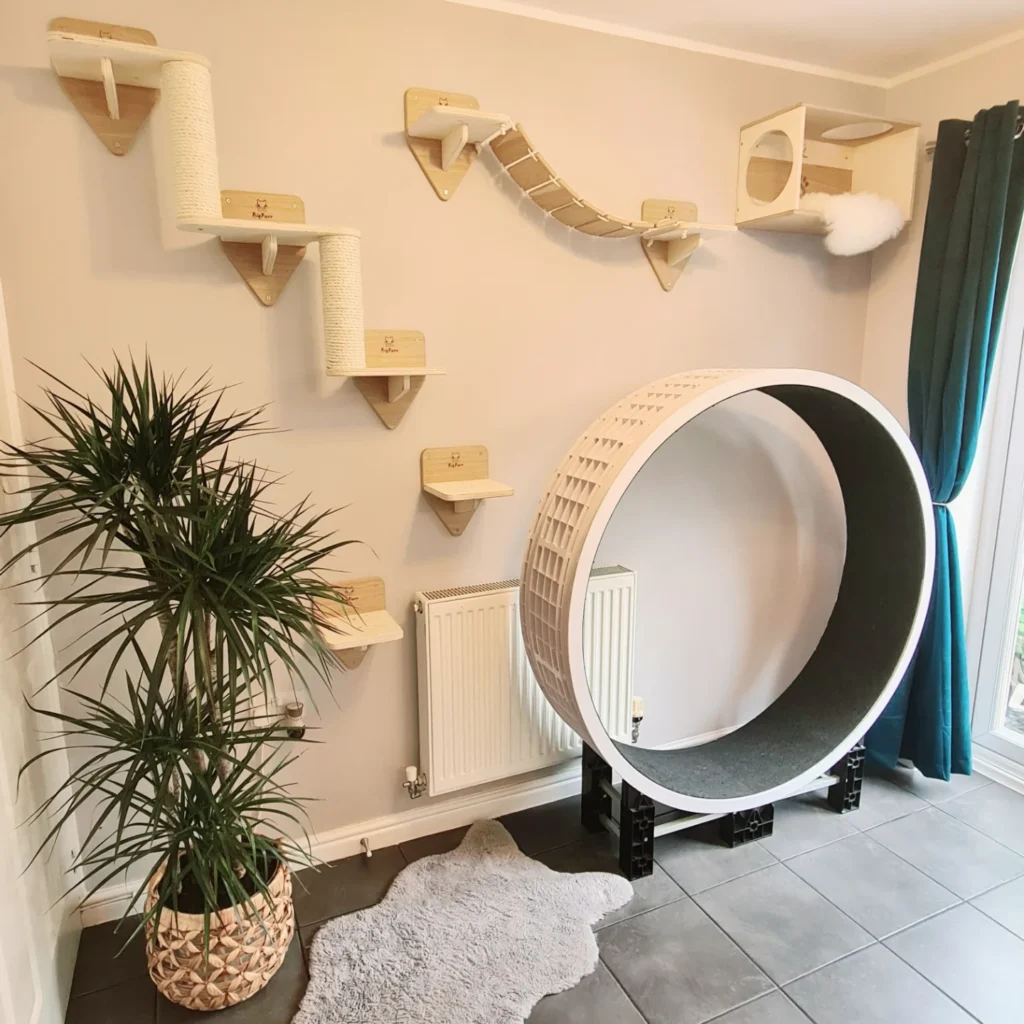
Pale pine platforms wrap the posts, the sisal-wrapped pillars finishing off the minimalist feel to your neutral walls.
What You’ll Need:
- Pine wall brackets and small platforms
- Heavy-duty wall anchors for cats
- Industrial sisal rope
- Wood screws and stud finder
- Drill and level
Instructions:
- Find studs with your finder. Start by securing the top corner bracket first.
- Wrap upright posts tightly with rope, gluing every few rotations.
- Mount used secure anchors to climb the steps below the top perch.
- Test weight limits before letting your crew test the run.
Pro Tip: Always screw into the wooden stud when possible so your furry pets don’t get into trouble during crazy leaps.
📸 Photo credit: Instagram @bigpurrcats
#4: Wall Staircase Setup
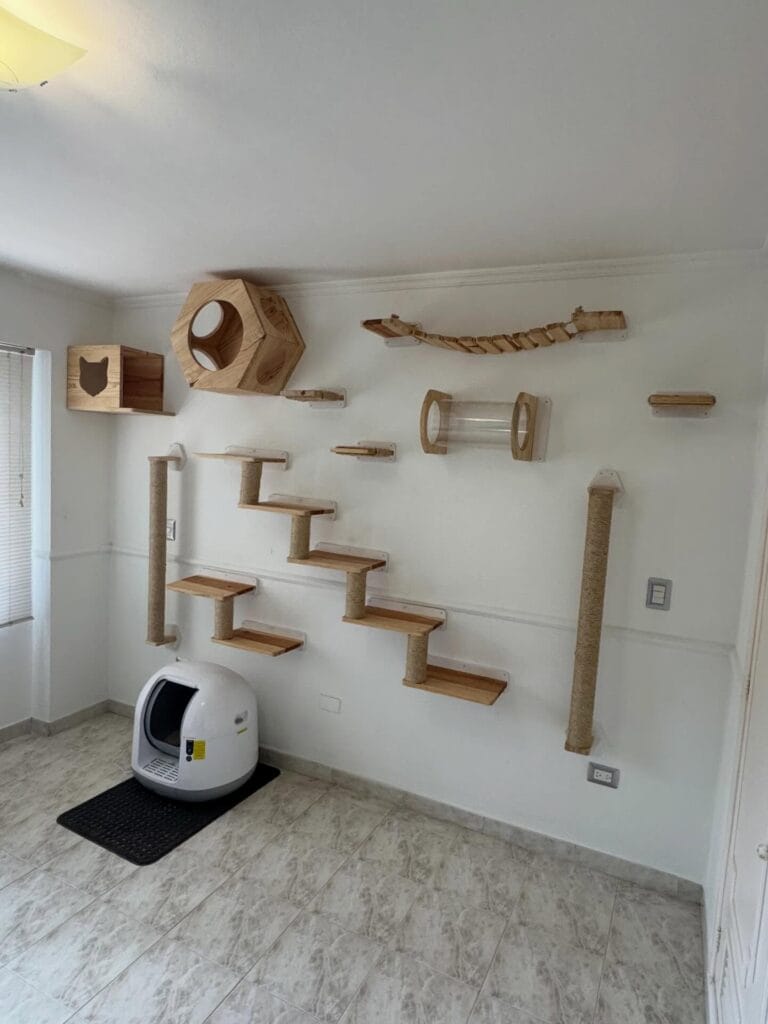
I’m totally obsessed with this new product! My pup will be watching from the rug while my cat claims this spot.
Prep Time: 30 minutes
Active Time: 1 hour
Difficulty Level: Moderate
What You’ll Need:
- Pine wood boards
- Heavy-duty wall anchors for cats
- Sisal rope
- Power drill
- Level
- Wall brackets
Instructions:
- Locate studs using your drill and mark the staggered layout on the wall, referencing our image for the exact step-up diagonal spacing.
- Wrap the vertical supports tightly with sisal rope, and secure both ends with wood glue.
- Screw the metal wall brackets firmly into the underside of each wooden shelf.
- Securely mount the stairs into the wall anchors, checking each tier with your level before tightening.
📸 Photo credit: Instagram @catgymvnzla
#5: Floating Greenery Walkways
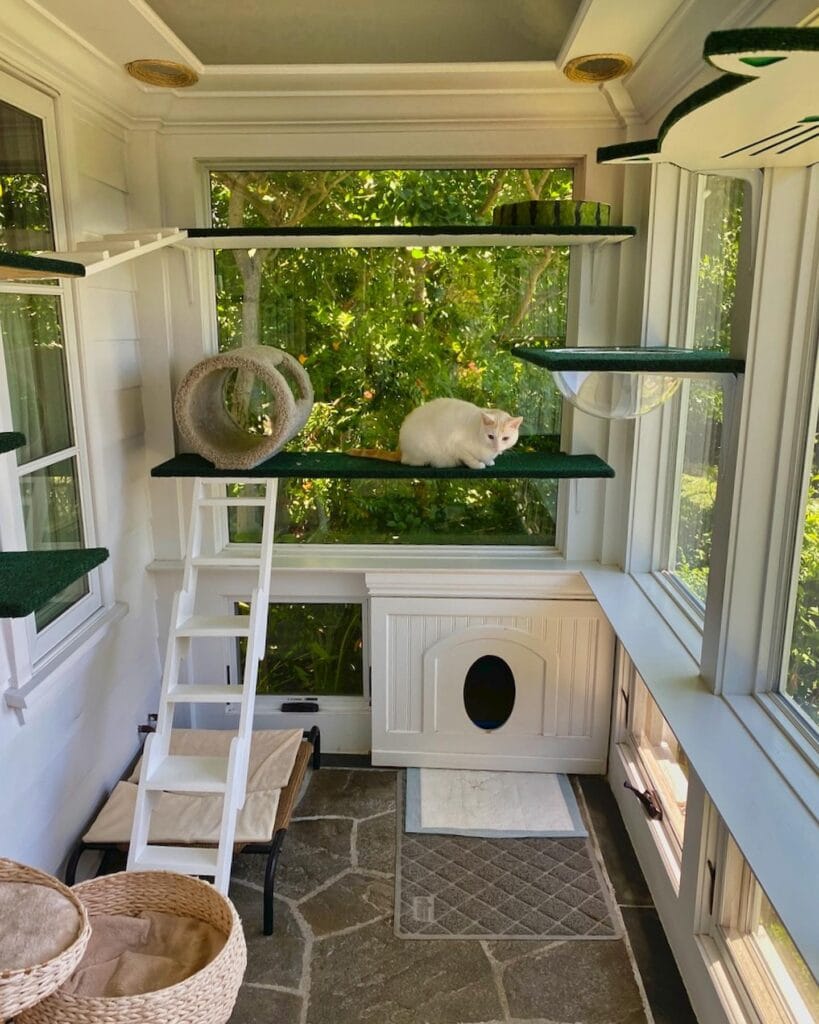
Most people just nail cheap boards into the drywall and call it a day, but your pup deserves something much sturdier, paw friendly, and frankly much cuter for your home.
- Prep Time: 30 minutes
- Active Time: 1 hour
- Difficulty Level: Intermediate
What You’ll Need:
- Custom wood floating shelves cut to length
- Heavy-duty wall anchors for cats
- Dark green indoor-outdoor carpet remnants
- Heavy-duty staple gun
- Stud finder and drill
Instructions:
- Locate your wall studs using the finder so those floating tiers won’t wobble when your cat leaps up.
- Wrap each wooden board neatly in the green carpeting, securing the edges underneath tightly with staples.
- Mount the brackets firmly to the wall, then anchor your new perches safely in place.
📸 Photo credit: Instagram @catioguy
#6: Build A Vertical Playground Above The Door
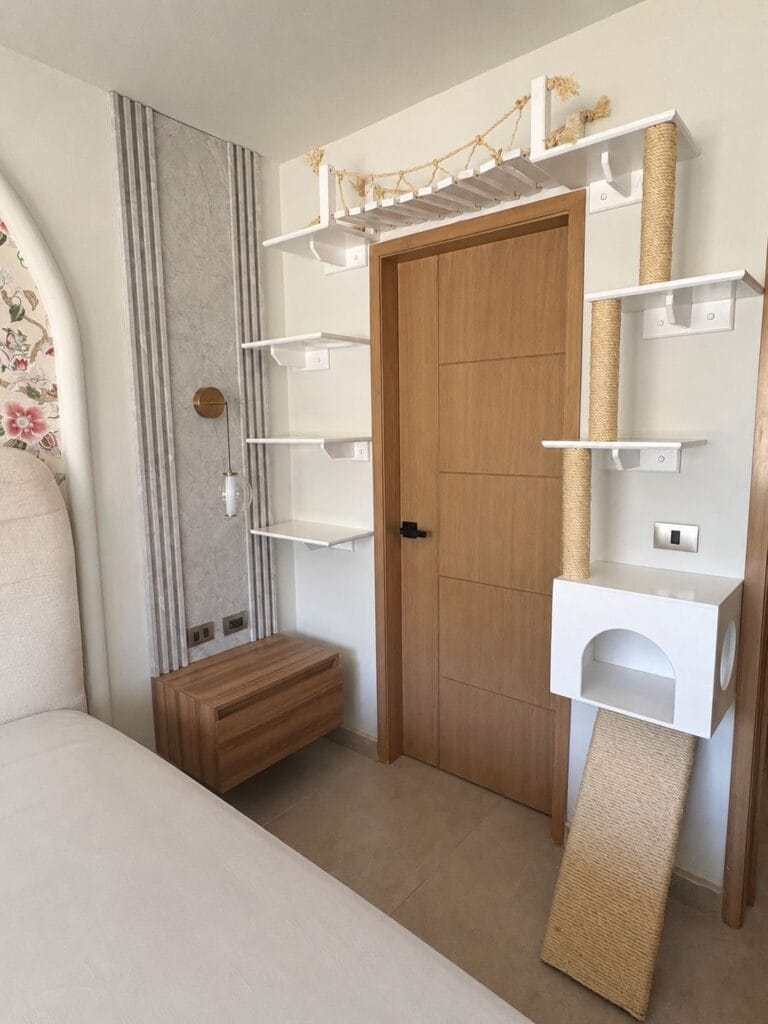
Sometimes that wasted space up there is used as a feline highway.
Prep Time: 45 mins
Active Time: 2 hours
Difficulty Level: Intermediate
What You’ll Need:
- White wood floating shelves
- Industrial sisal rope for scratching posts
- Heavy-duty wall anchors
- Cordless drill
- Wood screws
Instructions:
- Locate studs securely using an electronic finder above your doorway.
- Mount three matching white wood floating shelves in a staggered layout next to the frame.
- Wrap the support posts tightly with industrial sisal rope, then secure the ends with heavy-duty staples.
- Drive heavy-duty wall anchors directly into drywall if studs aren’t available for the upper bridge.
- Test it thoroughly before letting your cat try it out.
Pro Tip: Always double-check your anchor ratings. Cats launch themselves with surprising force!
📸 Photo credit: Instagram @gatificacionesyaccesorios
#7: Staggered Climbing Highway
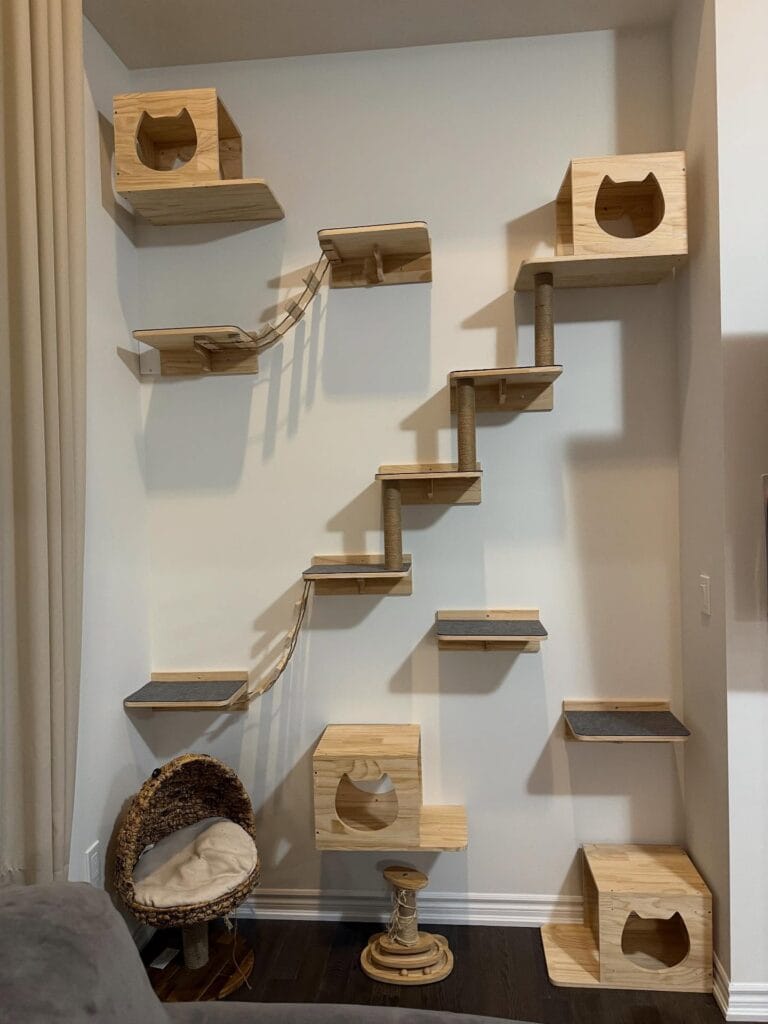
Does your dog ever watch your cat scamper up the wall and wonder why it’s stuck down on the rug? This gorgeous multi-level wooden playground is the perfect vertical paradise for your feline friend.
Prep Time: 45 minutes
Active Time: 2 hours
Difficulty Level: Intermediate
What You’ll Need:
- Custom wood floating shelves with cutouts
- Industrial sisal rope for scratching posts
- Heavy-duty wall anchors
- Sisal rope bridges
Instructions:
- Locate studs and secure heavy-duty anchors at various heights.
- Mount the cat house boxes at the top and bottom corners.
- Wrap support columns securely using industrial sisal rope.
- Attach staggered platforms and rope bridges between the boxes.
To get more inspiration to protect your living room, you can look at these diy cat scratcher projects that save your furniture.
📸 Photo credit: Instagram @devonrex.canada
#8: Modern Honeycomb & Sisal Cat Highway
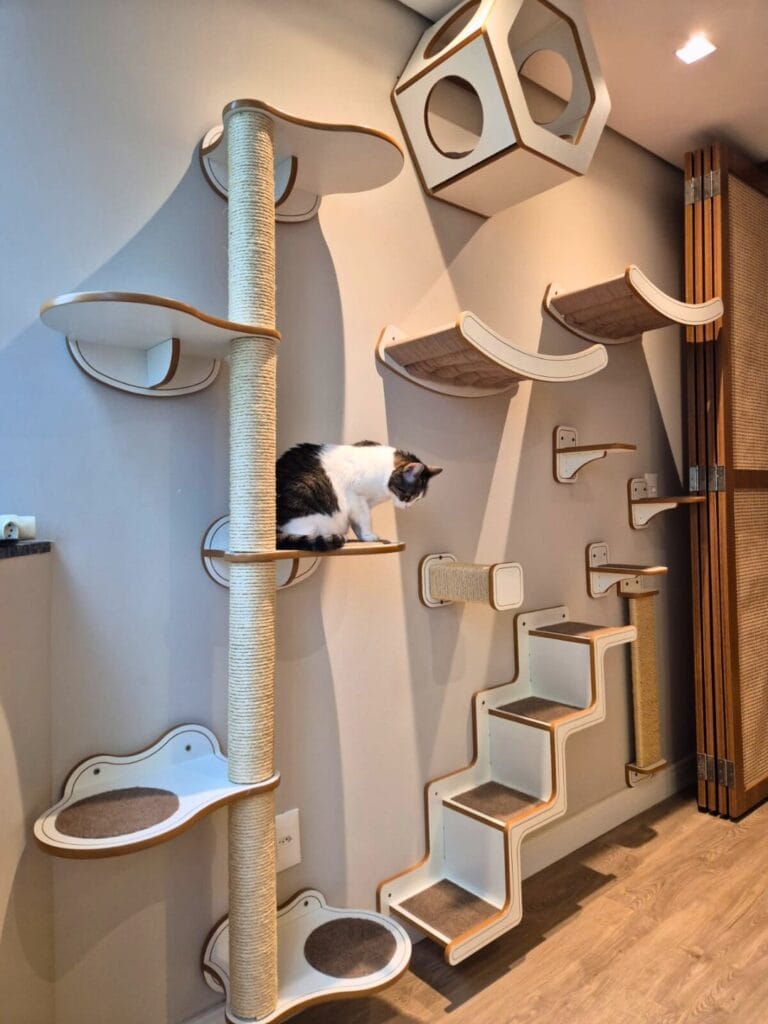
The smooth white laminate wood panels and warm rounded trim offer a touch of organic style on the drywall in the living room.
Prep Time: 30 minutes
Active Time: 2 hours
Difficulty Level: Intermediate
What You’ll Need:
- Plywood boards
- Heavy-duty wall anchors for cats
- Sisal rope
- Wood glue
- Drill
Instructions:
- Map your diy cat wall ideas directly onto studs using a level to keep the steps and perches sturdy.
- Wrap the vertical post tightly with sisal rope, securing the ends with heavy-duty staples so your pup’s feline nemesis can climb safely.
- Assemble the honeycomb box and floating platforms with wood glue before securing them.
- Fasten every piece to the wall using heavy-duty wall anchors for cats to handle high-speed jumps.
📸 Photo credit: Instagram @ferpadesign
#9: Wall-Mounted Climbing Gym
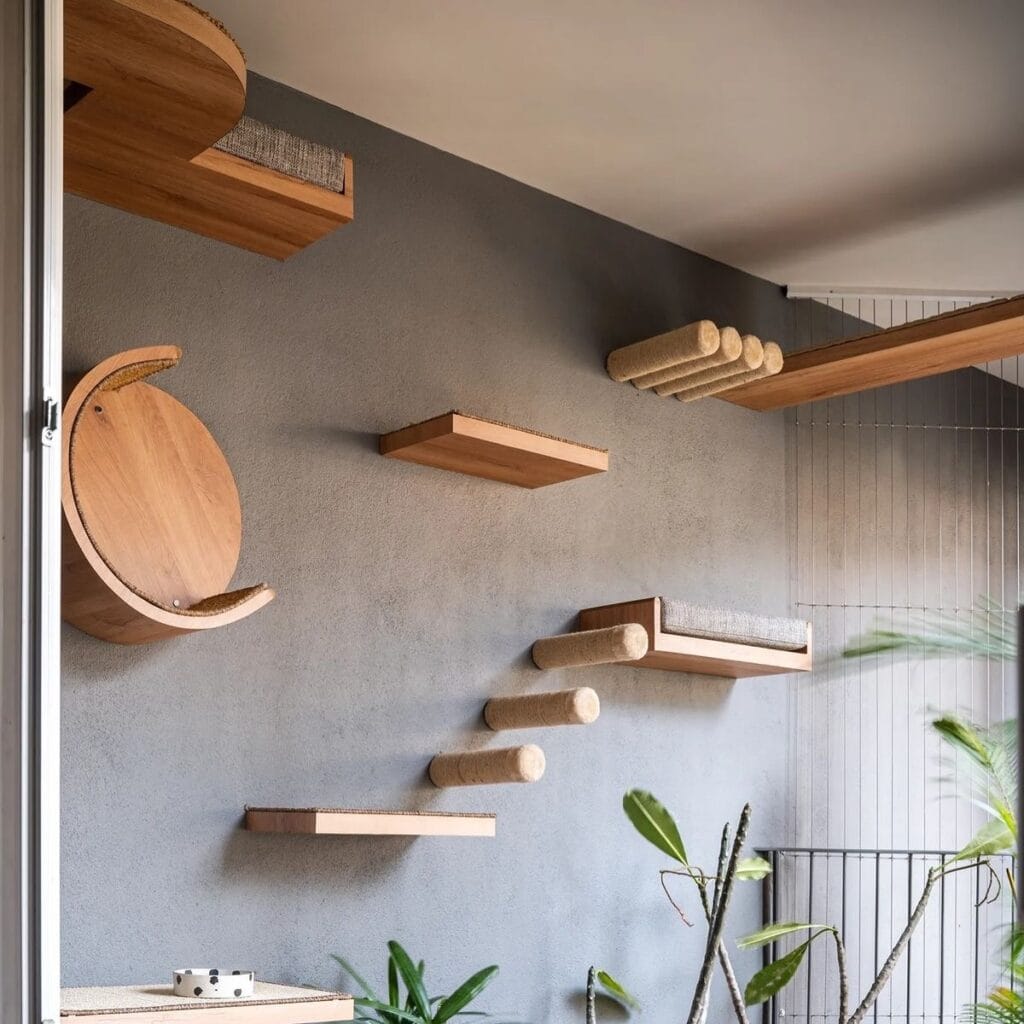
Your dog may get a little jealous while your cat climbs this handy homemade contraption.
- Prep Time: 45 minutes
- Active Time: 2 hours
- Difficulty Level: Intermediate
What You’ll Need:
- Plywood boards cut to varying lengths
- Industrial sisal rope for scratching posts
- Heavy-duty wall anchors for cats
- Sponge carpet padding and fabric
- Wood screws and drill
Instructions:
- Locate studs and attach your heavy-duty wall anchors for cats so they don’t wobble during high-speed parkour sessions.
- Wrap smaller wooden cylinders tightly with industrial sisal rope for scratching posts and attach them staggered up the drywall to create a functional stepping ladder.
- Build the floating platforms using your plywood boards, then staple soft fabric over thin padding on the top for traction.
- Mount the crescent lounger and upper perches securely above the ladder to complete the vertical playground.
Pro Tip: Always check your stud finder before drilling through the drywall, or you may end up with a rock climb.
📸 Photo credit: Instagram @houseofmeowss
#10: Level Up Your Wall Game With Custom Floating Perches
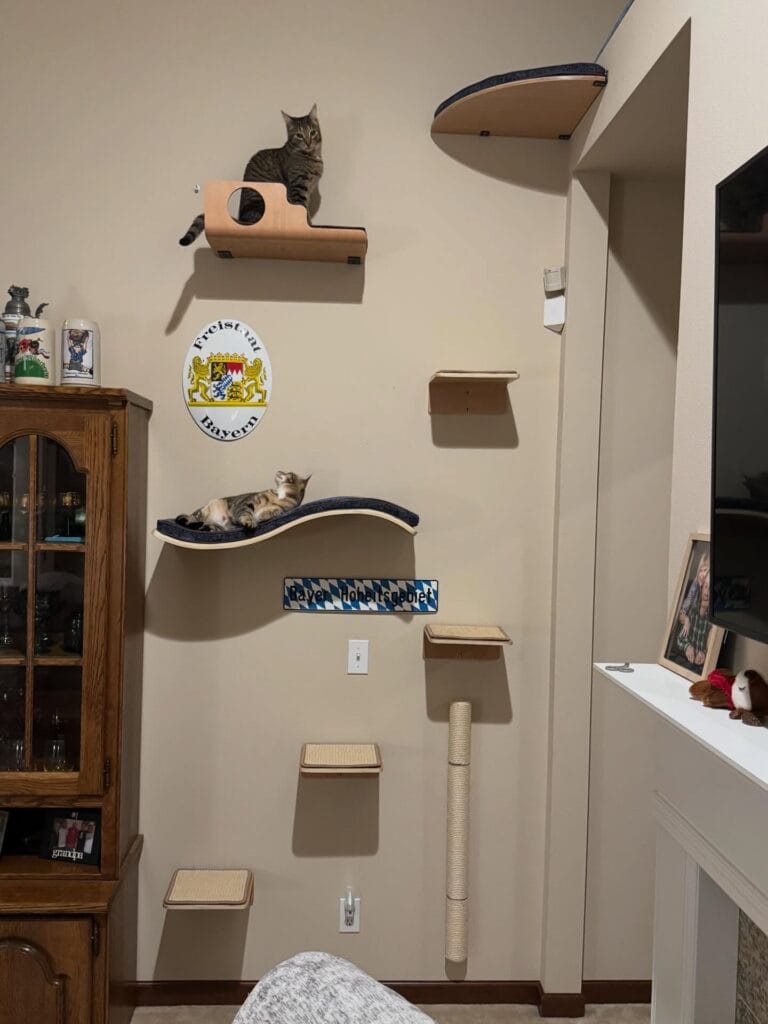
Most people just put some boring shelves on the wall and hope their pet will use it, but if your pup has a cat it might be a good idea to make sure the cats have some levels to explore too! Here are some fun diy cat wall ideas.
Prep Time: 30 minutes
Active Time: 2 hours
Difficulty Level: Moderate
What You’ll Need:
- 3/4-inch plywood boards
- Industrial sisal rope for scratching posts
- Carpet scraps
- Heavy-duty wood screws
- Stud finder and level
Instructions:
- Locate your wall studs using a stud finder so the layout stays secure when cats leap on it.
- Cut plywood into various shapes, including rectangular steps and a curved lounging hammock like the one in the photo.
- Wrap one vertical support tightly in industrial sisal rope for scratching posts to give your furry friends an extra stretching station.
- Glue short carpet pieces onto the top of each wooden platform for better paw traction.
- Screw heavy-duty brackets directly into the wall studs, securing every shelf firmly in place.
📸 Photo credit: Instagram @liorce
#11: Wooden Staircase Lounge
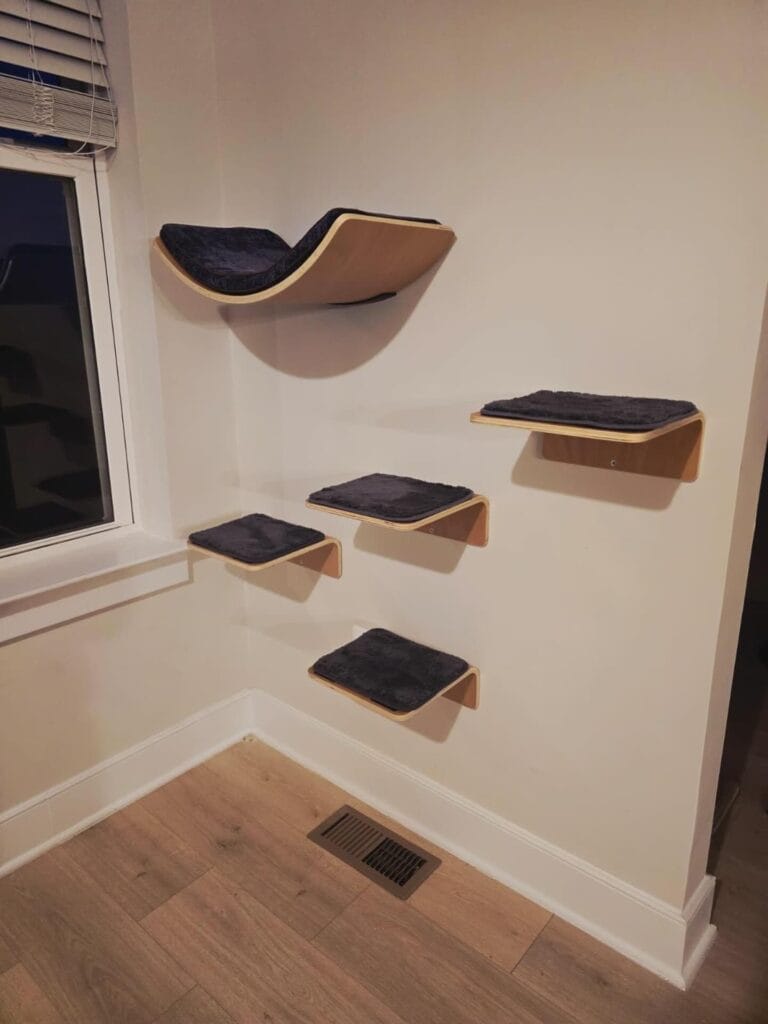
Creating vertical territory saves your floors.
Prep Time: 20 mins
Active Time: 1.5 hours
Difficulty Level: Medium
What You’ll Need:
- 4 curved wooden boards with dark grey carpet pads
- 1 large curved hammock shelf
- heavy-duty wall anchors for cats
- Stud finder and electric drill
- Screws and mounting brackets
Instructions:
- Put your wall studs near a window so your pup’s feline sibling gets a good view.
- Secure the main hammock shelf at the top left with heavy-duty wall anchors for cats to make sure it stays in place.
- Arrange the four smaller platforms in a diagonal staircase pattern going down.
- Make sure every bracket is secure before letting any pets climb.
📸 Photo credit: Instagram @liorce
#12: Build a floating feline playground
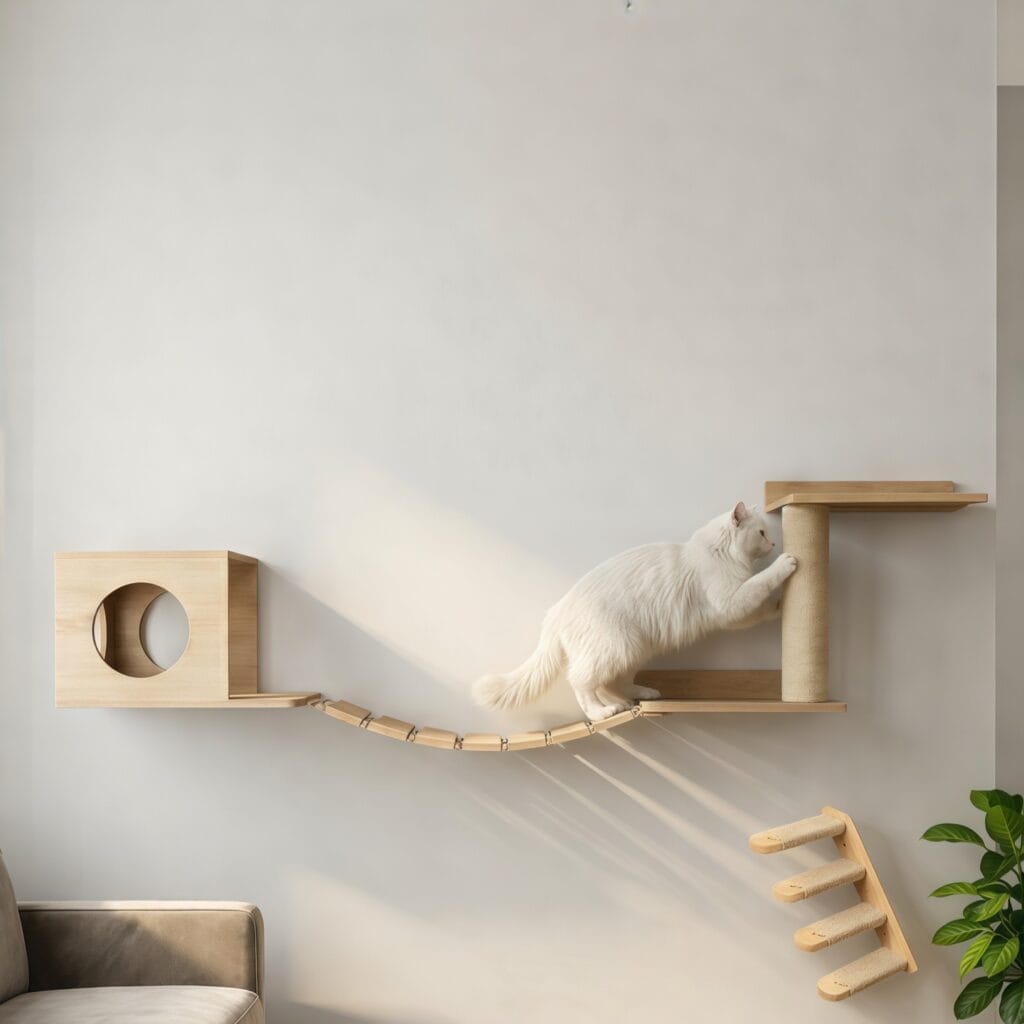
Have you ever tripped over your pet’s tree on your hallway?
You can reclaim some of your space with these fun, a creative diy cat wall ideas.
Prep Time: 45 mins | Active Time: 2 hours | Difficulty Level: Moderate
What You’ll Need:
- Birch plywood for shelves and boxes
- Heavy-duty brackets for wall support
- Sisal rope for scratching
- Wood screws and anchors
Instructions:
- Secure the wooden box to studs with a circular cut-out using heavy-duty brackets.
- Build a hanging bridge using small wooden slats threaded together.
- Attach the scratch post and top platform at the end of the walkway.
Pro Tip: always screw the steps to the wall studs. cats hit those steps with a lot of momentum!
📸 Photo credit: Instagram @nativhaus_
#13: Honey-Wood Cat Balcony Lookout
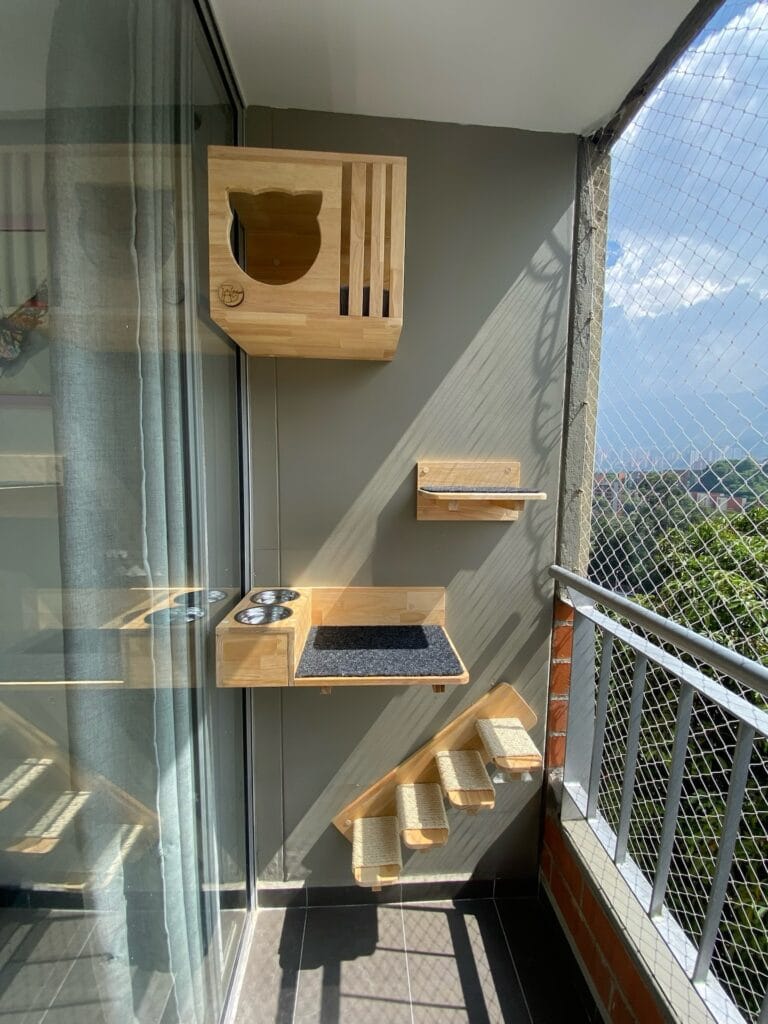
Warm honey-toned pine boards and plush grey felt pads come together in this cosy little outdoor lounge.
Prep Time: 45 minutes
Active Time: 2 hours
Difficulty Level: Intermediate
What You’ll Need:
- ¾-inch pine boards cut to size
- Heavy-duty wall anchors for cats
- Grey carpeting scraps
- Wood glue and screws
- Stainless steel pet bowls
Instructions:
- Assemble the upper cat cube using wood screws, leaving one side open and cutting a cat silhouette entry on the front.
- Build the middle platform with a cutout for the double feeding bowls and attach a carpeted resting pad next to it.
- Attach the staggered floating steps below the main platform using heavy-duty wall anchors for cats to ensure they can easily climb up.
- Mount your finished setup firmly to the exterior concrete balcony wall.
📸 Photo credit: Instagram @petipetmascotas
#14: Paint Splatter Climb
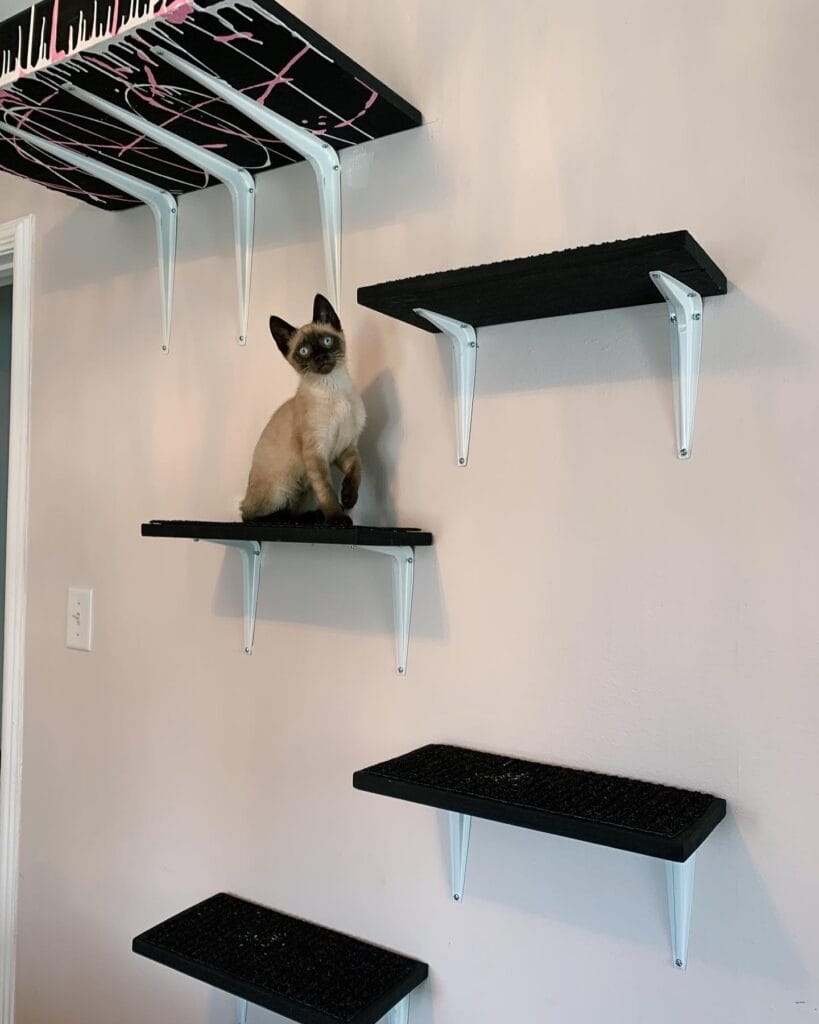
No dog will understand, but your cat will love this custom window hammock setup.
Prep Time: 45 mins
Active Time: 1.5 hours
Difficulty Level: Intermediate
What You’ll Need:
- Sturdy wood boards
- White L-brackets
- Black textured carpet remnants
- Acrylic paint for splatter effects
- Heavy-duty drywall screws
Instructions:
- Paint your boards black. Flick bright pink and white paint across the top shelf for that custom abstract look.
- Cut the textured carpet to fit each board surface and glue it down tight.
- Secure the heavy white L-brackets firmly into your wall studs using heavy-duty anchors.
- Mount the carpeted shelves in a staggered staircase pattern so your kitty can scramble up easily.
📸 Photo credit: Instagram @siamese_stanley
#15: Floating Stairs and Lounging Perches
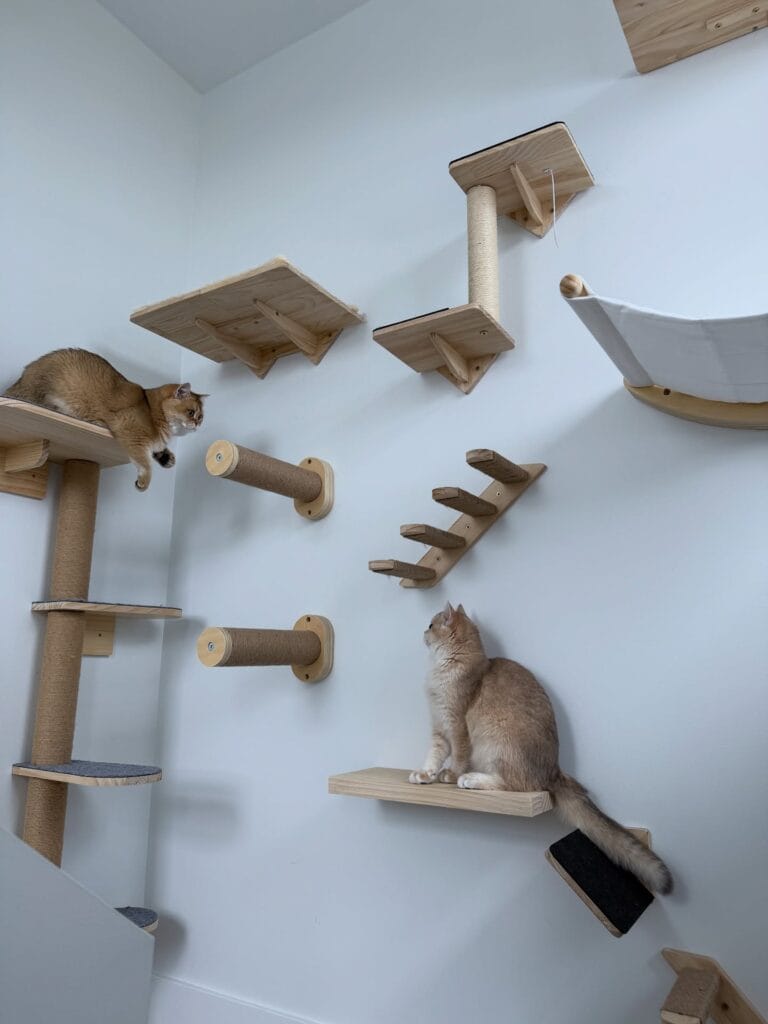
Most people just stick a huge cat tree in the corner and call it a day, but if you design the vertical walkway directly onto your drywall you save a lot of space. My dog will appreciate not having any obstacles in the hallway now too.
Prep Time: 2 hours
Active Time: 1 hour
Difficulty Level: Moderate
What You’ll Need:
- Custom wood floating shelves
- Industrial sisal rope for scratching posts
- Mounting brackets
- Wall screws
Instructions:
- Locate studs and mark the layout for your climbing steps and lounging ledges at different heights.
- Wrap the wooden cylinders tightly with sisal rope, then secure the ends with heavy-duty staples.
- Screw the metal brackets into the wall studs, then attach your wooden platforms.
Pro Tip: Always test the weight limit of your pet setup before allowing your pets to climb it.
📸 Photo credit: Instagram @snowy.andfrosty
#16: Build a Climbing Wall Jungle
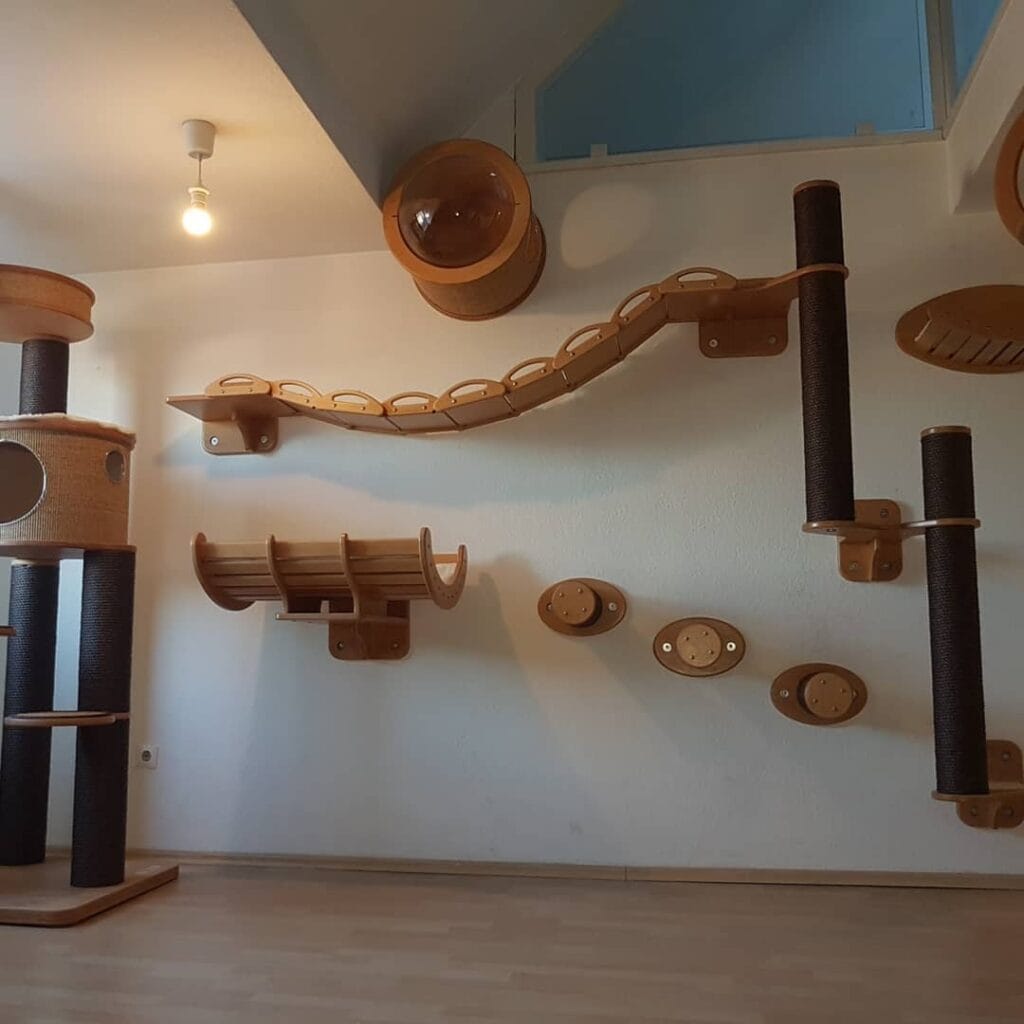
This climbing wall takes the dead space of a wall and turns it into an absolute playground for your cat. Your dog may get jealous watching this cat climb this custom wooden obstacle course.
Prep Time: 1 hour
Active Time: 3 hours
Difficulty Level: Intermediate
What You’ll Need:
- Modular cat tree hardware
- Pine board planks
- Acrylic dome bubble
- Heavy-duty wall anchors
- Industrial sisal rope
Instructions:
- Locate studs and secure strong wall brackets.
- Wrap posts tightly in sisal rope.
- Screw steps and bridges firmly into supports.
- Mount the bubble window securely.
While your cat enjoys their new vertical highway, you can check out these safe cat patio ideas for your feline to enjoy some outdoor fresh air.
📸 Photo credit: Instagram @tomohoko.de
The Pro Secret to Building a Clutter-Free Cat Lounge That Actually Stays Put
If you’re tired of your wobbly, wobbly, gross looking pet store eyesore ruining the aesthetic of your space, you need to build up your best friend’s vertical space, but you have to do it right or you’re going to have a disaster.
Here is my absolute biggest pet peeve when scrolling through home DIY boards: people skip the studs. Seriously. Your cat launches their entire body weight at high speed during zoomie hour. If you just rely on standard drywall plugs, that gorgeous setup is coming crashing down on your pristine hardwoods.
Always screw straight into the framing. If you have to place a tier between two studs, you will want heavy duty wall anchors for the cats so they can’t get knocked over easily.
If the layers of a good foundation are put in place, and the carpets feel steady under your feet, then it’s time to wrap those platforms with a neutral and tight textile. Forget the neon scraps and think instead of your living room; why destroy the style of your space for the sake of a little kitty?
Ready to Build That Kitty Playground
Your dog takes up enough space on the floor as it is. Why not give your cat some floor space too? Turn your walls into a feline lounge with these cool cat wall ideas.
Get some heavy-duty wall anchors for cats. And secure the boards to the wall, so if your little hunter decides to go ten feet up and jump, he will be ok.
While your dog is napping on the rug, you can check out these hidden litter box styles to keep the rest of the house smelling fresh.
Which wall are you tackling this weekend?

Amr Mohsen is a software engineer who traded his keyboard for a leash — at least on weekends. His love for dogs inspired him to share what he learns as a dog owner and enthusiast, bringing a detail-oriented, research-driven perspective to every article he writes. If it’s about dogs, he’s probably already looked it up twice.