One of my dogs always naps on the same spot on my living room rug. I’m picturing that spot, but instead, it’s a giant furry jungle gym that ruins my aesthetic. I love my animals, but pet furniture looks like a fuzzy disaster that fell out of the sky and wrecked my good space. After months of work, you finally got your space to look warm and put-together, only to have a bright blue carpeted monstrosity ruin the corner.
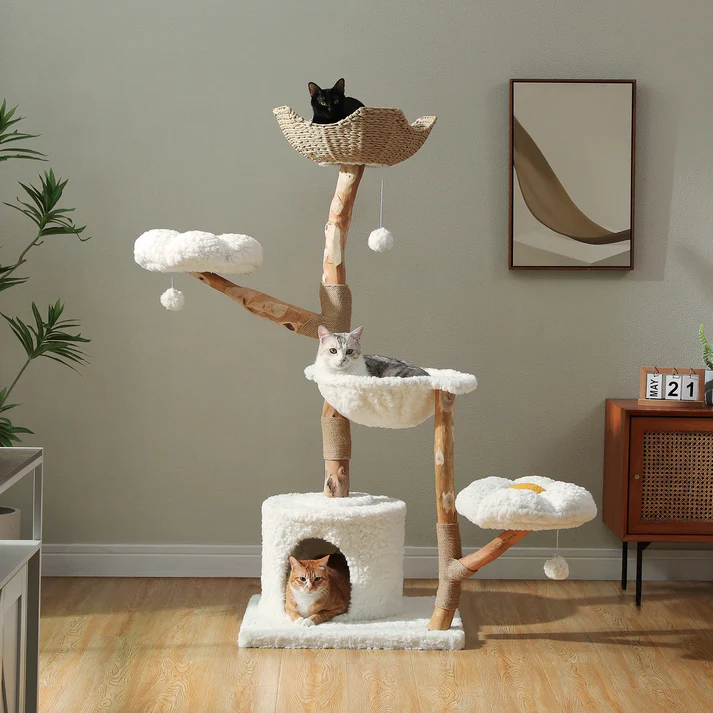
Take a deep breath, just because you can’t afford an expensive cat tree doesn’t mean your feline will be stuck with an ugly one. If you have some nice wood cat tree base boards then you can create a piece that is just perfect for your home and will keep your kitty busy for hours. Here are 18 cat tower ideas that your kitty will just love and you will not mind seeing either.
#1: Build a Sleek Floating Wall Playground
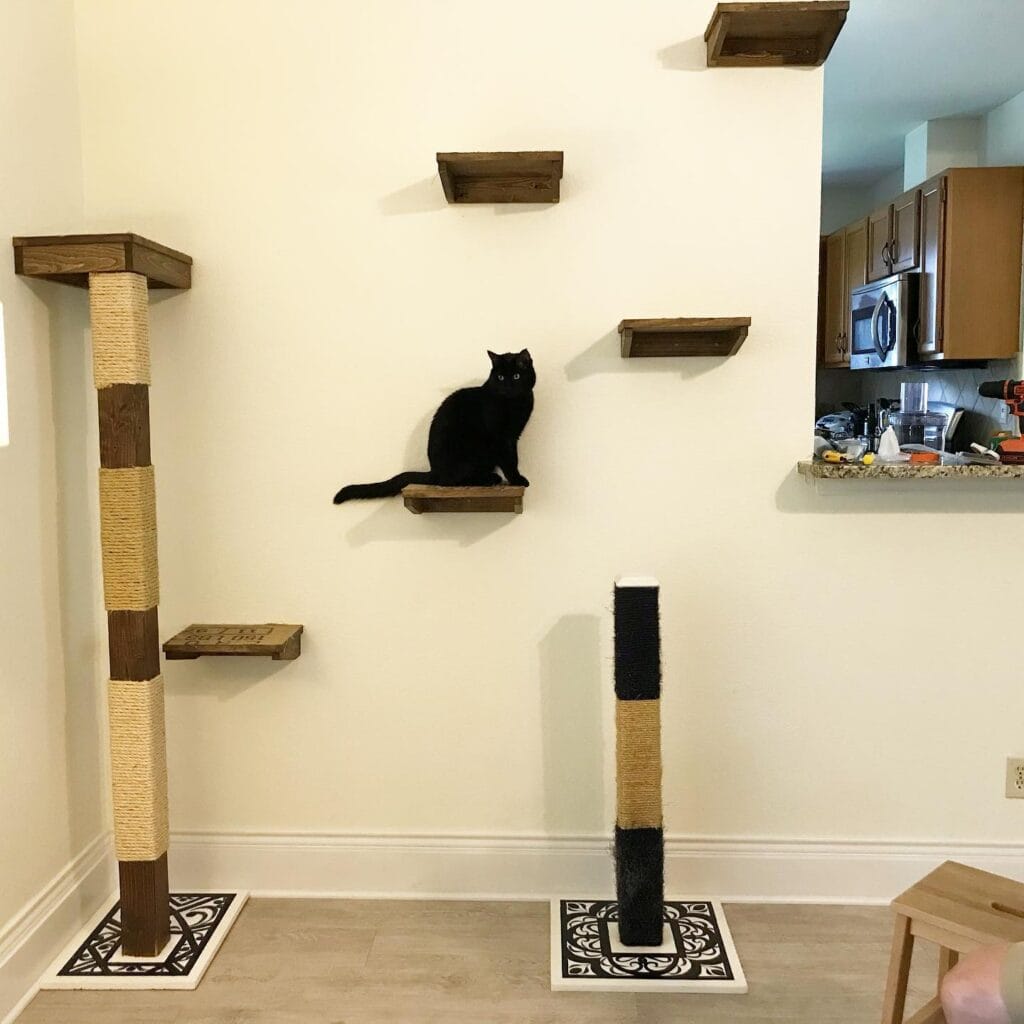
A vertical playground changes everything for your home setup.
Prep Time: 45 minutes
Active Time: 2 hours
Difficulty Level: Intermediate
What You’ll Need:
- Solid wood planks cut into various shelf sizes
- Heavy-duty shelf brackets
- Wall anchors and screws
- Stud finder
- Drill and level
Instructions:
- Locate studs along your wall using your finder. Mark where each wood tier will go at staggered heights, making sure your cat can jump comfortably between steps.
- Secure the heavy-duty brackets firmly into the studs with long screws. Check each bracket with a level before moving on.
- Attach your custom wooden platforms directly to the mounted brackets. Double-check that every piece holds firm under pressure before letting your furry friend near it.
📸 Photo credit: Instagram @akiyo_ogura
#2: Build a Multilevel Playground
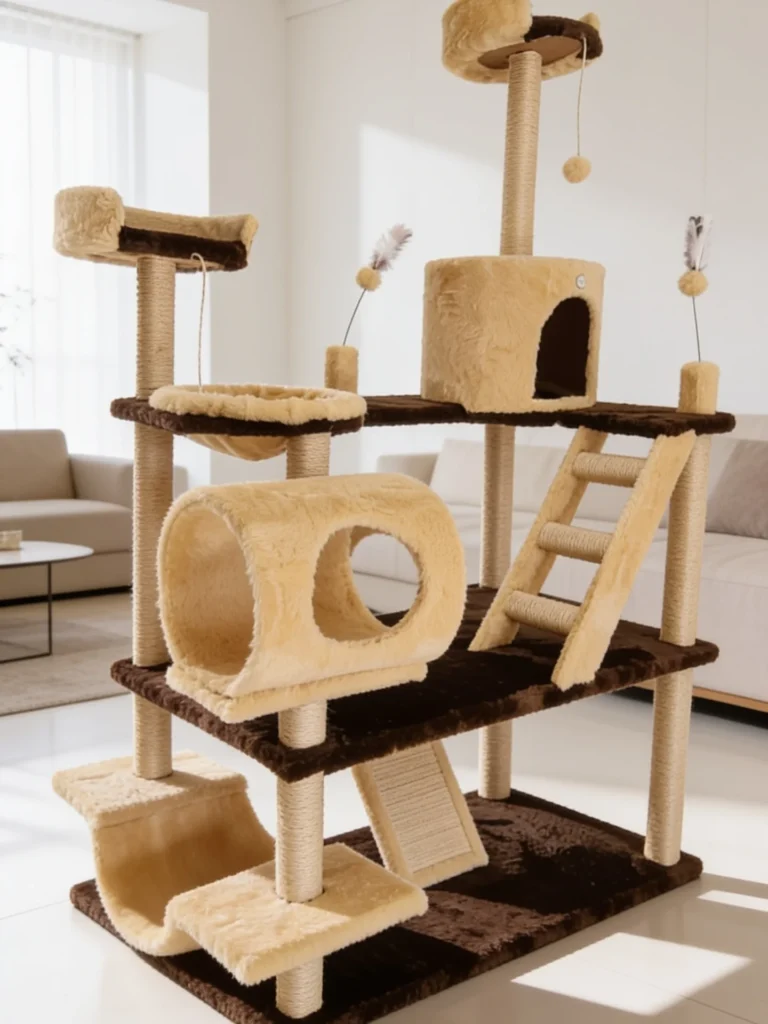
Do you ever see your dog sitting staring at your neighbors cat with envy?
Prep Time: 2 hours
Active Time: 1.5 hours
Difficulty Level: Intermediate
What You’ll Need:
- Solid wood cat tree base boards
- Industrial sisal rope for cats
- Plush faux fur fabric
- Heavy cardboard tubes
- Wood glue and screws
Instructions:
- Cut your base boards to size and wrap them tightly in plush faux fur fabric using heavy-duty staples.
- Secure the vertical support posts to the bottom platform using long wood screws for maximum stability.
- Wrap the central scratching pillars entirely in industrial sisal rope for cats, anchoring the ends with hot glue.
- Mount the horizontal barrel tunnel and top observation perch onto the upper platforms.
- Attach the side ladder and dangling feather toys to finish your custom multi-level climber.
📸 Photo credit: Instagram @arteando_catshop
#3: Build a Multi-Level Gray Carpet Tower
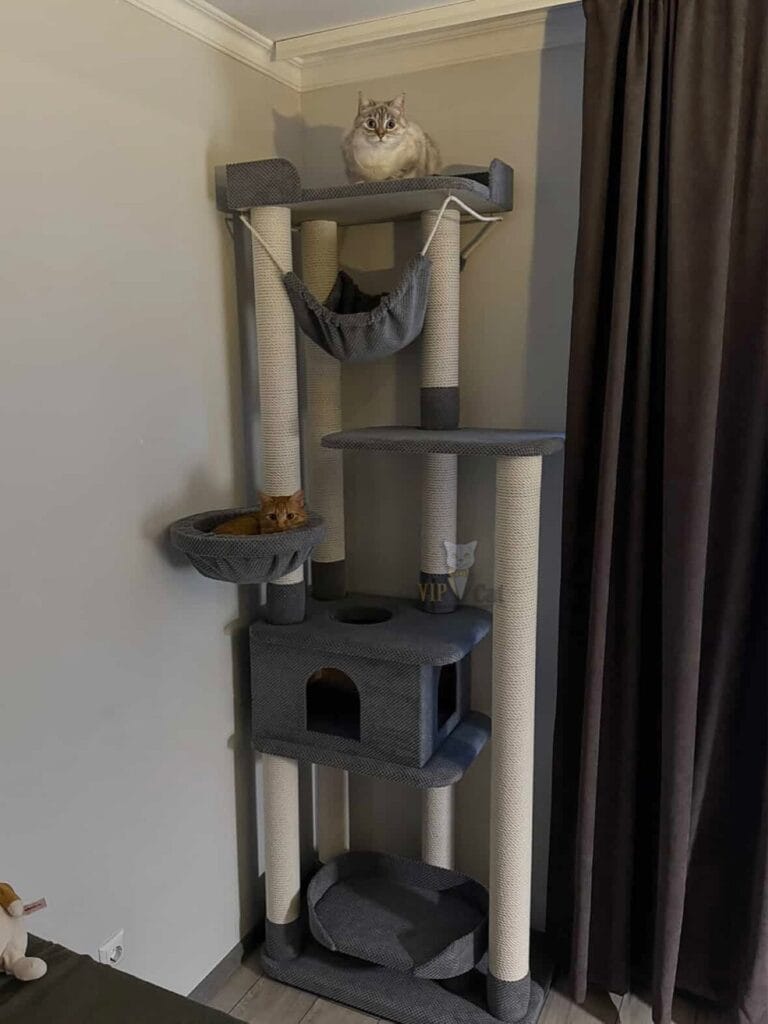
They’ve also got a comfy plush heather gray carpet, as well as thick, cream colored scratching posts that look comfy in the corner.
Prep Time: 1 hour
Active Time: 3 hours
Difficulty Level: Intermediate
What You’ll Need:
- Industrial sisal rope for cats
- Solid wood cat tree base boards
- Heavy-duty staples
- Carpet scraps
- Wood screws
Instructions:
- Cut your solid wood cat tree base boards and platforms to fit your corner space snugly.
- Wrap the supporting posts tightly with industrial sisal rope for cats, securing the ends with staples every few loops.
- Staple the heather gray carpet over each platform and inside the little box hideout.
- Attach the tiers using sturdy wood screws from the bottom up so they’re stable for climbers to jump on.
Pro Tip: I always measure the corner height again when making my base boards so that the whole structure fits flush against the walls and doesn’t wobble.
📸 Photo credit: Instagram @_vip_cat
#4: Vertical Wall Perch
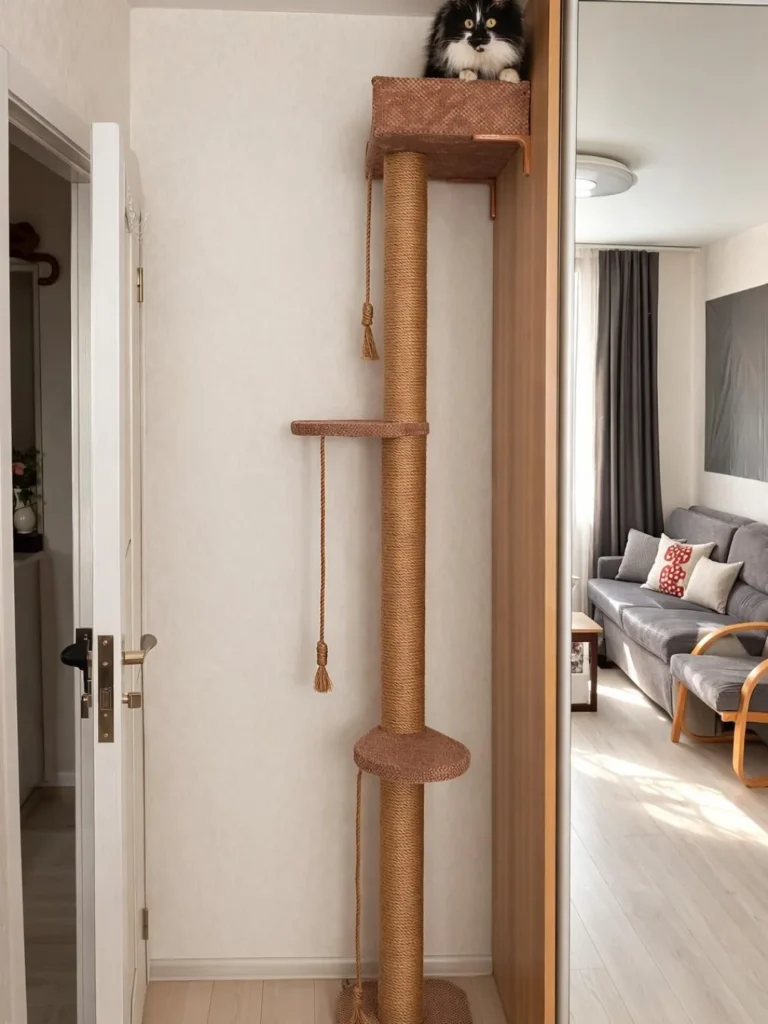
There never seems to be enough floor space when your pup rules the living room.
Prep Time: 1 hour
Active Time: 2 hours
Difficulty Level: Intermediate
What You’ll Need:
- 4-inch PVC pipe
- industrial sisal rope for cats
- Small plywood platforms
- L-brackets and heavy screws
Instructions:
- Wrap the PVC pipe tightly with your rope, then secure the ends with hot glue.
- Mount the top box securely to the wall stud using your wall mounted cat climbing hardware.
- Attach the circular platforms at staggered heights so pets can easily climb the vertical drop.
If you need more inspiration for your weekend building sessions, check out these creative plans to see other builds.
📸 Photo credit: Instagram @lapki_tsarapki_23
#5: Build a Clean, Custom Cat Tower That Won’t Ruin Your Decor
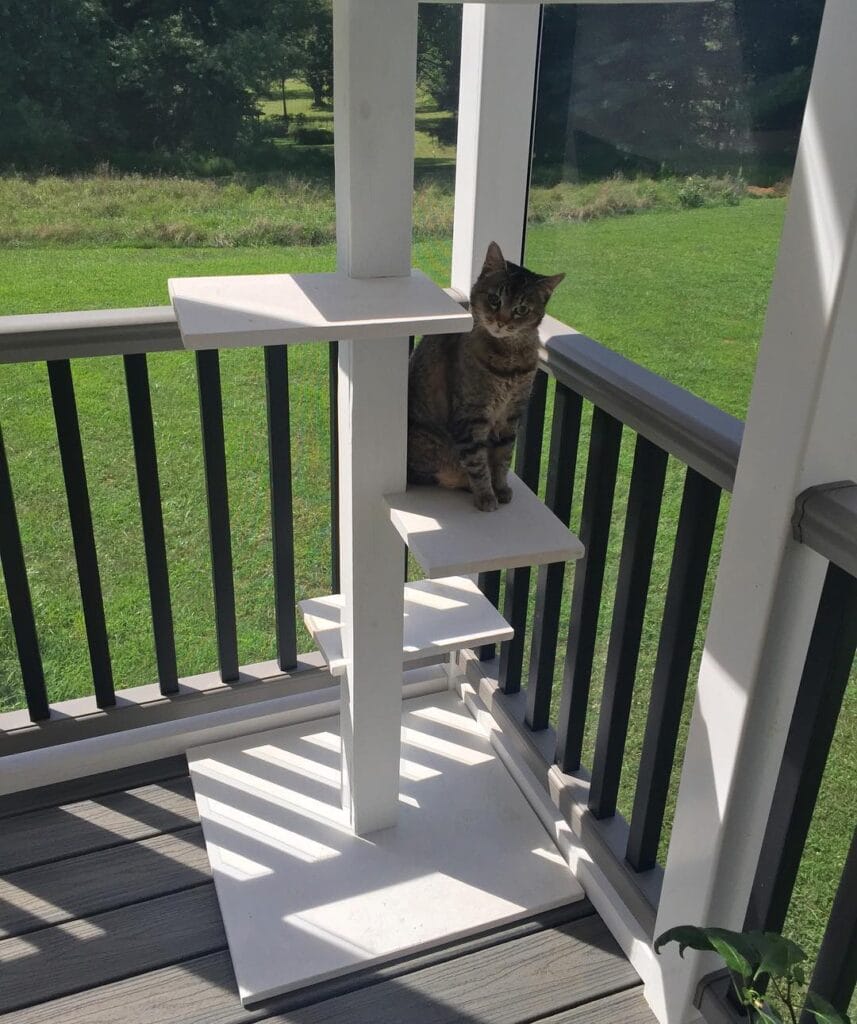
Most store bought perches look like a fuzzy carpet exploded in your living room, so I made my own sleek modern cat tower instead.
- Prep Time: 30 minutes
- Active Time: 2 hours
- Difficulty Level: Moderate
What You’ll Need:
- Solid wood cat tree base boards
- 4×4 white wooden post
- Pre-cut white wooden platforms
- Wood screws and heavy-duty brackets
- Miter saw and drill
Instructions:
- Secure the vertical 4×4 post to your square wooden base using heavy-duty L-brackets underneath for stability.
- Cut your wooden perches to staggered lengths so your cat can climb easily.
- Screw each platform directly into the main post at varying heights. Paint everything crisp white to match your trim.
- Mount the whole unit safely before letting your furry friend test it out.
📸 Photo credit: Instagram @for_all_animals
#6: Craft a Branching Wooden Cat Tree
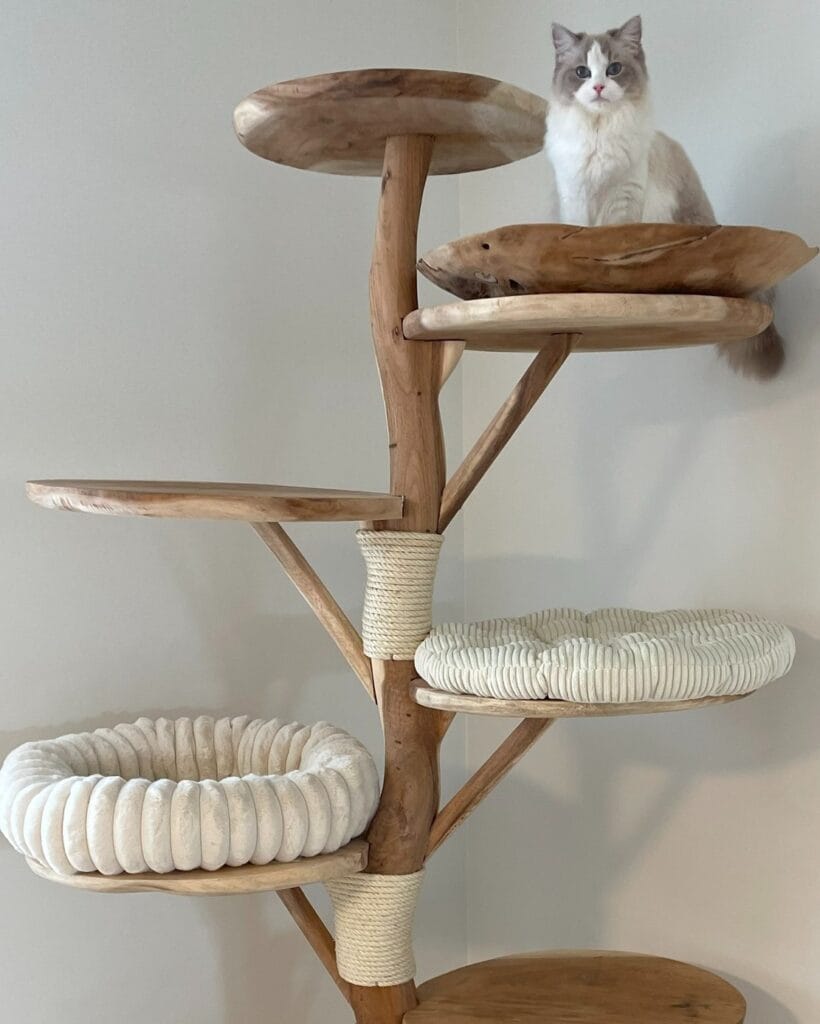
Prep Time: 45 minutes
Active Time: 2 hours
Difficulty Level: Intermediate
What You’ll Need:
- Solid wood cat tree base boards
- Natural tree branch trunk
- Jute or sisal rope
- Wood screws
- Power drill
Instructions:
- Secure the main trunk to your base board using heavy-duty wood screws from underneath for stability.
- Attach staggered natural wood rounds and bowls to the trunk at varying heights to mimic real tree branches.
- Wrap sections of the central trunk tightly with thick rope, securing the ends with heavy-duty staples so your pup’s feline housemate has plenty of scratching space.
- Place soft cushions on the upper wooden tiers to make cozy resting spots.
Pro Tip: Always sand down the edges of any rough bark on branches before assembly as pet claws (or your house blankets) can snag on them.
📸 Photo credit: Instagram @catznwood
#7: Floor-to-Ceiling Wood Climber
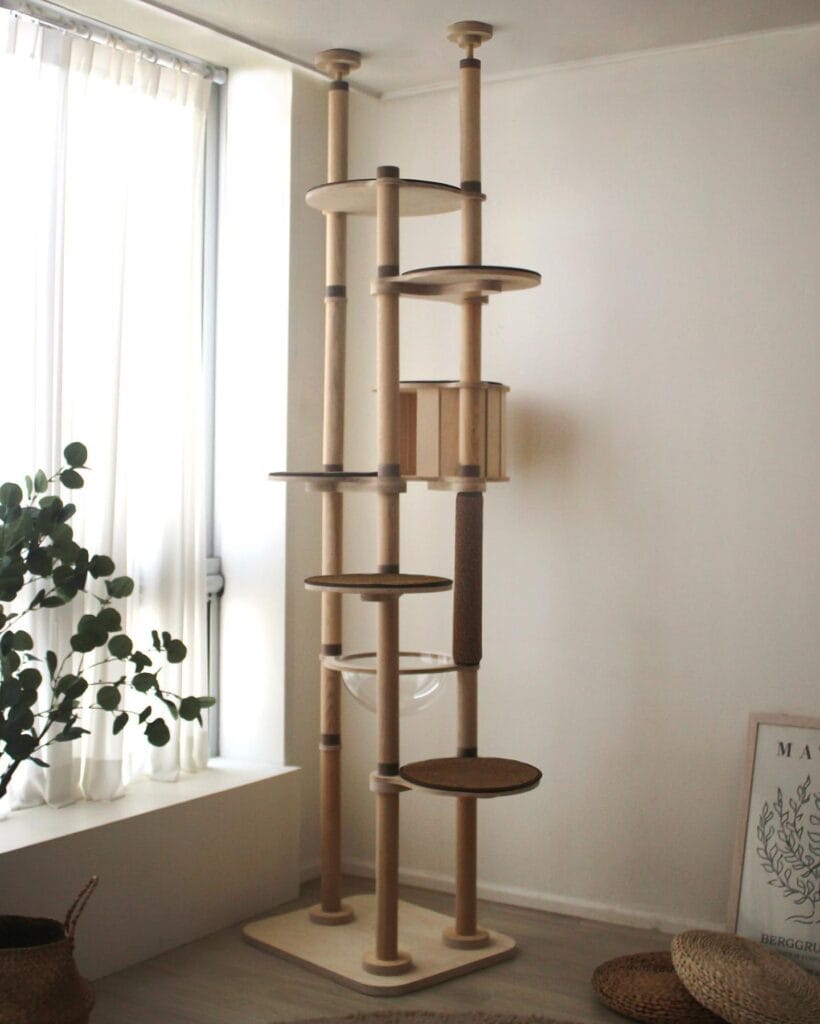
Does your living room currently look like a playground for your pup, leaving your cat with no vertical territory to call their own?
Prep Time: 45 mins
Active Time: 2 hours
Difficulty Level: Intermediate
What You’ll Need:
- Solid wood cat tree base boards
- Tension poles
- Pre-cut round wooden platforms
- Sisal rope
- Heavy-duty screws
Instructions:
- Secure the bottom plate to the floor. Add dual tension poles reaching up to your ceiling for maximum stability.
- Slide wooden platforms onto the poles at different heights so your cat can easily climb them.
- Wrap one vertical support section tightly in sisal rope. Anchor it with heavy-duty staples for endless scratching.
- Mount a transparent acrylic bowl into one of the circular cutouts for nap time views.
- Tighten all the tension fasteners. Test the structure before letting your pets climb.
📸 Photo credit: Instagram @mascotian.official
#8: Build a Sleek Floor-to-Ceiling Wooden Perch
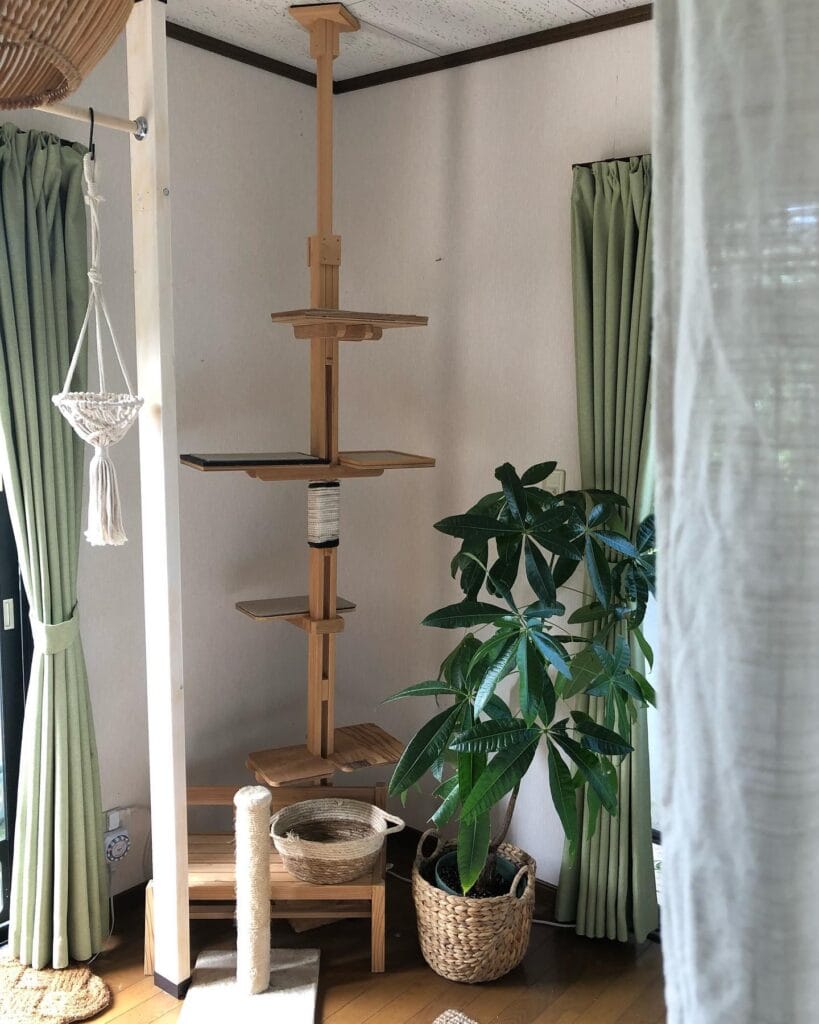
I love the pale birch wood poles and the soft green curtains in that corner.
Prep Time: 30 Minutes
Active Time: 2 Hours
Difficulty Level: Moderate
What You’ll Need:
- Solid wood cat tree base boards
- Tension rod hardware
- Sisal rope
- Wood screws and drill
Instructions:
- Measure floor-to-ceiling height accurately. Cut your main vertical lumber to size.
- Secure the top tension plate so the central beam wedges firmly against the ceiling.
- Fasten your solid wood cat tree base boards at staggered heights along the upright beam to create steps.
- Wrap the middle section tightly with sisal twine for scratching. Secure ends with heavy-duty staples.
A perfect fit in a tight corner; this cat tower is small enough to not hog space.
📸 Photo credit: Instagram @cozygarden_28
#9: Build a Branch-Style DIY Cat Tower
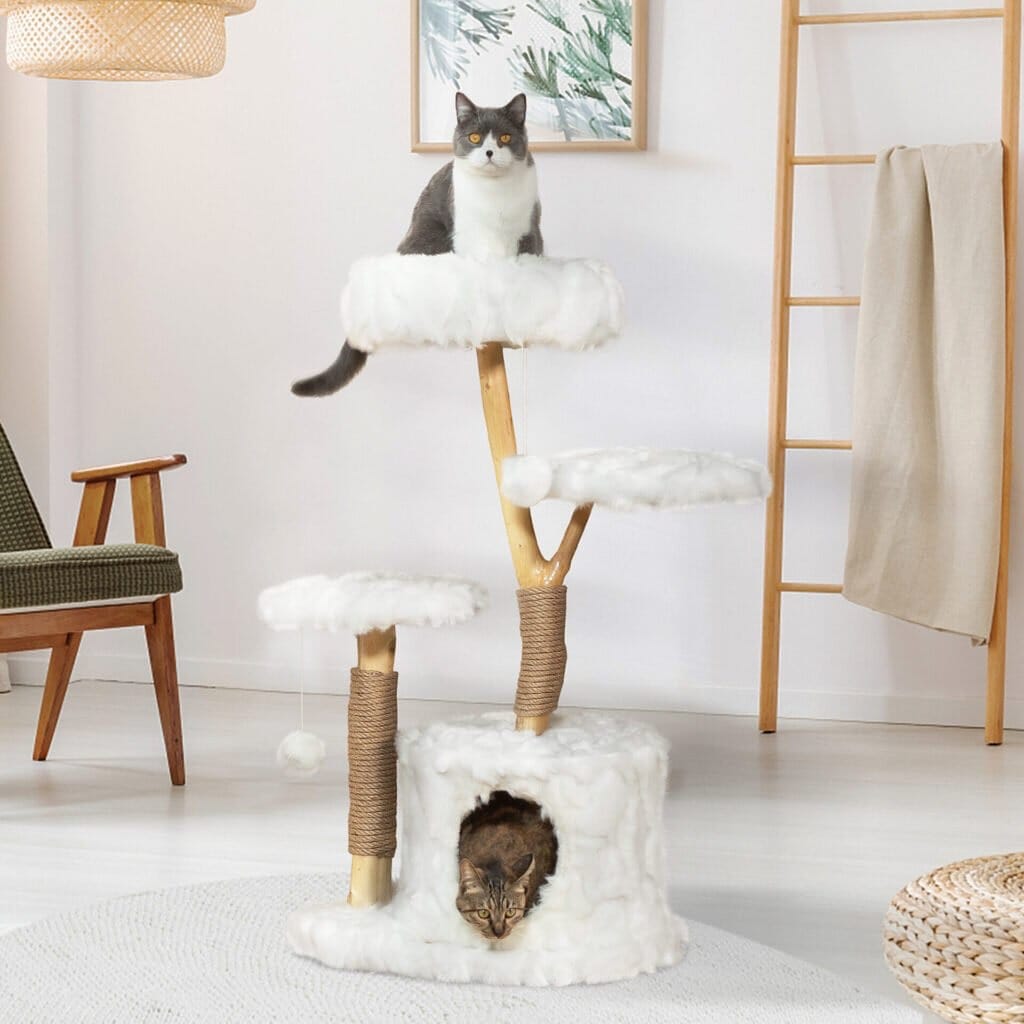
If your fur baby spends all day staring out the window, then you need this multi-level playground.
Prep Time: 1 hour
Active Time: 3 hours
Difficulty Level: Moderate
What You’ll Need:
- Solid wood cat tree base boards
- Real tree branches
- Faux white fur fabric
- Natural sisal rope
- Heavy-duty wood screws
- Staple gun
Instructions:
- Secure the main wooden base board to the bottom cylinder hideout.
- Fasten the treated tree branches upright using long wood screws from underneath.
- Wrap sections of the branches with sisal rope, then secure the ends with staples.
- Staple the white faux fur tightly over the top perches and inside the base.
Pro Tip: Always sand down any rough spots on your branches before wrapping them to keep your cats from getting splinters!
📸 Photo credit: Instagram @thepetsay
#10: Build a Rolling Multi-Tier Cat Playground
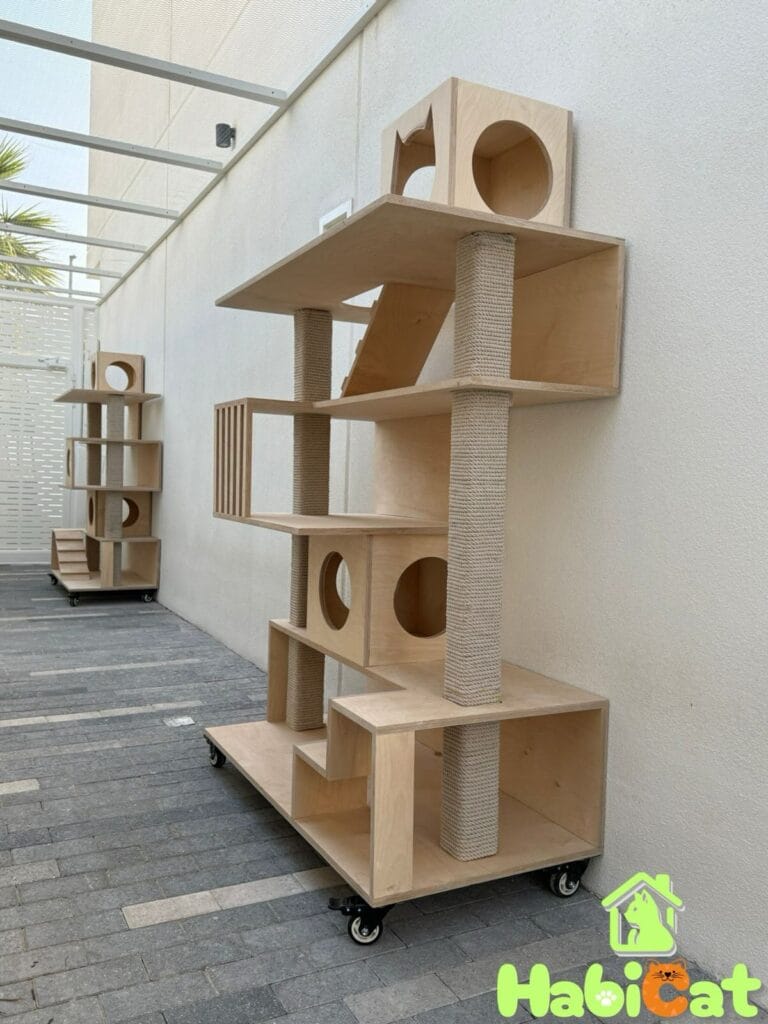
Most of the time, we will just buy a wobbly particle board box to call a cat tree. But you can make a custom cat tree for your kitty to play on.
Prep Time: 2 hours
Active Time: 4 hours
Difficulty Level: Intermediate
What You’ll Need:
- Solid wood cat tree base boards (3/4-inch plywood works great)
- Industrial sisal rope for cats
- Heavy-duty locking caster wheels
- Wood screws and wood glue
- Jigsaw and drill
Instructions:
- Cut your plywood into multiple platforms, cubes, and an observation box for the top.
- Wrap the vertical support posts tightly with your rope, then secure the ends with heavy-duty staples so your cat can scratch away.
- Screw four locking caster wheels onto the bottom board so you can roll the whole structure around for cleaning.
- Assemble the cubes and platforms using pre-drilled holes, wood glue, and screws. Stagger the levels so your cat has an easy climbing path.
📸 Photo credit: Instagram @habicat_ae
#11: Build This Modern Wooden Cat Tree
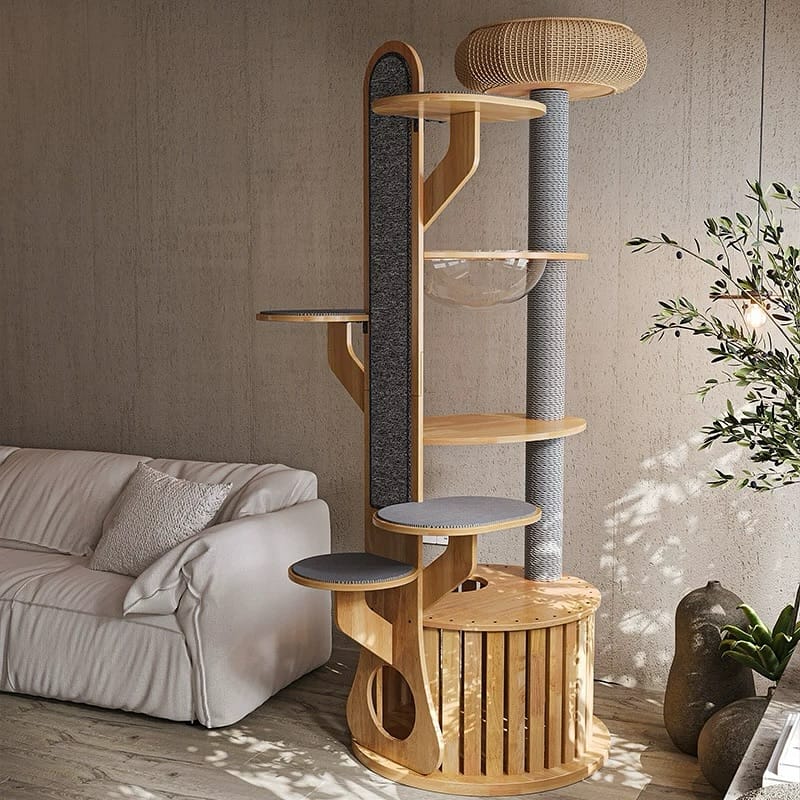
Sturdy handmade furniture beats flimsy pet store towers every single time.
Prep Time: 45 minutes
Active Time: 3 hours
Difficulty Level: Intermediate
What You’ll Need:
- Solid wood cat tree base boards (cut into circular and platform shapes)
- Heavy plywood upright spine
- Thick sisal rope
- Grey carpet remnants
- Clear acrylic half-sphere bowl
- Wood screws and wood glue
Instructions:
- Assemble the cylindrical slatted base using wood glue and screws to anchor your solid wood cat tree base boards.
- Secure the vertical plywood spine to the back of the base circle for maximum stability.
- Wrap the tall vertical scratching post tightly with sisal rope and secure the ends with heavy-duty staples.
- Attach the staggered wooden platforms and the acrylic bowl at varying heights along the main spine.
- Glue pre-cut grey carpet pads onto the platform tops and the tall back scratcher panel.
📸 Photo credit: Instagram @meowandpaw.store
#12: Build a Sturdy Branch Cat Tower
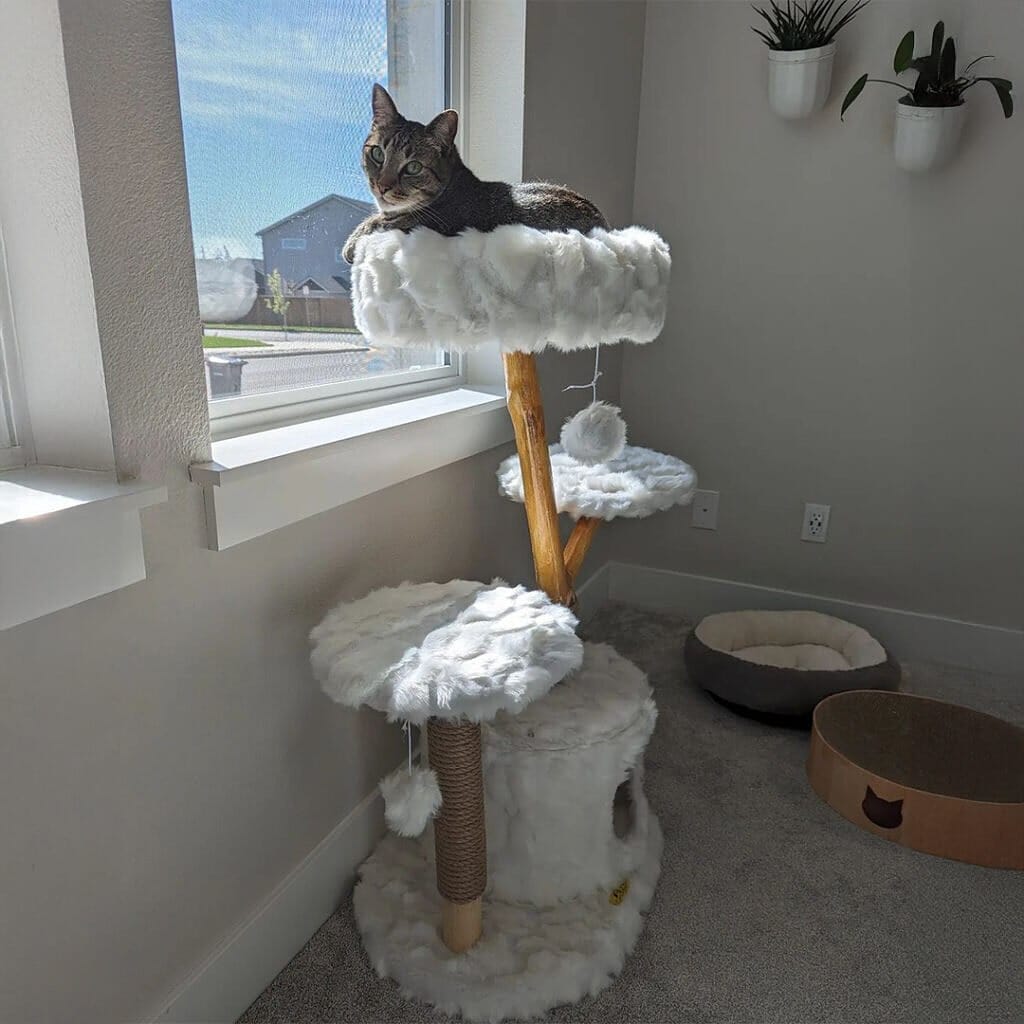
Have you ever seen a pet store condo and wished you could build your own, chic and natural-looking condo for your pet?
Prep Time: 45 minutes
Active Time: 2 hours
Difficulty Level: Intermediate
What You’ll Need:
- Solid wood cat tree base boards
- Sturdy tree branches
- Industrial sisal rope for cats
- White faux fur fabric
- Heavy-duty staple gun
- Wood screws
Instructions:
- Secure the thick tree branches to the heavy base board using long wood screws from underneath.
- Wrap the lower branch securely with industrial sisal rope for cats, then pull tight every few rotations.
- Cut plywood platforms to shape, staple soft white faux fur over each one, and mount them securely to the branches at staggered heights.
- Add a cozy top-perch rim for the ultimate sunny window lookout spot.
Pro Tip: Pre-drill all screw holes into your branches to prevent the wood from splitting when you anchor them down.
📸 Photo credit: Instagram @thepetsay
#13: Sleek Wood and Rope DIY Cat Tower
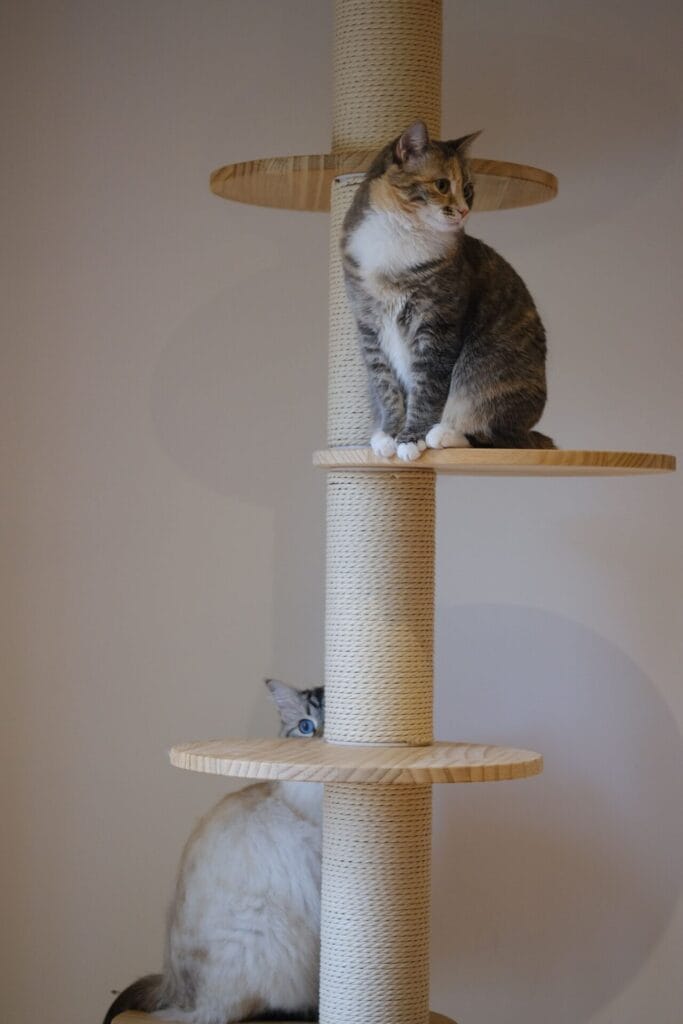
I love how the pale natural pine shelves tightly wrap around the thick cream sisal wrapped post. The climbing beans are looking very chic in the corner.
Prep Time: 1 hour
Active Time: 3 hours
Difficulty Level: Intermediate
What You’ll Need:
- Solid wood cat tree base boards
- Thick sisal rope
- Sturdy central wooden pole
- Wood screws and brackets
- Heavy-duty wood glue
Instructions:
- Secure your central pole firmly to the solid wood cat tree base boards using heavy brackets.
- Coat the pole sections in wood glue as you wrap the sisal rope tightly, pressing each row down.
- Pre-drill the shelf positions and mount the circular pine platforms at staggered heights.
- Let the whole thing cure overnight before your furry friends try it out.
📸 Photo credit: pexels
#14: Natural Branch Cat Tree
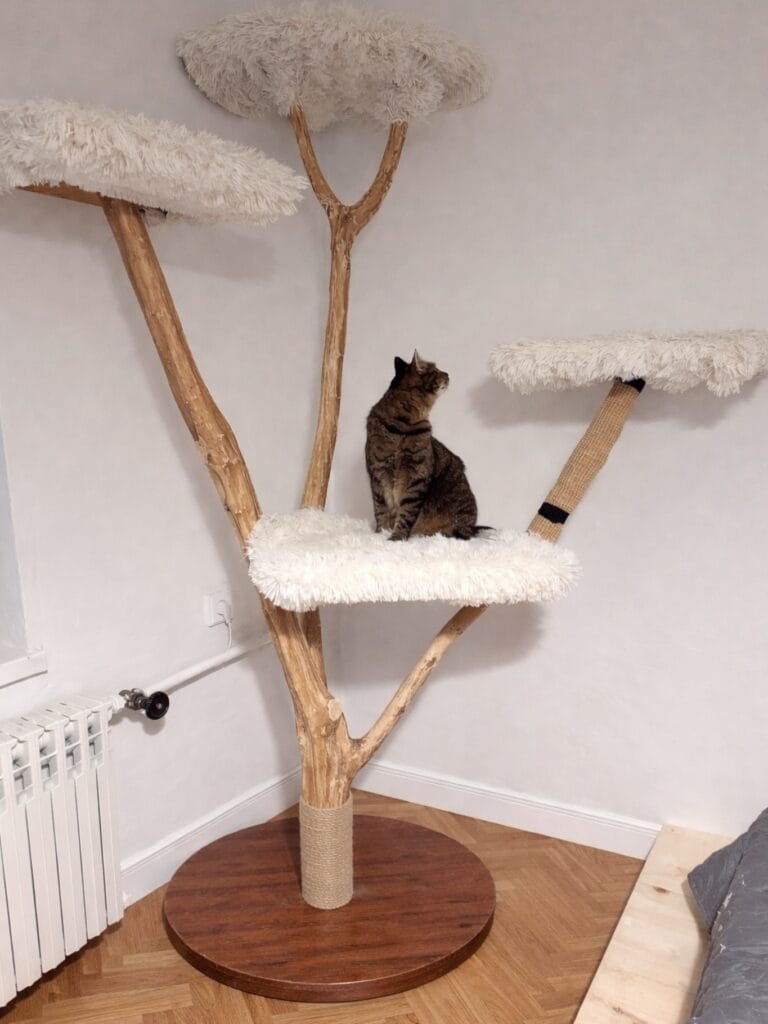
Sturdy branches are some of the most comfortable lounge spots, so your pup might try to claim this spot first when you are working.
Prep Time: 1 hour
Active Time: 3 hours
Difficulty Level: Intermediate
What You’ll Need:
- Heavy circular wood base board
- Sturdy fallen hardwood branches
- Sisal rope
- Faux fur fabric
- Heavy duty carpet adhesive for pet trees
- Wood screws and brackets
Instructions:
- Sand down your branches until smooth so your pets stay safe from splinters.
- Secure the main vertical branch upright onto the heavy wood base board using sturdy brackets underneath.
- Attach angled side branches to create climbing tiers, making sure the structure remains balanced.
- Wrap the lower trunk tightly with sisal rope for a scratching surface.
- Cut pieces of faux fur fabric to fit each platform and secure them using heavy duty carpet adhesive for pet trees. Let everything dry completely before inviting your furry friends over to test it out.
📸 Photo credit: Instagram @stella.and.sofia
#15: That Chic Branch-Style Climbing Tree
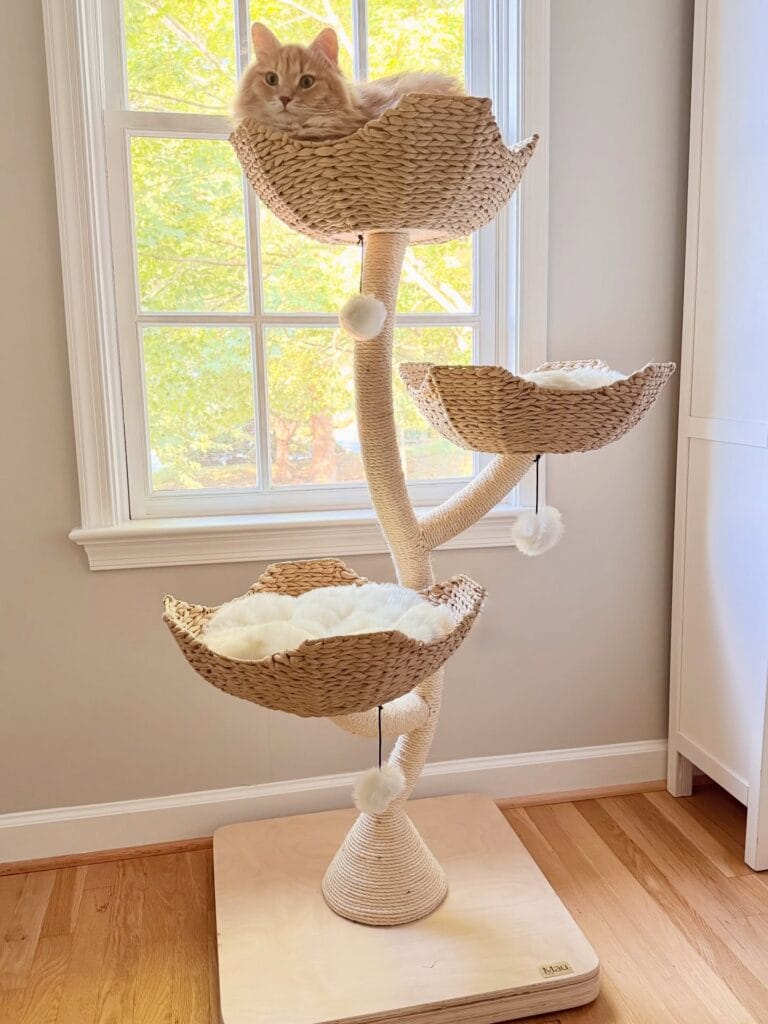
So, most people end up with some particle board eyesore, when they are trying to give their cats some height, but a real tree, made of solid wood cat tree base boards, changes the game.
Prep Time: 1 hour
Active Time: 3 hours
Difficulty Level: Intermediate
What You’ll Need:
- Heavy-duty plywood for the base
- Thick real-wood tree branches
- Natural sisal rope
- Woven seagrass baskets
- Wood screws and power drill
Instructions:
- Cut your thick plywood board into a large square, sanding the edges smooth.
- Secure your main upright branch and smaller side perches to the base using heavy-duty wood screws from underneath.
- Wrap the trunk and branches tightly with sisal rope, securing the ends with heavy-duty staples.
- Secure the woven baskets to the branch ends as cozy lounging beds.
If you want to spend more time online, check out this site for modern cat furniture.
Pro Tip: Always pre-drill your screw holes into the base board to prevent the thick plywood from splitting under pressure.
📸 Photo credit: Instagram @toby_._hope
#16: Build a Floating Balcony Lounge
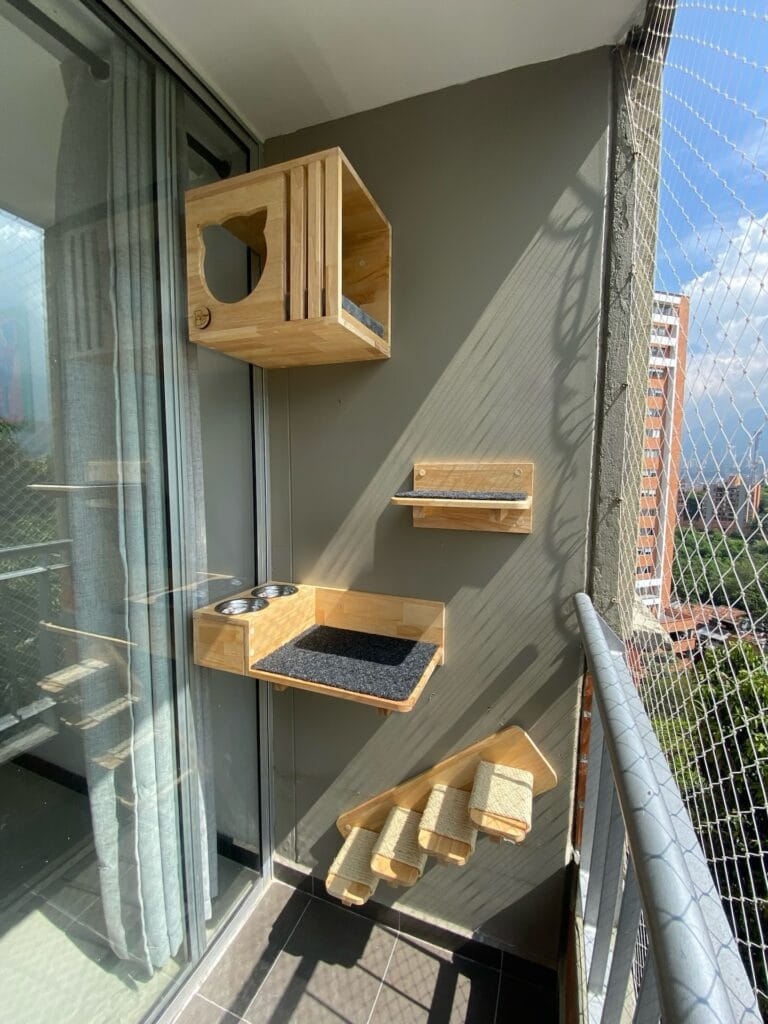
Perched on top of the vertical shelving, this little fella enjoys the epic view he gets from the outside.
- Prep Time: 30 minutes
- Active Time: 2 hours
- Difficulty Level: Moderate
What You’ll Need:
- Solid wood cat tree base boards
- Industrial sisal rope for cats
- 1×8 pine boards
- L-brackets and heavy-duty wall anchors
- Gray carpet remnants
- Non-toxic wood glue
- Staple gun
Instructions:
- Cut your pine boards into custom lengths for the corner cubby box, middle step, and the main platform holding those built-in metal food bowls.
- Fasten the wooden boxes securely using wood screws and reinforce the corners so they hold strong under jumping weight.
- Wrap the mini stairway treads tight with sisal rope, and secure the ends with heavy-duty staples so claws can grip.
- Glue your gray carpet pieces onto the platform floors to keep paws cozy during naptime.
- Screw your sturdy L-brackets straight into concrete balcony pillars or exterior studs using proper masonry anchors. Mount each piece firmly.
📸 Photo credit: Instagram @petipetmascotas
#17: Slat-Wall Cat Tower Upgrade
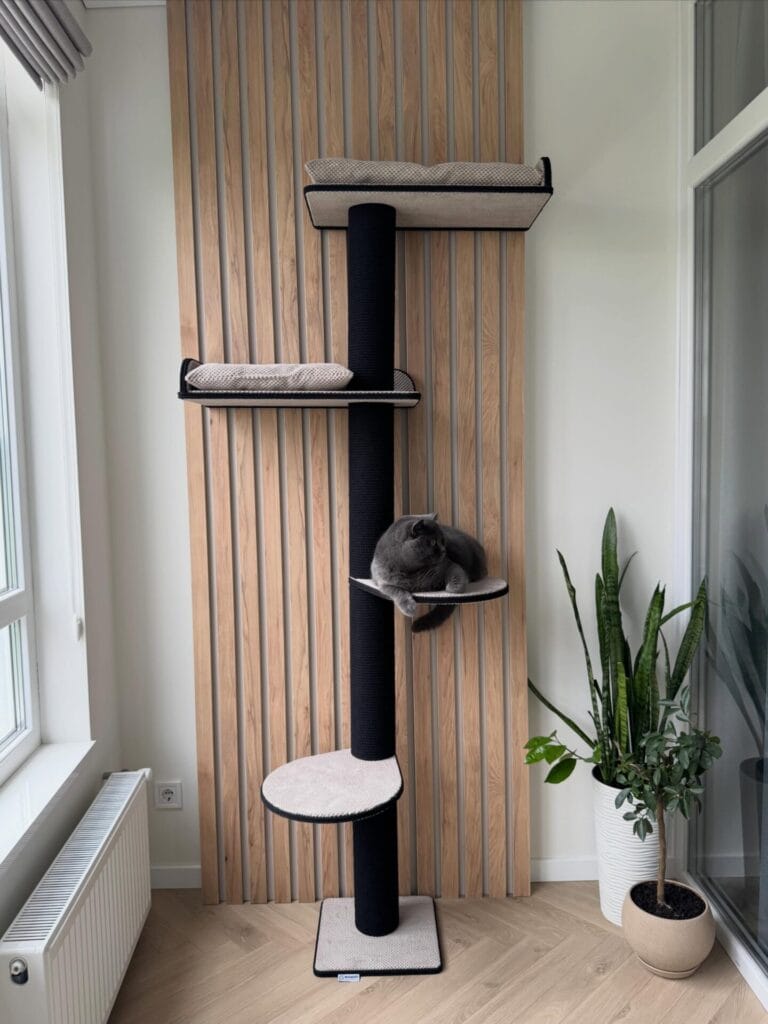
You’ve probably noticed it before: an ugly scratching post that ruins the entire ambiance of your living room.
Prep Time: 45 mins
Active Time: 2 hours
Difficulty Level: Medium
What You’ll Need:
- Vertical wood slat paneling
- Heavy duty carpet adhesive for pet trees
- Black sisal rope
- Plywood platforms and brackets
Instructions:
- Mount your wood slat backdrop to the wall studs.
- Wrap the central support pole tightly with black sisal rope, securing sections with heavy duty carpet adhesive as you go.
- Screw the matching carpeted platforms into the vertical slats at different heights for easy climbing.
- Top the tower with a cozy lounging bed.
📸 Photo credit: Instagram @makbeny.atelier
#18: Build This Creamy Sisal Kitty Sky-Rise
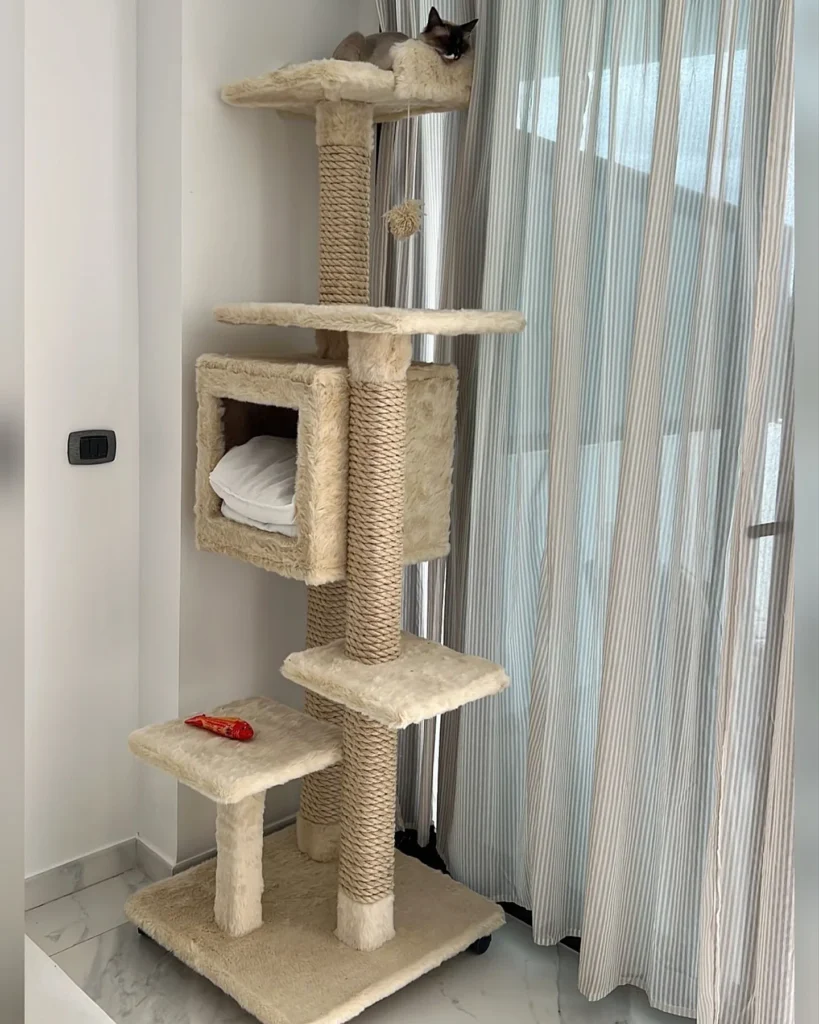
Soft beige faux fur meets chunky wrapped sisal pillars in a towering multi-level paradise for your furry best friend.
Prep Time: 45 minutes
Active Time: 2 hours
Difficulty Level: Moderate
What You’ll Need:
- Plywood boards for the base and platforms
- Industrial sisal rope for cats
- Plush beige faux fur fabric
- Sturdy cardboard casting tubes or wooden posts
- Heavy-duty staple gun and wood screws
Instructions:
- Cut your plywood into tiered platforms and a roomy square cubby box.
- Wrap the vertical wooden posts tightly using industrial sisal rope for cats, then secure the ends with heavy-duty staples.
- Staple plush beige faux fur across the platforms and inside the square resting box.
- Secure all the pieces with long wood screws from underneath the base board.
Pro Tip: Wrap the scratching columns as tightly as you can, you’ll be glad you did when your cat sits on them.
📸 Photo credit: Instagram @torresparagatosrd
Secrets to Building a Bulletproof DIY Cat Tower That Actually Lasts
While I love our fuzzy little terrorists just as much as you do, building feline furniture that is big enough to withstand their zoomies can be a bit of a challenge.
My biggest pet peeve with store-bought cat towers is they wobble. When you’re designing your own DIY cat tower, you need to anchor the frame in a way that will prevent it from tipping when your chunky monkey goes flying off the top tier.
Skip out on flimsy plywood from the scrap bin and invest in some solid wood cat tree base boards to help anchor everything down. You’re floors will thank you and you’ll save some nasty kitty tumbles.
Another neat trick for wrapping posts is to use the more expensive industrial sisal rope for cats. These will last you years of aggressive scratching without falling apart on you.
If you are going to add platforms, stagger them to make a multi-level cat tree. The cats love to be able to climb a “highway”, but there needs to be enough clearance so that they can jump without bumping their chin on the platform.
Build Something Purr-Worthy Today
Saw this tutorial on Instructables and had to try it. My cat is going to love it, and best of all I can do it my style without all those overpriced store cat towers.
Before you start sawing wood, you might want to protect your couch corners too. Take a peek at these durable scratcher ideas to keep your furniture safe while your dog watches the project unfold from the rug.
Grab your tools and some scrap lumber this weekend. Which of these designs matches your living room aesthetic best?

Amr Mohsen is a software engineer who traded his keyboard for a leash — at least on weekends. His love for dogs inspired him to share what he learns as a dog owner and enthusiast, bringing a detail-oriented, research-driven perspective to every article he writes. If it’s about dogs, he’s probably already looked it up twice.