Cat hair on your throw pillows. Scratch marks on that dresser you spent three weekends refinishing. Sound familiar?
Girl, I get it. My cousin has two cats and her living room looked like a tiny tornado lived there — until she started building stuff for them. Like, actual projects. Cute ones too.
Here’s the thing: cats destroy your space because they’re bored and have nowhere that’s actually theirs. That claw marks your favorite linen couch? That’s a cat screaming “I have nothing to do.”
These 7 cat DIY projects fix exactly that. We’re talking scratching posts that don’t look like cardboard eyesores, cozy hideaways that could honestly pass as Pinterest decor, and toy setups your cat will pick over your sofa every single time.
Your home stays cute. Your cat stays happy. Let’s build something.
#1: DIY Cat Hammock Side Table (That Actually Looks Good in Your Living Room)
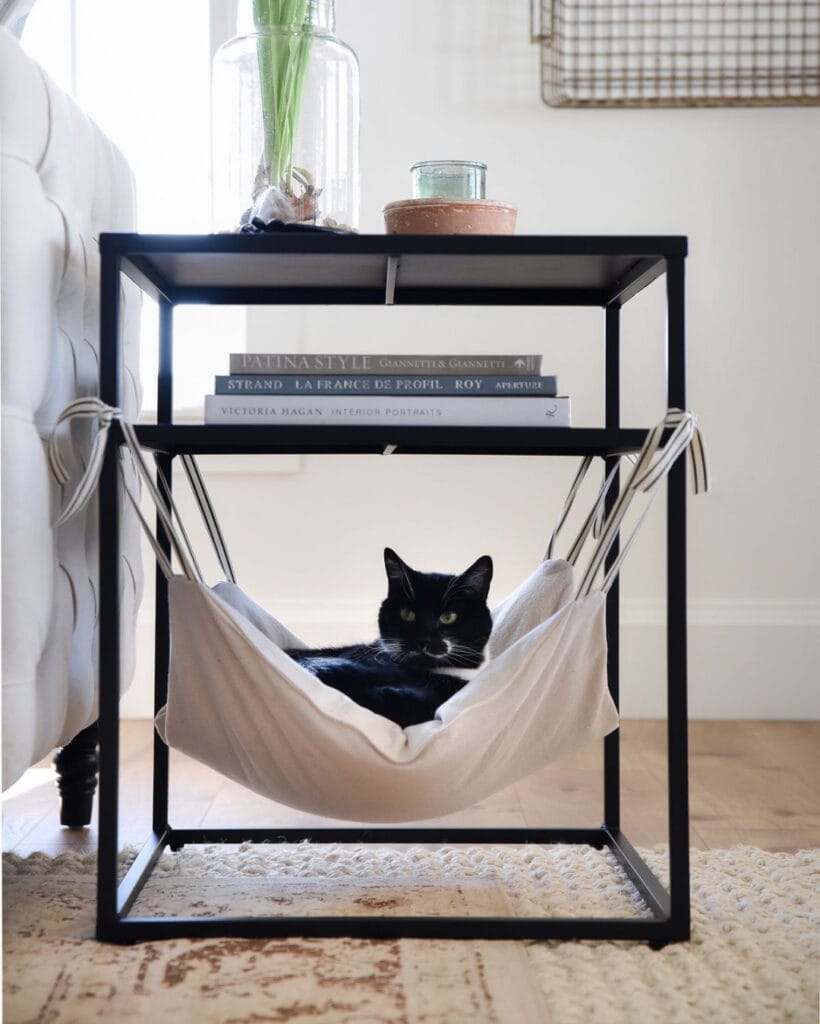
Okay, so you know that feeling when your golden has claimed every single couch cushion and you’re basically sitting on the armrest like a guest in your own home? That’s exactly the energy my cat had before I built her this little setup. She wanted to be near me but also needed her own spot — and honestly, same.
This is a black powder-coated steel frame side table with a built-in canvas hammock suspended from the lower tier using striped cotton ribbon ties. It’s functional furniture and a cat bed. Two things at once.
Materials & Tools
– Black steel square tube frame (approx. 18″ x 18″ x 24″) — welded or bolted corner brackets
– Natural canvas fabric (approx. 20″ x 20″ panel, unbleached)
– Striped cotton ribbon — 4 lengths, each 12″
– Drill + metal screws or zip ties for ribbon anchors
– Wood shelf panel (¾” thick, cut to frame size) for the middle book shelf
– Sandpaper, black spray paint (if needed), scissors, sewing machine or fabric glue
Prep Time: 30 min | Active Project Time: 2–3 hours | Difficulty Level: Intermediate
Instructions
Start by assembling your steel frame into a rectangular cube shape — three horizontal levels: top surface, middle shelf, and the open hammock zone at the bottom. If you’re buying a pre-made black metal side table frame from a hardware or home store, that saves you the welding entirely.
Cut your ¾” wood panel to fit the middle shelf slot and sand the edges smooth. Paint or stain it to match the frame. Slide it into place and secure with small L-brackets underneath.
Now the hammock. Cut your natural canvas into a square slightly larger than the inner frame width — you want some sag when the cat sits in it, that cradle shape is what makes cats actually use it. Fold each corner over 1 inch and sew or glue a clean hem. Thread one 12″ ribbon strip through each corner hem and tie it directly onto the steel frame bars with a double knot. The canvas should hang low enough to create a hammock curve but not drag the floor.
The canvas hammock feature keeps the cat cradled at mid-level, which means she’s off your couch but still in the room with you — and that payoff is zero cat hair on your throw pillows.
Style the top shelf with a glass vase or small plant. Stack a few coffee table books on the middle shelf — “Patina Style” fits the aesthetic here.
If your cat ignores it at first, rub a little catnip into the canvas. Give it two days. She’ll claim it like she built it herself.
And if you’re into building more for your cat, 7 Creative DIY Cat Tower Plans for Playing has some seriously good setups that pair well with this one.
📸 Photo credit: Instagram @crasy_about_diy
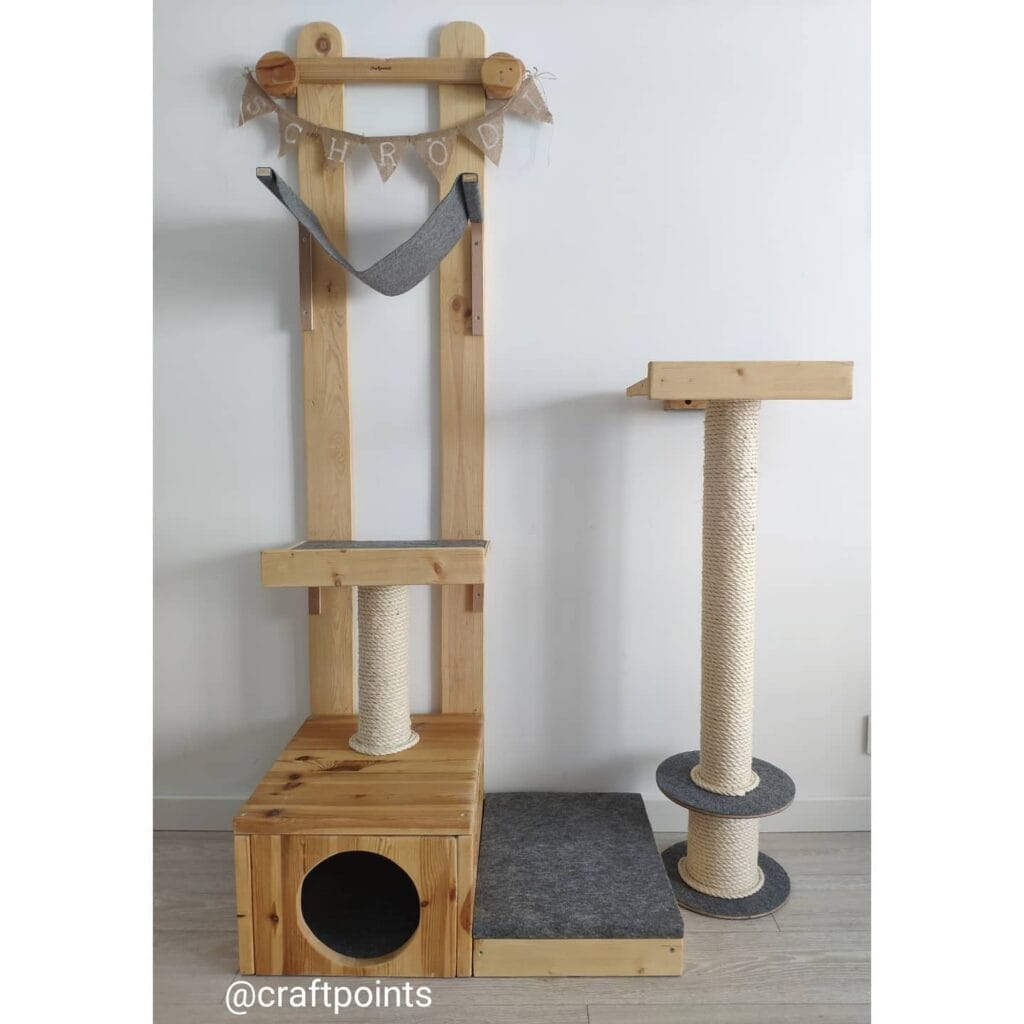
#2: Build a Modular Wooden Cat Tower with Hammock and Scratching Posts
Okay so picture this — you’re trying to keep your living room looking like it belongs on Pinterest, but your cat has completely claimed that one corner with a sad, carpet-covered eyesore that sheds fibers everywhere.
Yeah. We’ve been there.
This DIY cat tower from @craftpoints is honestly the answer. Natural pine wood, sisal rope scratching posts, and grey felt accents — it looks like furniture, not a pet store clearance rack.
Materials & Tools
– Pine lumber boards (main frame, shelves, base box)
– Sisal rope (natural, approx. 1.5 inch diameter)
– Grey felt fabric (hammock, platform coverings)
– Wooden dowels (hammock support rods)
– Burlap pennant banner (personalization touch)
– Circular plywood disc (scratching post base, approx. 12 inch diameter)
– Wood screws, wood glue, sandpaper (120-grit)
– Drill, jigsaw, staple gun, measuring tape
Prep Time: 1 hour | Active Project Time: 6–8 hours | Difficulty Level: Intermediate
Instructions
Start by cutting your pine boards into the frame pieces — two tall vertical uprights at roughly 60 inches, two horizontal crossbars at 18 inches, and three shelf platforms at 14 x 18 inches. Sand everything with 120-grit sandpaper before assembly so the surfaces are smooth to the touch. Trust me, skipping this step means splinters, and nobody wants that.
Assemble the base cubby box first. Cut four pine panels to form a square enclosure, then use your jigsaw to cut a 6-inch circular opening on the front panel — this becomes your cat’s little hideout den. Glue and screw the panels together, making sure corners are flush and square.
Attach the base platform on top of the cubby box, then mount the two vertical uprights directly onto it. The uprights carry everything above, so drill pilot holes and use 3-inch wood screws for a solid connection. Wobble-test it before moving forward.
Next comes the mid-level shelf. Slide it between the uprights at roughly 24 inches from the base platform and secure it with screws through the sides of the uprights. This shelf is where your sisal scratching post lives — wrap a 4-inch diameter wooden post tightly with sisal rope, starting from the bottom and working upward in snug, overlapping coils. A dab of wood glue on the starting end keeps it from unraveling.
The top crossbars get mounted at the very peak of the uprights. Cut two small notches into each crossbar so the grey felt hammock can hang naturally between them — staple the felt ends around the wooden dowel rods, then slot the dowels into those notches. The hammock sags slightly in the middle, which is exactly what cats love.
For the standalone scratching post on the right, mount a circular plywood disc as the base, wrap a tall 4-inch post in sisal rope, and top it with a flat pine platform at about 36 inches high. The felt-covered base square adds grip and keeps the whole thing from sliding on hardwood floors.
Here’s the takeaway: sisal rope scratching posts redirect your cat’s natural scratching instinct away from furniture, which means your sofa survives and your cat stays stimulated — the whole setup pays for itself the first week.
Hang the burlap pennant banner across the top crossbar to personalize it. The one in the image spells out “SCHRÖDI” — you can spell out your cat’s name with individual letter flags cut from burlap scraps and stamped with fabric ink.
Seal the entire wood frame with a clear matte wood wax — it deepens the natural pine grain without any chemical smell that might put your cat off the whole thing.
📸 Photo credit: Instagram @craftpoints
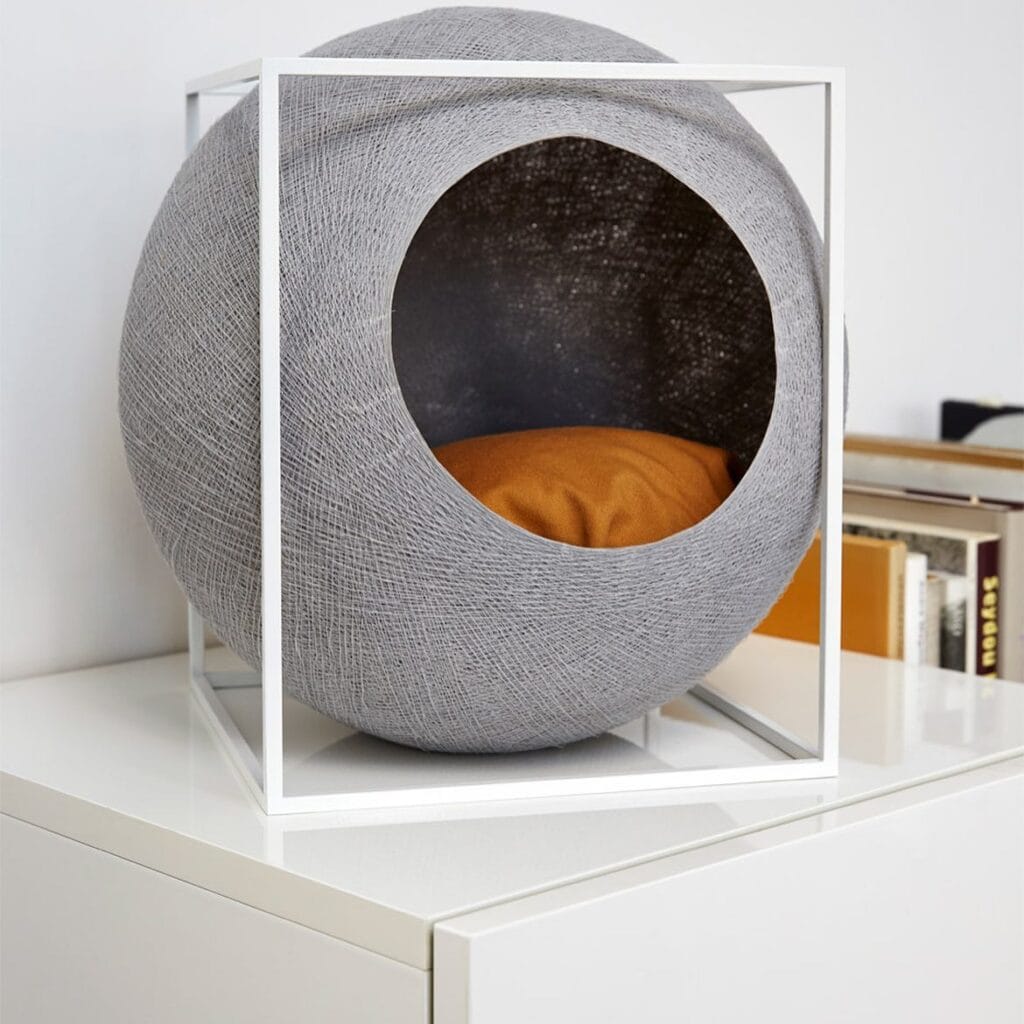
#3: DIY Sphere Cat Pod with Metal Cube Frame
Okay so picture this — your golden is sprawled across the couch, shedding everywhere, and your cat is desperately trying to find one quiet corner that’s just hers. No luck. She ends up on the bookshelf knocking things over again.
This sphere pod is literally the answer.
Materials & Tools You’ll Need:
– Gray cotton rope or chunky yarn (approximately 50–60 meters)
– Craft wire mesh or balloon mold (12-inch diameter)
– White powder-coated steel wire for the cube frame (4mm thickness)
– Mustard/amber fleece fabric for inner cushion (18 x 18 inches)
– Poly-fill stuffing
– Strong fabric glue or hot glue gun
– Wire cutters and pliers
Prep Time: 30 minutes | Active Project Time: 3–4 hours | Difficulty Level: Intermediate
Instructions
Start by shaping your wire mesh into a sphere around an inflated balloon — this is your mold. Wrap the gray cotton rope in overlapping layers across the entire surface, securing each pass with fabric glue. The tight weave gives the pod structural integrity, so your cat gets a sturdy cave that actually holds its shape over months of use — zero collapsing, zero frustration.
Once dry, pop the balloon and cut a 6-inch circular opening at the front using wire cutters.
And here’s where it gets satisfying — bend your white steel wire into a cube frame slightly larger than the sphere. The frame cradles the pod without constricting it, which means you can reposition the opening direction anytime.
Sew your mustard fleece into a simple round cushion, stuff it generously, and tuck it inside.
Small change, big win: placing this on a dresser or console table keeps your cat elevated and calm — cats genuinely sleep better when they feel tucked away from foot traffic.
Tuck the sphere slightly off-center in the frame for that effortless designer look you’d pin immediately. I did this for my aunt’s apartment and honestly her cat moved in the same day.
The rope texture gives cats a light scratch surface, the enclosed shape reduces anxiety, and the cushion keeps them warm — feature, benefit, and a cat that finally stops stealing your couch spot.
If you’re into building cozy enclosed spaces for cats, 7 Warm DIY Outdoor Cat Shelter Winter Designs has some really solid structural ideas you can borrow from.
Use a neutral gray rope if you want the pod to blend with white or Scandinavian-style furniture — it photographs beautifully and won’t clash with your existing decor palette.
📸 Photo credit: Instagram @ajadesigns_
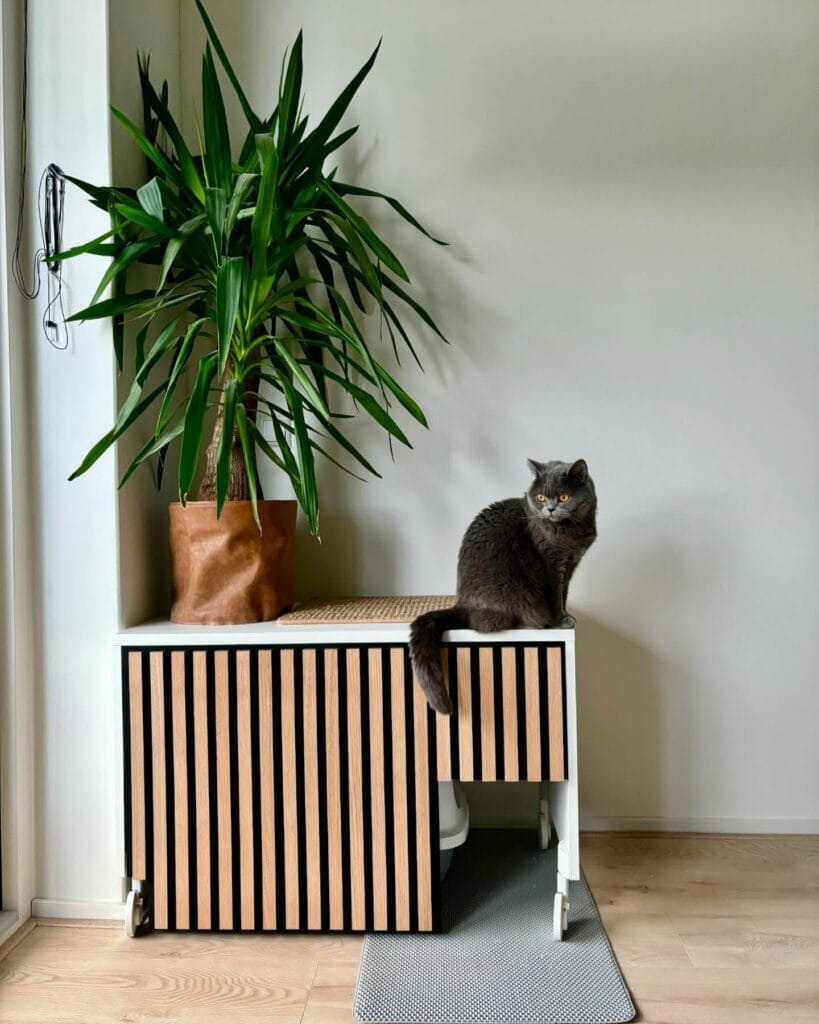
#4: DIY Wooden Slat Cat Tower (The One That Actually Looks Good in Your Living Room)
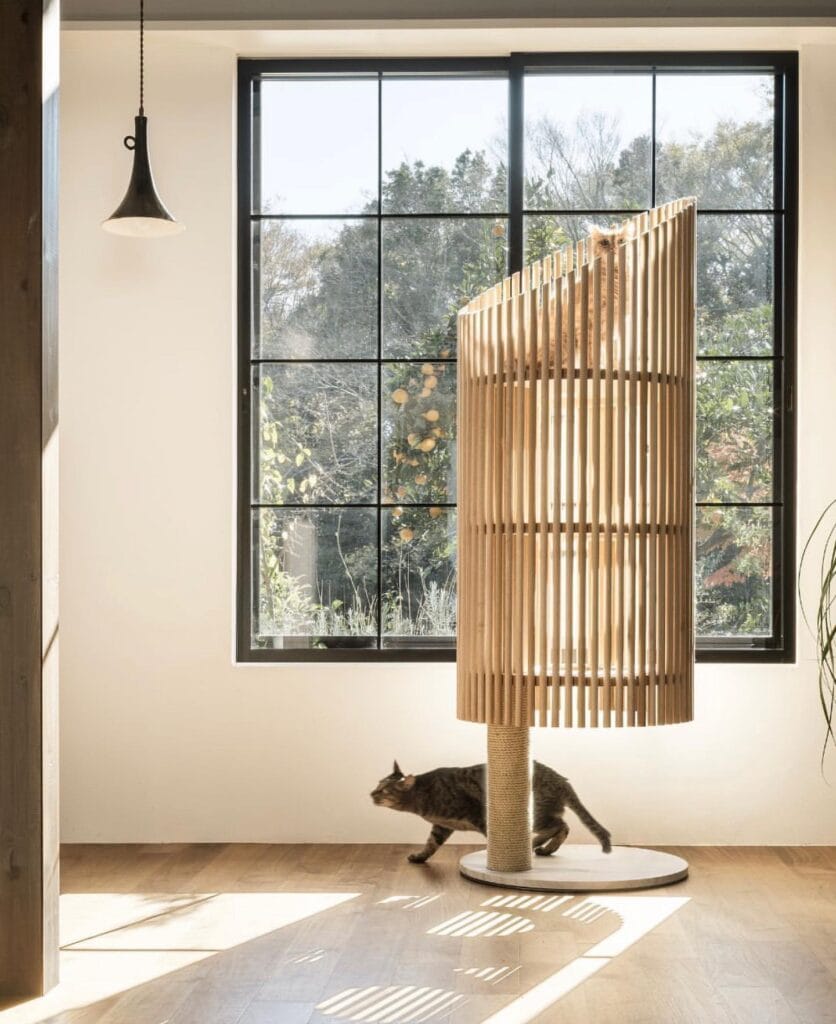
You know how you’ve rearranged your living room three times because that ugly carpet cat tree just ruins the whole vibe? Yeah. I had the same problem at my cousin’s place — her cats had this massive beige monstrosity sitting right in front of her picture window. It blocked the light, collected fur, and looked like it belonged in a storage unit.
This build fixes that.
Prep Time: 1 hour | Active Project Time: 4–6 hours | Difficulty Level: Intermediate
Materials & Tools:
– 40–50 oak wood slats (1″ × 0.5″ × 36″ each)
– 1 round MDF base (24″ diameter, ¾” thick)
– 1 sisal rope-wrapped center pole (4″ diameter, 48″ tall)
– 2 circular platforms (18″ diameter) cut from ¾” plywood
– Wood glue + 2″ wood screws
– Sandpaper (120-grit and 220-grit)
– Natural wood stain (optional)
– Drill, jigsaw, clamps
Instructions
Start by cutting your MDF base into a 24″ circle — this is your anchor, so make sure it’s thick enough to hold everything without wobbling. Sand it smooth with 120-grit, then finish with 220-grit.
Drill a centered hole through the base and secure your sisal pole with construction adhesive plus three 2″ screws from underneath. The sisal wrapping gives cats a built-in scratching surface, which means they stop attacking your sectional — and that is the real win here.
Attach your two plywood platforms at 24″ and 42″ heights along the pole. Drill through the pole and use metal brackets on the underside for stability. I cannot stress this enough — test each platform by pressing down hard before you add the slats. My friend skipped this step and her cat launched off the top one like a rocket.
Now for the slats. Arrange your oak slats in a curved formation around both platforms, evenly spaced about ¾” apart. Glue and screw each slat into the top and bottom platform edges. The curved shape isn’t just pretty — it creates a semi-enclosed perch that makes cats feel sheltered, so they actually use it instead of ignoring the whole thing.
Once all slats are secured, do a final sand on any rough edges. Apply your wood stain if you want that warm honey tone you see in the photo.
One thing to remember: the slat spacing matters. Too wide and cats feel exposed; too narrow and the whole thing loses that open, architectural look that makes it Pinterest-worthy.
The oak slat construction lets light pass through the structure, creating those gorgeous shadow patterns on your floor — which honestly makes it feel more like a design piece than a pet accessory. If you love building things like this, 7 Creative DIY Cat Crafts for Pet Lovers has more projects worth bookmarking.
And if your cat is an escape artist who wants outdoor climbing time, 7 Secure DIY Cat Enclosure Ideas for Outdoors is worth a look too.
Place the finished tower near a large window. Cats pick elevated spots to survey their territory, so a window view makes this their favorite spot in seconds — and keeps them off your kitchen counters.
📸 Photo credit: Instagram @designers_need
#5: Wall-Mounted Sisal Scratching Post With a Floor Scratcher Combo
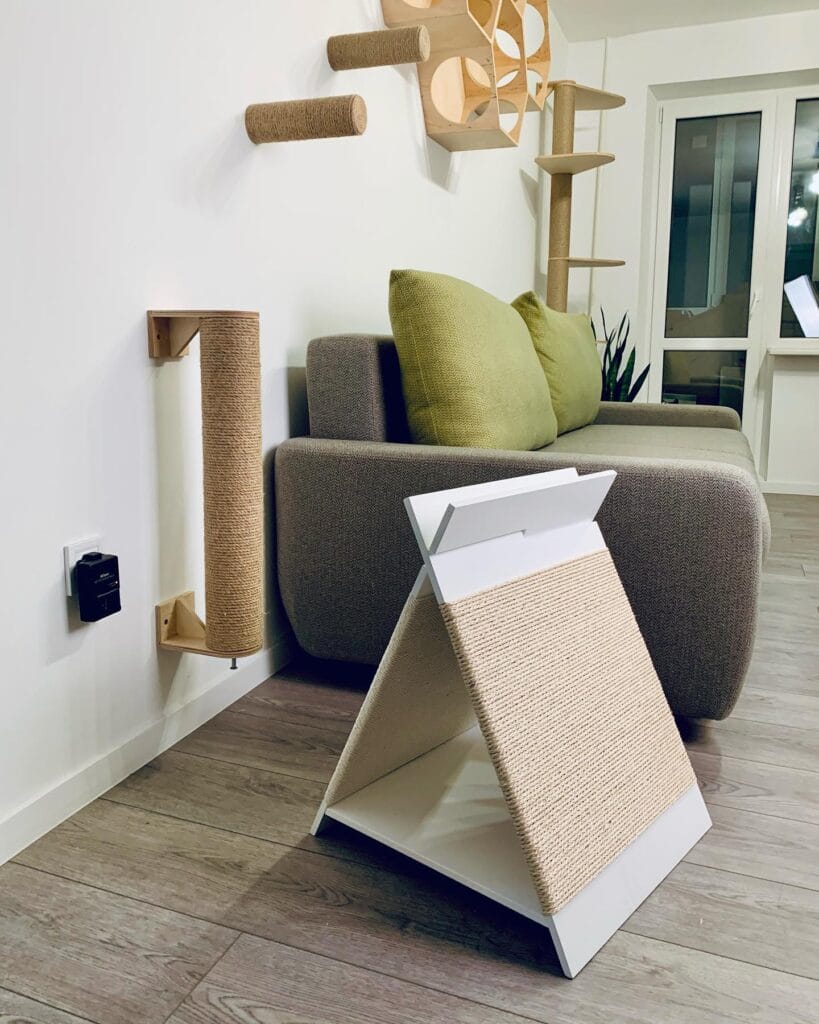
Your golden just discovered your couch cushions. Again. Now picture your cat doing the exact same thing to the armrest you just reupholstered last month. Yeah. That’s the moment this DIY saves you from.
Prep Time: 30 min | Active Project Time: 2–3 hours | Difficulty Level: Intermediate
Materials & Tools:
– Natural sisal rope (approx. 50–100 ft, 6mm thickness)
– 1 wooden post, 4 inches diameter x 24 inches tall
– 2 wooden L-brackets (4 x 4 inches, solid pine)
– White-painted MDF board for the A-frame base (2 panels, 18 x 12 inches each)
– 1 sisal mat panel (12 x 16 inches) for the angled scratcher surface
– Strong wood glue + hot glue gun
– Wall anchors and 3-inch screws
– Sandpaper (120-grit)
– Drill + level tool
Instructions
Start with the floor A-frame scratcher because it’s the more forgiving build. Cut your MDF panels to size and sand every edge smooth — rough edges catch fur and look messy fast. Attach the two panels at the top using a piano hinge so the angle stays adjustable. Paint both panels matte white and let them dry completely before touching anything else.
Once dry, wrap your sisal mat panel around the angled face and staple-gun it tight from the back side. Pull it taut as you go — loose sisal buckles within a week of use.
And that’s where most people quit too early. The wall-mounted post is actually what makes this setup work as a system.
For the post, wrap your 6mm sisal rope from the very bottom, using hot glue at the start and end only. Keep each row pressed tight against the last — gaps make cats lose interest faster than you’d think. Mount your L-brackets into wall studs (not just drywall, please), set your post level, and secure it from underneath each bracket using your 3-inch screws.
The wall scratcher handles vertical stretching, the floor A-frame handles the low diagonal scratch — sisal on both surfaces means your cat gets the texture they’re obsessed with, which keeps them off your furniture for real this time.
For a full cat wall system to pair this with, 7 Active Indoor DIY Cat Playground Setups has some seriously good inspiration.
Positioning matters more than people realize. Place the wall post right beside your sofa corner — that exact spot your cat targets — and put the A-frame scratcher a foot in front of it. Cats redirect when the alternative is right there.
📸 Photo credit: Instagram @buda_pets_shop
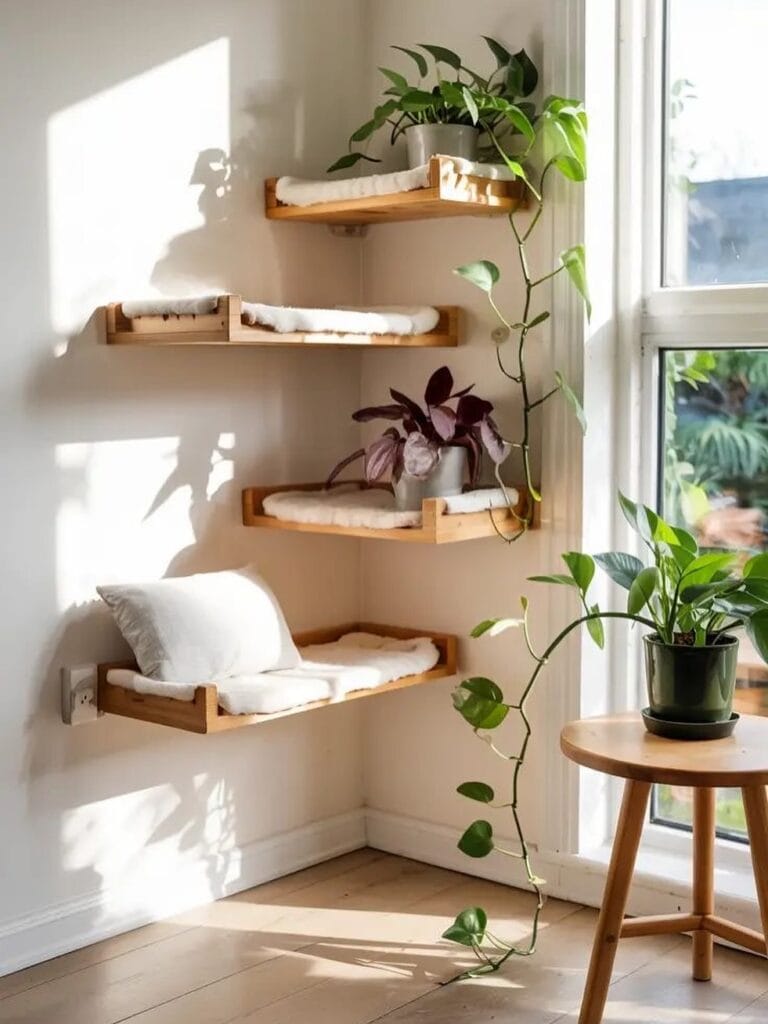
#6: Corner Cat Climbing Shelves With Cushioned Perches
You know that moment when your golden just completely takes over the couch and your cat is literally standing there, staring at you like “seriously?”
Yeah. My friend had the exact same situation — her cat, Miso, started knocking things off counters just to have somewhere to exist above the dog chaos. That’s when she built these corner shelves and honestly? Total game changer.
Materials & Tools:
– 4 pine wood boards (each 12″ x 24″, ¾” thick)
– L-shaped floating shelf brackets (6″ x 8″, 2 per shelf)
– Sandpaper (120-grit and 220-grit)
– Natural wood stain (warm honey tone)
– White faux-fur cushion fabric (cut to 11″ x 23″ per shelf)
– Foam padding (1″ thick)
– Wood screws (2.5″)
– Stud finder, drill, level
Prep Time: 30 minutes | Active Project Time: 3-4 hours | Difficulty Level: Intermediate
Instructions
Sand each board first with 120-grit, then finish with 220-grit until the surface feels like smooth skin under your fingertips. Apply two coats of honey stain, letting it dry fully between coats.
Use your stud finder and mark four wall studs in the corner — two on each wall, staggered at 12-inch vertical intervals to create that diagonal climbing ladder effect you see in the photo. The staggered placement means your cat can leap from shelf to shelf without needing a running start.
Mount the L-brackets directly into the studs using 2.5″ screws. Don’t skip the level here — even a slight tilt and your cat’s water bowl will slide right off.
Drop each pine board onto its brackets and secure from underneath. Then cut your foam to size, wrap it in the faux-fur fabric, and tuck the edges underneath like you’re making a little bed. No sewing needed — a hot glue gun along the underside holds everything together.
The staggered layout means four climbing surfaces in one tight corner — your cat gets a full vertical kingdom, your golden stays on the couch where he belongs, and you reclaim at least one piece of furniture.
Add trailing pothos plants on the top shelf like in the image — cats love brushing past leaves, and it makes the whole corner look intentional rather than a pet project.
Swap out the cushion covers seasonally by simply ungluing and remaking them. Washable fabric means no excuses when things get funky up there.
📸 Photo credit: Instagram @houseofmeowss
#7: DIY Wave Wall Cat Scratcher (That Actually Looks Like Wall Art)

Okay, you know that moment when your cat is just silently destroying your couch and you’re standing there holding your coffee like… what do I even do? Yeah. My cat Juniper did that for two months straight before I finally made her this wall scratcher, and girl, I have not looked back.
This one is genuinely cute enough to hang in your living room without hiding it behind furniture.
Materials & Tools You’ll Need:
– 1/2-inch thick sisal rope or sisal fabric sheet (natural tan color)
– Black acrylic craft paint and a wide brush
– 1 sheet of cardboard or thin plywood (18 x 24 inches)
– Stencil paper or freehand wave template
– Strong spray adhesive
– Picture hanging strips (heavy duty, holds up to 10 lbs)
– Scissors or a utility knife
– Pencil for tracing
Instructions
Cut your cardboard or plywood to 18 x 24 inches. This size lets your cat fully stretch, which means they actually use it instead of ignoring it like an expensive toy.
Draw your wave design freehand down the center of the board in pencil first. The wave in the image runs like a curvy S-shape, wide on both sides, bold in the middle. Don’t stress about perfection — organic curves look better anyway.
Paint the wave sections black using your acrylic paint. Let it dry for at least 30 minutes.
Cut your sisal fabric to match the board size. Apply spray adhesive to the board and press the sisal sheet down firmly, smoothing from center outward. The sisal sits on top of the paint, so the black wave shows through the natural weave of the fabric — that contrast is what makes it look like actual wall art.
Trim any excess sisal around the edges with your utility knife.
Attach picture hanging strips to the back, following the package weight limits. Press it against your wall at your cat’s full standing height — roughly 24 to 30 inches from the floor.
The sisal surface grabs claws without shredding, which means your cat gets the scratch satisfaction she needs and your sofa finally gets a break.
Keep this in mind: sisal dulls over time and you can swap the fabric layer for a fresh sheet without rebuilding the whole board — that’s the real money-saver here.
When Juniper first sniffed this thing, she stood up on her back legs exactly like the cat in this photo and just went for it. That was six months ago and my armchair is still intact.
Prep Time: 15 min | Active Project Time: 45 min | Difficulty Level: Beginner
📸 Photo credit: Instagram @doitbutdoitnow
The One Mistake That Ruins Every Cat DIY Project (And How to Skip It)
Okay, real talk — I wasted an entire weekend building the most gorgeous sisal-wrapped cat tower. We’re talking Pinterest-level stuff. Looked amazing. My cat Juniper sniffed it once and walked away.
Here’s the thing nobody tells you: cats reject DIY projects that smell like you, not them.
Before you introduce any new cat furniture, rub an old blanket your cat already sleeps on against the surface. Every corner, every shelf. That scent transfer is what makes them claim it as theirs instead of treating it like a stranger in their house.
Also — skip the hot glue gun for sisal rope. It holds for maybe three weeks before your cat’s claws rip it clean off the base. Wood glue plus staples? That combo stays put for years.
And if your home has a dog situation happening too (golden retriever chaos is real), separate the spaces early. Something like these creative DIY dog gate ideas can actually protect your cat’s new project from becoming a chew toy.
Your cat deserves better than a ignored cardboard box. Do the scent trick first. Trust me.
Your Dog’s Cozy Corner Starts Right Now
Pick one idea from this post and just start. Seriously, don’t overthink it. Even a simple DIY bed tuck into a corner with a cute blanket makes such a difference — for your pup and your sanity.
If you want to go bigger, these stylish DIY dog crate furniture ideas are chef’s kiss for keeping things Pinterest-worthy without sacrificing your living room vibe.
Your golden deserves a spot that feels like theirs — and honestly? You deserve a home that doesn’t look like a dog supply warehouse exploded in it.
So tell me — which idea are you trying first this weekend? 🐾

Amr Mohsen is a software engineer who traded his keyboard for a leash — at least on weekends. His love for dogs inspired him to share what he learns as a dog owner and enthusiast, bringing a detail-oriented, research-driven perspective to every article he writes. If it’s about dogs, he’s probably already looked it up twice.

