Okay, so you know how your golden boy has like a million toys scattered across your living room floor? Yeah, well my sister just adopted a cat, and that little gremlin ignored every single store-bought toy she brought home. Every. Single. One.
Meanwhile, the cat lost her mind over a crumpled receipt she found on the counter.
That’s when it hit us — cats don’t need expensive. They need interesting. And honestly? Making homemade cat toys is way more fun than it sounds, I promise.
I spent a weekend testing out different DIY ideas with my sister, and we found 7 that actually work — like, the cat-sprinting-across-the-room-at-midnight kind of works.
Here’s the thing: these toys cost almost nothing, take maybe 10 minutes, and your home stays looking cute. No sad plastic junk cluttering up your aesthetic. Just happy kitty chaos.
#1: The Crinkle Bell Ball — A Homemade Cat Toy That Takes 10 Minutes to Make
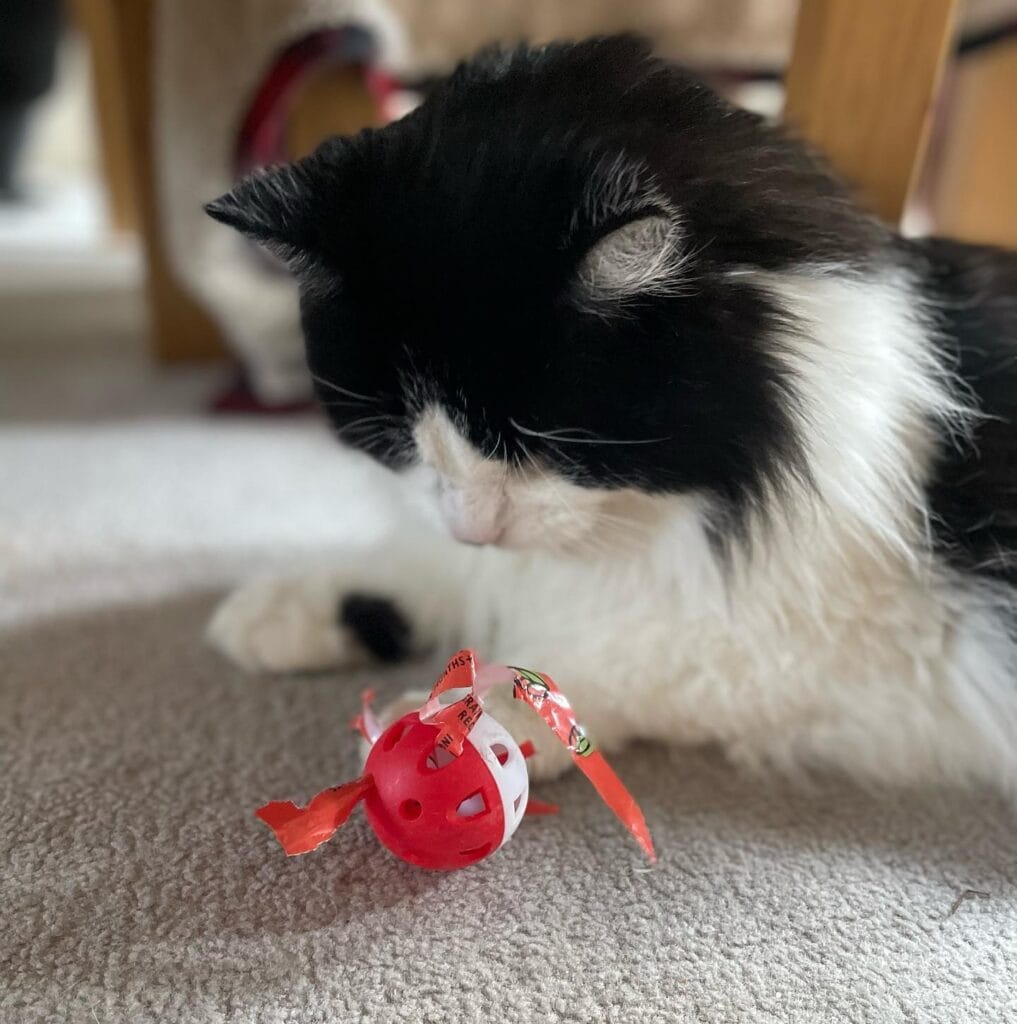
Okay so you know how your golden destroys every toy within like 48 hours? Cats are the same way, girl. My cat Maska had this store-bought toy phase where I was spending $12 every two weeks just to watch her shred them into nothing on my living room rug.
That’s when I started making this one. And honestly? It’s become her favorite thing in the house.
What You Need:
– 1 plastic jingle bell ball (the kind with holes — roughly 1.5 inches in diameter, red or white work great)
– 2-3 strips of crinkle ribbon or mylar candy wrapper strips (cut to about 6-8 inches long)
– Scissors
Instructions
Start by cutting your ribbon or wrapper strips into roughly 6-8 inch lengths — you want at least three strips so the toy looks full and wild when it moves. The crinkle texture is everything here. That sound drives cats absolutely feral in the best way.
Thread each strip through one of the holes on the plastic bell ball, then pull it halfway through so equal lengths hang out both sides. Do this with all your strips, spacing them around the ball so it looks like a little jellyfish.
The jingle ball hidden inside rattles every time your cat bats it — that sound triggers their hunting instinct, which means they stay engaged way longer than with a silent toy.
Tuck any loose ends slightly into the holes to keep them from pulling out too fast.
If your cat ignores it at first, rub a tiny bit of catnip on the ribbon strips. Works every single time.
Prep Time: 2 minutes | Active Project Time: 8 minutes | Difficulty Level: Beginner
📸 Photo credit: Instagram @nats_entertainment
#2: Fluffy Pom-Pom Balls Your Cat Will Carry Around Like a Trophy
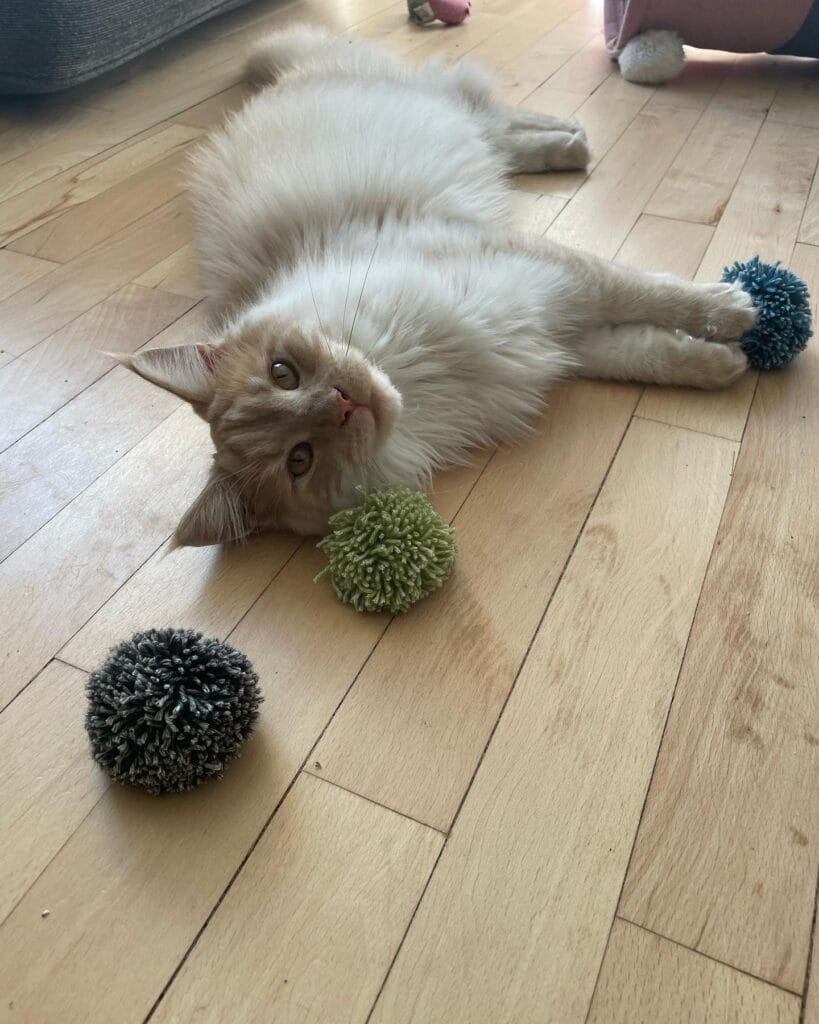
You know that moment when your golden’s favorite toy disappears under the couch again and you’re on your hands and knees fishing it out for the third time that day? Cats do the exact same thing. My friend’s Maine Coon literally hoards his toys in a corner like little treasures.
That’s exactly what these yarn pom-pom balls are about.
Materials & Tools You’ll Need:
– Worsted weight yarn in multiple colors (gray, green, teal — like in the photo)
– A pom-pom maker or two fingers + a piece of cardboard
– Sharp scissors
– A short piece of yarn to tie the center
Instructions
Wrap your yarn around the pom-pom maker 80-100 times — the more wraps, the fuller and denser the ball feels in your cat’s paws. Slide a 6-inch piece of yarn through the center channel and tie it tight, double knotting it so nothing unravels mid-play session.
Slide the yarn off, then cut both looped edges open. And here’s where the magic happens — shake and fluff the ball out, then trim any uneven strands into a 2-3 inch diameter sphere.
The textured yarn surface catches claws perfectly, which means your cat actually grips and carries it instead of just batting it once and walking away.
Make three different sizes. Cats go feral for variety.
Store extras in a little basket — honestly, they look adorable as decor too.
Prep Time: 5 min | Active Project Time: 15 min per ball | Difficulty Level: Easy
📸 Photo credit: Instagram @fenja_the_excited_cat
#3: The Spinning Wand Scratching Post (Your Cat’s New Obsession)
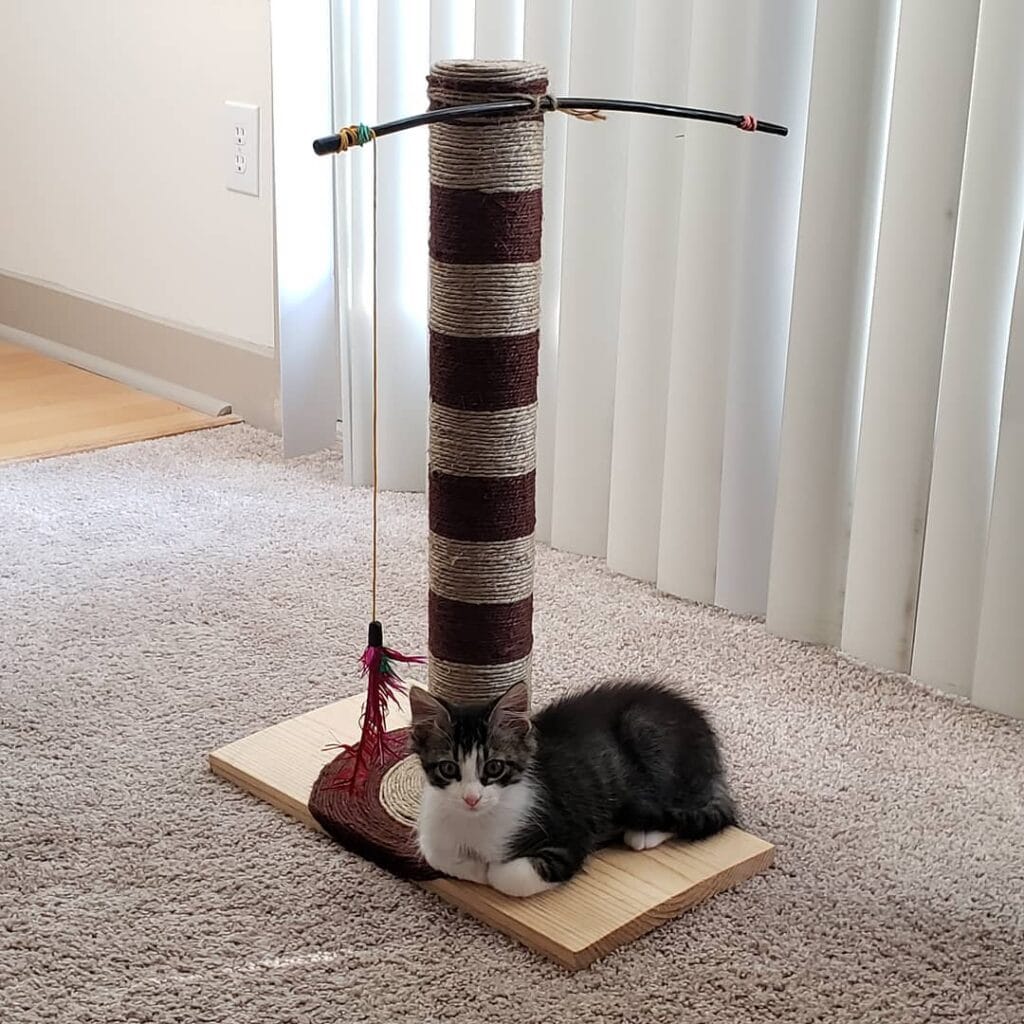
Okay so you know how your golden leaves his toys everywhere — and you’re always stepping on that squeaky bone at 2am? Cats are the same. My cousin’s kitten destroyed her couch armrest in like three days flat. This scratching post with a built-in wand? It actually redirects all that energy somewhere useful.
Materials & Tools:
– 1 wooden base board (roughly 12″ x 12″ x 1″ pine)
– PVC pipe or cardboard tube (3″ diameter, 24″ tall)
– Natural sisal rope (cream/tan color)
– Burgundy/dark red carpet or felt strips
– 1 black flexible metal rod (18-20″ long)
– Colorful elastic cord (red, green, teal)
– Pink feather toy attachment
– Wood screws, drill, hot glue gun
Instructions
Drill a hole dead-center in your wooden base and secure the tube with two ¾” wood screws from underneath. Start wrapping your sisal rope from the bottom, pulling it tight with each loop so there’s zero slack — loose wrapping unravels fast. Alternate 3-inch sisal bands with 2-inch burgundy carpet strips as you move up, securing each material transition with hot glue.
At the top, drill a small horizontal hole through the tube and thread your metal rod through, bending both ends slightly downward. Tie your elastic cord where the rod meets the post, then hang your feather toy from one end.
The scratching surface gives their claws the rough texture they crave, which means your sofa finally gets ignored.
Keep the feather toy within 4-6 inches of the base — kittens prefer low swatting angles over high jumps.
📸 Photo credit: Instagram @ni.ko.lit
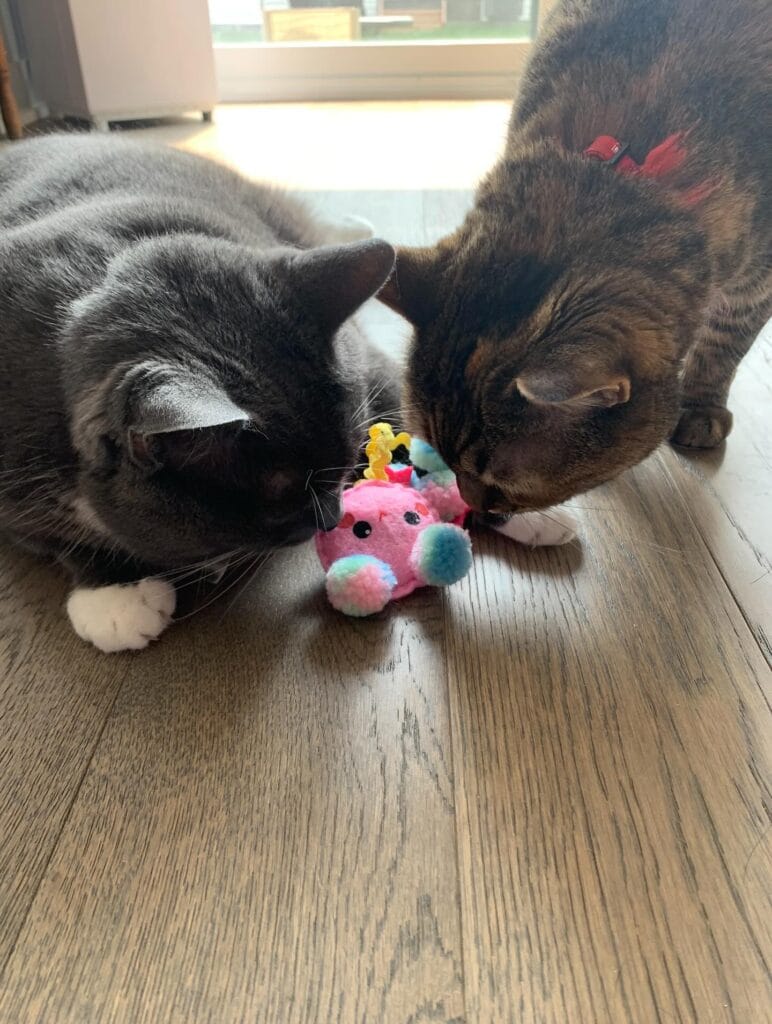
#4: The Catnip Unicorn Plushie – A Stuffed Toy Both Cats Will Fight Over
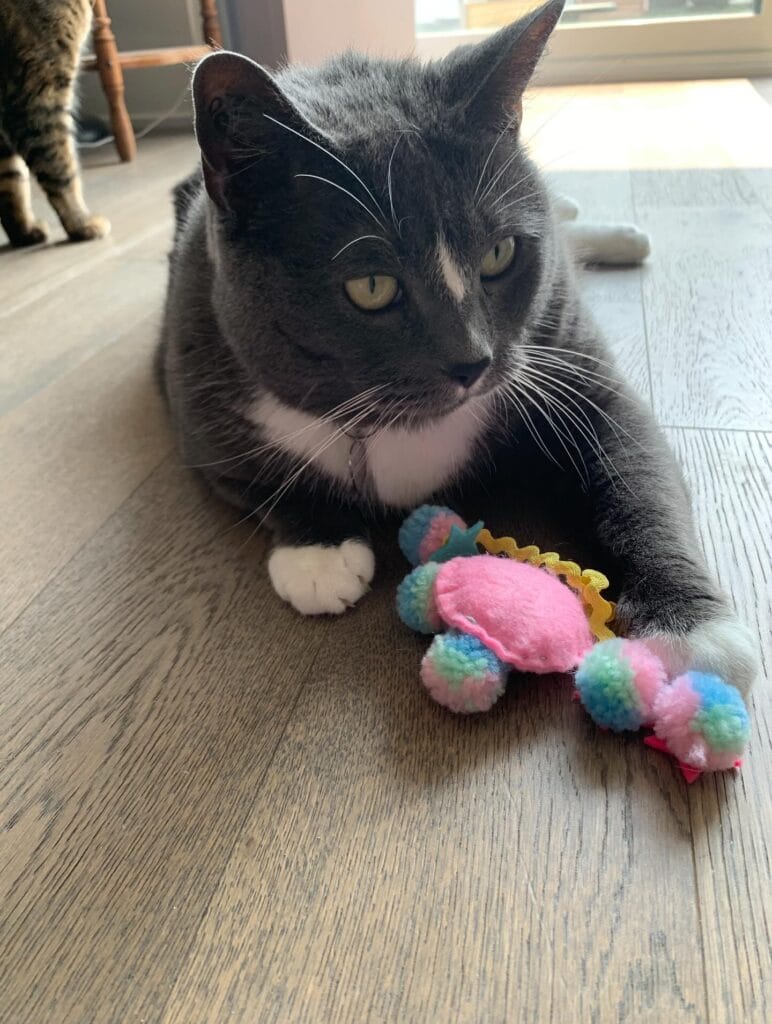
You know that moment when your golden retrieves their fifteenth chewed-up tennis ball and drops it at your feet, soaking wet? Yeah, cats have their own version of that energy — and mine showed me exactly what it looked like last Tuesday.
Both my cats locked onto this little pink unicorn toy like it held the secrets of the universe. That’s when I knew I had to make one myself.
Materials & Tools:
– Pink fleece fabric (roughly 6×6 inches)
– Catnip (dried, about 1-2 tablespoons)
– Colorful pom-poms — teal, pink, and blue (½ inch size)
– Yellow ribbon curls or crinkle ribbon (3-4 inches)
– Black felt for tiny eyes (small scraps)
– Needle and thread or fabric glue
– Polyester stuffing (small handful)
– Scissors
Prep Time: 10 min | Active Project Time: 25 min | Difficulty: Easy
Instructions
Cut your pink fleece into two matching unicorn or round blob shapes — nothing needs to be perfect here, cats genuinely don’t care. Place the two pieces together and sew around the edges, leaving a 2-inch gap at the bottom.
Flip it inside out through that gap. Now stuff it loosely with polyester filling, then pack in your catnip right in the center. The catnip sits deep inside the toy, so the scent releases slowly every time your cat bites or paws at it — which means longer play sessions and way less begging for attention at 3am.
Sew the gap shut. Glue or hand-stitch your pom-poms along the bottom as little feet and add one on top as a horn base. Attach your yellow ribbon curls at the crown for that unicorn mane effect. Finish with two small black felt circles for eyes.
Keep this in mind: double-stitching the seams adds maybe 5 extra minutes but prevents the toy from splitting open during aggressive play. And trust me, if the image above is any indication, aggressive play is exactly what’s coming.
The crinkle ribbon adds a sound element that triggers a cat’s hunting instinct — that sound-to-pounce response keeps them engaged far longer than a silent toy ever would.
My cats batted this thing across three rooms before one finally pinned it down and refused to share. The other one sat there staring like how dare you.
📸 Photo credit: Instagram @missbeesewknitfullco
#5: Pom-Pom Crab Cat Toy (The One Your Cat Will Guard Like It’s Precious)

You know that moment when you buy your golden retriever a brand-new toy and she completely ignores it — but she’ll lose her entire mind over a crumpled receipt? Cats are the same way. My cat Juniper once abandoned a $15 store toy to obsessively bat around a hair tie for three weeks straight.
This pom-pom crab hits different though. Cats actually go for it.
Materials & Tools:
– Pink, blue, teal, and mint yarn (bulky weight works best)
– 1 large pom-pom maker (2.5 inch) and 1 small pom-pom maker (1 inch)
– Yellow ribbon trim (⅜ inch wide)
– Pink felt or fabric scraps
– Hot glue gun + glue sticks
– Sharp scissors
– Sewing needle + thread (optional for reinforcing)
Instructions
Start by making one large pink pom-pom for the body — this is your crab’s shell. Wrap the yarn generously around the full pom-pom maker arm before closing and cutting. A tighter wrap means a fuller, denser pom-pom that survives aggressive batting sessions.
Make eight small multicolor pom-poms using alternating pink, blue, and teal yarn. These become the legs. And honestly, mixing the colors mid-wrap creates that cotton-candy swirl effect you see in the photo — don’t overthink it.
Cut your yellow ribbon into a 3-inch strip and loop it into a ruffle. Hot glue it between the body and a small oval of pink felt to create the crab’s shell detail.
Glue four legs on each side of the body pom-pom, slightly angled downward. Press each connection point for a full 30 seconds — that bond needs to hold up against paw swipes and carry-around sessions.
But here’s the thing nobody tells you: trim each pom-pom after assembly. It shapes the whole toy and makes it look intentional instead of homemade-sloppy.
Dense yarn pom-poms have just enough texture to catch on claw tips — which triggers that satisfying grab-and-kick behavior in cats and keeps them engaged way longer than smooth toys do.
Add a tiny pinch of dried catnip inside the body pom-pom before sealing it. Your cat will sniff it out and that toy becomes theirs.
Prep Time: 10 minutes | Active Project Time: 45–60 minutes | Difficulty Level: Beginner-Intermediate
📸 Photo credit: Instagram @missbeesewknitfullco
#6: Knitted Catnip Fish Toy — The Cozy Little Toy Your Cat Will Claim as Their Whole Personality
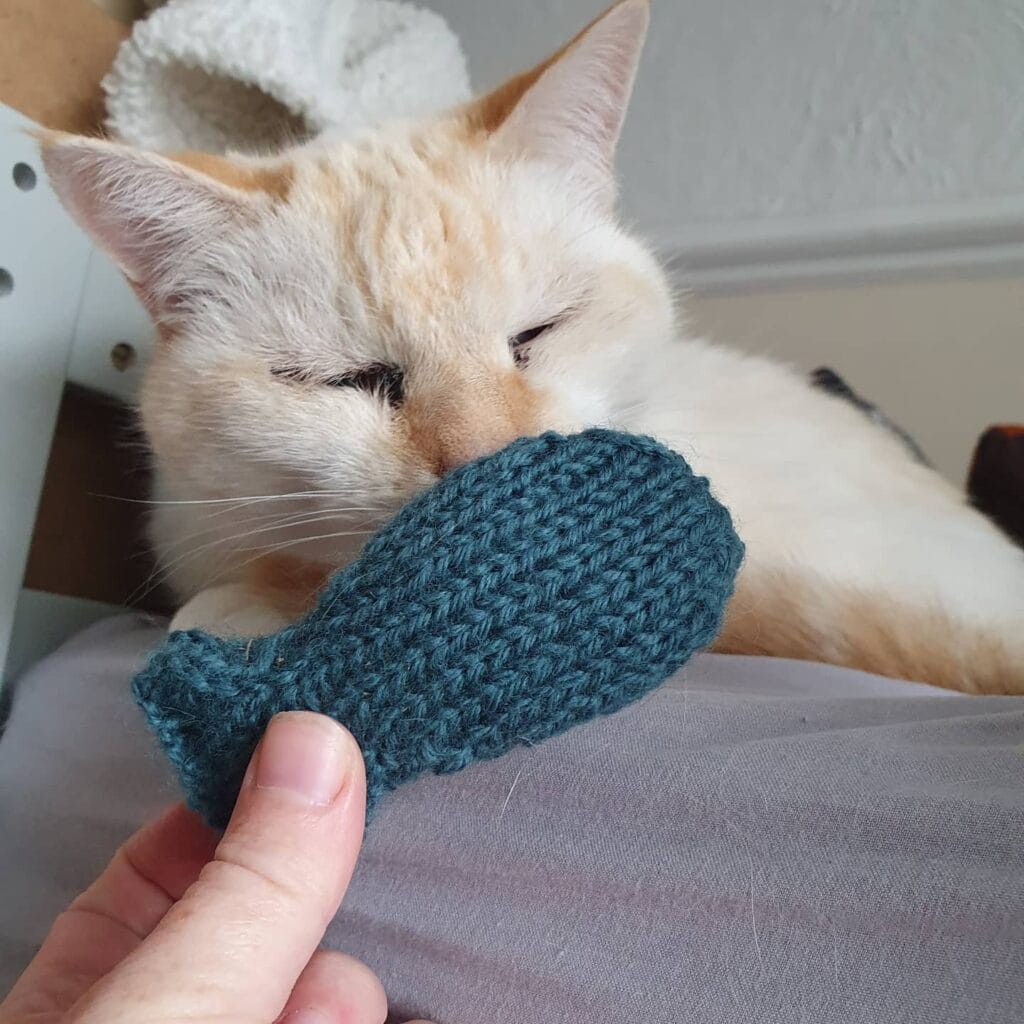
Okay so you know that moment when your golden has destroyed another squeaky toy and you’re just standing there holding the sad, deflated remains? Cats are a little different — my cousin’s cat, Miso, doesn’t destroy things so much as he obsesses over them. Like, full-on face-planting into his catnip fish for twenty minutes straight.
That’s exactly what this knitted fish toy does to cats.
Materials & Tools:
– Worsted weight yarn (teal, 100% wool works best — the texture drives cats wild)
– Size US 7 (4.5mm) knitting needles
– Catnip (dried, loose)
– Polyfill stuffing (small amount)
– Yarn needle
– Scissors
Instructions
Cast on 10 stitches and knit in seed stitch (knit one, purl one, alternating each row) until your piece measures roughly 4 inches long. Seed stitch creates that bumpy, irregular texture — cats grip it better than smooth stockinette.
Shape the tail end by decreasing two stitches on each side over two rows. This gives you that classic fish silhouette without complicated shaping.
Before you close the seam, stuff it loosely with polyfill first, then pack a generous pinch of catnip right in the center. The catnip stays locked inside the stuffing — that slow-release feature keeps cats engaged longer, meaning fewer 3am zoomie sessions for you.
Seam the edges using your yarn needle with a simple whip stitch. Weave in ends tightly so no loose yarn becomes a hazard.
Wool yarn holds catnip scent longer than acrylic, so the toy stays interesting for weeks instead of days. Toss it in a sealed bag with fresh catnip every few weeks to recharge it.
Prep Time: 5 min | Active Project Time: 45–60 min | Difficulty Level: Beginner
📸 Photo credit: Instagram @thisfoxwrites
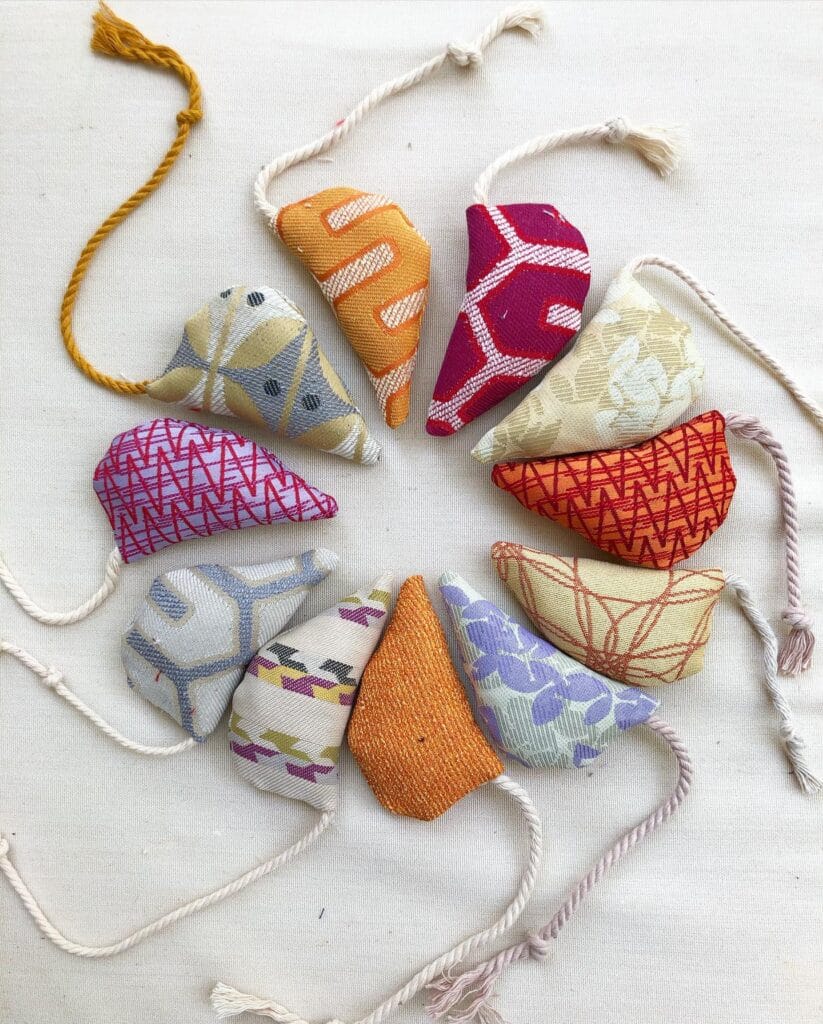
#7: Fabric Scrap Cat Toys on a String (The Garland Your Cat Will Actually Use)
Okay so you know how your golden leaves his toys everywhere — and somehow the cat ends up stealing them anyway? My aunt’s cat does the exact same thing. She’ll walk right past a $15 store toy and go straight for a crumpled receipt on the floor.
That’s what made me fall in love with these fabric scrap mice.
Materials & Tools You’ll Need:
– Assorted fabric scraps (4×4 inch pieces work best — upholstery or woven fabric holds shape)
– Polyfill stuffing
– 3–4 mm cotton rope or twisted cord (white, cream, or colored)
– Needle and thread or a sewing machine
– Scissors
– Optional: dried catnip (a small pinch goes a long way)
Instructions
Cut your fabric into rough teardrop or triangle shapes — about 3×4 inches each. Don’t stress about perfection. Fold each piece with the pattern facing inward, then stitch around the curved edges leaving a ½ inch seam allowance.
Leave a small opening at the base. Flip it right-side out, stuff lightly with polyfill, tuck a bit of catnip inside if you want, then thread a 12-inch cord tail through before closing the opening with a few firm stitches.
And here’s where the magic happens — knot all 8–10 toys along one long rope, spacing them about 6 inches apart, so the whole thing becomes a garland your cat bats at for hours.
Woven fabric grips claws just right, which keeps cats engaged longer — and that means less furniture damage.
Mixing bold patterns like burnt orange, raspberry, and soft lavender makes this pretty enough to actually leave out on display. Your Pinterest board will thank you.
Use scrap fabrics from old throw pillows or curtains you’ve replaced — it gives the toys texture variety, and cats genuinely respond better to mixed sensory surfaces than uniform ones.
Prep Time: 10 min | Active Project Time: 45–60 min | Difficulty Level: Beginner-Friendly
📸 Photo credit: Instagram @ericaannart9
The One Mistake That Makes Homemade Cat Toys Dangerous (And How to Fix It Fast)
Okay, real talk — most people grab a loose feather or a dangling string and call it a day. But here’s the pro secret nobody tells you: texture contrast is what actually triggers your cat’s hunting instinct, not just movement.
Crinkle material wrapped around a cotton ball? Game-changer. Smooth plastic alone? Your cat will sniff it once and walk away.
Now the pitfall — and this one matters. Avoid any toy with small, detachable pieces under one inch. I learned this the hard way when my cousin’s cat swallowed a button off a DIY toy. Vet visit. Not fun.
Small change, big win: swap loose decorations for tightly knotted fabric strips instead. They’re just as stimulating and way safer for solo play.
Also, rotate your cat’s toys every three days. Cats lose interest fast, but a “retired” toy brought back out feels brand new to them. That little trick saves you from making a whole new batch every week.
Your Golden Deserves a Clean Home Too
You’ve done the research, you know what works — now just pick one and try it. Don’t overthink this. Even swapping out one rug or tossing a washable cover on the sofa makes a real difference in how your space feels day-to-day.
And hey, if you want to go full devoted dog mom mode, pair your clean-home setup with some homemade soft dog treats your pup will love — because a happy, well-fed golden is somehow even messier, but totally worth it.
So tell me — what’s the one spot in your home your golden has completely taken over?

Amr Mohsen is a software engineer who traded his keyboard for a leash — at least on weekends. His love for dogs inspired him to share what he learns as a dog owner and enthusiast, bringing a detail-oriented, research-driven perspective to every article he writes. If it’s about dogs, he’s probably already looked it up twice.

