When it comes to dog cages, why settle for something bland? You can whip up a DIY design that’s both stylish and functional, giving your pup a cozy retreat while enhancing your home decor. Think outside the box—a multilevel setup with shelves for toys, or a charming wooden enclosure that feels like part of your living room. Got a flair for creativity? Let’s explore these ten innovative ideas that’ll transform your pup’s space from drab to fab.
Unique Design Concepts
When it comes to designing a dog cage, have you ever thought about how your furry friend might actually enjoy their space?
Believe it or not, a DIY dog cage can be a canvas for creativity. Imagine turning that plain metal box into a cozy hideaway. You could use reclaimed wood, paint it in your pup’s favorite color, or add some soft bedding for comfort.
How about incorporating shelves for their toys? A multi-level design might just keep them entertained. You might even want to add a rustic touch with small planters for a fresh vibe.
The possibilities are endless. So, why not have some fun with it? Your dog deserves a space that feels like home, don’t you think?
Our Collection
Now, let’s check out our collection of dog cage designs.
From a decorative wooden cage that looks like it belongs in a magazine to a hidden storage cage that’s basically a two-for-one special, you’ll find something that suits your style.
And don’t worry, if DIY isn’t your strong suit, these designs are super customizable, so you can add your own flair—who knew dog crates could be so trendy?
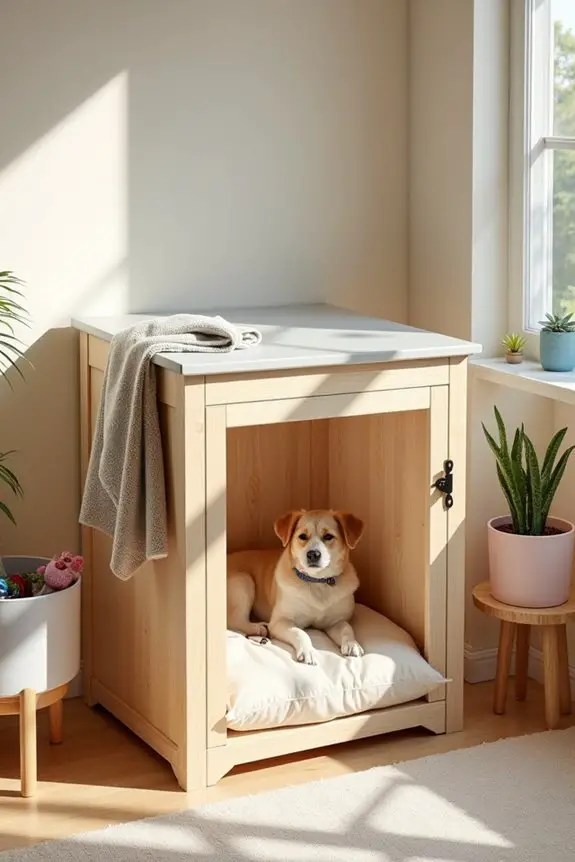
1. Decorative Wooden Cage Design
If you’ve ever found yourself wishing your dog’s cage didn’t look like a jail cell, you’re in the right place. This DIY decorative wooden cage design not only makes your furry friend feel more at home, but it also elevates your interior decor. Plus, it saves you some dollars by turning a plain, sometimes unsightly item into a beautiful piece of furniture. For added comfort and style, consider incorporating essential emotional support dog accessories that can enhance your dog’s living space and functionality. Additionally, investing in luxury dog accessories female can further add elegance and comfort to your pup’s environment. By adding premium dog fashion accessories, you’ll create an inviting space your dog will love. Moreover, a luxury indoor dog kennel can provide an even more refined living experience for your furry companion.
Let’s make a cozy space for your pooch that you won’t mind showing off.
Materials Needed:
- 1 large sheet of plywood (for the frame)
- 1 small sheet of lattice or wooden slats (for the sides)
- Sandpaper (medium and fine grit)
- Wood screws (1-1.5 inches long)
- Wood glue
- Paint or wood varnish (choose a color that matches your decor)
- Hinges (2-4, depending on the design)
- Drill with drill bits
- Saw (circular or jig saw)
- Measuring tape
- Safety glasses
Step-by-Step Instructions:
- Measure Your Space: Start by measuring where you want to place the cage. You want your dog to have enough room to stand up and turn around, but you also want it to fit snugly in your space. Generally, a 2×2 foot area works for small breeds, while larger dogs need more room.
- Cut the Plywood: Using your saw, cut the plywood into your desired shape. You’ll want a back piece, a bottom piece, and two side pieces. If you want a top – go for it, but make sure it has a way for your dog to get in and out comfortably.
- Prep the Wood: Sand down the edges of all your cut pieces. Nobody likes splinters, right? Use medium grit sandpaper first, then finish with fine grit for a nice smooth touch.
- Assemble the Frame: Attach your back, bottom, and side pieces together using wood screws and wood glue for extra support. Be sure to pre-drill your holes to avoid splitting the wood. For wisdom’s sake, measure twice, cut once.
- Add the Sides: Now, attach your lattice or wooden slats to the sides. This won’t only give your cage a more finished look but allow your pup to see their kingdom (and you).
- Finishing Touches: Paint or varnish your wooden cage in your chosen color. This is where you can really let your creativity shine. Let it dry completely before moving on.
- Install the Hinges and Door: If you’ve made a door, it’s time to put it on. Attach the hinges to the frame and the door. This will create a simple, swinging door for easy access.
Optional Add-ons/Variations:
Want to take it to the next level? Consider using two-tone colors for a chic look, or even stencil some fun designs on the sides. You could also use different types of wood for added texture, like mixing in some reclaimed wood for a rustic feel.
Pro Tip:
Always test your finish by applying it to a small area first. Some dogs are notorious for chewing and scratching, so consider choosing a durable paint or varnish that can withstand their playful nature.
Also, think about lining the bottom of the cage with a cozy dog bed or blanket for added comfort—no dog likes a cold, hard floor after all!
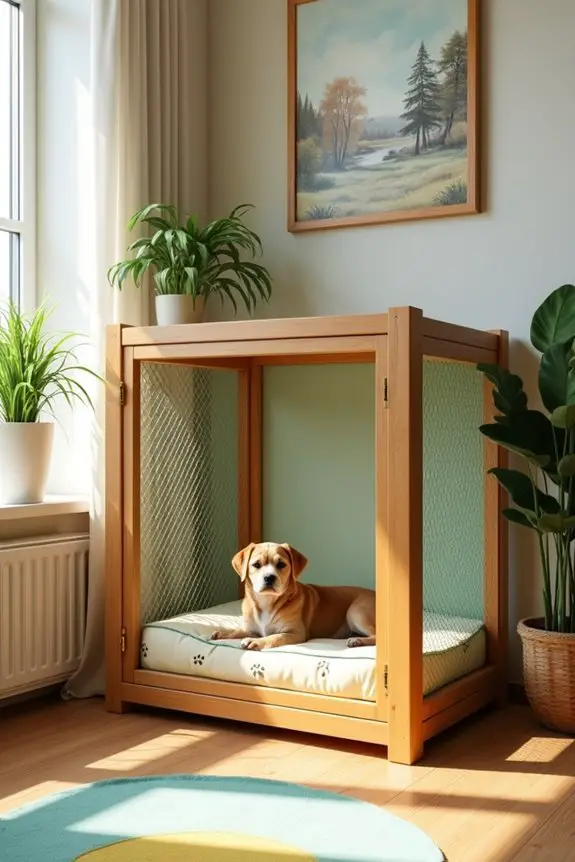
2. Stylish Wire Mesh Design
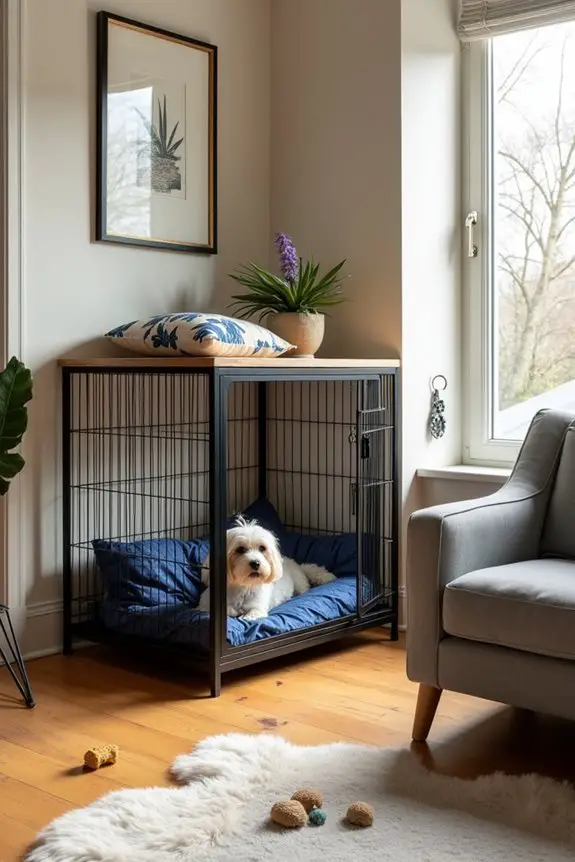
Are you looking for a chic and modern alternative to dog cages that doesn’t clash with your home decor? Well, this DIY stylish wire mesh dog cage design has you covered. Not only is it functional and comfortable for your furry friend, but it also adds a sleek and sophisticated touch to your living space. Additionally, consider elevating your pup’s style with luxury dog collar materials, which can complement the overall aesthetics of your pet’s space.
It’s budget-friendly too, so no need to break the bank for a stylish pet haven.
Materials Needed:
- 1 large sheet of plywood (for the base)
- Wire mesh (enough to cover the sides)
- Wood screws (1-1.5 inches long)
- Wood glue
- Hinges (for the door)
- Latches (for extra security)
- Drill with drill bits
- Measuring tape
- Wire cutters
- Saw (circular or jig saw)
- Sandpaper (medium and fine grit)
- Safety glasses
Step-by-Step Instructions:
1. Measure Your Space: Decide where your stylish cage will live. Verify there’s enough room for your dog to move freely, but also remember to measure the space where the cage will fit snugly.
Think about dimensions—2×2 feet for smaller breeds works well, while larger breeds need noticeably more floor space.
2. Cut the Base and Frame: Start with your plywood. Cut out a base that’s a little larger than needed for your breed. Next, make four pieces for the frame—two sides, a front, and a back.
It doesn’t have to be fancy, just make sure it’s sturdy.
3. Sand and Prep: Channel your inner carpenter and sand those edges down to avoid any splinters. Who wants a mad dog because of a tiny snag?
Use medium grit first, then smooth it all out with fine grit.
4. Assemble the Base and Frame: Attach the frame pieces to the base using wood screws and a little wood glue for extra strength.
Don’t forget to pre-drill those holes—nobody wants a cracking frame.
5. Attach the Wire Mesh: Now, this is where the magic happens. Cut the wire mesh to size, and using your wire cutters, fit it into the frame.
Secure it firmly with wood screws or a staple gun, making sure it’s tight enough for your pup not to escape, but not so tight that it causes any pinch points.
6. Finishing Touches: You can leave the wood natural, or paint it in a color that matches your decor scheme.
Just let it dry thoroughly before introducing your dog to their new castle.
7. Install the Door: To create a door, cut a section of the frame and attach it back using hinges.
A latch will keep it secured, and you’ll have easy access for your pup’s comings and goings.
Optional Add-ons/Variations:
Want to jazz it up? Consider painting the frame in bright, bold colors to add some personality, or opt for a distressed look for a rustic feel.
You could also line the bottom with a cozy dog bed or cushion for extra comfort, keeping them cozy and content.
Pro Tip:
Always remember to wear safety glasses while cutting wood or wire mesh; it’s better to be safe than sorry.
And, if you’re feeling particularly crafty, consider creating interchangeable covers with fun patterns to change up the look of the cage whenever you want a fresh vibe.
3. Customizable Fabric Cover Design
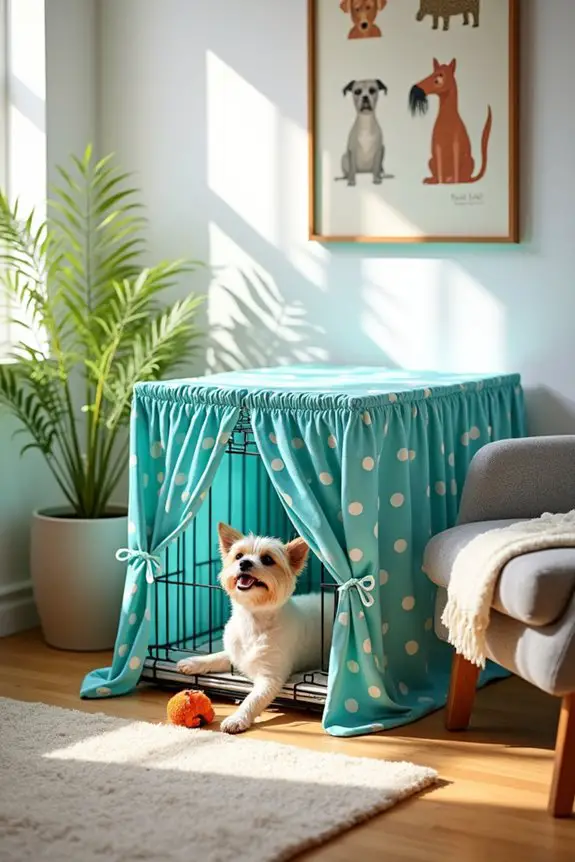
If you’re on the hunt for a quick and innovative way to transform your dog cage into a cozy haven that matches your living space, this DIY customizable fabric cover design is just what you need. Not only does it hide the typical metal or wooden appearance of traditional cages, but it also adds a splash of personality and warmth to your home, all while providing your pup with a comfy and secure retreat. Plus, it’s an easy way to save money rather than splurging on expensive, ready-made options.
Materials Needed:
- Fabric of your choice (enough to cover the cage)
- Measuring tape
- Scissors
- Sewing machine (or needle and thread for hand sewing)
- Velcro or fabric ties
- Iron (for smoothing out fabric wrinkles)
- Safety pins (for positioning fabric)
Step-by-Step Instructions:
- Measure Your Cage: Grab that measuring tape and figure out the dimensions of your dog cage. You’ll want to note the height, width, and depth. This will guarantee you don’t accidentally sew a cover that fits like a baggy old sweater.
- Cut the Fabric: Once you have your measurements, cut your fabric accordingly. Make sure to add a few extra inches on each side for hems—trust me, the last thing you want is to be wrestling with fraying edges.
- Sew the Edges: With your fabric cut, it’s time to sew the edges to prevent fraying. If you’re a sewing wizard, a sewing machine will make this quick work. If you’re like me, a simple needle and thread will do, just be prepared for some of that good ol’ finger wrestling. Hem up those edges all around.
- Attach Velcro or Ties: To keep the fabric securely in place, sew or glue Velcro strips to the inside base of the cage and the corresponding parts on the fabric. Alternatively, you can create fabric ties that can be wrapped around the bars of the cage to hold the cover in place.
- Iron for Smoothness: Give your fabric a good press with the iron. Nothing says “I’m ready for company” like a wrinkle-free cover. Plus, it will help when you’re fitting it on your cage.
- Fit It On the Cage: Once your cover is ready and wrinkle-free, place it over the cage. Use your safety pins to help the fabric stay in position and adjust it as necessary to make sure it fits snugly like your favorite blanket.
- Final Adjustments: Take a step back and admire your handiwork. Tweak any loose ends and make sure it looks fabulous. You may even want to drape a cute blanket over the top for that extra cozy vibe.
Optional Add-ons/Variations:
- Fabric Choice: Choose colorful patterns or solid tones that match your home—think cheery polka dots or classy grey tones. You can also use weather-resistant fabric if your dog likes to lounge outside.
- Personalized Touch: For an added flair, consider adding embellishments like patches, embroidery, or even your pup’s name stitched into the fabric.
Pro Tip:
Before you start this project, consider using a machine-washable fabric. We all know that dogs can be adorable yet quite messy, so having a cover that you can toss in the wash means you’ll save yourself some headaches later. And let’s be real, nothing takes the shine off your DIY masterpiece like a big old mud stain.
Now roll up those sleeves and give your pup’s cage a makeover that’ll make it the envy of the dog park. Happy crafting!
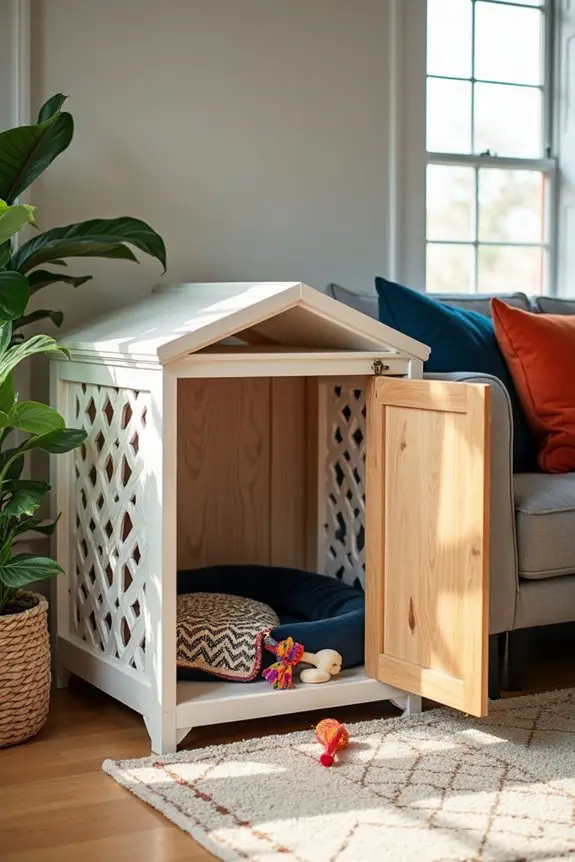
4. Hidden Storage Cage Design
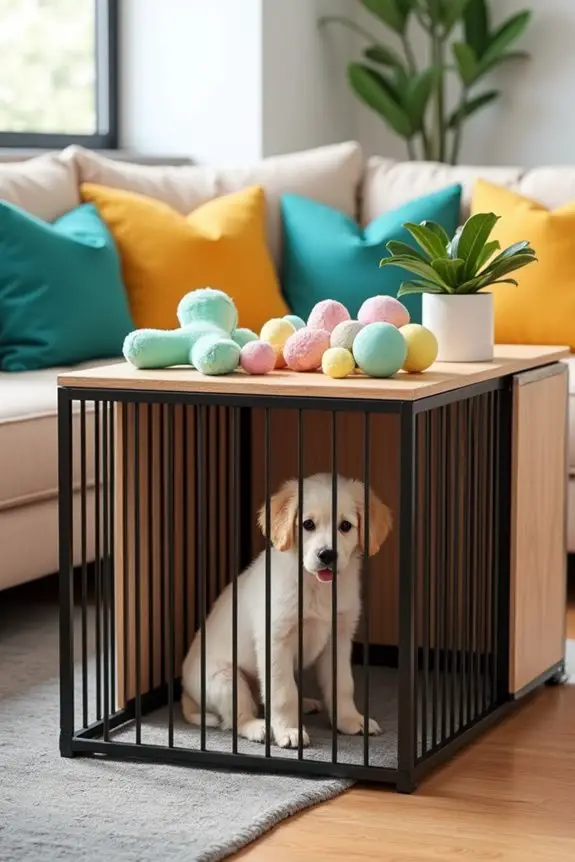
Are you looking for a way to combine functionality with style for your dog’s cage? This DIY hidden storage cage design is an ingenious way to transform a standard dog cage into a stylish piece of furniture that also helps you make the most of your space. It not only keeps your pup cozy but also allows you to store toys, leashes, or any other doggy essentials, saving you from clutter and mismatched items scattered around your home. Plus, it can all be done without breaking the bank.
Materials Needed:
- Dog cage (of your choice)
- Plywood sheets (for the top and sides)
- Measuring tape
- Wood screws
- Wood glue
- Sanding paper
- Paint or wood stain (to match your decor)
- Paintbrush
- Hinges (optional for a liftable top)
- Safety goggles (for protection)
Step-by-Step Instructions:
- Measure Your Cage: First things first, whip out your measuring tape and get the dimensions of your dog cage. Measure the height, width, and depth. You want your storage to be just right—a little snug but not too tight.
- Cut Your Plywood: Using your measurements, cut your plywood sheets. You’ll need a top piece that covers the cage and two side pieces that will hide the cage’s openings. If you’re not comfortable cutting wood, most hardware stores will do this for you—just ask nicely.
- Sand the Edges: After your pieces are cut, take some sanding paper and smooth out those edges. We don’t want any splinters catching a curious paw or your own hand. Safety first.
- Attach the Sides: Grab your wood glue and a friend (if possible) to help you position the side pieces against the cage. Use wood screws to secure the sides in place, making sure they fit snugly against the cage. Don’t be a lone ranger here; it gets a little awkward trying to hold everything at once.
- Finish the Top: If you want a liftable top, attach hinges to one side of the plywood piece that will serve as the lid. Otherwise, simply place the plywood on top of the cage. Make sure it’s sturdy and secure—no one likes a wobbly table, especially when there’s an enthusiastic pup around.
- Add a Touch of Style: Now that the basic structure is done, it’s time to release your creative side. Paint or stain the wood to match your home decor. Feel free to go wild with patterns or colors because this is your space too. Just be sure to use non-toxic options—dogs have a way of investigating everything.
- Final Touches: Once the paint or stain is dry (which can feel like eternity), place your new storage solution in your chosen spot. Fill it with dog toys, treats, or any pet necessities. Sit back, and enjoy the blend of style and function that you’ve just created.
Optional Add-ons/Variations:
- Use fabric to cover the sides of your hidden storage for a softer aesthetic, making it feel more like a decorative piece than furniture you’d find in a dog park.
- Add some decorative knobs to the front for a stylish touch—think about what would fit your home’s vibe, or pick something fun that draws your pup’s attention.
Pro Tip:
If you’re worried about durability, consider using a water-resistant finish on your wood. It’s a simple step that protects against any spills (like that time your dog accidentally knocked over the water bowl) and guarantees your design lasts through puppy antics.
After all, we love our dogs, but they do tend to turn our homes into playgrounds sometimes.
5. Pet-Friendly Multi-Function Design
Are you tired of choosing between style and function when it comes to your dog’s cage? The pet-friendly multi-function design is here to save the day! This clever DIY project transforms a standard dog cage into an eye-catching piece of furniture that serves multiple purposes, keeping your home neat while providing a comfortable spot for your furry friend.
Plus, it helps you save money on pet furniture, putting extra funds toward what really matters—treats and toys.
Materials Needed:
- Dog cage (choose your preferred size)
- Plywood sheets or wooden boards
- Measuring tape
- Wood screws
- Wood glue
- Sanding paper
- Non-toxic paint or wood stain
- Paintbrush
- Optional: Cushions or soft bedding for added comfort
- Optional: Decorative fabric for a stylish touch
- Safety goggles
Step-by-Step Instructions:
- Measure Your Cage: First, grab that measuring tape and jot down the height, width, and depth of your dog cage. You want everything to fit just right—like finding the perfect pair of shoes, but for your pup.
- Cut the Wood: Based on your measurements, cut your plywood sheets or wooden boards—one piece for the top and side panels. If cutting wood feels more intimidating than teaching your dog to roll over, don’t worry. Many hardware stores can cut it for you if you ask nicely.
- Sand Those Edges: Once your wood is cut, use sanding paper to smooth all the edges. Trust me, you don’t want splinters turning into your dog’s newest chew toy.
- Attach the Side Panels: Use wood glue to hold the side panels against the cage, making sure they fit snugly. Use wood screws to secure everything together. Don’t be a lone wolf; get someone to help hold it in place while you screw it down.
- Add the Top Board: Place the top piece on your cage. For a more dynamic design, you can even create a liftable top using hinges. Test for sturdiness—nobody wants a surprise collapse, especially not your playful pup!
- Stylize It Your Way: Now it’s time to reveal your inner artist. Paint or stain the wood to match your decor, or go wild with colors and patterns. Just remember to use non-toxic options—your dog might fancy a little taste test.
- Finish Up with Comfort: Lay down some comfy cushions or soft bedding on the inside to make it a cozy den for your dog. You can also cover the top with decorative fabric to hide any imperfections and give it that designer feel.
Optional Add-ons/Variations:
- Experiment with different colors, fabrics, or even stencils to personalize your design further. Want a pop of color? Try bright yellow or calming blues, or consider adding a unique pattern for extra flair. Each choice will give your cage a unique personality.
- Consider adding small storage bins or hooks on the side for leashes, toys, and treats. Imagine not having to chase down that elusive squeaky toy anymore because it’s neatly tucked away!
Pro Tip:
Before starting your project, make sure you have all the tools ready and maybe pop on some music to get into a fun DIY mood.
And if you’re worried about your dog trying to chew on the wood, a dog-safe bitter spray can help deter their curiosity while it dries. Your canine companion will love their new setup, and you can breathe easy knowing you’ve created something special for both of you.
6. Eco-Friendly Bamboo Cage Design
So you want a cage that’s not just a home for your pup but also a beautiful addition to your space? The eco-friendly bamboo cage design is the perfect DIY project for dog owners who care about our planet while keeping their furry friends comfortable. With bamboo being sustainable and stylish, it’s a win-win for both your pup’s style and your decor, plus it helps you save money on traditional pet furniture.
Materials Needed:
- Bamboo poles (available at local hardware or craft stores)
- Strong mesh or wire for the sides
- Measuring tape
- Wood screws
- Wood glue
- Saw (hand saw or power saw)
- Sandpaper
- Non-toxic finish (optional)
- Drill
- Safety goggles
Step-by-Step Instructions:
- Measure the Space: Decide where you want to place the bamboo cage and measure the area. Make certain it’s spacious enough for your dog to stretch out but cozy enough to feel secure.
- Cut the Bamboo: Using your saw, cut your bamboo poles into the length you desire for the frame. Think of it like Lego blocks—only, less colorful and without that annoying *snap* sound when you step on it.
- Create the Base: Arrange four bamboo poles in a rectangle to form the base and secure them together with wood screws for sturdiness. You might need an assistant, unless you’re feeling overly ambitious and want to hold it all together with your knees.
- Build the Walls: Measure and cut additional bamboo poles for the sides of the cage. Attach them vertically to your base, spacing them out evenly. For added safety, you’ll want to connect them with wire or mesh to guarantee your pup stays snug inside.
- Finish the Top: Use more bamboo poles to create a frame for the top. If you love the idea of being able to peek in on your pup without opening the cage (or if your pup has mastered the art of escape), create a removable top or add a door with hinges.
- Sand Everything Down: Use sandpaper to smooth out any rough edges. You definitely don’t want this becoming your dog’s new chew toy—unless your pup has a thing for construction site chic.
- Optional Finishing Touches: If desired, apply a non-toxic finish to protect the bamboo and enhance its look. This is also a great way to guarantee it withstands the wear and tear of your energetic doggo.
Optional Add-ons/Variations:
- Get funky with colors by staining the bamboo in bright hues or leaving it natural for a rustic feel.
- Consider upholstering the top with a soft fabric to create a cozy nook or laying a cute rug inside for extra comfort. Your dog will definitely appreciate ‘paw-sitive’ vibes.
Pro Tip:
Before placing your eco-friendly bamboo cage in its final location, make sure to add a cozy bedding area. This way, your pup will see it as a special retreat rather than just another piece of furniture.
And let’s be honest, who doesn’t love a bit of extra comfort?
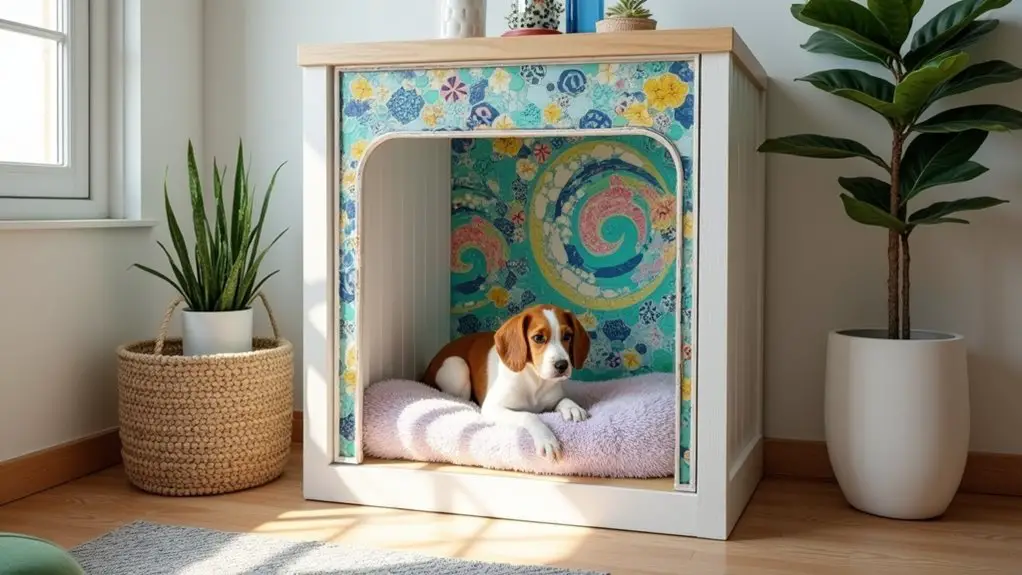
7. Decorative Tile Mosaic Cage
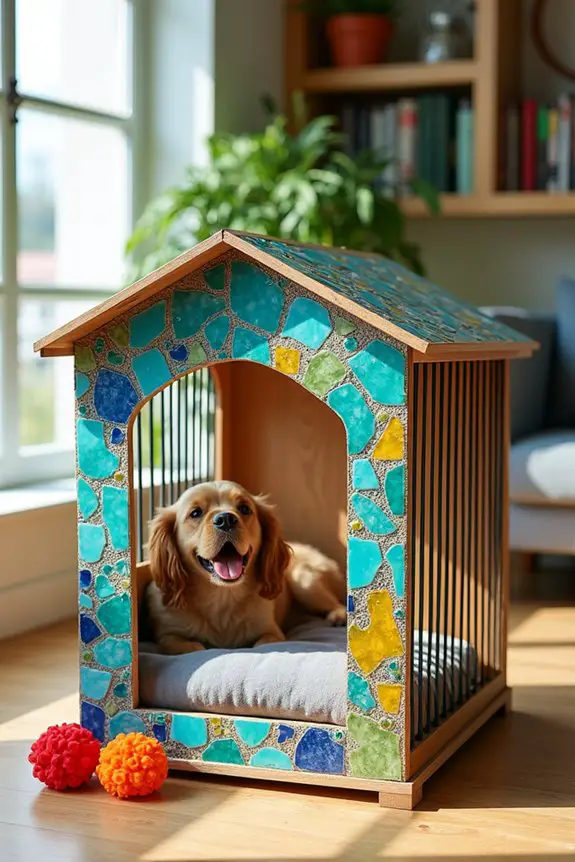
If your pup deserves a stylish space that’s as unique as they are, why not create a decorative tile mosaic cage? This DIY project combines functionality with a pop of personality, enhancing your home’s decor while providing a cozy retreat for your dog.
Plus, it’s a fantastic way to save money and use up some of that spare tile you’ve got lying around from your last home improvement project!
Materials Needed:
- Old tiles (ceramic or glass, whatever you can salvage)
- Plywood (for the base and sides)
- Strong adhesive (like tile adhesive or construction glue)
- Grout (optional, for the finish)
- Measuring tape
- Tile cutter (if tiles need resizing)
- Safety goggles
- Paint (optional, for the base)
- Sealer for tiles (optional)
Step-by-Step Instructions:
1. Design Your Mosaic: First up, plan your design. Lay out your tiles on a flat surface, getting creative with colors and patterns. Do you want a calming ocean vibe or something more vibrant like a flower garden?
It’s entirely up to you and your fabulous imagination.
2. Cut the Base: Measure your desired cage size and cut the plywood into pieces for the base and walls. This will be your cage’s frame.
Think of it as building a cozy little fortress for your furry friend.
3. Assemble the Frame: Securely attach the walls to the base using screws or strong adhesive. Verify there are adequate openings for airflow and your pup’s easy entry and exit.
It’s all about comfort, right?
4. Tile It Up: Start applying your tiles to the surface of the sides and top of the cage. Use adhesive to stick them down, and press firmly.
An artistic tip: Mix sizes and colors randomly for an eclectic yet charming look (just like your dog’s fur, right?).
5. Grouting (Optional): If you’re feeling fancy, mix up some grout and spread it between the tiles for a more polished finish.
It’s like giving your mosaic a warm hug. Don’t forget to wipe off any excess grout from the tiles with a damp cloth.
6. Seal the Deal: Once everything’s dry, seal the tiles with an appropriate sealer. This will help protect your artwork from everyday wear and tear, especially if your pup’s loving all the attention nearby.
7. Add a Cozy Touch****: Finally, line the bottom with soft bedding or a warm blanket (maybe avoid the fancy cashmere throw, though).
Your furry friend will appreciate the extra layer of comfort as they lounge in their stunning new abode.
Optional Add-ons/Variations:
– Use different colors and fun patterns for your tiles to make the cage pop.
Want to channel a bohemian vibe? Mix different tile styles and shapes. Or keep it chic with a monochromatic theme. Your choice, your style!
– You could also paint the wood base before tiling it—colorful paints can provide a beautiful contrast that enhances your mosaic.
Pro Tip: Before starting, check if your tiles are suitable for pets. Verify there’s nothing toxic, and avoid sharp edges whenever possible.
The cozy factor is great, but safety comes first—your pup will appreciate a cushy, secure environment even more!
Extra Tips & Ideas
While you might think building a dog cage is straightforward, there are plenty of extra tips and ideas that can take your project from “meh” to marvelous.
First off, think about the location. Place it where your pup can see the family—nobody wants a lonely dog. You can also layer in some coziness with soft bedding or even a favorite toy. Seriously, my dog has a giraffe stuffed animal he won’t share with anyone.
Why not throw in some color? Paint or stain the wood in a fun shade that matches your decor.
Finally, consider adding a removable top for extra ventilation during summer days. These small touches won’t only make the cage functional but also add a personal flair that you’ll both love.
Frequently Asked Questions
What Materials Are Best for DIY Dog Cages?
For DIY dog cages, you’ll want to use sturdy wood or metal for durability. Wire mesh provides ventilation, while non-toxic finishes guarantee safety. Don’t forget to take into account easy-to-clean surfaces and secure latches for your design!
How Large Should a Dog Cage Be for My Pet?
Your dog cage should be at least six inches taller and longer than your pet when they’re standing. This guarantees comfort, allowing them to stand, turn around, and lie down without feeling cramped or restricted.
Can I Make a Dog Cage From Repurposed Furniture?
Yes, you can absolutely make a dog cage from repurposed furniture! Just guarantee it’s sturdy, safe, and appropriately sized for your pet, while also allowing for proper ventilation and comfort. Get creative!
What Tools Do I Need for Building a Dog Cage?
Did you know that 68% of households own a pet? For building a dog cage, you’ll need a saw, drill, screws, measuring tape, and sandpaper. These tools guarantee a safe, sturdy, and comfortable space for your furry friend.
How Do I Ensure My Dog Feels Safe in the Cage?
To guarantee your dog feels safe in the cage, make it cozy with blankets, toys, and a familiar scent. Gradually introduce them to the space, using positive reinforcement to create a sense of security.
Conclusion
Ready to create a dog cage that’s not just a cage but a cozy retreat? With all these fun design ideas, you can blend style and comfort seamlessly. Whether you lean toward rustic wood or vibrant fabrics, there’s something here for every dog-loving DIYer. So, why settle for boring when your pup deserves a stylish space, too? Grab some supplies, release your creativity, and let your furry friend enjoy a cozy hideaway made by you.

