Have you ever thought about the joy of crafting DIY dog costumes for kids? It’s like stirring up a fun recipe with imagination as your secret ingredient. Envision this: your child dressed as a fluffy pup or a dapper cowboy. Sounds adorable, right? These projects not only spark creativity but also create some hilarious moments along the way. And trust me, there are plenty of tail-wagging options. Ready to get started? Let’s explore these whimsical ideas together.
Costumes for Every Breed
When you’re diving into DIY dog costumes for kids, the first step is figuring out which breed you’ll be channeling.
Got a little one obsessed with golden retrievers? Consider a cute golden tutu!
If poodles are their jam, ruffled skirts and colorful bows could do the trick.
Channeling a bulldog? A cozy hoodie with a faux snout offers that signature look.
Our Collection
Let’s talk about the costumes you’ve been dreaming of for your little ones.
From the Paw-Some Superhero Cape that’ll have them feeling invincible to the Fluffy Dog Onesie that’s just too cute, our collection has something for every pet-loving kid.
You won’t want to miss the Bark-tastic Cowboy Outfit or the Playful Pooch Pirate Costume—each one a chance for imaginative play and wagging tails aplenty.
1. Paw-Some Superhero Cape
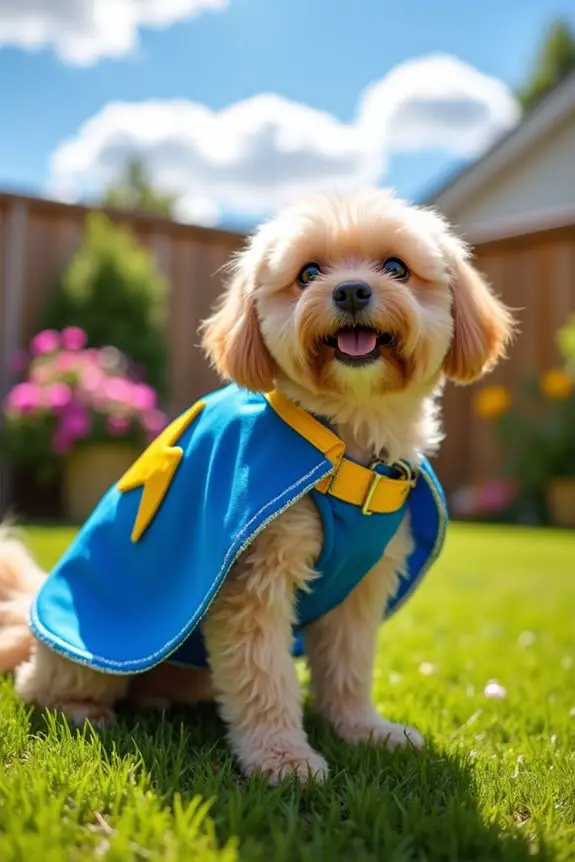
Want to turn your furry friend into a superhero? This DIY project for a Paw-Some Superhero Cape isn’t just fun; it’s a budget-friendly way to give your dog an epic makeover for special occasions, holidays, or just for playtime. Your pup will feel like the star of their own adventure, and as an added bonus, you’ll save some money over pricey store-bought options! Additionally, you can elevate your pet’s feeding experience by using a premium dog food machine to ensure they are getting the best nutrition possible.
Materials Needed:
- 1 yard of fabric (e.g., felt, cotton, or any durable fabric)
- Scissors
- Sewing machine or needle and thread (depending on your skills)
- Fabric glue (optional, for extra sturdiness)
- Velcro or snaps (for fastening)
- Pencil or fabric marker (for marking)
- Ruler or measuring tape
- Embellishments (like appliqués, felt shapes, or fabric paint for designs)
Step-by-Step Instructions:
- Measure and Cut the Fabric: Measure around your dog’s neck and from their neck to just above their tail. Use these measurements to cut a rectangular piece of fabric, usually around 20” by 30”. This forms the cape’s base.
- Create the Neck Loop: Fold the top edge (the smaller side) of the rectangle down about 4 inches. Pin or mark where you’ll make a seam. This will create a pocket that holds the collar comfortably.
- Sew or Glue the Neck Loop: Sew or glue along the edges of this fold to secure it, leaving the center open for the collar. If you’re sewing, use a straight stitch for stability.
- Add Fasteners: Attach Velcro or snaps to the ends of the neck loop. Make sure it’s snug but comfortable enough to slip on and off easily without pulling on your dog’s fur.
- Personalize the Cape: Use your embellishments to create a superhero logo or design! Think about adding a felt lightning bolt or star, or even painting a mask shape on the back of the cape for emphasis. Let your creativity soar!
- Try It On: Safely fasten the cape around your dog’s neck. Give it a quick tug to verify it’s secure (but not too tight) and watch as they strut around like the superhero they are!
- Capture the Moment: Go ahead, take some cute photos of your dog in their new cape. Trust me, you’ll want to share these with friends, family, and on social media.
Optional Add-ons/Variations:
- Want to go for an even bolder look? Try using bright colors or patterns like polka dots or stripes for the fabric. Your dog can be the talk of the dog park.
- You can even add a matching superhero mask using a simple piece of fabric, eye cutouts, and elastic bands for a complete hero ensemble.
Pro Tip: When sewing, a straight stitch is your best friend; it keeps things nice and tidy. Also, make sure to inspect the cape regularly for wear and tear. Dogs can be rascally, and the last thing you want is for them to lose their superhero cape mid-chase.
Now, are you ready to create a masterpiece that your pup will love? Let the superhero adventures begin.
2. Fluffy Dog Onesie
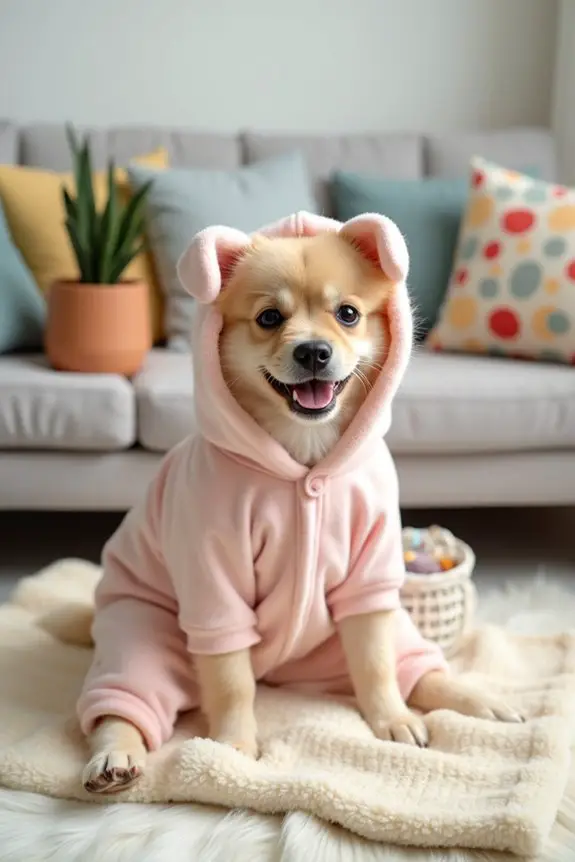
Looking to keep your furry friend cozy and stylish? This DIY Fluffy Dog Onesie is perfect for chilly days and adds a touch of adorable flair to your pup’s wardrobe. Not only does it save you money on store-bought options, but it also brings warmth and comfort to your furry companion while giving them that irresistibly cuddly look we all love. Plus, making dog clothing with a sewing machine allows you to create custom-fit designs tailored to your pup’s unique size and style.
Materials Needed:
- 1–2 yards of soft fleece or plush fabric (the fluffier, the better)
- Scissors
- Sewing machine or needle and thread (grab a buddy to hold the fabric if necessary)
- Measuring tape
- Fabric glue (optional, for those non-sewing champions)
- Velcro or snaps (for easy on and off)
- Pencil or fabric marker (to mark cutting lines)
- Pattern paper (for creating a custom fit)
Step-by-Step Instructions:
- Measure Your Pup: Start by measuring around your dog’s neck, chest, and the length from neck to tail. You’ll want to make certain it fits snugly but comfortably—no one likes to feel constricted.
- Create Your Pattern: Using the measurements, draw a simple template on your pattern paper. A basic onesie shape includes a rounded top for the neck and a wider body part covering the chest area. Don’t stress about it being perfect; a little stretch goes a long way!
- Cut the Fabric: Carefully cut out the pattern from your fluffy fabric. Make sure to leave an extra inch around the edges for seam allowance—this is where the sewing magic happens.
- Sew the Edges: Fold in the edges of the fabric and sew them, or if you prefer, use fabric glue for a no-sew option. You’ll want to create openings for the neck and legs, so leave those parts open. Think of it as giving your pup “airflow” for ultimate comfort.
- Add Fasteners: Attach Velcro or snaps at the neck and belly areas to make the onesie easy to put on and take off. Just ascertain it’s snug but doesn’t constrict your pooch’s precious movements.
- Try It On: Carefully slip the onesie onto your dog. Give it a little tug here and there to check the fit, and watch how they strut around in their new look. Feel free to do a little fashion show in the living room!
- Personalize It: Get creative! You can add patches, a fun pattern on the back, or even some simple stitching to give it a unique flair. Is your dog a superhero? Maybe add a logo to match their personality.
Optional Add-ons/Variations:
- Try out different fabric textures like knit or even holiday-themed prints for festive occasions. A plaid one might just turn your pup into the cutest lumberjack.
- Feeling wild? Add a hood with floppy ears! It’s a game changer, trust me. Just remember that ears need freedom too.
Pro Tip: When sewing around sensitive areas, always check how the fabric feels on your dog’s skin. Soft fleece is great, but if you notice any irritation, consider adding a soft lining to keep things comfy. After all, a happy pup makes a happy owner!
Now that you’ve leveled up your DIY game, who knew keeping your furry friend warm could be this fun? Happy crafting!
3. Bark-tastic Cowboy Outfit
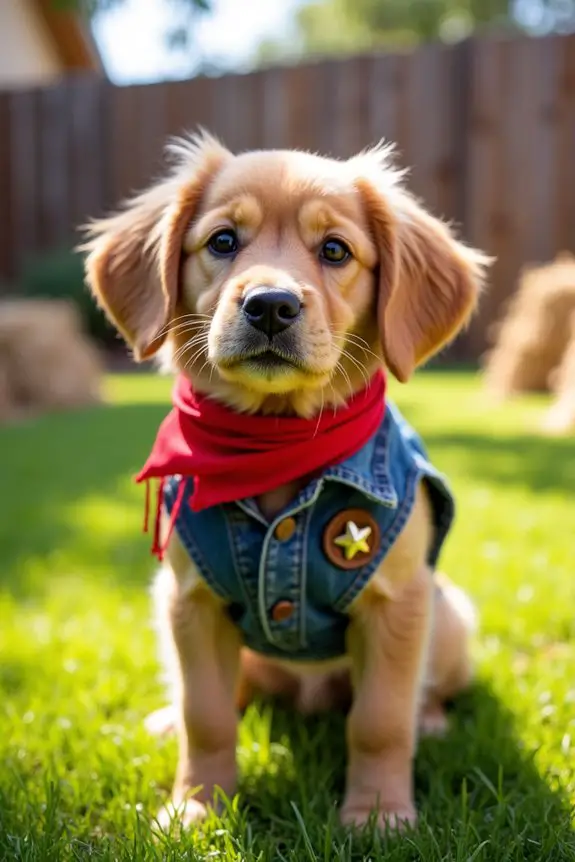
Stand aside, partner, because this DIY Bark-tastic Cowboy Outfit is here to give your pup a taste of the Wild West. Not only will your canine companion look ridiculously adorable, but this project is also a fun way to bond with your furry friend while saving a few bucks instead of opting for expensive store-bought costumes. Plus, nothing beats the joy of seeing your pup struttin’ their Western wear with pride.
To keep your dog’s diet in check, consider pairing this outfit with the best premium dog food brands to ensure they’re healthy and happy while showing off their new look.
Materials Needed:
- 1 yard of denim or a denim-look fabric
- 1 bandana (red or blue for that classic cowboy look)
- Scissors
- Sewing machine or needle and thread
- Measuring tape
- Fabric glue (if you’re not feeling the sewing vibe)
- Velcro or button (for easy wear)
- Pencil or fabric marker
- Pattern paper for the template
Step-by-Step Instructions:
1. Measure Your Dog: Start by measuring around your dog’s neck, chest, and back length from neck to tail. This is essential—no one wants a cowboy who can’t wiggle.
2. Create Your Template: With your measurements handy, sketch out a simple cowboy vest shape on the pattern paper. The vest should have a scoop neck and enough room to cover just the back.
Don’t worry about making it too fancy; it’s all about the charm.
3. Cut Out Your Fabric: Use the pattern to cut out the vest from your fabric. Make sure to leave an extra half-inch along the edges for sewing—safety first, fashion second.
4. Sew the Edges: Fold the edges of the fabric vest in and sew them down for a clean finish, or try fabric glue if you’d rather avoid the needle dance.
Cut slits in the fabric to make room for your pup’s front legs, so they can move without restrictions—nobody wants an unhappy cowboy.
5. Add Fasteners: Attach Velcro or a button at the neck area to secure the vest. This makes it easy to put on and remove, which is great when your dog gets a rush of the cowboy spirit and decides it’s time to run around the yard.
6. Try On the Outfit: Once your vest is ready, gently slip it onto your dog. Check for comfort and let your pup strut their stuff as they set off on their rodeo adventure around the house.
7. Accessorize: Grab that bandana and tie it around your dog’s neck, and maybe add some faux leather fringe to the vest for that extra cowboy flair.
After all, no cowboy look is complete without some stylish accessories.
Optional Add-ons/Variations:
- Switch up the fabric and use a plaid pattern for a more rustic look.
- Add fun patches, like a star badge or cowboy hat, to make it uniquely yours.
Personalization makes it special, right?
Pro Tip: Always verify the outfit isn’t too tight and gives your pup enough room to breathe and move.
Plus, if you use a machine to sew, remember to keep any threads or small bits out of Fido’s reach—it’s best for both of you.
Now saddle up and let your dog show off their new cowboy style. Who knows? They might be the next big star at your neighborhood dog parade.
4. Playful Pooch Pirate Costume
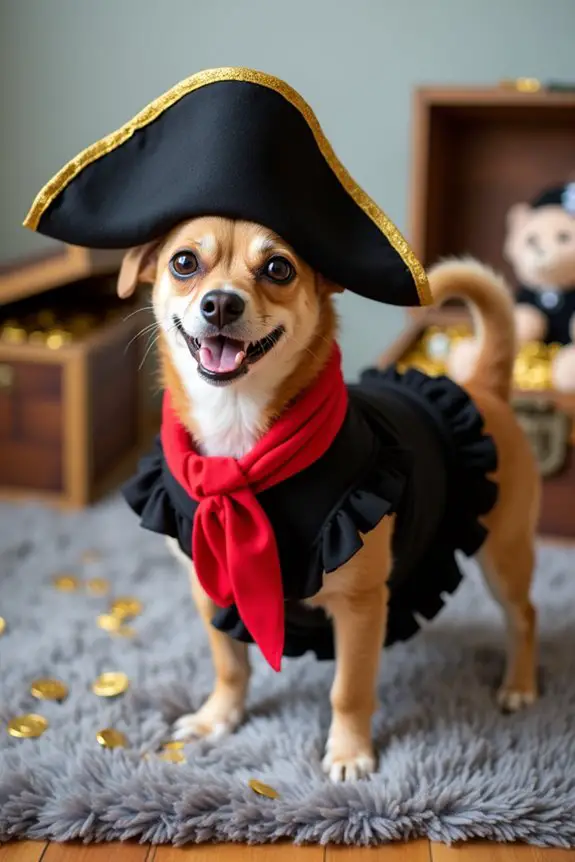
Playful Pooch Pirate Costume
Ahoy there, fellow pet lovers! Get ready to transform your furry friend into the swashbuckling pirate of your dreams with this whimsical DIY Playful Pooch Pirate Costume. Not only does this project save you some treasure that would have gone to a store-bought outfit, but it also guarantees your pup is comfortable and the center of attention at any event.
Plus, you’ll be creating some lovely memories as you set sail on this crafty adventure together! To top it all off, you can complete the look with luxury dog accessories female that will elevate your pup’s style.
Materials Needed:
- 1 yard of black felt or fabric
- 1 red or black bandana
- Scissors
- Sewing machine or needle and thread
- Measuring tape
- Fabric glue (for the non-sewers out there)
- Velcro or snaps for easy wear
- Pencil or fabric marker
- Pattern paper for the template
- Optional: Pirate hat or eye patch (store-bought or homemade)
Step-by-Step Instructions:
1. Measure Your Dog: Grab your measuring tape and take note of the circumference around your dog’s neck, the widest part of their chest, and the length from neck to tail.
Remember, you want your little pirate to feel free to move about like a true rogue of the seas.
2. Create Your Template: Using your measurements, draw a simple pirate vest pattern on the paper. It can be a basic rectangle with a scoop neckline.
The more adventurous you get with the shape, the more room for creativity—but keep it straightforward for now.
3. Cut Out Your Fabric: With your pattern ready, cut the vest shape out of the black fabric. Be sure to leave about half an inch of extra fabric around the edges for sewing.
Yes, it’s a little bit like the pirate code – always leave room for flexibility.
4. Sew the Edges: Fold those edges inward and either sew them for a neat finish or use fabric glue. If you’re feeling extra crafty, you can even add a ruffled edge for that authentic pirate flair.
Don’t forget to cut slits where your pup’s front legs go so they can strut around like the fearless buccaneer they are.
5. Add Fasteners: Attach Velcro or snaps around the neck area to make it easy to put on and take off. A secure vest is key—it helps prevent any lucky pirate from escaping their adventures.
6. Try On the Costume: Slip the vest onto your canine companion. Watch them prance around in their new look.
If they seem less than thrilled, maybe adjust the fit—comfort is king, even for pirates.
7. Accessorize: Tie the bandana around your pup’s neck for an authentic touch. If you’re feeling ambitious, grab an old cardboard box to make a treasure chest prop, and throw in some faux gold coins for that added element of fun!
Optional Add-ons/Variations:
- Swap the black felt for a navy blue or striped fabric to give your pup a whole new sea-faring identity.
- Craft a little pirate hat using stiff felt or cardboard to complete the look if you feel particularly crafty (or a bit mad).
And trust me, it’ll be worth it when your furry friend is rocking the hat.
Pro Tip: As you create this costume, keep an eye on how your dog reacts to the materials. A comfortable outfit means a happy dog, so always check to ascertain nothing is too tight or bothersome.
And if the fabric has any itchy tags or seams, snip them away. After all, even the toughest pirates deserve a little comfort on their adventures.
5. Wagging Tail Dinosaur Costume
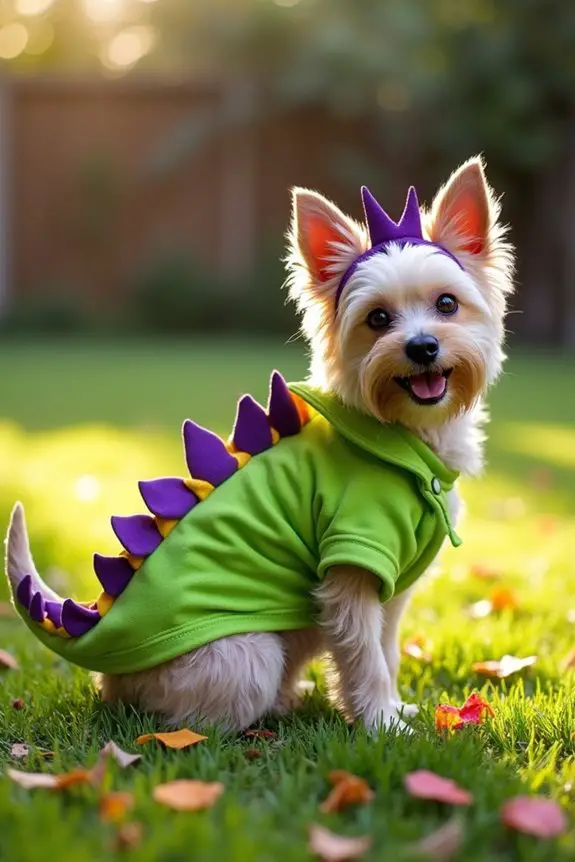
When it comes to costume-making for our four-legged friends, nothing says fun like a Wagging Tail Dinosaur Costume. This delightful DIY project is perfect for dog owners who want their pets to join in on the dress-up fun without spending a fortune on store-bought costumes. Plus, it’s comfy and easy to wear for your pup, guaranteeing they look adorable while feeling free to roam and play. Luxury dog collars can also enhance your pup’s style during their costume adventures.
Materials Needed:
- 1 yard of green felt or fabric (get bright shades for extra pop)
- Small pieces of contrasting colored felt (like purple or yellow for spikes)
- Scissors
- Sewing machine or needle and thread
- Measuring tape
- Fabric glue (great for those who prefer not to sew)
- Velcro strips or snaps
- Pencil or fabric marker
- A headband (optional, for dino horns)
Step-by-Step Instructions:
1. Measure Your Dog: Measure around your dog’s neck, the widest part of their chest, and the length from neck to tail. This will help guarantee a perfect fit, so your tiny dino can move without restriction.
2. Cut the Main Body Shape: Using your measurements, cut a rectangle shape from the green fabric. Make it longer for a tail that drapes down, and wider to accommodate your pup’s body without squishing them.
3. Create Spikes: Cut out small triangular shapes from your contrasting colored felt. These will be the dino spikes. Aim for a mix of sizes, as a little variation leads to a more playful look.
4. Attach Spikes: Sew or glue the spikes in a row along the back piece of the green fabric. For added flair, stagger them slightly so they look like a real dino’s spine.
5. Add Fasteners: Attach Velcro strips or snaps at the neck and belly areas to secure the costume. This makes it easy to slip on and off.
Just imagine your dino strutting around without any wardrobe malfunctions.
6. Try It On: Gently put the costume on your pooch. Take a moment to admire how cute they look. If they seem less than enthusiastic, adjust the straps or give them a few treats to keep spirits high—everyone loves snacks, right?
7. Accessorize: If you’re feeling crafty, take that headband and create dino horns using more felt. Glue them on, pop it on your pup’s head, and you’ve got a full dino look.
Optional Add-ons/Variations:
Want to jazz things up? Consider using different colors of fabric to create a multi-colored dino costume. You could even go wild with glittery felt for a sparkly dino. Personalize your creation by adding your dog’s name or fun dino-themed phrases such as “T-Rex on the Loose!”
Pro Tip: Before sewing or gluing, let the fabric breathe—to make sure it’s not too stiff.
If your dog isn’t used to wearing costumes, a quick dress rehearsal at home can ease them into their new dino persona.
Trust me; nothing feels worse than a pup in a costume that’s too tight. Keep it comfy and watch their tail wag with joy.
6. Adorable Doggy Mermaid Outfit
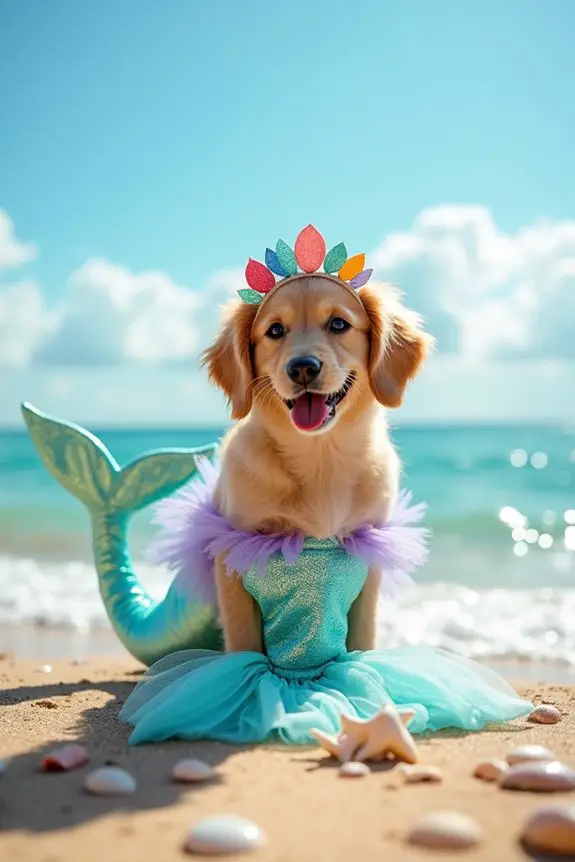
Getting crafty with your canine can lead to some truly fantastic outcomes, like this Adorable Doggy Mermaid Outfit. If you’ve ever dreamt of your furry friend sparkling like the ocean on a sunny day, then this DIY project is for you.
It’s not only a great way to join in on the fun of costume season without breaking the bank, but it also keeps your pup comfortable while looking like the belle of the beach.
Materials Needed:
- 1 yard of shiny, iridescent fabric (you know, the one that catches the light just right)
- 1/2 yard of soft tulle or netting (for an extra whimsical touch)
- Measuring tape
- Scissors
- Sewing machine or needle and thread (or fabric glue for non-sewers)
- Velcro strips or snaps (to keep everything secure)
- A headband (to hold the mermaid crown, if you’re so inclined)
- Optional: Shell embellishments or sequins (because who doesn’t love some extra sparkle?)
Step-by-Step Instructions:
1. Measure Your Pup: First up, grab that trusty measuring tape and measure around your dog’s neck, along their chest, and from neck to tail. This way, your little mer-pup can swim through their day without any costume hurdles.
2. Cut the Main Piece: Using your measurements, cut a large triangle from the shiny fabric. This is the tail fin, so make it wide enough for some dramatic movement. It’s important; we want that swish factor for when your pup struts their stuff.
3. Create the Tail’s Body: From the remaining fabric, cut a long rectangle. The top should taper slightly to fit snugly against your dog’s body.
Keep it loose enough so it’s comfy—your dog should be able to wag, wiggle, and frolic without restriction.
4. Add Tulle for Flair: Cut a piece of tulle or netting that matches the width of your tail fin. Gather it along one edge (like you’re making a ruffled skirt) to give it an enchanting underwater look, then sew or glue it to the end of your triangle.
5. Attach the Tail to the Body: Use Velcro strips or snaps to secure the tail piece to the body casing. Attach one side to the tail and the corresponding piece to the body.
This makes it easy-peasy for you to put on and take off, and it won’t embarrass your pup with wardrobe malfunctions when they’re off chasing squirrels.
6. Try It On: Carefully dress your dog in their new finery. Take a moment to marvel at how precious they look.
If your pup shows any signs of being uncomfortable, it’s a good idea to adjust the fit. Treats might help win them over too—who can resist a delicious snack?
7. Finish It Off: If you made that headband, now’s the time to cut out some simple shell shapes from colorful felt and glue them on. A little seashell crown never hurt anyone, right?
Optional Add-ons/Variations:
Feeling adventurous? Try out different patterns or colors for the fabric to really make the outfit your own—instead of basic blue and greens, blend some bright pinks or corals for a unique flair.
For an ethereal finish, consider sprinkling some glitter on those shells or even using fabric with a subtle shimmer.
Pro Tip: When choosing fabrics, opt for lightweight and breathable materials to keep your dog comfortably cool during any event.
It’s important that fashion doesn’t come at the expense of your pup’s comfort—because nobody wants a grumpy mer-pup sulking about rather than striking a pose.
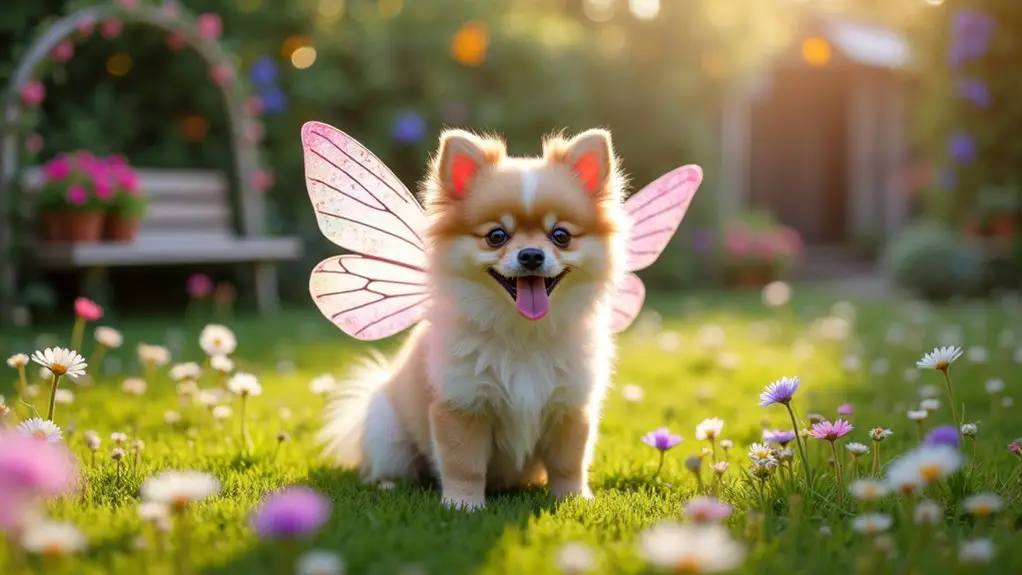
7. Charming Puppy Fairy Wings
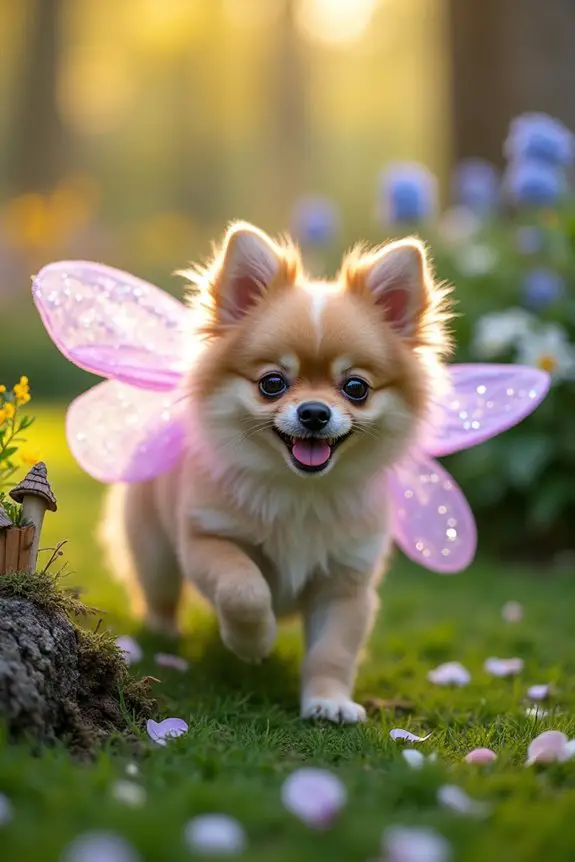
If you’ve ever wanted to turn your dog into a magical creature of the forest, search no further than these Charming Puppy Fairy Wings. Not only is this DIY project a fun way to dress your pup up, but it also provides them the freedom to move comfortably—a win-win for any dog owner. Plus, you can whip these up without spending a fortune. Who knew crafting could make your home a little more whimsical?
Materials Needed:
- 1 yard of colorful lightweight fabric (think soft organza or tulle)
- 2 wire hangers (the classic kind)
- Scissors
- Wire cutters (for safety’s sake)
- Ribbon or elastic (for securing the wings to your dog)
- Hot glue gun (stick with the glue, not the fingers)
- Optional: Glitter, sequins, or fabric paints for decorating
Step-by-Step Instructions:
- Prep the Hangers: Start by bending each wire hanger into a wing shape. For a classic fairy look, create long ovals or butterfly-like shapes. You can be as creative as you’d like—just make certain both wings are shaped similarly to prevent any awkward flight patterns.
- Cut the Fabric: Lay out your fabric and cut two large rectangles, making sure they’re big enough to cover each wing shape. You want enough fabric to drape over but not so much that it becomes cumbersome.
- Attach the Fabric: Drape the fabric over the wire frames. Using your hot glue gun, carefully glue the fabric edges to the back of the hangers. Make sure it’s secure but not so tight that it restricts movement.
- Make It Twinkle: Now, it’s time for the fun part—decorating! Use glitter, sequins, or fabric paint to add some sparkle and life to the wings. Let your creativity run wild, but remember, less can sometimes be more. (And cleaning up glitter can be a bit of a nightmare, trust me.)
- Secure the Wings: Cut a length of ribbon or elastic long enough to create a comfortable harness for your pup. Attach one end to the top of each wing with hot glue, making sure it’s snug but not too tight. Your dog should be able to wiggle freely.
- Put Them On: Once everything’s dry and secure, gently place the wings on your dog’s back, adjusting the harness to confirm they’re comfortable. Take a minute to admire their new look. (And maybe snap a few pics for social media, because what dog doesn’t want to be an Instagram star?)
Optional Add-ons/Variations:
- Consider using fabric in different colors for a fun twist, like pastel shades for a fairy princess look or metallics for an ethereal vibe.
- Add LED lights along the edges of the wings for a truly magical effect—perfect for nighttime adventures.
Pro Tip: Always do a comfort check once the wings are on your pup. If they seem fidgety or stressed, adjust the harness or take off the wings entirely. Remember, it’s about having fun, not causing stress.
And hey, if your dog refuses to walk gracefully in their wings, just let them prance like the little goofball they are.
Extra Tips & Ideas
While you might think that creating a DIY dog costume for a kid is just about the basics, there’s a whole world of extra tips and ideas waiting to release your creativity.
Ever thought about adding some personality? A wagging tail on the back could make all the difference. You can use old socks or even fabric scraps for those floppy ears.
Don’t forget to involve your kid in the process; they’ll love picking their favorite colors or patterns! And, if you’re feeling brave, why not turn it into a crafting party? Just be ready for glitter everywhere.
Oh, and when your kid struts their stuff in the costume, you might feel a swell of pride—and a slight pang of envy because they look so cute.
Frequently Asked Questions
What Materials Are Best for Making Dog Costumes?
You’ll want lightweight fabric, felt, and foam for comfort and flexibility. Craft supplies like glue, scissors, and sewing kits are essential too. Don’t forget embellishments like ribbons or buttons to add a fun flair!
How Can I Ensure My Pet Is Comfortable in a Costume?
To guarantee your pet’s comfortable in a costume, choose soft, breathable fabrics, avoid tight fittings, and let them try it on for a short time. Monitor their behavior and adjust as needed for a stress-free experience.
Can I Use Store-Bought Elements in DIY Costumes?
Absolutely, you can mix store-bought elements into your DIY costumes. Picture a canvas splashed with vibrant colors as you combine homemade magic with ready-made pieces, crafting something unique that showcases your creativity and your pet’s personality.
How Long Does It Take to Make a Dog Costume?
It usually takes a few hours to make a dog costume, depending on your skill level and the complexity of the design. You’ll want to gather materials first, then enjoy the creative process!
Are There Any Safety Concerns With DIY Dog Costumes?
Yes, there are safety concerns with DIY dog costumes. Ascertain your materials are non-toxic, avoid choking hazards, and make certain the costume doesn’t restrict movement or breathing. Always supervise your dog while they’re wearing it.
Conclusion
So, there you have it—seven adorable DIY dog costumes for your little ones that’ll spark joy and creativity. Whether they’re soaring through the skies as superheroes or splashing around as mermaids, these projects are all about fun. Just picture the laughter and excitement as they roam in their fab outfits. Ready to release your craftiness? Jump in, grab some materials, and let the tail-wagging adventures begin. Who knew getting crafty could be so pawsitively rewarding?
Amr Mohsen is a software engineer who traded his keyboard for a leash — at least on weekends. His love for dogs inspired him to share what he learns as a dog owner and enthusiast, bringing a detail-oriented, research-driven perspective to every article he writes. If it’s about dogs, he’s probably already looked it up twice.

