Creating a cozy little hideaway for your furry friend doesn’t have to be an intimidating task. With just a bit of fabric and creativity, you can whip up a stylish dog crate cover that reflects your pup’s unique personality. Ever wondered how you can mix comfort and charm? From soft checks to bright florals, the design options are endless. So, let’s explore ten heartfelt ideas that will make your dog’s space both inviting and oh-so-personalized.
Cozy Fabric and Color Combinations
When you think about cozying up your dog’s crate, fabric and color choices really matter. A soft, fluffy material can make your pup feel safe and snug, while the right colors can suit your home’s vibe.
For your DIY dog crate cover, think about fabrics like fleece or quilted cotton – they’re durable and oh-so-comfy. Light colors can brighten up a space, while deep hues give a warm, inviting touch.
Ever try a fun print? Your dog mightn’t care, but every guest will appreciate it. Just remember, the easier it’s to clean, the happier you’ll be.
Learn from my mistakes—spaghetti sauce on white fabric? Not the best combo. Choose wisely and watch your dog beam with cozy delight.
Our Collection
Let’s talk about our collection of dog crate covers, which has something for every style.
Whether you’re into rustic plaid that screams cozy cabin vibes, bright floral prints that bring a splash of sunshine, or sleek geometric patterns that fit a modern aesthetic, we’ve got you covered.
And don’t forget about the soft velvet and durable cotton canvas options—perfect for both pampered pups and those who think mud is a fashion statement.
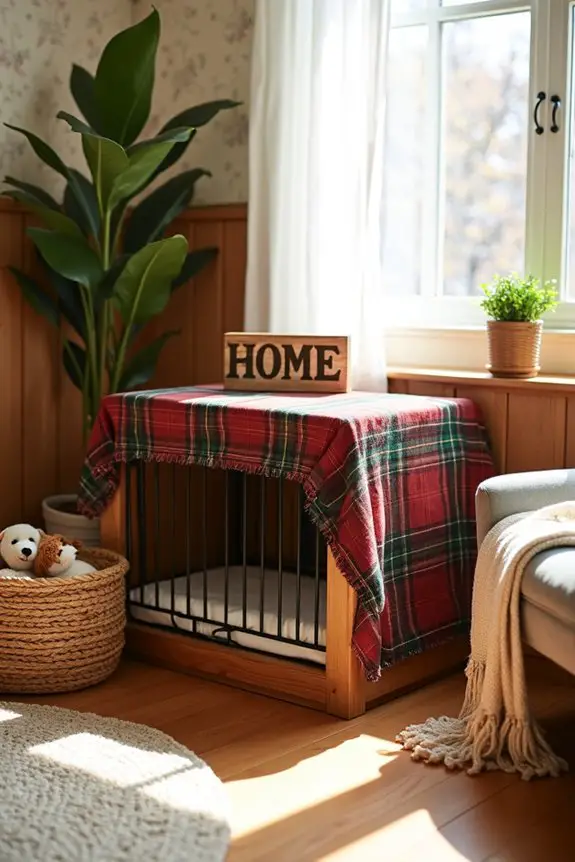
1. Rustic Plaid Fabric Options
Materials Needed:
- Fabric: 2-3 yards of rustic plaid fabric (cotton or flannel works great)
- Measuring tape
- Scissors
- Sewing machine or needle and thread
- Pins
- Iron
- Optional: Fabric glue or hem tape for no-sew option
Step-by-Step Instructions:
- Measure Your Crate: Start by measuring the dimensions of your dog crate. You’ll need the height, width, and depth to create the right fit. A tape measure and some math skills, and you’re golden.
- Cut Your Fabric: Once you have your measurements, cut your plaid fabric to size. You’ll likely need a rectangle for the front and two panels for the sides, plus additional fabric for the top if desired. Don’t forget to add an extra inch for hems.
- Hem the Edges: To prevent fraying, fold over the edges of each piece about a half inch, pin them down, and sew or glue the hem in place. If you’re nervous about sewing, fabric glue can come to your rescue—a little dab will do ya.
- Assemble Your Cover: Take the front panel and pin it to the top of the crate first. Then attach the side panels, making sure everything is straight and smooth. It’s like dressing a giant dog—except this one doesn’t stick its tongue out at you, hopefully.
- Sew or Glue Everything Together: Secure the fabric by sewing it or using fabric glue to keep things neat. If you’re a fan of the rustic look, a few loose threads can add character and charm. Consider pairing your crate cover with premium dog training equipment to enhance your pet’s learning environment while they relax in their comfy space.
- Iron for a Crisp Finish: Once that’s all done, give your new cover a quick iron to remove any wrinkles, and you’ll be amazed at the difference—like magic but with fluffier outcomes. Additionally, using a pet treat maker machine can provide your furry friend with tasty rewards, making their cozy space even more special.
- Place Your Cover on the Crate: Finally, drape your stylish cover over the crate, adjusting it so that it fits well. Ideally, tuck it under the crate for a snug fit. Your dog’s new cozy vibe is officially on display.
Optional Add-ons/Variations:
- Mix and Match Fabrics: Why stop at plaid? Try layering in some solid colors or coordinating patterns for a fun twist. Imagine a plaid front with a solid back—so chic!
- Personalize with Embroidery: Amp things up by adding your dog’s name or a fun phrase, like “Paw-sitively Cozy,” in cute lettering. Trust me, it makes this DIY project not only practical but also a conversation starter.
Pro Tip:
Before starting, check your fabric for any loose threads. A little prep can save you from future fraying and potential puppy pull-aways. Furthermore, choosing a premium puppy food can also contribute to your dog’s overall well-being, enhancing their comfort in their new cozy space.
Remember, a comfy space isn’t just about looks; it’s also about durability. A crate cover that can handle your dog’s playful nature is a win-win all around.
Creating a rustic plaid dog crate cover isn’t just a project; it’s a small way to show your furry buddy that they truly belong in your home décor. So grab that fabric, release your creativity, and make your pup’s space as cozy as it’s stylish. After all, who says dog crates can’t be fashionable?
2. Bright Floral Prints
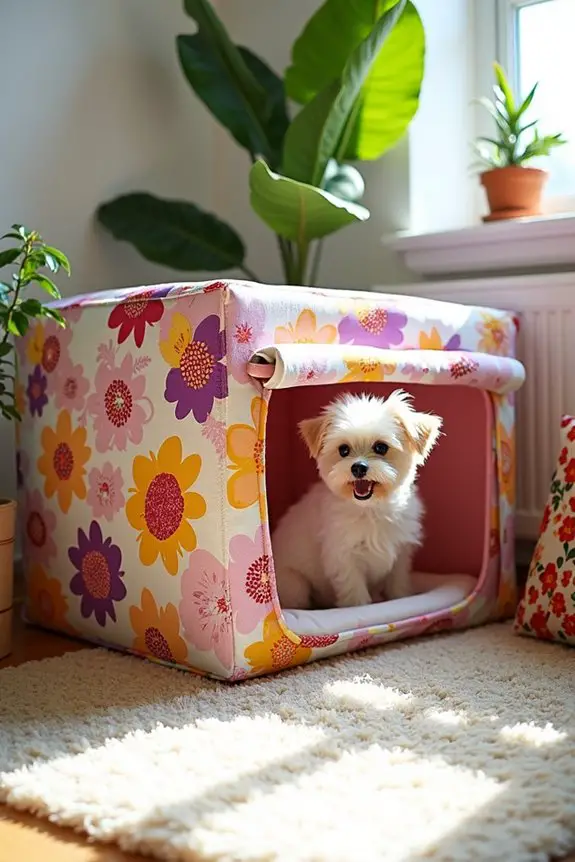
If you’re looking to brighten up your space and give your furry friend a cozy nook, this DIY dog crate cover using bright floral prints is the perfect project. Not only does it make your home more vibrant, but it also provides a comfortable, secure spot for your pup.
Plus, you’ll save money while customizing their space to suit your style. It’s a win-win!
Materials Needed:
- Bright floral fabric: 2-3 yards (cotton or canvas works well)
- Measuring tape
- Scissors
- Sewing machine or needle and thread
- Pins
- Iron
- Optional: Fabric glue or hem tape if you prefer a no-sew option
Step-by-Step Instructions:
1. Measure Your Crate: Start by measuring the height, width, and depth of your dog crate. Write these numbers down—trust me, you’ll thank yourself later.
2. Cut Your Fabric: Based on those measurements, cut your floral fabric into the right sizes. You’ll need a rectangle for the front panel, two side panels, and if you’re feeling fancy, some extra fabric for a top panel too.
Remember to add an extra inch on each side for hems.
3. Hem the Edges: To avoid any annoying fraying (unless frayed is your new aesthetic), fold over the edges of your cut fabric pieces about half an inch and secure them with pins.
Sew or glue those hems in place. If sewing sounds too ambitious, don’t fret—fabric glue can be your best buddy.
4. Assemble Your Cover: Now, let’s put it together! Start by pinning the front panel to the top of the crate first. Then, pin the two side panels, trimming off any excess if they’re not fitting quite right.
It’s like dressing a large, immovable dog—but a little less messy.
5. Secure It All: Time to make it permanent. Sew everything down or use fabric glue for a sturdy finish. You might embrace a few charmingly loose threads; after all, who doesn’t love character?
6. Ironing Time: Once everything is sewn or glued, give your cover a good press with the iron.
This step can make a world of difference, making your hard work look sharp and polished.
7. Finalize Your Cover: Drape your lovely new cover over the crate, adjusting it for a snug fit. Tucking the fabric under the crate will help keep it looking neat, and your dog will surely appreciate the cozy vibes.
Optional Add-ons/Variations:
– Play with Colors and Patterns: Why limit yourself to just one type of floral? Consider mixing different floral patterns or using solid colors on the sides to add a fun twist.
A wild pattern on the front and a calming color on the back can create a delightful contrast. Get creative; the only limit is your imagination!
Pro Tip:
Always wash your fabric before sewing. It helps prevent any surprises later, like shrinking or fading.
A bit of pre-wash love will keep your cover looking fresh and vibrant for those sleepy afternoons and rambunctious playdates.
3. Geometric Patterns for Modern Aesthetics
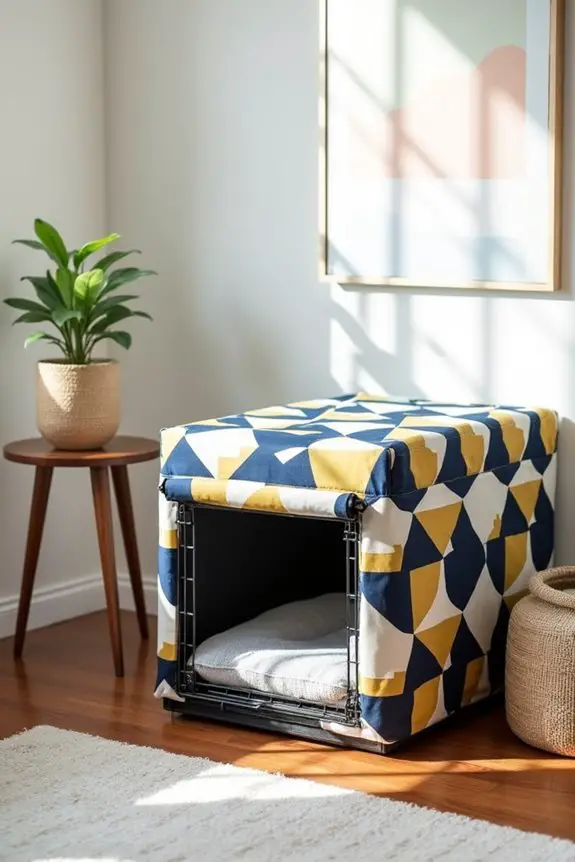
If you’re aiming to add a touch of contemporary flair to your dog’s space, why not try a DIY geometric-patterned crate cover? This project not only enhances your home’s aesthetic but also creates a stylish sanctuary for your furry companion.
Plus, with just a little time and effort, you can save money while impressing your friends with your crafty skills. Additionally, using high-quality materials can help maintain your dog’s health, as premium dog food brands emphasize the importance of nutritional value in dog diets.
Materials Needed:
- Geometric fabric: 2-3 yards (think cotton, canvas, or even outdoor fabric)
- Measuring tape
- Scissors
- Sewing machine or needle and thread
- Pins
- Iron
- Optional: Fabric glue or hem tape for a no-sew version
Step-by-Step Instructions:
1. Measure Your Crate: Grab that measuring tape and jot down the height, width, and depth of your dog crate. Trust me, you’ll feel accomplished as you avoid the “oops, I cut it too small” moment.
2. Cut Your Fabric: Using your measurements, cut the fabric into the appropriate sizes. You’ll need one rectangle for the front, two for the sides, and if you’re up for it, a top piece too.
Remember to add an inch for hems, so you don’t end up freestyling a lopsided cover.
3. Hem the Edges: To stop those fabric edges from fraying like they just saw a squirrel, fold each edge over by about half an inch, pin them down, and sew or glue.
If sewing feels like climbing a mountain, fabric glue is a fantastic and less intimidating option.
4. Assemble Your Cover: It’s time to play puzzle master! Start with the front panel, pin it to the top of the crate, then attach the sides, trimming as needed.
Think of it as clothing your crate—minus the fashion week.
5. Secure It All: Now, make it official. Sew down those panels or secure them with glue, ensuring everything stays put.
Sure, a couple of loose threads can add character—who doesn’t want a “rustic chic” look for a dog crate?
6. Ironing Time: This is where the magic really happens. Press your cover with an iron so it looks sharp and ready to impress.
Trust me, those wrinkles can be very unforgiving.
7. Finalize Your Cover: Drape your fabulous new cover over the crate and adjust for a snug fit.
Tuck it under for that neat, polished look. Your pooch will love the cozy vibe, and you’ll love the extra style in your home.
Optional Add-ons/Variations:
- Mix Patterns: Have fun and mix different geometric patterns or colors. Maybe a stripes and dots combo could be your next design adventure—it’ll be uniquely yours.
- Add a Pocket: Think about sewing on a little pocket to hold treats or toys. Practical and cute, right?
Pro Tip:
When choosing fabrics, look for something that’s easy to clean.
Our furry pals can be messy, and a durable fabric will make your life so much easier. Plus, consider pre-washing your fabric to prevent shrinkage after you’ve lovingly crafted your masterpiece.
4. Soft Velvet Options
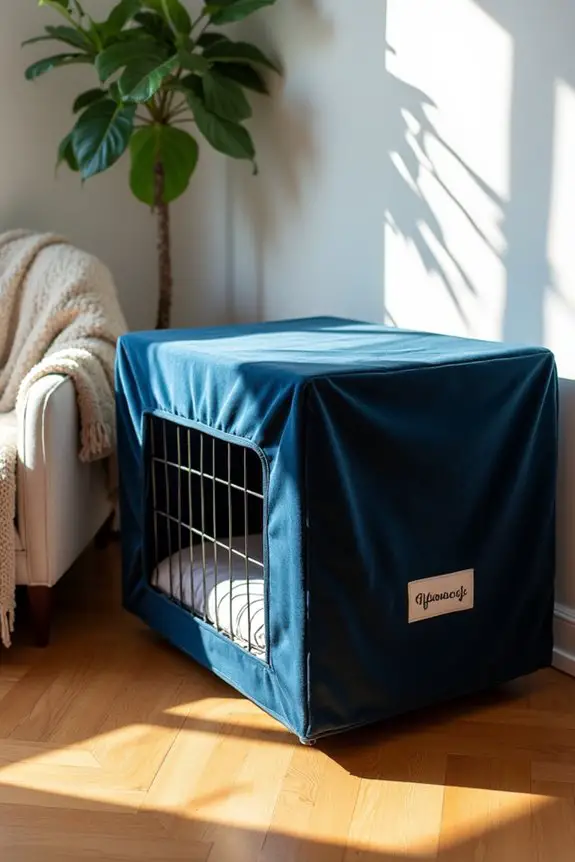
If you’re looking to take your DIY dog crate covers to the next level of luxury, consider making one in soft velvet. This elegant fabric not only elevates your home décor but also adds a touch of comfort for your furry friend, turning their crate into a cozy retreat.
Plus, working with velvet can be a fun challenge that showcases your creative side—making your pup’s space feel even more special without breaking the bank.
Materials Needed:
- Soft velvet fabric: 2-3 yards (choose a color that complements your home)
- Measuring tape
- Scissors
- Sewing machine or needle and thread
- Pins
- Iron (with a cloth for protection)
- Optional: Fabric glue or hem tape for a no-sew option
Step-by-Step Instructions:
- Measure Your Crate: Begin by measuring the height, width, and depth of your dog’s crate. Jot those numbers down—you want to avoid a repeat of that one time I misjudged a project and ended up with a very odd-looking cover.
- Cut Your Fabric: Based on your measurements, cut the velvet into the right sizes. You’ll need a rectangle for the front, two for the sides, and a top piece if you fancy it. Remember to add an inch for hems; it makes all the difference, trust me.
- Hem the Edges: Take a deep breath, and let’s tackle those edges. Fold each edge over about half an inch, pin it in place, and sew or glue it down. If sewing seems intimidating, fabric glue can really save the day—plus, who doesn’t love a no-sew option for those of us who may need a little extra practice?
- Assemble Your Cover: Time to put it all together! Start with that front panel, pin it to the top of the crate, and then attach the side panels. Adjust as needed—it’s like dressing your pup but in fabric; so much easier without the barking and tail wagging.
- Secure It All: Go ahead and sew down those panels or stick them down with glue. You want this cover to stay put, especially since a snug fit creates that inviting, plush look that velvet is all about.
- Ironing Time: Gently iron your cover—remember to use a fabric cloth between the iron and that lovely velvet. You want it looking sharp but not scorched; trust me, singed velvet isn’t a cute look.
- Finalize Your Cover: Place your beautiful new cover over the crate and adjust it for that perfect fit. Tuck it under neatly for a polished finish. Your pup might just think it’s a new plush toy instead of their crate.
Optional Add-ons/Variations:
- Add Contrast: Try pairing soft velvet with a bold geometric pattern in the fabric. Imagine a deep blue velvet cover with bright yellow geometric patterns peeking through—it’ll be eye-catching for sure.
- Monogram Magic: Personalize the cover by adding your dog’s name through simple appliqué. You’ll have a unique piece that reflects your pup’s personality, and it’s a great way to showcase your DIY prowess.
Pro Tip:
When working with velvet, be mindful of its tendency to shed a bit. It’s an alluring fabric, but frequent vacuuming around the crate can save you from tiny “fuzz” explosions.
Also, if you’re ever in doubt about your sewing skills, remember: even the greats had to start somewhere, and practice makes perfect (my first attempt looked like a dog chewed on it, but hey, I learned).
5. Cotton Canvas for Durability
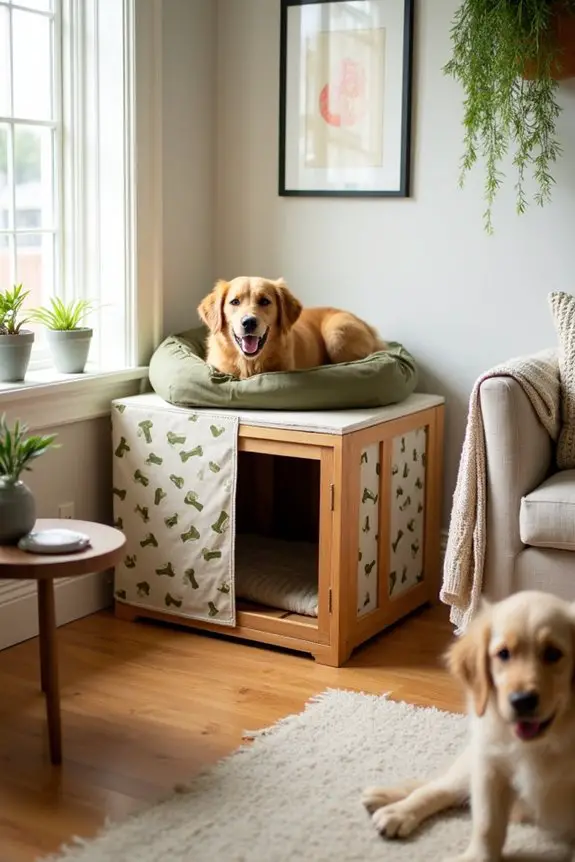
If you’re on the hunt for a DIY dog crate cover that can withstand the wear and tear of an active pup, cotton canvas is your go-to material. This sturdy fabric not only provides a long-lasting solution to crate decor, but it’s also easy to clean—making it perfect for those messy moments that come with being a dog owner.
Plus, it helps create a cozy retreat for your furry friend while giving your space a stylish boost. Who doesn’t love a cover that’s tough enough for the dog park but chic enough for your living room?
Materials Needed:
- Cotton canvas fabric: 2-3 yards (pick a fun pattern or color that matches your vibe)
- Measuring tape
- Scissors
- Sewing machine or needle and thread
- Pins
- Iron
- Optional: Fabric paint or stencils for custom designs
Step-by-Step Instructions:
1. Measure Your Crate: Start by measuring the height, width, and depth of your dog’s crate. This step is essential, so avoid my past mistake of guessing—trust me, those rogue measurements can lead to some quirky shapes.
2. Cut Your Fabric: Based on your measurements, cut the cotton canvas into sections. You’ll want one rectangle for the front, two for the sides, and possibly a top piece (if you’re feeling ambitious).
Don’t forget to add an extra inch for hems—it makes the finish look professional, even if this is your first sewing project.
3. Hem the Edges: Let’s get those edges tidy! Fold each edge over about half an inch, pin it down, and either sew or glue it in place. If you’re not too confident with a needle, fabric glue is a lifesaver—it’s practically magic for those of us still mastering the art of sewing.
4. Assemble Your Cover: Now it’s time for assembly. Start with the front panel, pin it to the top of the crate, then attach the side panels. Remember to step back and check your work.
You want it to fit nicely, sort of like a cozy jacket for your pup—the last thing we want is an ill-fitting cover throwing off the vibe.
5. Secure It All: Sew or glue down those panels firmly. A snug fit is key here; it not only looks good but keeps everything in place as your pup bustles about in their space.
6. Iron It Out: A quick press with the iron will make your cover look sharp. Just remember to use a clean cloth between the iron and the fabric—burnt canvas is definitely not a trendy look.
7. Final Touch: Slip your newly crafted cover over the crate and adjust it for that perfect fit. Tuck in any loose edges, and voila—your dog now has a stylish, durable hideaway.
Optional Add-ons/Variations:
Want to spice things up? Consider adding a pop of personality by using fabric paint or stencils to customize your cover with your dog’s name or fun patterns.
This little addition can elevate an already charming project, making it truly unique to your home.
Pro Tip:
If your pup is prone to nibbling on fabrics (like mine—yikes), treat your cotton canvas with a fabric spray to make it more resistant to stains and wear.
It’s a small step that can save you from replacing that cover too soon. Plus, a durable cover means your dog can enjoy their cozy space without you worrying about the next unexpected mess.
6. Water-resistant Outdoor Fabrics
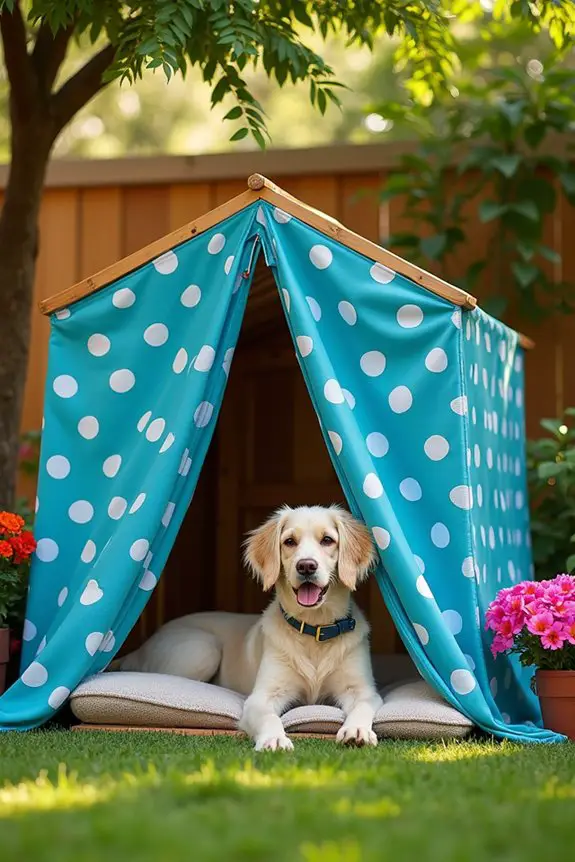
If your pup loves to lounge outside, a water-resistant dog crate cover is a game-changer. Not only does it keep them dry and comfy during the unpredictable weather, but it also protects the crate from moisture and sun damage. Plus, it adds a touch of style to your outdoor setup—because why shouldn’t your dog’s space be just as chic as yours? Let’s explore making one.
Materials Needed:
- Water-resistant outdoor fabric: 2-3 yards (pick a durable color or pattern that matches your outdoor décor)
- Measuring tape
- Scissors
- Heavy-duty sewing machine or needle and thread
- Pins
- Iron (with care as some fabrics might melt)
- Optional: Reflective strips for added visibility in low light
Step-by-Step Instructions:
1. Measure Your Crate: Start off by measuring the height, width, and depth of your dog’s crate. This is essential, folks. Trying to wing it could end with a cover that would make a great tent for a mouse instead of a home for your pup.
2. Cut Your Fabric: Based on your measurements, cut your water-resistant fabric into sections. You’ll want to create one piece for the front, two for the sides, and potentially a top panel if you’re feeling ambitious.
Make sure to leave an extra inch on each edge for hems—trust me, your future self will thank you for those tidy edges.
3. Hem the Edges: Let’s tidy up those edges! Fold each edge over about half an inch, pin it down, and sew or glue it in place. If you’re like me and still trying to figure out your sewing machine, fabric glue can save the day.
4. Assemble Your Cover: Alright, assemble time! Pin the front panel to the top of the crate, and then attach the side panels. Step back, check it out—this is like fitting a doggie suit. You want it snug but not too tight.
5. Secure It All: Go ahead and sew or glue those panels down firmly. A tight fit keeps the cover in place, so your pup doesn’t end up with a side of decor where they’re lounging.
6. Iron It Out: Give your cover a quick press with the iron to smooth out creases and give it a polished look. Just remember to be cautious of the fabric’s melting point—keep a cloth between the iron and the fabric if you’re unsure.
No one wants their dog’s fancy new cover to double as an abstract art piece.
7. Final Touch: Slide your beautifully crafted cover over the crate and adjust as needed. Your pup is in for a real treat; their outdoor lounging just got a serious upgrade.
Optional Add-ons/Variations:
- Consider using fun, vibrant colors to match your outdoor furniture or even a playful pattern that reflects your dog’s personality.
- You could also add reflective strips along the edges for better visibility in those twilight hours. Who says practical can’t be stylish, right?
Pro Tip:
For extra durability, try to choose a fabric that’s easy to clean—this way, when muddy paws decide to take a nap, you can simply wipe down the cover or toss it in the wash.
It’s all about keeping your pup cozy while reducing your cleaning hassle. Happy crafting!
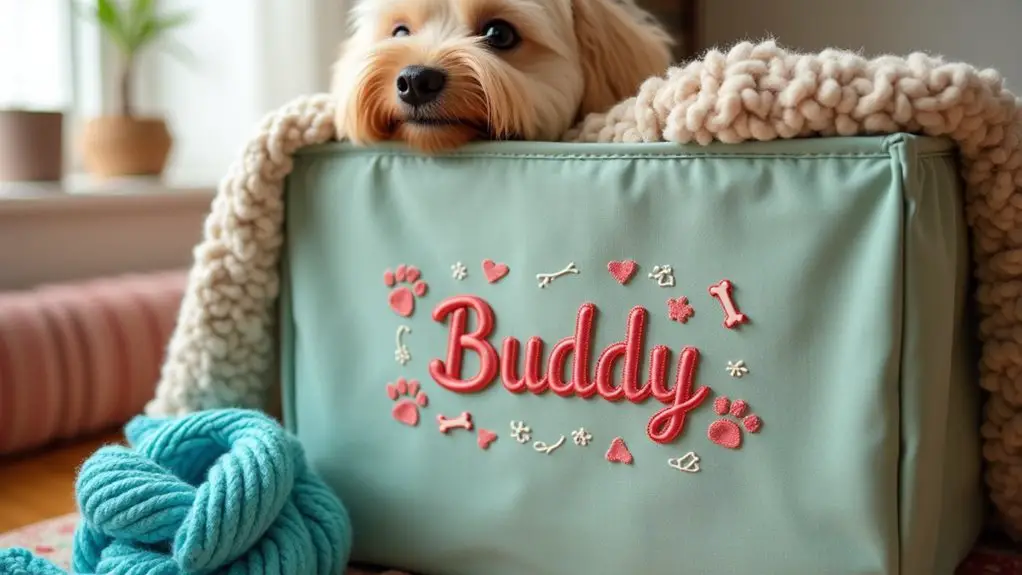
7. Personalized Embroidered Dog Names
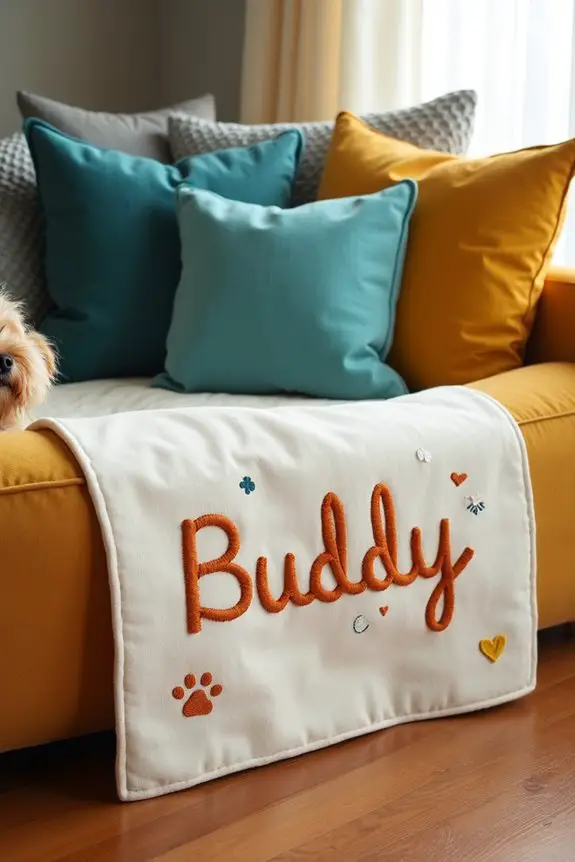
If you want to make your furry friend feel extra special, a personalized embroidered name for their crate or tag is just the ticket. This DIY project not only adds a unique touch to their space but also helps you save a few bucks compared to store-bought options. Plus, who doesn’t love a little flair in their pet’s accessories?
Let’s get started on this fun and easy craft that’s sure to put a wag in your dog’s tail.
Materials Needed:
- Embroidery hoop: Small or medium-sized, depending on your design
- Fabric: Canvas or cotton in a color that complements your pup’s personality
- Embroidery thread: Choose colors that pop against your fabric
- Embroidery needle: A large-eyed needle works best for this project
- Scissors: Sharp enough to cut through thread and fabric
- Measuring tape: For precise measurements (or wing it like I do…yikes)
- Pencil or fabric marker: To trace the design
- Iron (for smoothing fabric before starting)
Step-by-Step Instructions:
- Pick Your Fabric: Choose a durable fabric that matches your dog’s style. Think of colors that pop or patterns that say, “Yes, I’m fabulous!” Iron out any wrinkles to give yourself a smooth canvas to work with. We’ll want it looking sharp, just like your pup.
- Measure and Cut: Use your measuring tape to figure out the size you want for your embroidered name. Cut a rectangle or square about an inch larger than your desired size, leaving a little room for any future mistakes (trust me, I’ve been there).
- Trace the Name: With your pencil or fabric marker, draw the name you want to embroider onto the fabric. You can even use a stencil or print out the name in a fun font as a guide. Warning: this is where my artistic skills tend to vanish—try not to judge my handwriting too harshly!
- Set Up Your Embroidery Hoop: Place the fabric in the embroidery hoop, making sure it’s taut but not so tight that it’ll snap (like my patience when I’m a few stitches in). Secure it in place by tightening the hoop clamps.
- Start Embroidering: Thread the needle with your chosen embroidery thread, tie a knot at the end, and start stitching. Simple backstitches or satin stitches work well. If you’re feeling adventurous, try adding little doodles or paw prints around the name. Just remember: if your stitches look like a five-year-old did them, that’s “character,” right?
- Finish Off: Once you’ve finished stitching, tie off your thread at the back and trim any excess fabric if needed. Stand back and admire your work. I mean, it’s way more than just a name; it’s a mini masterpiece.
- Display It: Attach the newly embroidered name to your dog’s crate using fabric glue, sew it on, or pop it in a frame for a classic touch. Take a photo for your Instagram and bask in the glory of your creative prowess.
Optional Add-ons/Variations:
- Use different fabrics: Experiment with playful patterns like polka dots or stripes, or even use felt for a softer touch that might suit your pup.
- Try different fonts: Get creative with the font styles you trace—maybe a funky script or a blocky print that really stands out.
Pro Tip:
When cutting your fabric, give yourself some extra room—better to have a little too much than to find out halfway through that you’ve created a tiny name tag for a hamster.
And remember, if you mess up a stitch, just turn it into a “design feature.” Your pup won’t judge, and honestly, their wagging tail will be all the approval you need.
Extra Tips & Ideas
While you may think a dog crate cover is just about aesthetics, there’s so much more you can do to make it cozy and practical for your furry friend.
Consider adding a soft, washable blanket or cushion inside. Your pup will appreciate that extra comfort, especially on cold nights. You could even hang some of their favorite toys from the side—who doesn’t love a little playtime in their den?
Oh, and a little bit of scent goes a long way; sprinkle some lavender or chamomile near their crate for calm vibes.
And don’t forget to personalize it further with fabric that matches your home decor. It’ll look fab, and your dog will feel right at home.
You’ve got this!
Frequently Asked Questions
What Materials Are Best for a Durable Dog Crate Cover?
For a durable dog crate cover, you’ll want to use sturdy fabrics like canvas or upholstery materials. Waterproof or water-resistant options can help, and guarantee the cover fits snugly to prevent wear and tear.
How Do I Measure My Dog’s Crate for the Cover?
To measure your dog’s crate, first grab a tape measure. Then, take the height, width, and depth, ensuring you account for any unusual shapes. Trust me, this step’s essential for a perfect fit!
Can I Machine Wash the DIY Dog Crate Covers?
Yes, you can machine wash your DIY dog crate covers! Just be sure to use a gentle cycle and cold water. Hang them to dry or tumble dry on low to keep them looking great.
How Long Does It Take to Make a Crate Cover?
Creating a cozy cover for your dog’s crate usually takes about two to three hours, depending on your sewing skills. You’ll enjoy the process and soon have a lovely addition to your pet’s space!
Are There Any Safety Concerns With Using Crate Covers?
Yes, there are safety concerns with crate covers. Guarantee proper ventilation and avoid materials that could entangle or suffocate your dog. Monitor your pet’s comfort level regularly to prevent anxiety or overheating while inside.
Conclusion
Creating a DIY dog crate cover not only jazzes up your pup’s space but also makes it a cozy retreat. Did you know that dogs spend about 12 to 14 hours a day resting? That’s a whole lot of snoozing in style. So, whether you go for rustic plaid or an eye-catching floral print, you’re adding comfort and personality. Remember, your creativity can turn an ordinary crate into a beloved haven for your furry friend. Happy crafting!

