Did you know that around 60% of dog owners struggle with finding a proper potty area for their furry friends? If you’re in the same boat, you might be scratching your head over how to create a space that’s both functional and looks good in your yard. Picture a cozy corner with stylish elements. Sounds impossible? Stick around, and you’ll discover easy, creative designs that can make your pup’s potty spot the envy of the neighborhood.
Dog-Friendly Landscaping Ideas
When you think about creating a dog-friendly landscape, it’s easy to get overwhelmed, right? But don’t worry. You can start small, like by designing a DIY dog potty area.
Think about it—every pup deserves a comfy spot. Pick a quiet corner, maybe near some shaded trees. Lay down some gravel or pavers; they’re easy to clean.
Then, introduce some low-maintenance plants around the area to keep it inviting. Trust me, your dog will appreciate the thought you put into it. Plus, having a designated spot saves your flowers from becoming a makeshift bathroom.
And you won’t have to chase after your furball every time nature calls. You’ve got this; a little effort goes a long way in keeping tails wagging!
Our Collection
When it comes to creating the perfect potty area for your pup, you’ve got some fantastic options at your fingertips.
From eco-friendly grass alternatives to the ultimate in pee-proof paver stones, there’s a little something for every taste and interest.
1. Grass Alternatives for Dog Potty

Creating a dedicated potty area for your dog can be both a practical and stylish solution for your yard. The Pebble Poo Pad is an easy-to-make, low-maintenance option that uses smooth pebbles as the surface, providing a clean, pleasant spot for your pup to do their business. Not only does it save money compared to store-bought alternatives, but it also guarantees your yard stays looking neat and tidy. An added benefit is the option for automatic pet waste disposal solutions, which can make maintenance even easier. Additionally, using the right dog-friendly materials ensures the area remains safe and enjoyable for your pet.
Plus, your dog might just think it’s the coolest place around to take care of business. It’s also important to consider an effective dog incontinence management system, which can be a helpful addition for dogs needing extra support.
Materials Needed:
- A variety of smooth pebbles (limit to those that are dog-safe and won’t hurt their paws)
- Landscaping fabric or heavy-duty tarp
- Edging stones or bricks (optional)
- Shovel
- Rake
- Wheelbarrow (or buckets)
- Water (to wet the ground for easier digging)
Step-by-Step Instructions:
1. Choose the Spot: Find a level area in your yard that’s easy for your dog to access. It should be away from your garden or precious plants because, let’s be real, those unexpected deposits can be a gardener’s nightmare.
2. Prepare the Ground: Clear the chosen area of any grass, dirt, or debris. If you’re anything like me, this step will include some back-breaking efforts and perhaps a few questionable dance moves as you reluctantly dig around.
3. Lay the Base: Once the area is cleared, place your landscaping fabric or tarp down. This prevents weeds from growing through and keeps your pebbles in place. Make sure it’s taut and covers the entire area, so you have a clean slate for your pebbles.
4. Add Pebbles: Pour your pebbles onto the fabric, spreading them evenly. The layer should be about three to four inches thick. Grab a rake and smooth them out, creating a cozy, even surface for your pup.
If only smoothing out life’s worries was as easy, right?
5. Edge It Up: If desired, use your edging stones or bricks to create a defined border around the area. This extra touch can really make it look polished—like a fancy dog bathroom. Plus, it helps keep the pebbles contained.
6. Test It Out: Once everything is in place, encourage your dog to check out their new potty area. Use treats or their favorite toy to lure them over. You might need some patience here—dogs can be notoriously picky.
7. Regular Maintenance: Give the pad a rinse every once in a while to keep it fresh and clean. With just a little upkeep, it’ll look good as new.
Optional Add-ons/Variations:
- Colorful Pebbles: If you want to jazz up your Pebble Poo Pad, consider using colored pebbles to add a pop of fun. You could also paint the edging stones in bright colors to match your yard’s aesthetics.
- Dog-Friendly Plants: Surround your potty area with dog-friendly plants or herbs. Think lavenders or chamomiles, which are safe and can soothe your pup while giving your yard a nice fragrance.
Pro Tip:
Always give your pebbles a good rinse before placing them down. You wouldn’t want your dog accidentally sniffing out funky dirt leftovers.
It also helps to choose smooth, rounded pebbles to avoid any injuries to their paws. After all, comfort is key in your dog’s little world, and we want them to love their new potty area as much as possible.
Now that you have your very own Pebble Poo Pad, your dog can enjoy a stylish potty spot that’s both functional and fabulous. Happy DIY-ing!
2. Pee-Proof Paver Stones
Creating a pee-proof potty area using paver stones is a smart and stylish DIY solution for dog owners. Not only do these stones give your yard a neat appearance, but they also make cleanup a breeze. Plus, they’re durable and can withstand all kinds of weather—no soggy grass or muddy paws to deal with. It’s a win-win for you and your furry friend. Additionally, providing your pup with premium small dog food can enhance their overall health and contribute to a happy lifestyle.
Materials Needed:
- Paver stones (size and color of your choice)
- Landscape fabric
- Gravel (for drainage)
- Leveling tool (like a long straight board or a level)
- Rubber mallet
- Shovel
- Rake
- Garden hose (optional, for rinsing)
Step-by-Step Instructions:
- Select Your Spot: Find a flat, accessible area in your yard that your dog can easily reach. Aim for a spot that’s away from flower beds or other plants. Trust me, your flowers will thank you.
- Clear the Area: Remove any grass, weeds, or debris from your chosen site. This part can feel like a mini workout, so get ready for some serious digging. Just think of it as a way to earn your post-project snack.
- Lay Down Landscape Fabric: Once the area is cleared, lay down landscape fabric to prevent weeds from popping up in between your stones. Tuck it under the edges to make certain it stays in place. This might feel like wrapping a present, except it’s for your dog.
- Create a Base Layer with Gravel: Spread a few inches of gravel over the fabric. This helps with drainage, so your area doesn’t become a mud pit in rainy weather. Use that shovel and rake to get it even, and then compact it down. You want a solid foundation for your paver stones.
- Place Your Paver Stones: Start laying your paver stones in your desired pattern over the gravel. Gaps can be filled with soil or sand later. Tap each stone down with a rubber mallet to guarantee they’re level and secure. It’s like making a puzzle, but with heavy objects—not the best for the back, but so rewarding!
- Check for Levelness: Use your leveling tool to make sure everything is even as you go along. Adjust as necessary by adding or removing gravel underneath. It’s that satisfying moment when you step back and realize you might just have a hidden talent for DIY.
- Fill Gaps and Secure: Once the stones are laid, fill in any gaps with sand or soil to keep the paver stones steady. Give it all a rinse with the garden hose to settle everything in place. Voilà! Your dog has a stylish, pee-proof potty space.
Optional Add-ons/Variations:
- Color Customization: Choose paver stones in different colors or shapes for a unique look that fits your style.
- Decorative Edging: Add decorative stones or bricks around the border for a polished finish—think of it as giving your dog their very own luxury restroom.
Pro Tip:
Before you start, think about your dog’s preferred potty habits. If they tend to dig, consider using heavier paver stones or securing them with a bit of adhesive to prevent shifting.
It saves you the hassle of redoing it all, and keeps it looking good for longer. Plus, who wants to keep redoing work? Time-saving and sanity-saving—sounds good to me.
3. Scented Dog Potty Plants
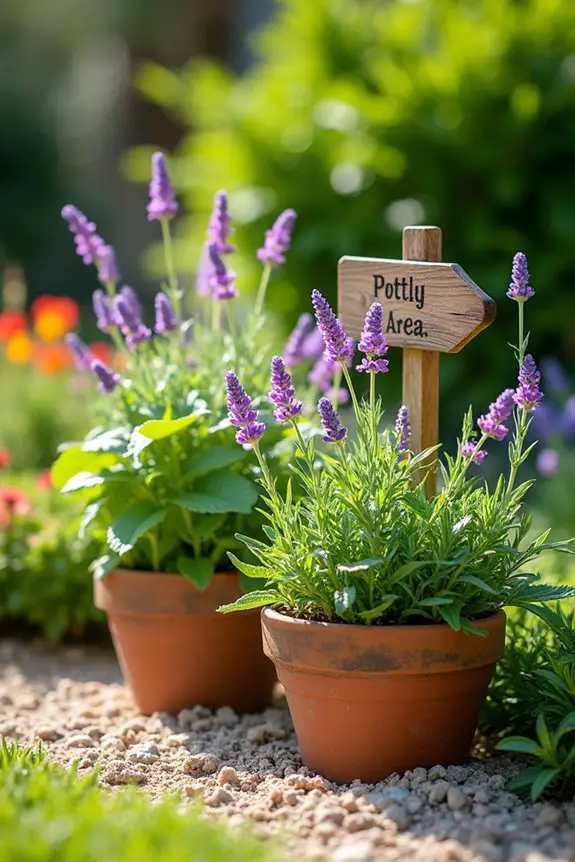
Creating a fragrant oasis in your dog’s potty area isn’t only a delightful way to keep your space smelling fresh but also promotes a calming atmosphere for your furry friend. Imagine your pup doing their business surrounded by pleasant scents—it’s like a spa day for dogs.
Plus, incorporating scented plants can enhance your garden’s aesthetics, making it visually appealing while serving a practical purpose. Who knew potty time could be so peaceful?
Materials Needed:
- Scented dog-friendly plants (like lavender, mint, or rosemary)
- Potting soil
- Planters or garden bed space
- Garden trowel
- Watering can or hose
- Mulch (optional, for moisture retention)
Step-by-Step Instructions:
1. Choose Your Plants: Select dog-safe plants that are known for their delightful scents. Lavender is a classic choice, while mint can be a revitalizing addition.
Rosemary not only smells great, but it’s also easy to maintain.
2. Pick the Perfect Spot: Look for a sunny location in your yard or a spot that’s easily accessible for your dog. They’ll appreciate being able to sniff out their “potty” area with a lovely fragrance greeting them.
3. Prepare Your Planters or Bed: If you’re using planters, make sure they’ve drainage holes. Fill them about halfway with potting soil. If you’re planting directly into the ground, loosen the soil to make it easier for roots to establish.
4. Plant Away: Dig small holes in the soil for your chosen plants. Take them out of their pots and place them into the holes, covering the roots with soil.
Pat it down gently to give your plants a cozy home—almost like tucking them into bed. Give them a little pep talk while you’re at it; plants love some encouragement.
5. Water Wisely: After planting, give your plants a good drink with a watering can or hose—but don’t drown them. Just enough to keep the soil moist will do.
Trust me, overzealous watering might lead to a soggy situation that neither you nor your dog wants to deal with.
6. Maintain Regular Care: Keep an eye on your plants as they grow. Trim any dead leaves and make sure they stay hydrated—much like you’d for a pet.
If you notice any pests, address them promptly. No one enjoys uninvited guests at their spa day, right?
7. Enjoy the Aroma: Sit back and appreciate your handiwork. The next time your pup has to go, they’ll get a revitalizing sensory experience that’s as delightful for you as it’s for them.
Optional Add-ons/Variations:
You can create a themed plant area by selecting several different plants that bloom at various times of the year, ensuring that there’s always something delightful to smell.
Or, try using colorful pots to add a pop of vibrancy to your dog potty area—just think of it as accessorizing your outdoor space.
Pro Tip:
Planting herbs like mint can deter pests not only around the potty area but throughout your yard as well.
Plus, if your dog decides to take a nibble (which they might), rest assured these plants are safe, and they might enjoy the tastiness of fresh minty goodness. It’s a win-win!
4. Recycled Rubber Mulch Ground Cover
If you’re looking for a way to create a comfortable, clean, and safe potty area for your pup without breaking the bank, recycled rubber mulch is your answer. It’s an eco-friendly solution that not only adds a splash of color to your yard but also provides excellent drainage and cushioning for your dog’s tender paws. Moreover, costume design software can enhance your creativity when customizing the look of the space.
Plus, it’s an investment that pays off by reducing yard maintenance and keeping your dog’s area tidy. Who wouldn’t want a low-maintenance oasis for their furry friend?
Materials Needed:
- Recycled rubber mulch (you can usually find this at garden centers or online)
- Garden rake
- Landscaping fabric (optional, but helps with weeds)
- Garden gloves
- Measuring tape
- Shovel or spade
- Edging material (like bricks or border timbers, optional)
Step-by-Step Instructions:
1. Determine Your Area: Use the measuring tape to find out how much space you want to cover with the mulch. You could create a designated potty zone or cover a larger dog-friendly area for play.
Visualize what would work best for you and your pup.
2. Prepare the Ground: Clear the area of any debris, grass, or weeds. If you head into battle with stubborn grass, a shovel or spade will be your trusty sidekick.
If weeds keep crashing the party, consider laying down landscaping fabric to keep them at bay.
3. Lay Down the Fabric: If you chose to use landscaping fabric, roll it out over the cleared area. This helps prevent weeds from sprouting through your lovely mulch while allowing water to drain away.
Cut the fabric to fit your area snugly—think of it as the mulch’s cozy blanket.
4. Spread the Rubber Mulch: Grab your recycled rubber mulch and start pouring. Use your rake to spread it evenly across the area, aiming for a depth of about 2-3 inches.
You want your pup to enjoy a soft surface while giving their paws a break as they “do their business.” It’s almost like their own little luxurious carpet.
5. Create Edging (Optional): If you want a neat, polished look, consider adding some edging material around the perimeter—think bricks or timber.
It helps keep your mulch contained and adds a charming touch to the entire area.
6. Admire Your Work: Step back, take a deep breath, and appreciate the transformation. The vibrant color of the rubber mulch not only looks good but also signifies a welcoming spot for your dog, making potty time feel a little less tedious and a lot more fun.
Optional Add-ons/Variations:
- Color Selection: You can find rubber mulch in various colors like red, black, and green. Choose a color that complements your yard or even matches your dog’s personality!
- Custom Edging: Get creative with your edging. Use old stones, wood planks, or even bricks in fun patterns.
It can add a unique flair to your puppy’s potty area while showcasing your personal style.
Pro Tip:
If you want to save some cash while going green, check local recycling centers or eco-friendly landscaping supply stores for deals on recycled rubber mulch.
Just be sure to ask about any maintenance tips for keeping things looking spick-and-span. Think of it this way—it’s an investment in less time spent picking up after your dog and more time enjoying cuddles on the couch.
5. Artificial Turf Options

If you’re dreaming of a pristine, low-maintenance potty area for your beloved dog, but don’t want to deal with mud, grass stains, and endless cleanup, then artificial turf might just be the ultimate solution.
It’s a fantastic way to create a dog-friendly environment that looks good year-round without the fuss of real grass. Think of the time you’ll save on yard work and the money you won’t spend on lawn care products. Plus, your pup gets a soft spot to do their business, so it’s a win-win all around.
Materials Needed:
- Artificial turf (can be found at home improvement stores or online)
- Utility knife or turf scissors
- Yard rake
- Landscape fabric (optional)
- Adhesive or turf nails
- Measuring tape
- Shovel (for base preparation, if needed)
- Edging material (like bricks or wood, optional)
Step-by-Step Instructions:
- Select Your Location: Choose an area that offers plenty of shade, good drainage, and is away from foot traffic unless you want your yard to double as a doggy bathroom. Measure the area with your measuring tape to determine how much turf you’ll need.
- Prepare the Ground: Clear the selected area, removing rocks, debris, and any existing grass or plants. If the soil is uneven, use a shovel to level it out, giving your turf a smooth place to lay. Think of it as giving your pup a comfy bed to lie on.
- Consider Landscaping Fabric (Optional): If you’re feeling proactive about preventing weeds from crashing your turf party, lay down some landscaping fabric. Cut it to size so it fits snugly in your designated area—this is like setting up a barrier for unwanted plant guests.
- Lay Down the Turf: Roll out the artificial turf over the area, cutting it with your utility knife or turf scissors to fit around any corners or edges. Make sure it lays flat without any bumps—nobody likes stumbling over a turf mountain, not even your dog.
- Secure and Attach: Use adhesive or turf nails to secure your turf in place, especially around the edges, so it doesn’t wiggle or slide during your pup’s potty sessions. This will keep your turf in tip-top shape without having it escape from its designated area.
- Finishing Touches: If you want to give your turf an extra polished look, add some edging material, like bricks or wood, around the perimeter. It’s like framing a beautiful picture, making the area look neat and tidy.
- Enjoy Your Turf: Step back and admire your handiwork. You’ve created a stylish, practical potty zone that not only makes your yard look better but also enhances your dog’s comfort—now that’s something to wag your tail about.
Optional Add-ons/Variations:
– Consider using artificial turf in different colors or patterns to create a unique look that complements your home and landscape.
Want a pop of personality? How about mixing green turf with some fun colored tiles?
– For some added flair, you could create a small, decorated path leading to the potty area using decorative stones or pavers—this way, every time your dog heads over, it feels like their own special route.
Pro Tip:
Make sure to choose dog-friendly artificial turf that’s designed to be durable against chewing and scratching.
Plus, a quick rinse with a hose every now and then will keep things fresh and clean. It’s easy to maintain—just like the perfect online shop for all your doggy needs. Who doesn’t love a good deal where both you and your pup win?
6. Dog Potty Training Station
Creating a dedicated potty training station for your furry friend is a game changer for dog owners. Not only does it provide a consistent spot for your pup to do their business, but it also helps minimize accidents around your home. A well-designed potty station not only keeps your yard looking tidy but also makes training easier and less stressful for both you and your pet.
Let’s explore how to craft a simple yet effective dog potty training station that you and your dog will love.
Materials Needed:
- Wooden pallets or a small, shallow wooden frame
- Artificial turf (cut to fit the frame)
- Landscape fabric (optional)
- Dog potty training pads (optional)
- Rake (for leveling)
- Utility knife
- Measuring tape
- Bucket (for early morning potty trips)
Step-by-Step Instructions:
- Choose the Location: Scout out a spot in your yard that’s easily accessible for your dog but away from high-traffic areas. You want this space to feel private for your pet. Measure the area to determine how large your station needs to be.
- Prepare Your Base: If you’re using a wooden pallet, you’re already starting with a sturdy base. If you opted for a wooden frame, use a rake to level the ground inside the frame. You want a clean, tidy space that makes your dog feel comfy, not like they’re walking on a rocky mountain.
- Lay Down Landscape Fabric (Optional): If you’re keen on keeping weeds at bay, place some landscape fabric inside the station. Cut it to size, ensuring edges don’t poke through. It’s like laying down a welcome mat for all potty visits.
- Add the Turf: Roll out your artificial turf and cut it to fit perfectly inside your frame or on top of the pallet. Make sure it lies flat and smooth—no bumps or lumps for your canine buddy to trip over. This gives them a solid footing every time they visit their special potty area.
- Secure It All Together: Fasten the turf in place if necessary. Using a little adhesive around the edges will keep the turf from slipping and sliding with each excited wag of a tail. You want all elements of this station working together seamlessly.
- Optional Potty Pads: If you’re in the midst of training, consider layering some dog potty training pads on top of the turf. This can be especially handy for younger puppies still mastering their timing. Just make sure they’re in place to catch any surprise puddles.
- Pat Yourself on the Back: Give the station one last look, making sure everything is tight and tidy. Allow your dog to explore their new potty paradise and watch how happy they’re to have a designated spot.
Training is going to feel a whole lot less intimidating now.
Optional Add-ons/Variations:
- Paint or Stain the Wood: For an extra touch, give your wooden frame a bright coat of paint or stain it a rich brown. This not only allows for personalization based on your home’s decor but also adds a fun pop of color to your yard.
- Decorate the Area: Add some flowers, grass, or signs near the potty station that tell your dog it’s time to do their business. Have fun with it. It might also make it easier for guests to know what that charming little section is for.
Pro Tip:
Consider cleaning the turf regularly. Simple water and a bit of mild soap can help keep odors at bay. And remember, if you’re struggling with potty training, be patient. Some pups take a little longer to learn where their bathroom is. Each dog has their own personality—it’s all part of the adventure of dog ownership.
Creating a dog potty training station can be a fun and rewarding project that saves you from the mess and gives your pup a clear spot for their bathroom needs. So, roll up your sleeves and get started on crafting this essential doggie hangout space. Your pup will thank you for it.
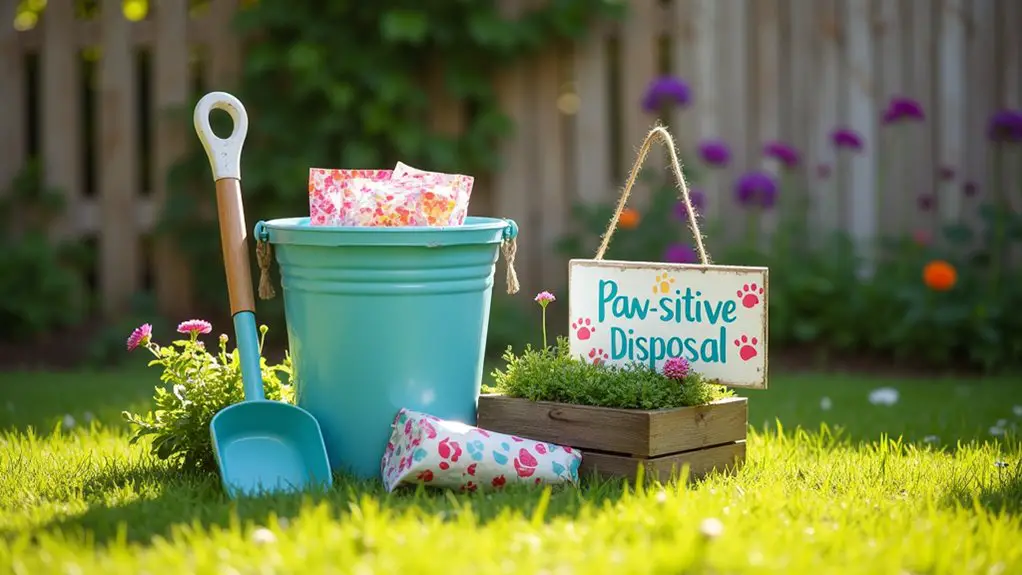
7. Dog Waste Disposal Solutions
So you’ve got a lovely doggy potty area all set up, but what about keeping it clean and tidy? Enter the DIY Dog Waste Disposal Solution. This project isn’t only helpful for maintaining a fresh environment for your furry friend, but it also saves you money on expensive waste disposal systems. Plus, a neat area means you can proudly invite friends over without worrying about the sight—and smell—of poochy leftovers.
Let’s plunge into crafting a simple waste disposal solution that’ll make your life a whole lot easier.
Materials Needed:
- Small trash can or bucket with a lid (preferably one that’s odor-resistant)
- Dog waste bags (biodegradable if possible)
- A garden shovel or scoop
- Optional: A decorative planter or container to disguise the trash can
- Optional: Labels for organization
Step-by-Step Instructions:
- Select Your Trash Can: Choose a size that suits your dog’s potty area. A small trash can works well for a couple of pooches, but if you have a larger fur family, a bigger bucket will do the trick.
- Add Waste Bags: Line the trash can with a roll of dog waste bags. This way, every time you’re ready to clean up, you have a bag right at your fingertips. It’s like having your own waste disposal superhero at the ready.
- Designate a Tool: Grab your garden shovel or scoop and place it near your waste container. This is going to be your trusty sidekick for those clean-up missions. Make sure it’s easy to reach—or else you might find yourself doing a bit of an awkward hop-and-scoop dance. Trust me, I’ve been there.
- Choose a Disguise (Optional): If you want to dress up your waste disposal area, consider putting your trash can or bucket inside a decorative planter. Just make sure it has enough ventilation and won’t attract critters. Who says trash cans can’t have a little flair?
- Label It (Optional): If you’re feeling creative, take a label maker or some paint and label your waste can something fun like “Doggy Duty Station” or “Paw-sitive Disposal.” It adds character and makes clean-up feel a bit more special, don’t you think?
- Establish a Routine: Now that you have your disposal solution ready, create a clean-up schedule. Larry the Labrador and Bella the Beagle won’t mind. Setting a routine helps you stay on top of their messes, making your yard—and your nose—happier.
Optional Add-ons/Variations:
- Consider using colored trash bags to match your garden theme. There’s nothing wrong with adding a splash of fun color; it might even brighten up your dog duty area.
- If you’re feeling crafty, you could stencil cute paw prints or doggy quotes on the outside of your disposal container for added charm.
Pro Tip:
For an odor-busting touch, toss in a few baking soda sachets or use odor-neutralizing trash can liners. This little trick keeps the smells at bay, making clean-ups so much more pleasant. Your future self will thank you every time they go outside.
Now you’re equipped with a simple but effective DIY dog waste disposal solution that keeps your potty area spick and span. Happy cleaning!
Extra Tips & Ideas
While you might think designing a DIY dog potty area is just about picking a spot and throwing down some grass, there’s actually a lot more you can do to make it functional and fun for both you and your pup.
How about using decorative stones around the potty area? They not only look great but also prevent mud from being tracked inside.
Ever thought about adding a little seating bench? Trust me, it’s heavenly for those long stakeout moments. You can even plant some dog-safe herbs nearby. Just think of it as gourmet grass for your pup.
Also, don’t forget to use odor-control sprays—your nose will thank you. And remember, using a shovel for clean-up saves your back, maybe even your sanity too.
Frequently Asked Questions
What Materials Are Best for a DIY Dog Potty Area?
For a DIY dog potty area, you’ll want to use materials like artificial turf, gravel, or concrete. Verify good drainage and consider a border to contain the area, making cleanup and maintenance easier for you.
How Can I Maintain Odor Control in the Potty Area?
To maintain odor control, you’ll want to regularly clean the area, use pet-safe deodorizing sprays, and guarantee proper drainage. Adding natural absorbents like cedar chips or baking soda can also help minimize unpleasant smells.
What Size Should the Potty Area Be for My Dog?
The potty area should be at least twice the length of your dog, ensuring they have enough space to move comfortably. For larger breeds, consider expanding it further to accommodate their size and needs.
Can I Incorporate Decorative Elements in the Potty Area?
Yes, you can absolutely incorporate decorative elements in the potty area. Consider using potted plants, stylish borders, or colorful signage to enhance its aesthetic while keeping it functional and comfortable for your dog.
How Often Should I Clean the Dog Potty Area?
Cleaning the dog potty area’s like spring cleaning for your pet—do it at least once a week. Daily checks for waste will keep odors down and guarantee your furry friend enjoys a fresh spot.
Conclusion
Creating a DIY dog potty area can turn a chore into a charming corner of your yard. Remember, “A place for everything, and everything in its place.” As you design your space, think about how your pup can enjoy it while keeping cleanup simple for you. With a bit of creativity and a sprinkle of patience, you’ll not only train your furry friend but also enhance your yard’s look. So go ahead, get your hands dirty and embrace this fun project.

