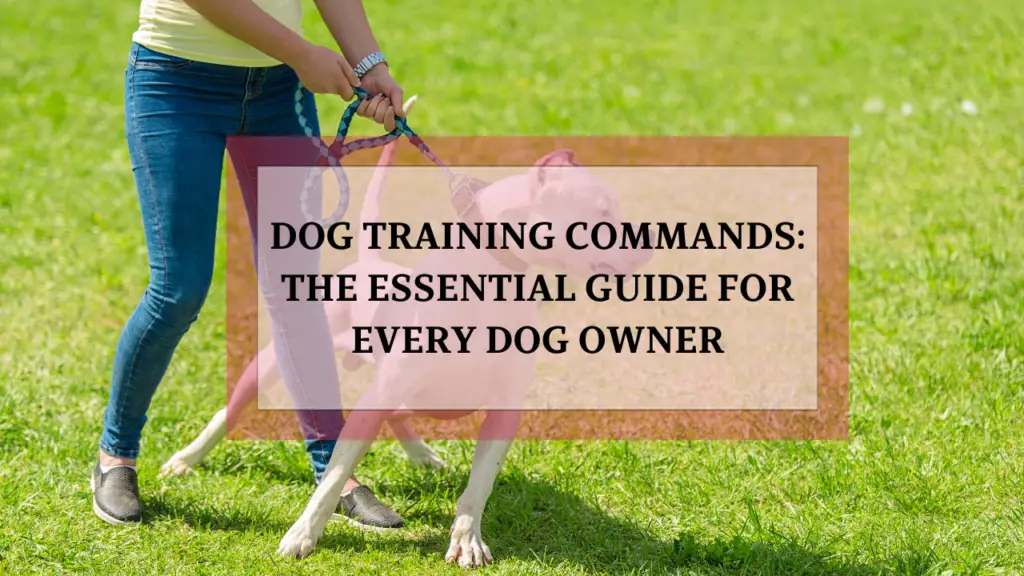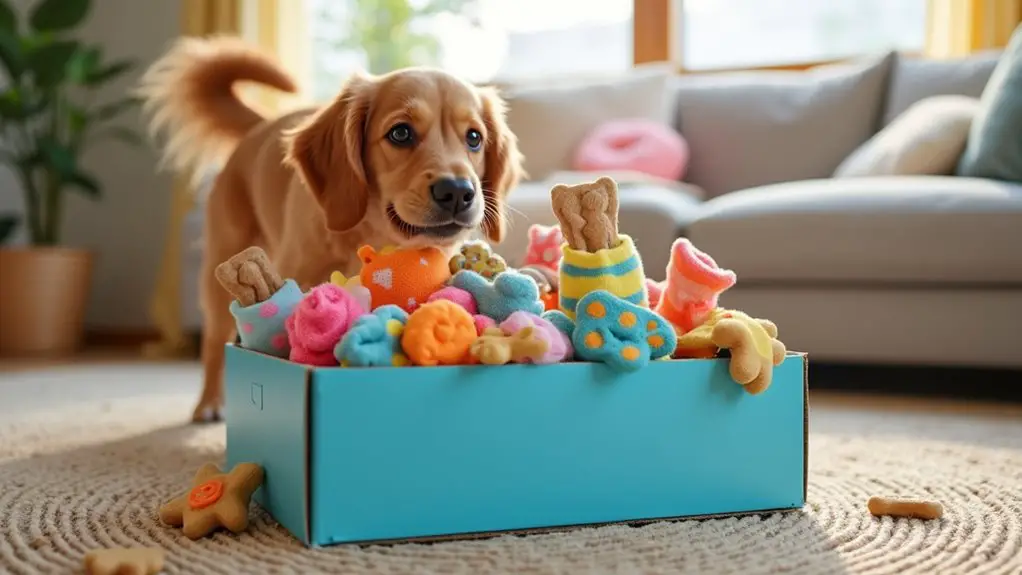
Have you ever watched your dog stare blankly at a toy, looking like they’re waiting for an invitation to get involved? It’s like they need a little spark to ignite their curiosity. Well, let’s light that fire with some DIY dog puzzles. From a treat dispenser that keeps them guessing to a nose work challenge that’ll make their snouts twitch with joy, you might just find that your furry friend turns into a little Einstein. Ready to transform playtime?
Creative Puzzle Concepts
When you think about keeping your pup entertained, have you ever considered turning ordinary household items into stimulating puzzles? Seriously, it’s a fun way to keep your furry friend engaged.
One easy idea is using an empty cardboard box. Just toss in some crumpled paper and a few of their favorite toys; watch them dig through the chaos like a little archaeologist.
Or, how about a muffin tin filled with treats? Cover each cup with a tennis ball, and let your pup snuffle out their rewards.
Before you know it, you’ll have your own DIY dog puzzles! You’ll feel like a dog-parenting genius—and trust me, your pup will think you’re the best for keeping boredom at bay.
Our Collection
Now that you’ve got some fun concepts simmering in your brain, let’s check out what we’ve gathered in our collection.
From the squeaky toy hide-and-seek to the tug-of-war puzzle challenge, there’s something here for every pup out there.
1. Squeaky Toy Hide-And-Seek
Are you ready to engage your dog’s mind and keep them entertained? This DIY Squeaky Toy Hide-and-Seek project is a fun and budget-friendly way to create interactive playtime for your furry friend.
With just a few materials, you can transform simple toys into a thrilling game that stimulates your pup’s natural instincts and keeps them happily occupied.
Materials Needed:
- A few squeaky toys (the more, the merrier)
- A shallow box or plastic container (ensure it’s dog-safe)
- Soft fabric (like fleece or an old t-shirt)
- Scissors
- Optional: Treats (for added motivation)
Step-by-Step Instructions:
1. Gather Your Toys: Grab those squeaky toys your dog loves, plus any older ones that are still in good shape. This is basically an excuse to dig into your toy stash and see what treasures you find!
2. Prepare the Box: Take your shallow box or plastic container. Make sure it’s clean and free of any sharp edges. This will be the “hiding spot” for your toys.
3. Add the Fabric: Take your soft fabric and cut it into smaller pieces. These pieces will help cushion the toys and give your dog some extra fun when they’re nosing around.
You can even stuff the fabric bits into the box with the toys for a little surprise.
4. Hide the Toys: Place the squeaky toys in the box, covering them with the fabric. You can hide them in different layers or just toss them in there — whatever feels right!
5. Introduce the Game: Now it’s time for the fun part. Show your dog the box and let them sniff around. You might need to give them a little encouragement.
Remember, patience is key here. Once they catch on, watch their excitement soar!
6. Reward Good Behavior: If your dog successfully finds a squeaky toy, give them a treat as a reward. This reinforces the idea that seeking out toys equals good things — like yummy snacks and praise!
7. Repeat & Switch It Up: You can play this game repeatedly, changing the toys or the way you hide them to keep things fresh.
You can even create themed boxes for different occasions.
Optional Add-ons/Variations:
- Color Theme: Use fabric scraps in a color scheme that matches your home decor. Who knew DIY could also double as home improvement?
- Seasonal Surprises: Change out the toys for seasonal ones — pumpkins in fall, snowflakes in winter — keeping your dog’s playtime festive and fun!
Pro Tip:
Always supervise your dog while they’re playing with the toys, especially if they’re determined chewers.
And to save some cash, check out local thrift stores for squeaky toys instead of buying brand new ones. Who doesn’t love a good find?
Plus, your pup will adore the quirky additions! Don’t forget to pamper them with luxury dog food for yorkies after playtime for a special treat!
2. Interactive Treat Dispenser
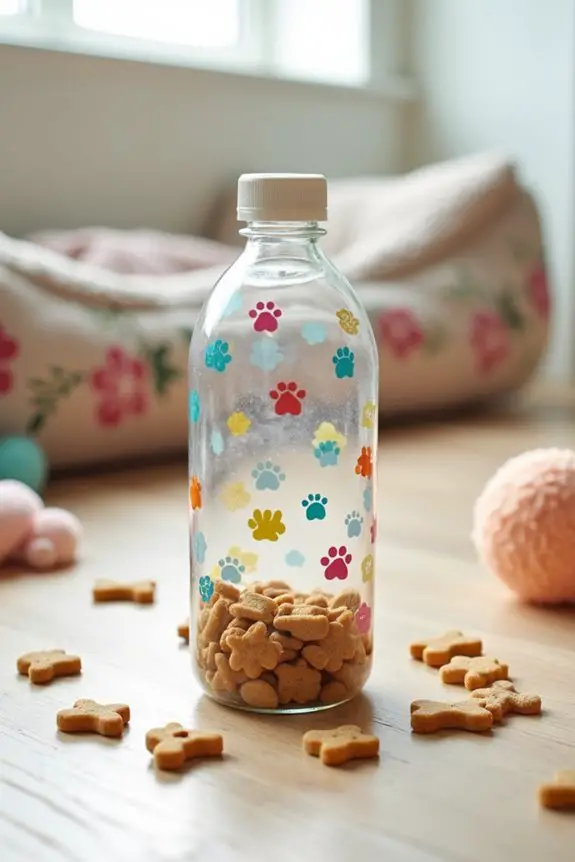
Want to keep your dog engaged and mentally stimulated while treating them to a tasty snack? This DIY Interactive Treat Dispenser isn’t only a fantastic way to make mealtime fun, but it also helps to slow down fast eaters and provides your pup with a challenge that promotes their natural problem-solving instincts. Additionally, using a dog food scale can help ensure you’re providing the right portion sizes when you fill the dispenser. Investing in luxury dog stairs beds can make it easier for your pup to reach their favorite elevated spots after their playtime. Having the right dog food processor appliance can also help you create customized meals that complement the treats your dog loves.
Materials Needed:
- A clean, empty plastic bottle
- A pair of scissors
- Dog treats or kibble (small enough to drop through the holes)
- Optional: Tape (for securing any loose parts)
- Optional: Decorative materials (stickers or markers to personalize your dispenser)
Step-by-Step Instructions:
- Prepare the Bottle: Start with your empty plastic bottle. Make sure it’s washed out and free from residues because we want to keep it safe for our four-legged friends.
- Cut Holes: Use your scissors to carefully cut small holes in the sides of the bottle. These should be just big enough for the treats to fall out but not too large that your pup can easily reach inside. Think of it as a little puzzle.
- Fill with Treats: Once the holes are ready, fill the bottle with dog treats or kibble. The more treats, the more fun, right? Just don’t overstuff it; you want to guarantee they can actually dispense out when your pup gives it a nudge.
- Seal It Up: If you’re worried about your dog unscrewing the cap, you can use tape to keep it secure. This is especially useful if you have a persistent pooch who’s determined to beat the system.
- Introduce It to Your Dog: Show your dog the interactive treat dispenser. You might want to shake it a little to get them excited. Let them sniff it, and encourage them to roll it around to get those treats to come out.
- Supervise: Watch your dog engage with their new toy. This is where the fun begins, but you’ll want to keep an eye on them to confirm they’re playing safely. If they seem to be getting too aggressive, it might be time to take a break.
- Repeat & Refill: Once the treats are all dispensed, just refill, and it’s ready for more playtime. You can adjust the difficulty by creating more or fewer holes or changing up the treats for different rewards.
Optional Add-ons/Variations:
- Color Creativity: Get crafty and decorate the outside of the bottle with stickers or markers. Not only will this add a personal touch, but it’ll also make it look more fun and colorful. Your dog might just love it even more!
- Dual-Purpose Fun: Make it a two-in-one interactive toy by placing a smaller bottle inside a larger one, with treats inside the smaller one. This way, your pup will have to figure out how to get to the inner bottle first. Now that’s what I call brain-workout!
Pro Tip:
Always make sure to remove any loose parts after playtime. Safety first! Additionally, if you find that your dog gets bored of the same treats, mix it up by alternating between their favorite kibble and some special treats now and then. Because who doesn’t like a surprise snack?
With this DIY Interactive Treat Dispenser, playtime becomes a delightful challenge that keeps your dog mentally sharp and physically active. So, let’s get those tails wagging!
3. Nose Work Challenge Box
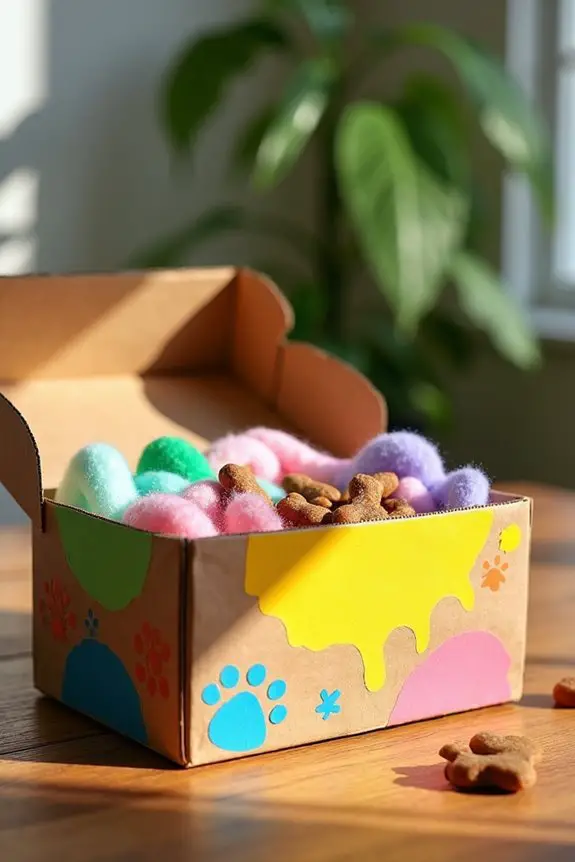
Looking to amp up your pup’s playtime while tapping into their natural scent-driven instincts? The DIY Nose Work Challenge Box is a fantastic and engaging project that turns treat hunting into an exciting adventure right at home. It not only provides mental stimulation for your furry friend but also saves you money on expensive dog toys. Plus, it’s a fun way to keep your dog happy and healthy by encouraging them to use their powerful sense of smell. Additionally, if your dog has a sensitive stomach, you might want to consider selecting premium dog food sensitive stomach to complement their playtime with a suitable diet.
Materials Needed:
- A small cardboard box (shoe box works great!)
- A pair of scissors (adult supervision if needed)
- Non-toxic fabric or paper (cut into strips or small pieces)
- Dog treats (anything your pup loves)
- Optional: Tape or glue (for securing fabric/paper)
- Optional: Decorative items (burlap, paint, or stickers to personalize)
Step-by-Step Instructions:
- Prepare the Box: Start by taking your small cardboard box; make sure it’s clean and intact. You don’t want any stray smells lingering from last season’s shoes.
- Cut Holes: Using your scissors, cut small holes in the top of the box, just big enough for your dog’s snout to fit through. Be careful not to cut them too large; we want it to be a bit of a challenge.
- Create the Hidden Layers: Take your non-toxic fabric or paper and cut out various shapes or strips. This colorful material will serve as hiding spots for the treats. If you’re feeling crafty, you can even layer them, making a mini maze inside the box.
- Hide the Treats: Place a few treats among the fabric/paper pieces inside the box. Tuck them in well so they’re not immediately visible. It’s like a little treasure hunt waiting to happen!
- Seal It Up: Close the box, and if necessary, use tape or glue to secure the top to prevent any sneaky pups from opening it up too early. But don’t be surprised if your dog wants to get in there as soon as you bring it out.
- Introduce the Challenge: Show your dog the Nose Work Challenge Box and give them a sniff. Encourage them to use their nose to find the treats. You might be amazed at how focused they become.
- Supervise & Adjust: Watch your dog as they dig through their new puzzle. Keep an eye on them to verify they’re engaging positively. If they get too frustrated, you can help them out by hiding the treats more visibly next time.
Optional Add-ons/Variations:
- Decorative Touches: Want to jazz it up? Paint the box in colors that match your home, or use fun stickers to make it visually appealing. A little personalization goes a long way in creating a special toy for your pup.
- Layered Difficulty: If your dog becomes a pro at finding treats, consider adding more layers or different textures inside the box to increase the challenge. Incorporating different scents (like a tiny dab of peanut butter) could also make it more exciting.
Pro Tip:
Make sure to supervise your pup during this activity, especially with cardboard materials. We love our dogs, but cardboard isn’t the best snack option. Additionally, if your dog has a tendency to shred things, you might want to replace the cardboard with a sturdier box or reinforce it with some tape for added durability.
4. Puzzle Ball Feeder Game
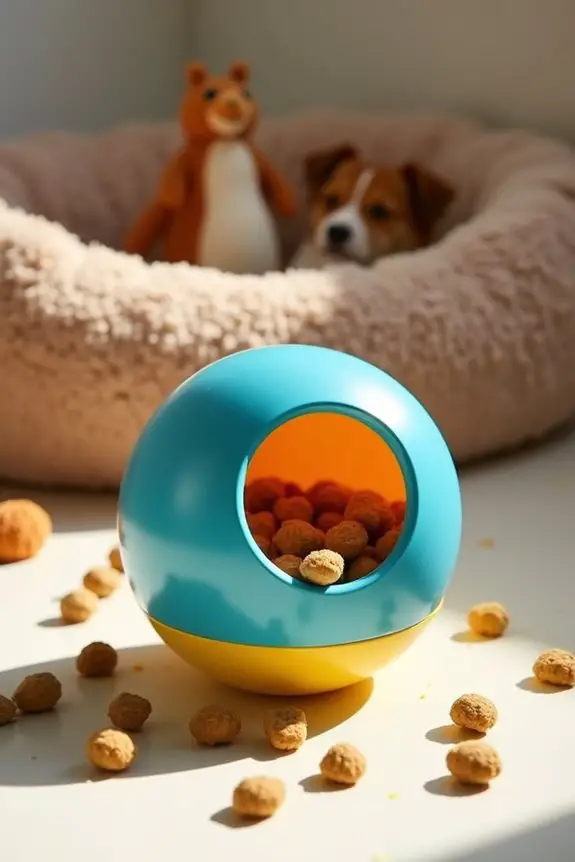
Looking for a way to make mealtime a little more exciting for your pup? The Puzzle Ball Feeder Game is a brilliant DIY project that not only challenges your dog’s mind but also keeps them active during meal times. It transforms the mundane task of eating into a fun game, all while saving you some cash compared to store-bought puzzle feeders.
Let’s turn snack time into playtime!
Materials Needed:
- A sturdy plastic ball (like a tennis ball or a dog toy ball)
- A utility knife or scissors (adults only, please!)
- Dog kibble or small treats
- Sandpaper (optional, for smoothing edges)
- Optional: Markers or stickers for decoration
Step-by-Step Instructions:
1. Choose Your Ball: Pick a plastic ball that your dog can easily carry around. Make sure it has a hole or is easy to cut open.
2. Create the Opening: Using your utility knife or scissors, carefully cut a hole in the ball. It should be big enough for the dog food or treats to tumble out, but not so big that they can just spill everything in one go.
Make sure to supervise this step closely—it’s a tough job for unsteady hands.
3. Smooth the Edges: If you used a knife, this is where the sandpaper comes in handy. Gently rub around the cut edges to avoid any sharp spots that could hurt your pup’s mouth. Safety first.
4. Fill It Up: Now comes the fun part. Stuff the ball with your dog’s kibble or some of their favorite treats. The more you pack in, the more incentive there’s for them to roll it around!
5. Seal It Up: Close the ball up and test it to see if it rolls smoothly. If it doesn’t roll well, adjust the amount of kibble inside until it does.
6. Let the Games Begin: Present this puzzling masterpiece to your pooch and watch them try to figure it out. It’s amazing how quickly they’ll get the hang of it. You might even catch a little puppy dance as they roll it around.
7. Supervise Their Play: Keep an eye on your dog as they play with their new puzzle feeder. If they seem overly frustrated or are getting too aggressive with it, you can always help them out by giving hints or adjusting the difficulty.
Optional Add-ons/Variations:
- Decorative Flair: Want to add a personal touch? Use washable markers or stickers to decorate the ball. This step can really reflect your dog’s personality – who doesn’t love a little pizzazz?
- Multiple Hole Game: For a more complex challenge, you can cut multiple holes in the ball. Just be aware that this could lead to a quicker meal, so make sure your pup has enough time to play.
Pro Tip:
Always check the durability of the ball. Confirm it’s not made from easily chewed materials. If you notice any signs of wear after a few play sessions, it might be time to retire it for safety. Better safe than sorry, right?
With this Puzzle Ball Feeder Game, you’ll not only keep your furry friend entertained but also provide a stimulating outlet for their energy – and that’s a win-win. Happy crafting, and may your pup’s playtime be filled with wagging tails and happy barks!
5. Tug-of-War Puzzle Challenge
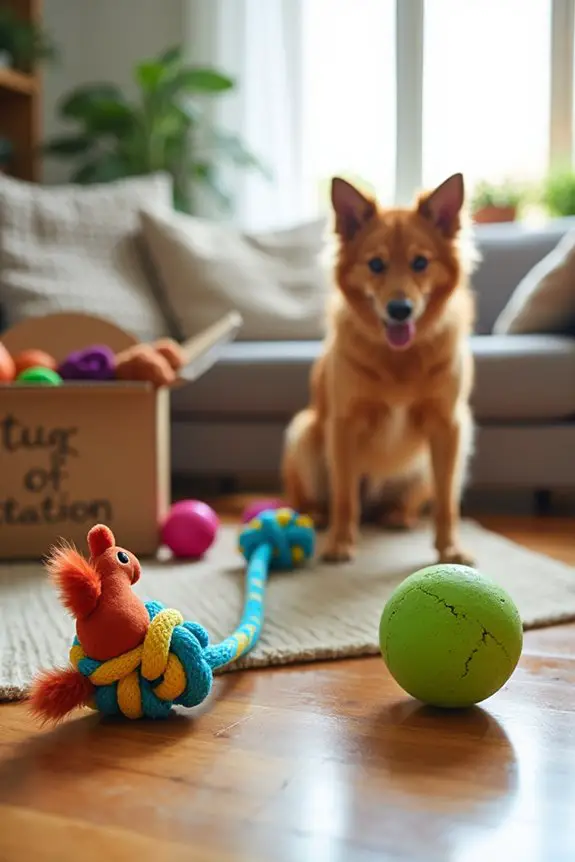
If your dog loves a good game of tug-of-war, why not turn that playful energy into a fun DIY puzzle?
The Tug-of-War Puzzle Challenge combines the thrill of tugging with brain-teasing fun, making it the perfect activity for energetic pups. Plus, it’s a great way to save money while keeping your dog entertained and mentally stimulated. Can you say, “win-win”?
Materials Needed:
- A sturdy rope (like a cotton or jute rope)
- A few small, durable toys or old t-shirts
- Scissors
- Optional: A sturdy cardboard box or container (for storage and organization)
- Optional: A non-toxic fabric dye (if you want to add some color)
Step-by-Step Instructions:
- Cut the Rope: Take your sturdy rope and cut it into lengths that are comfortable for your dog to handle. Think about two to three feet for a good tugging length, but adjust based on your dog’s size and strength.
- Attach the Toys: Tie small toys or strips of old t-shirts to each end of the rope. This way, your dog will have something to grip onto while playing. Make sure they’re secure so they don’t come off during those intense tug-of-war moments.
- Create a Tug Station: If you’re using a cardboard box or container, cut a hole in the side just large enough for the rope to slide through. This is where your dog can grab on, and you can join the fun. It adds an extra challenge, encouraging them to pull the toys through the opening.
- Test It Out: Give it a quick shake. Tug gently on the rope to show your dog how it works. Watch them jump in excitement as they catch on to the game. Playtime will soon become super interactive.
- Customize Your Game: If you want to spice things up, create bridges or loops with the rope in a secure area to make it a more complex puzzle. Maybe even introduce a few obstacles (like pillows or boxes) they’ve to maneuver around while tugging.
- Supervise Their Fun: As always, keep an eye on the action. Tug-of-war can get rambunctious. Make sure everyone is playing nicely and that your dog doesn’t try to chew on the rope too aggressively.
Optional Add-ons/Variations:
- Colorful Fun: If you want to add a pop of color, use non-toxic fabric dye to brighten the rope before tying on the toys. It’s an easy way to make the game more visually appealing, and you can even match it to your dog’s personality.
- Tug-of-War Combo: For even more variety, you can attach different types of toys to the same rope. Maybe one squeaky toy and one rope pull: you never know what might tempt them more on that tugging journey.
Pro Tip:
Always check the rope for wear and tear regularly. If you see any fraying, it’s time to replace it. Safety first, fun next. A worn rope can be a choking hazard. Plus, a fresh rope will keep the tugging experience engaging and safe.
With this Tug-of-War Puzzle Challenge, your dog won’t just get to show off their strength, but they’ll also be exercising their brains.
6. Rotating Colorful Block Puzzle
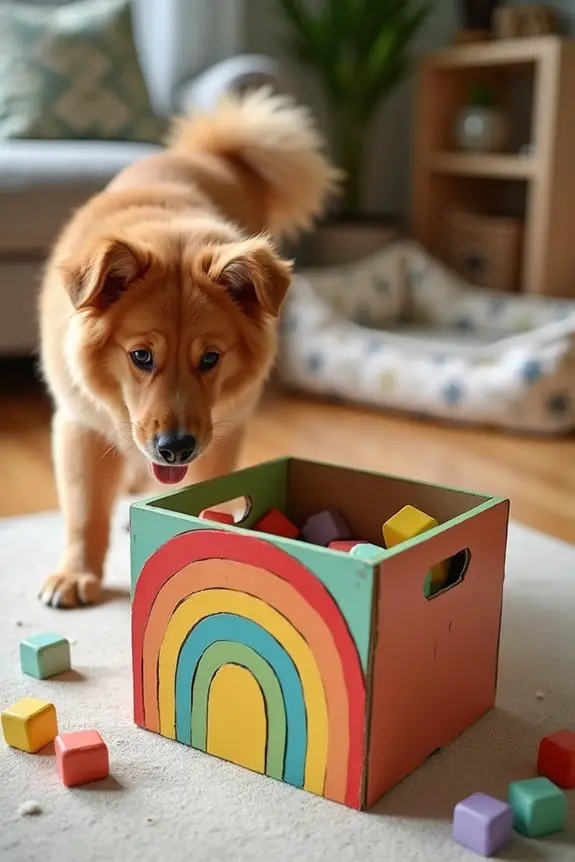
Looking for a creative way to keep your dog entertained while also engaging their brain? The Rotating Colorful Block Puzzle is a fantastic DIY project that serves both purposes. Not only will it challenge your pup mentally, but it’s a fun way to recycle materials while sprucing up your home decor. Plus, who doesn’t love a splash of color in their living space?
Materials Needed:
- A sturdy cardboard box (like a shoe box)
- Colorful craft paper or non-toxic paint (for decoration)
- Small wooden blocks or foam blocks (make sure they fit through the box openings)
- Scissors
- Ruler
- Non-toxic glue or double-sided tape
- Optional: Decorative stickers or washi tape for added flair
Step-by-Step Instructions:
- Prepare the Box: Take the cardboard box and remove the lid. If you’re feeling brave, cut out one side to create an opening that your dog can easily reach into. Just make sure it’s not too big—after all, we don’t want them diving headfirst into a treasure trove.
- Create Access Holes: Using your scissors, cut several small holes on the top or sides of the box. These should be big enough for your wooden or foam blocks to slide in and out, but not so big that your dog could easily pull them out without a little effort.
- Decorate the Box: Grab your colorful craft paper or paint and jazz up that cardboard. Whether you go with a whimsical rainbow or a simple chic pattern, this step makes not just the puzzle more appealing to your dog, but also more appealing for you to look at. Use glue or tape to secure the colorful paper around the box.
- Prepare the Blocks: If your blocks need a little sprucing up too, slap some paint on them or wrap them in decorative washi tape for extra colors. You can even write numbers or symbols on them to add an educational twist.
- Load the Puzzle: Now that your blocks are colorful and your box is beautiful, it’s time to load up the puzzle. Place the blocks inside the box, making it a bit challenging for your dog to get to them through those small openings.
- Introduce the Puzzle to Your Dog: Show your pup what to do—maybe use a block to tease them a bit, coax them into the puzzle, and watch as they figure out how to rotate and slide the blocks to retrieve them. It might take a little patience, but before you know it, they’ll be working that noggin.
- Monitor and Adjust: Keep an eye on your dog during playtime. Make sure they’re having fun without destroying the puzzle. If they seem to get bored, switch up the blocks or add more for a fresh challenge!
Optional Add-ons/Variations:
- Painted Blocks: Choose a different color palette or pattern for each block to create a vibrant rainbow of options. This not only looks great but can help your dog learn colors too.
- Themed Decor: Change the design of the box throughout the year. Seasonal themes can keep things interesting. Imagine a Halloween block puzzle or a spring floral one!
Pro Tip:
When it comes to durability, consider reinforcing the box with some extra layers of cardboard on the inside, or using a plastic container instead. Dogs can be relentless, and you want this puzzle to stand the test of time. Also, always supervise during play; we don’t want any accidental cardboard feasts happening.
7. Matching Sock Finder Puzzle
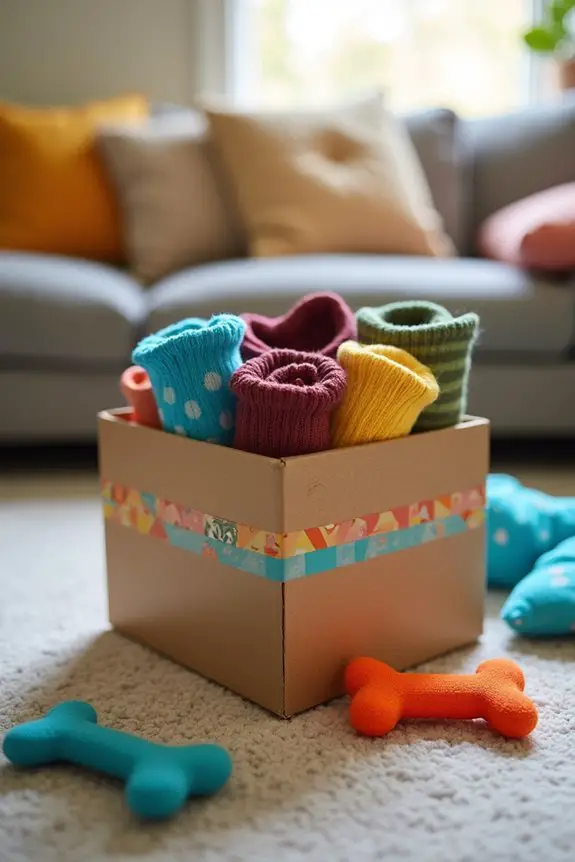
Have you ever found yourself frustrated by your dog’s obsession with stealing, hiding, and sometimes, well, munching on your socks? This Matching Sock Finder Puzzle is a playful way to engage your dog’s mind while also recycling those mismatched, lonely socks that usually end up at the bottom of your drawer. It’s a win-win! Plus, creating a fun activity out of everyday items helps save money and adds a touch of whimsy to your pet’s playtime.
Materials Needed:
- 1 sturdy cardboard box or plastic container (something that won’t fall apart)
- 4-6 mismatched socks (clean, of course)
- Scissors
- Non-toxic glue (optional)
- A treat or toy to motivate your dog
Step-by-Step Instructions:
- Prepare the Container: Take your box or container and make certain it’s clean and sturdy. If you’re using a cardboard box, you might want to reinforce it with some extra tape to keep it secure during play.
- Alter the Socks: Take your mismatched socks and, if they’re too long, cut them down to a more manageable size. You want them to have enough space to stuff inside the container, but not so much that they won’t give your dog a challenge when finding them.
- Create a Sock Nest: Stuff the socks inside the box or container, layering them in a playful nest-like arrangement. Don’t worry about making it perfect—dogs are great at sniffing out treasure even in a messy pile, right?
- Hide A Treat: For a little added motivation, place a dog treat or toy underneath the socks or buried within them. This gives your furry friend something to really work for, turning the sock hunt into a treasure dig.
- Show Your Dog: Introduce your pup to the newly crafted Matching Sock Finder Puzzle. Use your excited tone (you know the one) to coax them into sniffing and exploring. It’s like that moment when you find the last slice of pizza in the fridge—you want them to feel that thrill.
- Let Them Play: Stand back and watch as your dog uses their nose and paws to dig through and match your hidden socks! They’ll love the challenge, and you’ll get to laugh watching their concentrated faces. Just a word of caution: if they seem to be more interested in eating the socks than finding the treats, it might be time to rein in the fun.
- Mix It Up: Once they’ve mastered the sock hunt, change it up! Try different containers, rearrange the socks, or even replace them with small toys or balls to keep things fresh and exciting.
Optional Add-ons/Variations:
- Sock Patterns: Use socks of different textures or patterns to make the puzzle visually stimulating. Maybe even sew a little toy into one for added excitement.
- Fabric Choices: Instead of socks, try small fabric pouches filled with soft toys or crinkle material for a different tactile experience.
Pro Tip:
Always supervise your pooch while they enjoy their Matching Sock Finder Puzzle. Just in case they get a bit too enthusiastic with those socks! Plus, keeping a spare set of mismatched socks ready to refresh the puzzle keeps the interest alive. Just remember, if your dog emerges looking like they just raided the laundry basket, consider it a sign of success.
Extra Tips & Ideas
When it comes to making DIY dog puzzles, a sprinkle of creativity can transform ordinary items into hours of tail-wagging fun. Think about using muffin tins or shoe boxes as bases for your puzzles. Your pup will love searching for treats hidden inside; it’s like a treasure hunt!
Got an old blanket? Turn it into a snuffle mat by tying knots and hiding kibble in the folds. You could also consider layering different puzzle ideas—start easy, then crank up the challenge as your dog catches on.
Remember to switch things up often. If your dog’s not a fan of one design, don’t sweat it; they might just prefer the next quirky creation. Who knew puzzle-making could be a bonding adventure?
Frequently Asked Questions
What Materials Are Best for Making DIY Dog Puzzles?
You’ll want to use materials like wood, cardboard, silicone, and non-toxic fabric. These options are durable, easily manipulated, and safe for your dog, making them perfect for creating engaging DIY dog puzzle projects.
How Long Do These Puzzles Typically Last?
Imagine a favorite toy wearing out from countless play sessions. Typically, DIY dog puzzles last several weeks to a few months, depending on your dog’s chewing habits, materials used, and puzzle complexity. Keep an eye on them!
Can Dog Puzzles Entertain Multiple Dogs at Once?
Yes, dog puzzles can entertain multiple dogs at once! Just make sure the puzzles are large enough and have various challenges. You’ll find that your pups will enjoy playing together and keeping busy.
What Size Should the Puzzle Be for My Dog?
The puzzle should be appropriately sized for your dog’s breed and age. Small dogs thrive on compact puzzles, while larger breeds need more space. Always guarantee they can comfortably access all areas without frustration.
Are There Age Restrictions for Dogs Using Puzzles?
There aren’t strict age restrictions for dogs using puzzles, but younger pups may need simpler designs. Older dogs, especially those with cognitive decline, might benefit from more engaging challenges to stimulate their minds and keep them active.
Conclusion
Creating DIY dog puzzles can turn an ordinary day into a tail-wagging adventure. You’ve got a treasure trove of ideas, from that sneaky sock search to the colorful block challenge. Why let your pup lounge around when you can whip up these engaging activities? What’s better than a happy dog, right? So, gather those household items, release your creativity, and watch your furry friend go from curious explorer to puzzle master. Trust me, you’ll both have a blast.

Amr Mohsen is a software engineer who traded his keyboard for a leash — at least on weekends. His love for dogs inspired him to share what he learns as a dog owner and enthusiast, bringing a detail-oriented, research-driven perspective to every article he writes. If it’s about dogs, he’s probably already looked it up twice.