Okay, so you know how your golden is just bouncing off the walls lately?
Like, you’ve already walked him twice, tossed the ball until your arm gave out, and he’s STILL doing laps around your living room knocking into your favorite throw pillows.
Girl, I felt that so hard last summer with my cousin’s lab. That dog destroyed an entire coffee table corner out of pure boredom. We were both losing our minds.
Here’s the thing — your dog doesn’t need a fancy gym membership. He needs a challenge. Something that makes his brain work.
That’s exactly why I put together these 7 dog agility course DIY ideas you can actually build this weekend.
No expensive equipment. No contractor. Just you, some basic supplies, and one very happy golden who finally has a reason to run outside.
#1: Train Your Golden Like a Pro With This DIY Bird Dummy Retrieve Station
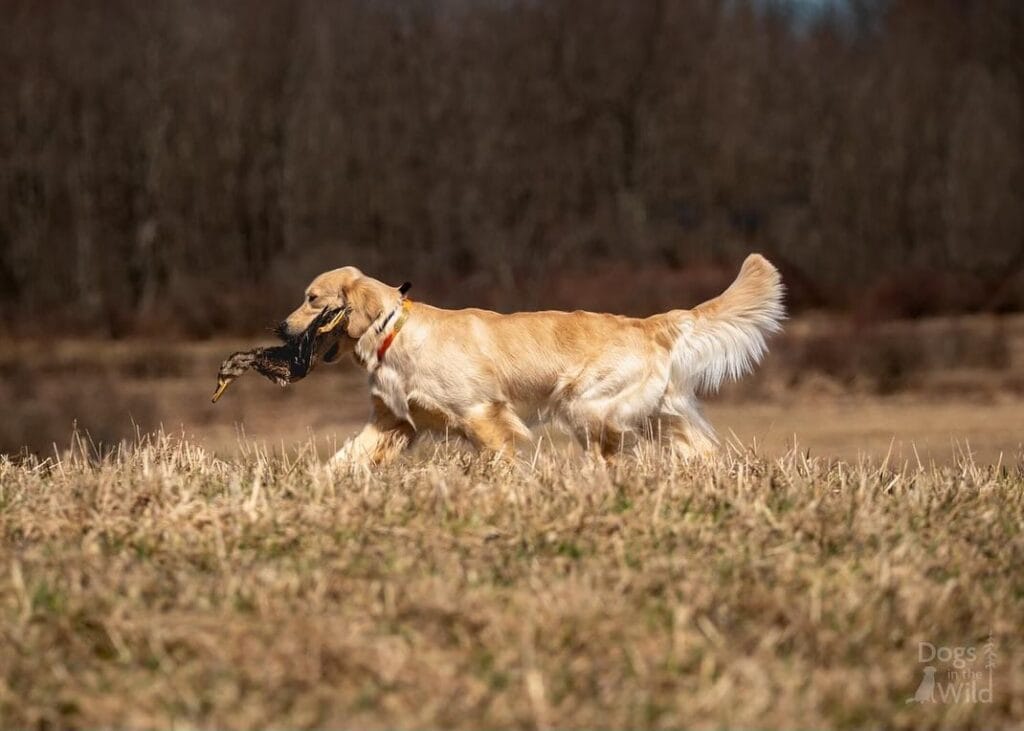
You know that moment when your golden loses her mind the second she spots a bird outside the window? Full body wiggle, nose pressed to the glass, tail going a hundred miles an hour. She’s got that instinct running deep — and a DIY retrieve station is honestly the best way to channel it.
Materials & Tools:
– Frozen or thawed game bird dummy (or a duck decoy, ~12 inches)
– Open field or backyard space, minimum 20 x 30 feet
– Bright orange hunting collar (safety + visibility)
– Long lead rope, 30 feet
– Treats for positive reinforcement
Instructions
Start with your golden on a 30-foot lead. Toss the dummy 15 feet ahead. The moment she picks it up, crouch low and call her back with excitement in your voice — not commands. Crouching triggers her natural retrieve instinct faster than standing tall does.
Repeat in short bursts, 3-5 tosses max per session. Keeping sessions brief builds drive without burnout, which means she’ll come running every single time you grab that dummy.
Gradually increase distance by 5-foot increments each week. Add light distractions — rustling leaves, another person nearby — once she’s solid at close range.
📸 Photo credit: Dogs in the Wild
#2: DIY K9 Focus Training Station (Bark & Hold Obedience Pole)

Prep Time: 15 min | Active Project Time: 45 min | Difficulty Level: Beginner
Okay so you know that moment when your golden is literally vibrating with excitement and you have zero control over where that energy goes? Yeah. This one’s for that.
This setup teaches your dog to hold focus on you — like, locked in — before getting the reward.
Materials & Tools:
– 1-inch PVC pipe, 4 feet tall
– Heavy-duty rubber base (or sandbag anchor)
– Braided tug toy (12–14 inches, rope or fleece)
– Carabiner clip
– Treat pouch with waist strap
– Sunglasses (optional but make you look cool, just saying)
Instructions
Plant your PVC pole firm in the rubber base on flat grass. Clip the tug toy to the top using the carabiner. Stand beside the pole — not behind it. The moment your dog sits and locks eyes upward toward the toy, that focus behavior becomes the trigger for reward. Structured eye contact builds impulse control, which means fewer zoomie disasters in your living room. The braided tug gives your dog something to earn, not just chase.
Keep sessions under 3 minutes. Short reps build faster results than long, exhausting ones.
📸 Photo credit: Instagram @klutch_k9
#3: DIY Dog Dock Diving Pool Ramp — The Backyard Splash Zone Your Pup Will Lose Their Mind Over
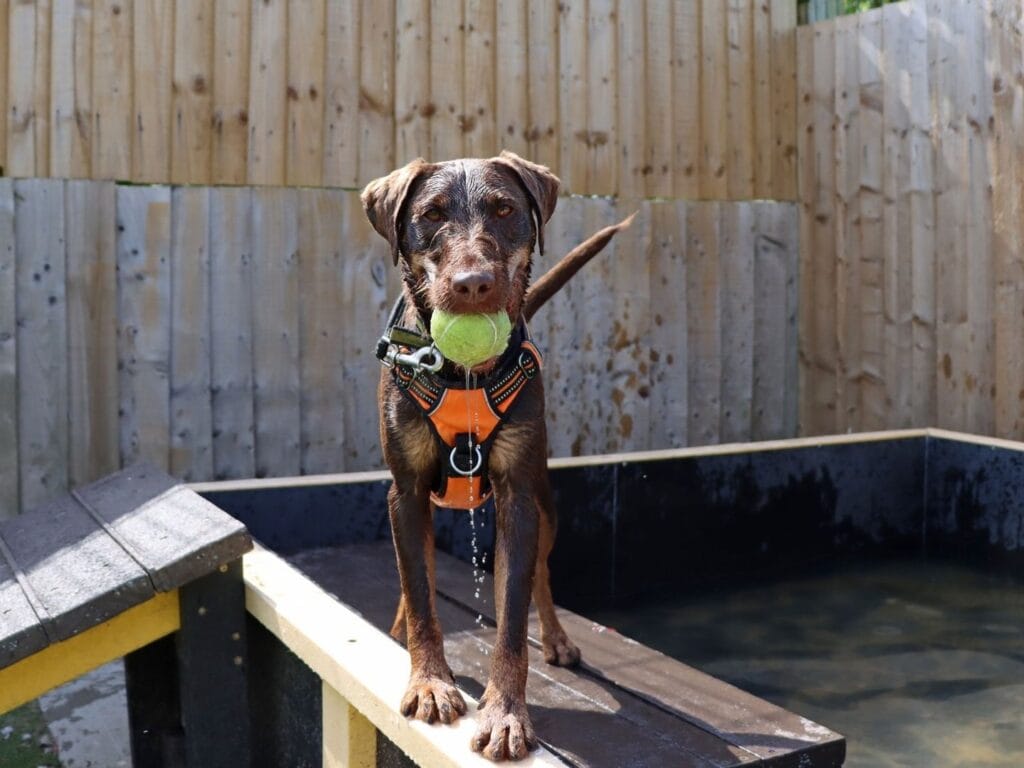
You know that look your golden gives you when she spots water? That look. Tail going crazy, whole body wiggling — she’s already soaked before you even blink.
This dock diving setup gives her a real outlet for that chaos.
Prep Time: 30 min | Active Project Time: 3–4 hours | Difficulty: Intermediate
Materials & Tools:
– 2×6 pressure-treated lumber (dock platform)
– Black rubber pond liner (pool walls)
– Yellow and black exterior paint
– Galvanized metal brackets
– Non-slip grip tape (top of ramp)
– Drill, saw, measuring tape, waterproof sealant
Instructions
Cut your 2×6 boards into a 4-foot ramp platform and secure them with galvanized brackets underneath — this keeps it stable when a wet 60-pound dog lands hard. Paint the edges bright yellow so your dog learns the jump zone. Line your pool frame with the black rubber liner, fold corners tight, and seal every seam. The non-slip tape on the ramp surface means she gets a confident launch every time, which builds her drive and reduces joint strain on landings.
Pair it with an orange adjustable harness so you keep control near water.
Keep the water depth at 18–24 inches — deep enough for safe entry, shallow enough for easy exit.
📸 Photo credit: Instagram @dogstrust_darlington
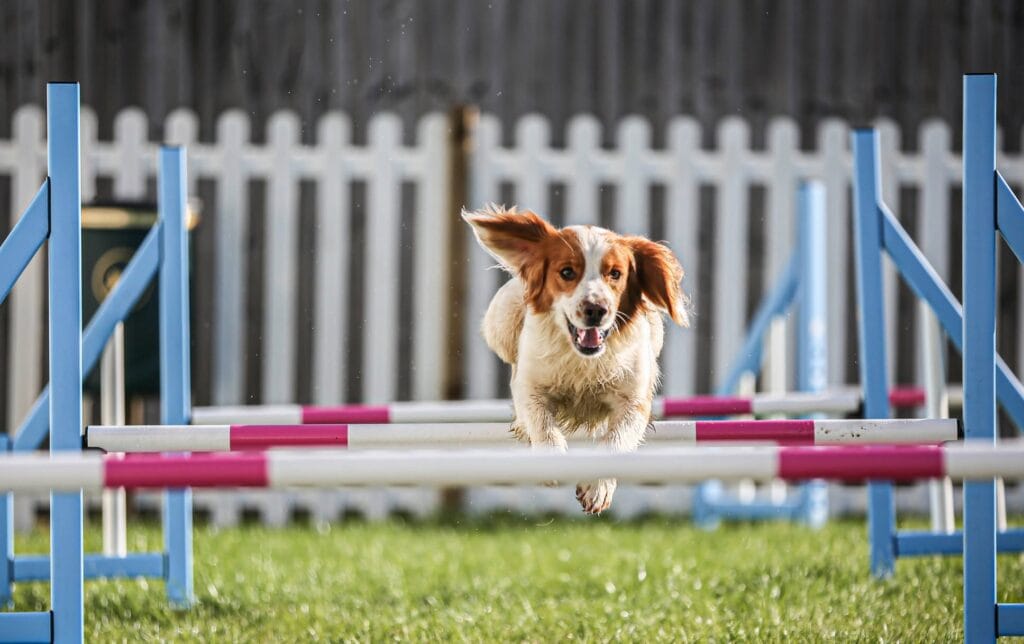
#4: DIY Agility Jump Set (The One That Makes Your Dog Look Like a Total Athlete)
Prep Time: 20 min | Active Project Time: 1.5 hours | Difficulty Level: Beginner
—
Your golden is zooming around the backyard anyway, right? Give that chaos purpose.
This jump set uses 1-inch PVC pipes cut to 4-foot lengths for the crossbars, painted white with hot pink tape wrapped at intervals — exactly like the setup in this photo. The blue upright frames? ½-inch PVC assembled into H-shaped stands.
Materials & Tools:
– 1-inch PVC pipe (crossbars)
– ½-inch PVC pipe (uprights)
– PVC T-joints and elbow connectors
– Hot pink athletic tape
– White spray paint
– PVC cutter or hacksaw
Instructions
Cut two upright H-frames at 24 inches tall. Connect the horizontal base using T-joints so the frame sits flat on grass without sinking. Slide the crossbar pipes through — no glue needed, which means adjustable jump heights as your dog builds confidence.
And that’s the real payoff: adjustable height means your dog graduates from 4 inches to 12 inches without buying new equipment.
Sand every pipe end before assembly. Rough edges scratch paws mid-jump and nobody wants that.
📸 Photo credit: Instagram @thevalleyevesham
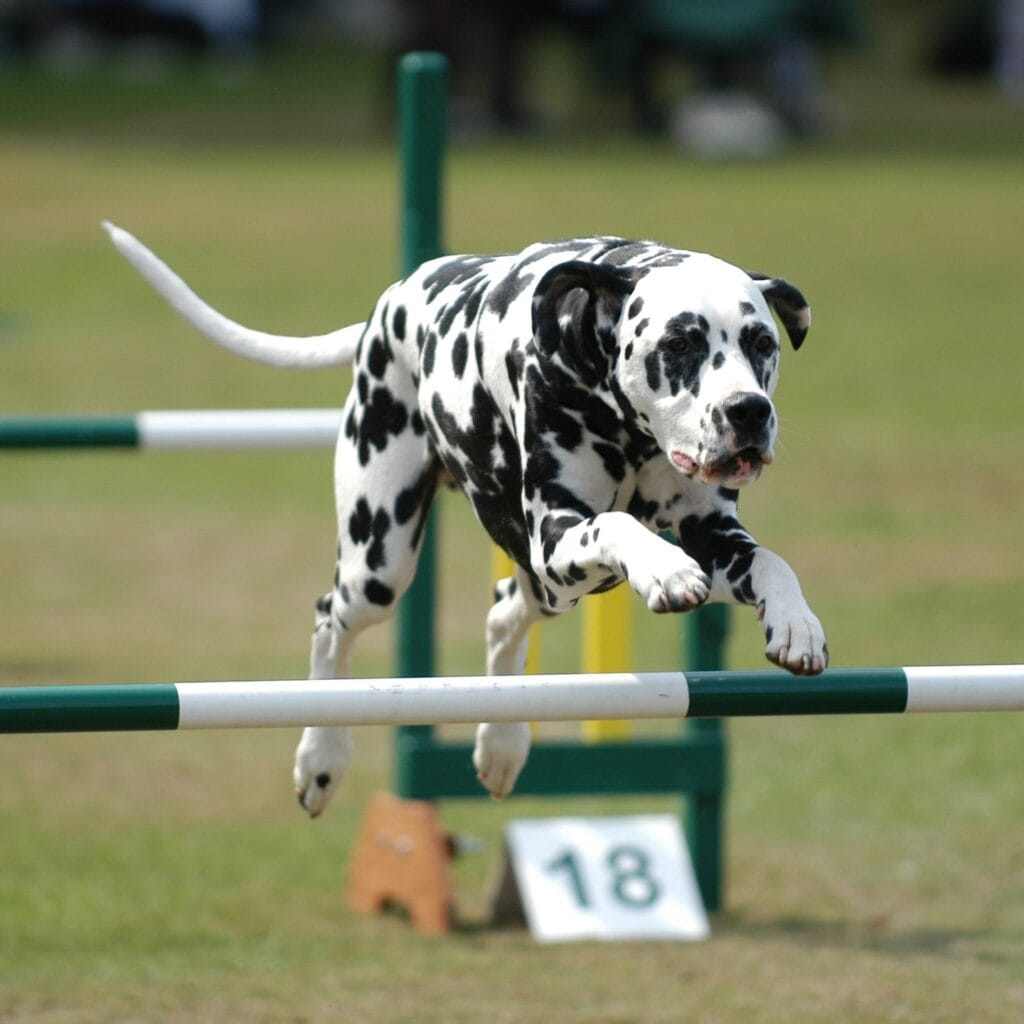
#5: DIY Dog Agility Jump (The One That’ll Make Your Pup Look Like a Total Star)
Your golden probably knocks over everything in the backyard anyway — might as well make it intentional.
I built one of these after watching my neighbor’s Dalmatian clear jumps at a local agility trial and immediately texting my sister like “we need this.”
Materials & Tools:
– 2x (1-inch diameter) PVC pipes, cut to 48 inches (the bar)
– 4x green-painted wooden upright posts, 36 inches tall
– 2x base support blocks (scrap 2×4 wood, 12 inches each)
– White spray paint + green painter’s tape for bar striping
– Wood screws, drill, sandpaper
Instructions
Sand your 2×4 base blocks smooth so no splinters catch your dog’s paws. Screw each upright post into a base block at 90 degrees — two posts per side, spaced 24 inches apart. Mark your uprights with notches every 4 inches starting from 8 inches up. Rest the PVC bar across matching notches on both sides. No glue — the bar should fall if your dog clips it. That protects their joints completely.
Number each jump station. The image shows jump #18 — sequencing teaches your dog focus and builds confidence obstacle by obstacle.
Prep Time: 20 min | Active Project Time: 45 min | Difficulty: Beginner
Keep the bar at 8 inches to start. Raising it too fast strains growing joints.
📸 Photo credit: Instagram @oneminddogs
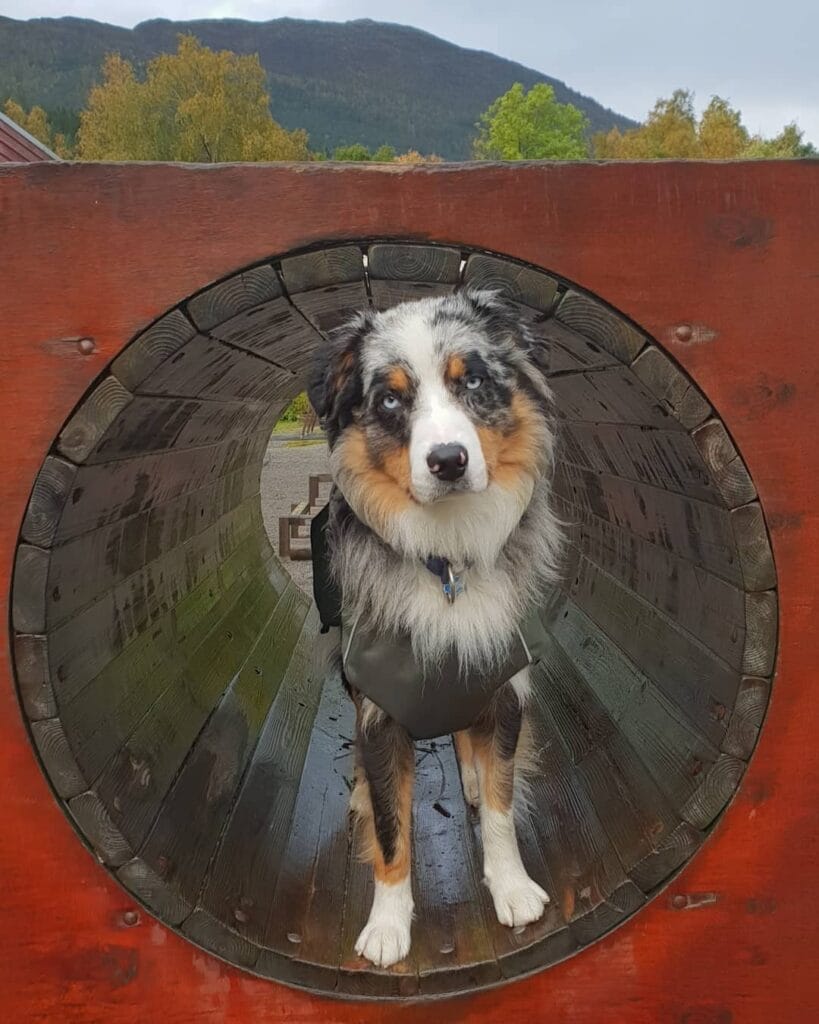
#6: PVC Tunnel Crawl That’ll Make Your Dog Feel Like a Champion
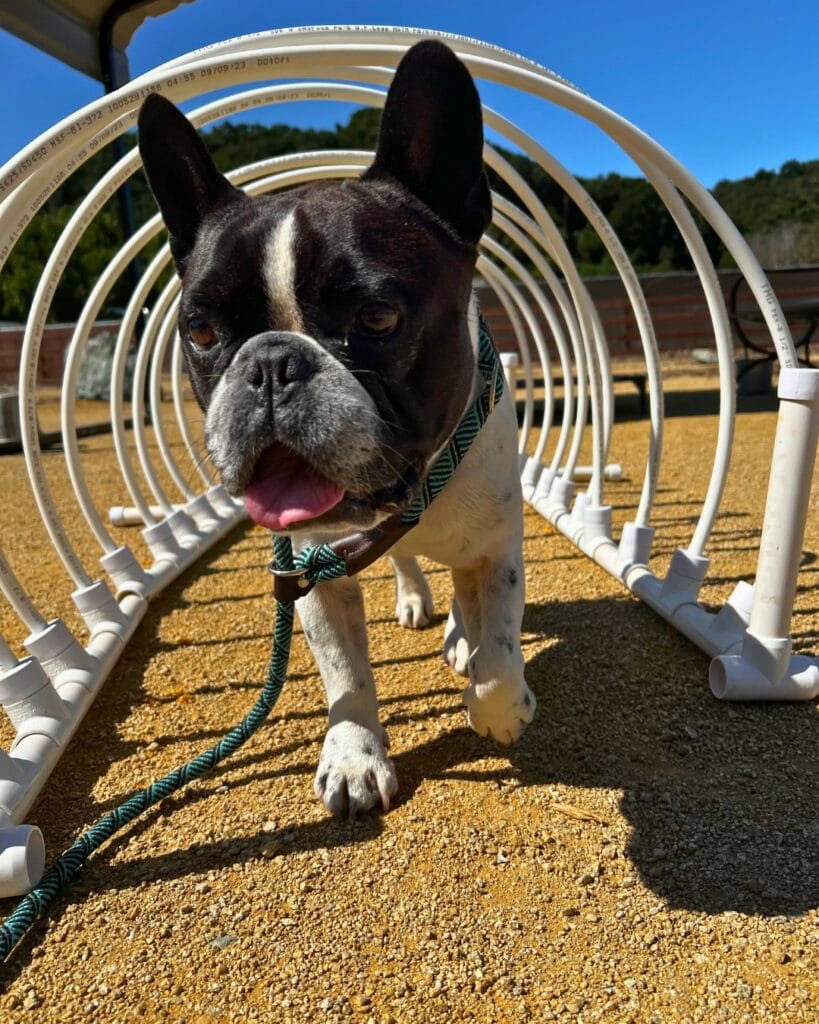
Your golden bolts through the backyard and you’re just praying she doesn’t knock over your planters again. This white PVC pipe tunnel gives her a real job to do — and it photographs beautifully on gravel or grass.
Materials & Tools:
– 10–12 pieces of ¾-inch white PVC pipe (each cut to 24 inches)
– 20–24 curved PVC elbow connectors
– 10–12 T-joint PVC connectors (for base stability)
– PVC cutter or hacksaw
– Measuring tape
– PVC cement (optional for permanent build)
Instructions
Connect each 24-inch pipe into a half-circle arch using two elbow connectors. Slide a T-joint onto each base end so the arch stands upright without tipping. Space 5–6 arches about 12 inches apart, connecting them with short 6-inch horizontal pipes along the bottom. Your dog crawls through each arch — the low clearance builds focus and body awareness.
And the gravel base? It gives paws traction during turns.
Real talk: skip the PVC cement first. A dry-fit build lets you adjust arch height as your dog grows more confident.
Prep Time: 20 min | Active Project Time: 45 min | Difficulty: Easy
📸 Photo credit: Instagram @springdalepetranch
#7: Giant Tractor Tire Tunnel Jump
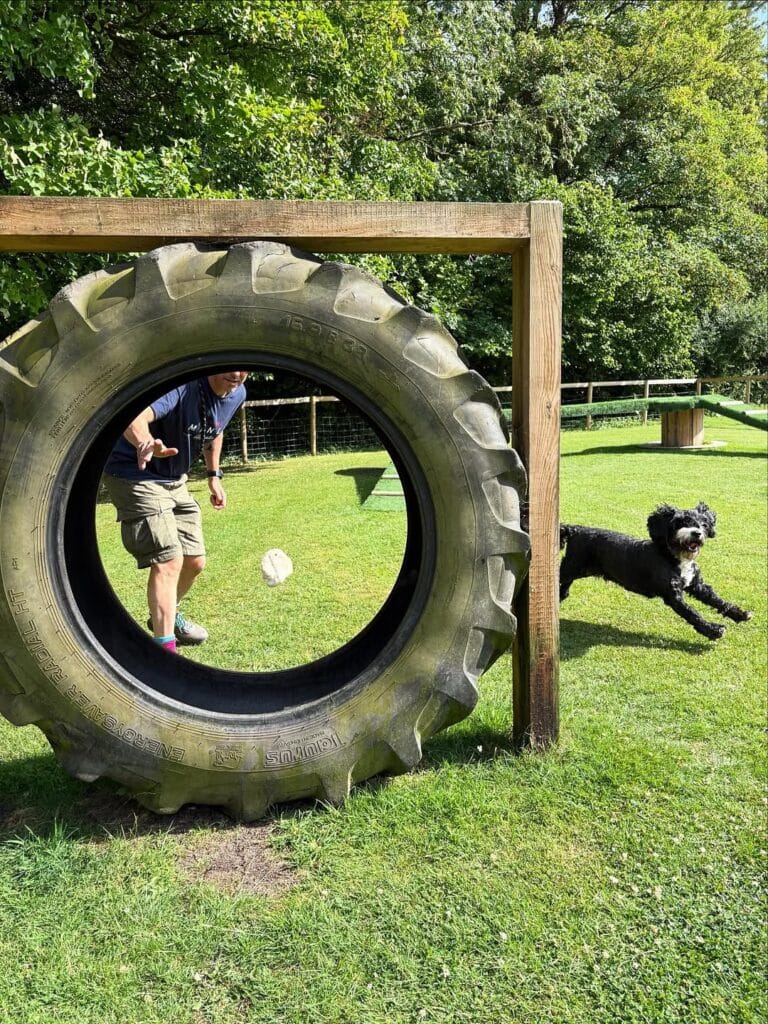
Okay, so picture this — your golden bolts across the yard, ears flying, completely ignoring you. Now picture her flying through a massive tire tunnel like she owns the place.
That’s exactly what this build does.
Materials & Tools:
– One large tractor tire (farm supply or scrapyard, free–$30)
– 2 pressure-treated 4×4 posts, roughly 6 feet tall
– One 2×6 horizontal beam, cut to 48 inches
– Wood screws (3-inch galvanized)
– Post hole digger + concrete mix
– Sandpaper (smooth tire edges)
– Drill
Prep Time: 45 min | Active Project Time: 2–3 hrs | Difficulty: Medium
### Instructions
Dig two post holes 18 inches deep, spaced 48 inches apart. Set posts in concrete — let them cure overnight.
Attach the horizontal beam across both posts at the top. Slide your tractor tire between the posts and secure it to the beam using galvanized L-brackets drilled into the tire’s sidewall.
The tire’s heavy rubber walls hold their shape under pressure, meaning your dog gets a consistent jump target every single time — no wobbling, no frustration.
Sand any rough tire edges before your dog ever touches it. Trust me, I skipped this step once and immediately regretted it.
And honestly? Tractor tires last years outdoors with zero maintenance.
📸 Photo credit: Instagram @bishopstrowhotel
The One Spacing Mistake That’ll Make Your Golden Hate the Course
Here’s something most people figure out the hard way — obstacle spacing makes or breaks everything.
I built my first agility course and crammed the jumps way too close together. My dog kept knocking poles because she had zero room to collect herself between obstacles. Total disaster.
The pro secret? Space each obstacle at least 18-21 feet apart for a medium-to-large dog like your golden. That distance gives her time to land, reset her body, and approach the next obstacle with confidence instead of panic.
Common mistake: building everything at full height right away. Start every jump and hurdle at the lowest setting, even if your girl is athletic. Muscle memory builds on success, not struggle.
Also — ground surface matters more than the obstacles themselves. Wet grass turns your whole course into a slip-and-slide nightmare. A simple rubber mat at each landing zone saves your dog’s joints and keeps her motivated.
Once she’s crushing the basics, you can pull inspo from these 15 DIY dog playground ideas for your backyard to level things up.
Your Golden Deserves a Clean Home Too
You’ve already put so much love into making your space beautiful. Don’t let muddy paws and fur tumbleweeds undo all of that.
Pick one product from this list and just try it. Seriously, start there. I did that last spring with a lint roller set I almost skipped — and now I can’t picture my living room without it.
Your home can look Pinterest-ready AND survive golden retriever chaos. Those two things aren’t mutually exclusive anymore.
So tell me — which one are you grabbing first, and how bad has your pup wrecked your favorite couch lately? 😄

Amr Mohsen is a software engineer who traded his keyboard for a leash — at least on weekends. His love for dogs inspired him to share what he learns as a dog owner and enthusiast, bringing a detail-oriented, research-driven perspective to every article he writes. If it’s about dogs, he’s probably already looked it up twice.