Okay, so you know that face your golden makes when you’re eating something and he just stares at you? Yeah, mine does that too — and honestly, it got me thinking about what I’m actually feeding him as treats.
Store-bought cookies have ingredient lists that read like a chemistry exam. You flip the bag over, squint at it, and just… give up. Meanwhile, your pup is scarfing down stuff you can’t even pronounce.
Here’s the thing — baking your own dog cookies recipe at home takes maybe 30 minutes, and you know exactly what goes in them.
No weird fillers. No mystery preservatives.
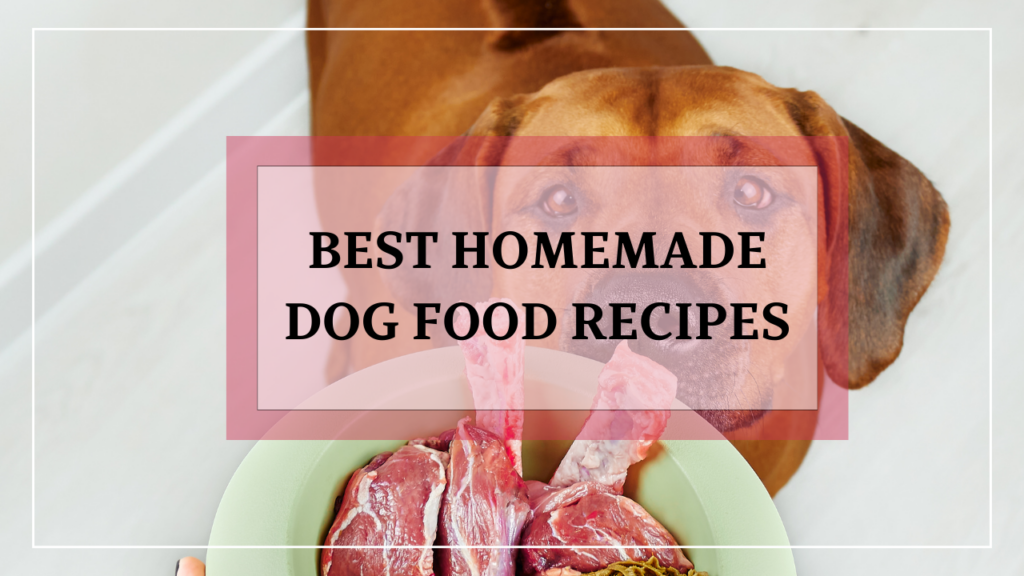
I pulled together 9 recipes that are stupid-easy and actually good for your pup. Your kitchen’s about to smell amazing, and your dog? He’s going to lose his mind in the best way.
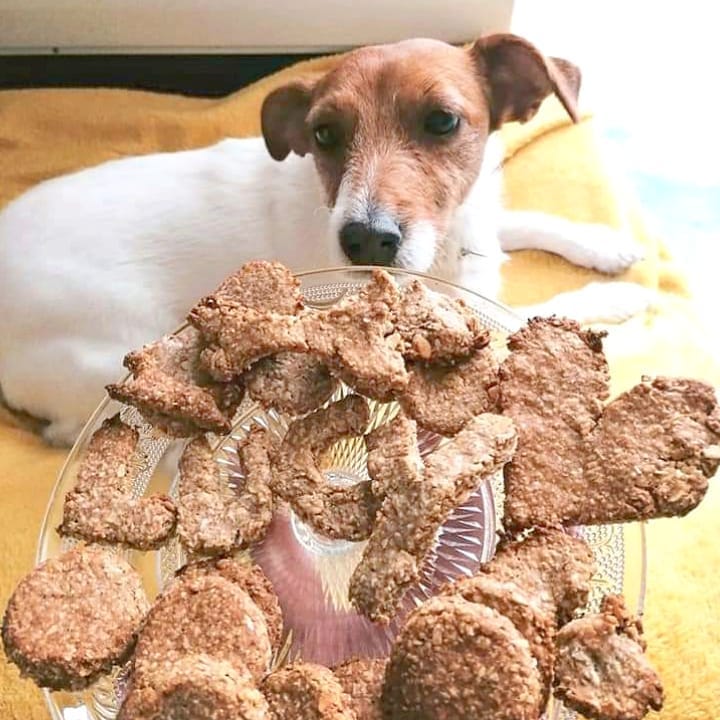
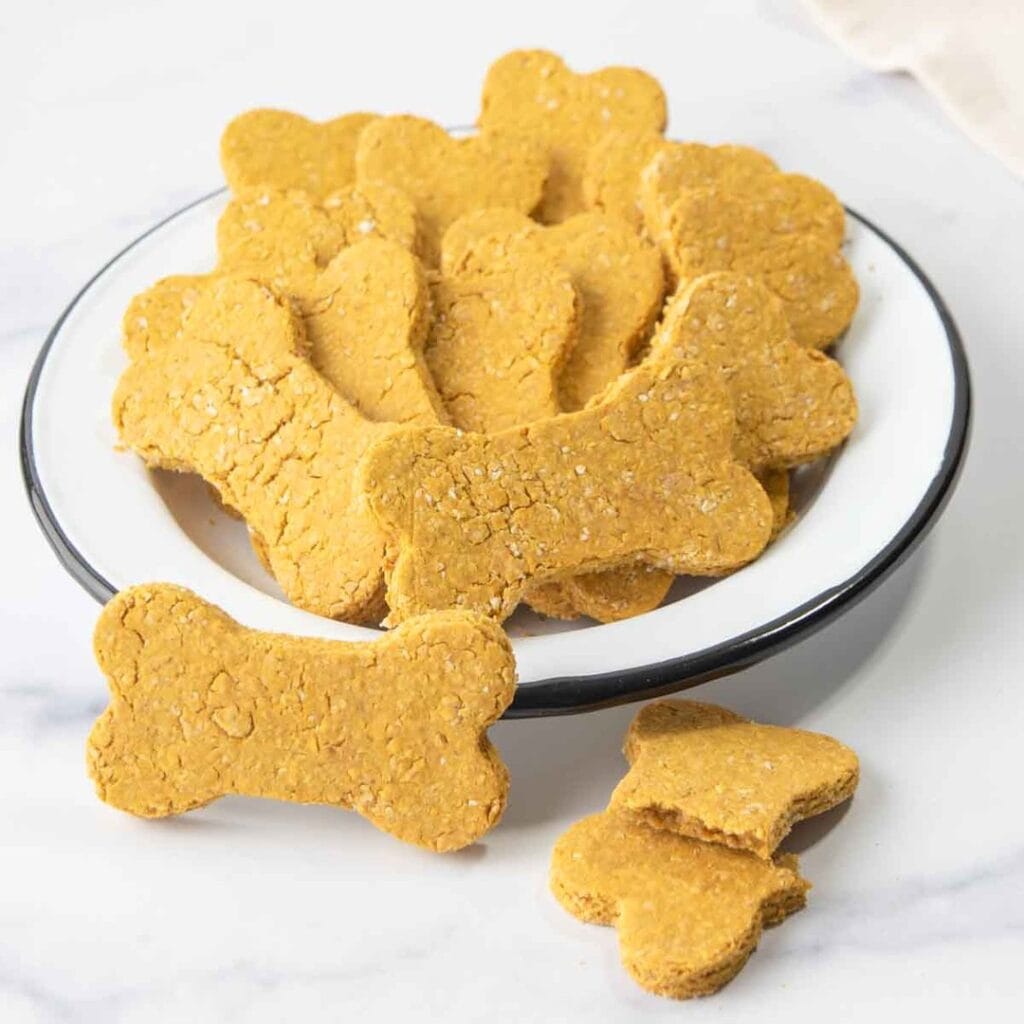
#1: Homemade Bone-Shaped Dog Treats on a Crystal Plate
Your golden is staring at you from across the room right now, isn’t she? That sad-eyes-on-the-couch look that makes you feel guilty for eating anything near her.
These grain-free baked dog biscuits are shaped like little bones and paws — and honestly, they look so good I almost ate one myself. My cousin made a batch for her rescue pup last winter and said her dog literally vibrated with excitement. She’s been making them every two weeks since.
Ingredients:
1. 2 cups whole wheat flour
2. ½ cup rolled oats
3. 1 large egg
4. ⅓ cup natural peanut butter (unsalted)
5. ½ cup low-sodium chicken broth
Let’s Get Baking
Preheat your oven to 350°F. Mix the dry ingredients first — flour and oats together in a bowl. Add the egg, peanut butter, and broth, then stir until a firm dough forms. Roll it out to about ¼ inch thick on a floured surface and press your bone or paw cutters in. Bake on a lined sheet for 25 minutes until golden and firm. Let them cool completely before serving — they harden as they cool, which gives that satisfying crunch dogs go wild for.
Prep Time: 15 min | Cook Time: 25 min | Makes: ~30 treats
Store in an airtight container for up to two weeks. And if they seem soft after cooling, pop them back in the oven for 5 more minutes — that extra dry-out time makes them last longer and keeps them from going stale fast.
These pair perfectly with the recipes in Homemade Dog Biscuits Recipes: Healthy and Delicious Treats for Your Pup if you want to mix up your treat rotation.
📸 Photo credit: Instagram @lucy_jrt_love
#2: Homemade Square Dog Biscuits (With a Chocolate Lab Judging You the Whole Time)
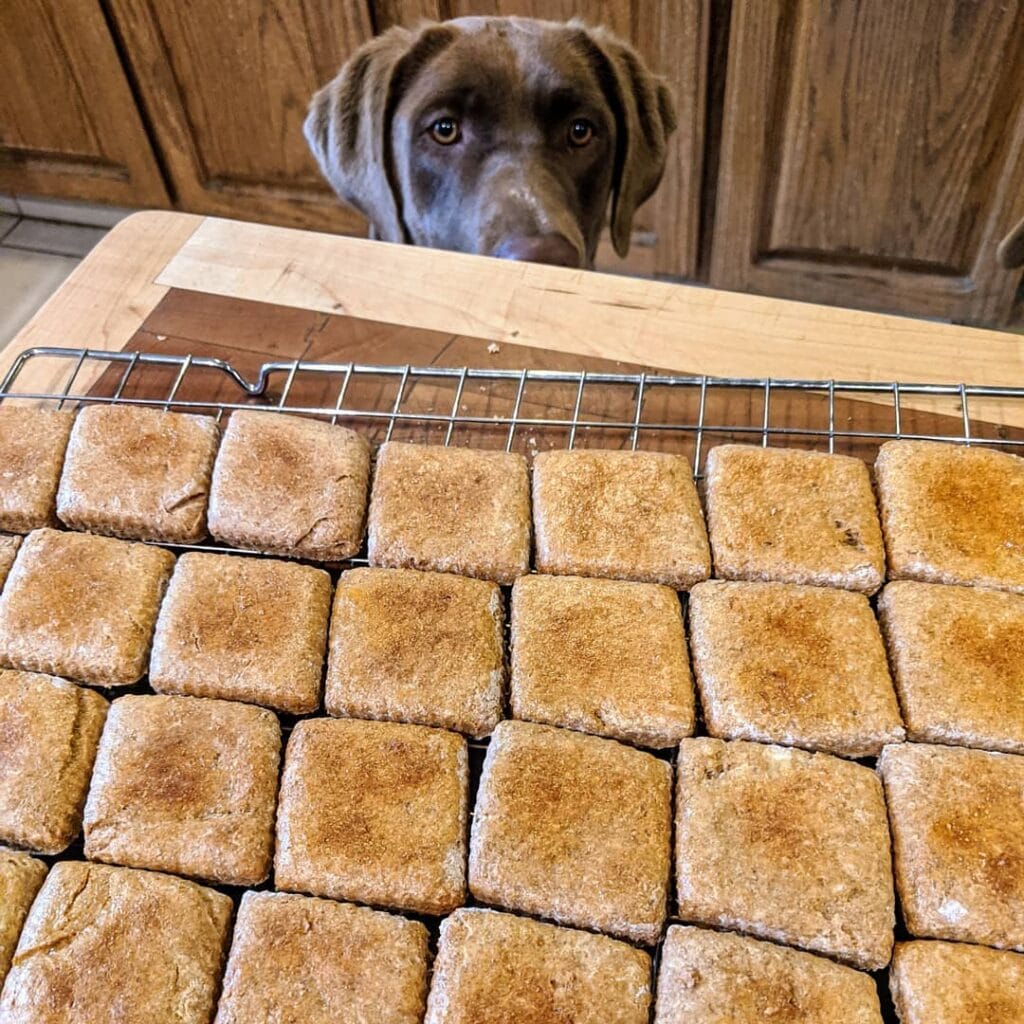
You know that look. Your golden gives you those eyes the second something comes out of the oven. My cousin’s lab does the exact same thing — nose just barely clearing the counter, staring like she’s personally offended she hasn’t gotten one yet.
These biscuits are made with wholesome, dog-safe ingredients and baked until they’re firm all the way through — no soft centers, no crumbling mess on your rug.
Ingredients:
1. 2 cups whole wheat flour
2. 1/2 cup rolled oats
3. 1/3 cup natural peanut butter (unsalted, xylitol-free)
4. 2 eggs
5. 1/2 cup unsweetened applesauce
6. 1 teaspoon cinnamon
How to Bake These Bad Boys
Preheat your oven to 350°F. Mix the peanut butter, eggs, and applesauce together first — getting those wet ingredients smooth before adding the dry stuff makes rolling so much easier. Add the flour, oats, and cinnamon and mix until a firm dough forms.
Roll it out to about 1/4 inch thick on a lightly floured surface. Cut into 2-inch squares. Bake on a lined sheet for 25-30 minutes, flipping halfway. Let them cool completely on a wire rack — warm biscuits stay soft inside, and you want that satisfying crunch.
Prep Time: 15 min | Cook Time: 30 min | Makes: ~30 biscuits
Firm biscuits = longer shelf life. Store them in an open container so any remaining moisture escapes — that’s what keeps them crunchy for up to two weeks.
📸 Photo credit: Instagram @busybeemd13
#3: “Baked With Love” Dog Biscuits That’ll Make Your Golden Go Full Chaos Mode

You know that look — ears perked, nose basically pressing into your hand, eyes doing that thing where they go slightly unhinged with excitement? Yeah. My cousin’s husky did exactly that the first time she held out one of these biscuits, and honestly it broke my heart in the best way.
These are the treat your golden deserves.
“Baked With Love” Dog Biscuit Recipe
1. 2 cups whole wheat flour
2. 1/2 cup rolled oats
3. 1/3 cup natural peanut butter (xylitol-free — this is non-negotiable)
4. 2 eggs
5. 1/3 cup low-sodium chicken broth
How To Make Them
Preheat your oven to 350°F. Mix the dry ingredients first — flour and oats together in a bowl. Add the peanut butter, eggs, and broth. Work the dough until it holds together but isn’t sticky. Roll it out to about 1/4 inch thick and cut with a round scalloped cutter. Press a “Baked With Love” stamp firmly into each round before baking. Bake for 20-25 minutes until golden and firm. Let them cool completely — a warm biscuit crumbles and your golden will vacuum the floor.
And that crunch when they bite down? That’s the payoff.
Chilling the dough for 15 minutes before rolling makes cutting way cleaner and helps the stamped design hold its shape after baking.
Prep Time: 20 min | Cook Time: 25 min | Serves: ~24 biscuits
📸 Photo credit: Instagram @lokidokidogshop
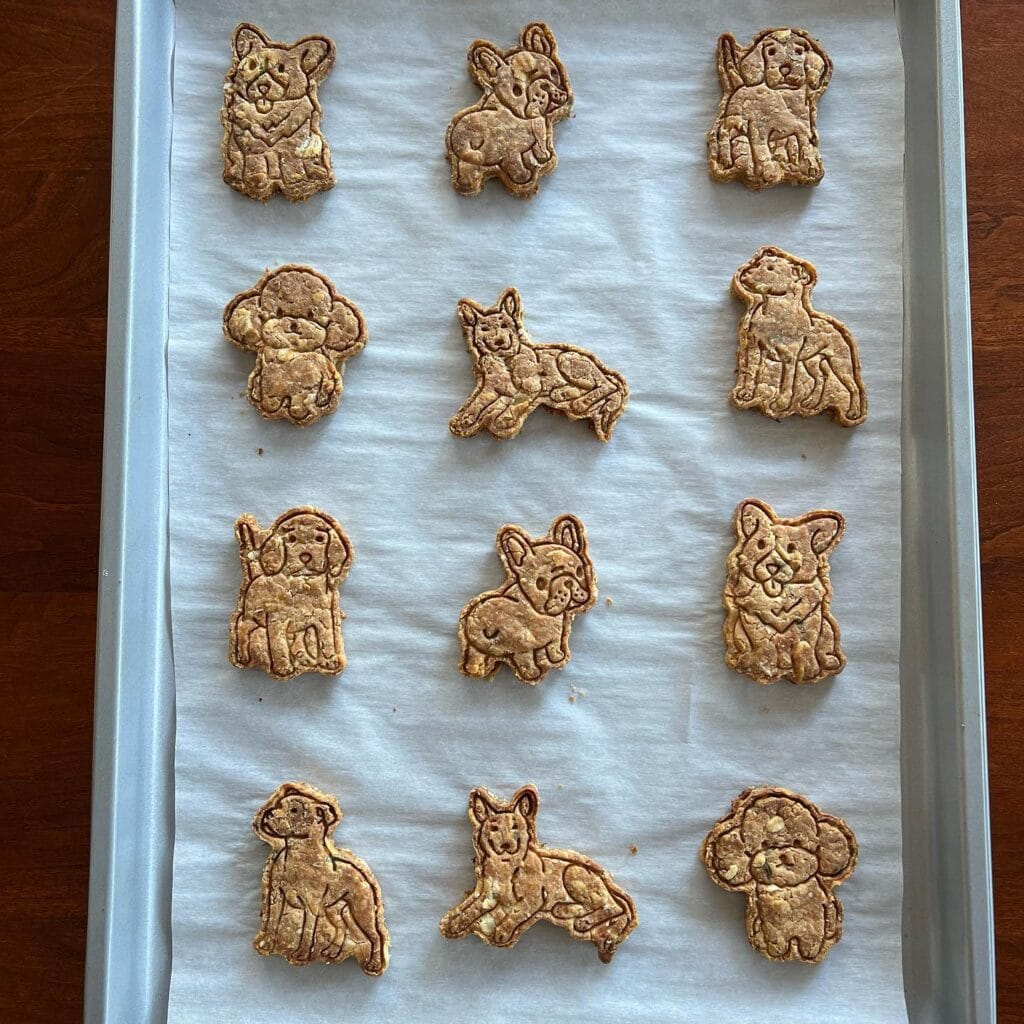
#4: Dog Breed Shaped Homemade Peanut Butter Treats
Your golden is staring at you from the kitchen doorway. That specific stare. The one that means she’s been watching you bake for twenty minutes and she wants in on whatever’s happening.
These cookies are exactly what she deserves.
Made with whole wheat flour, rolled oats, peanut butter, and honey, these are simple pantry ingredients pressed into the cutest dog breed cookie cutters you’ve ever seen. The baked result is this golden-brown, slightly crunchy treat that smells like a warm bakery in your house.
I made a batch of these last fall and my cousin’s shepherd mix inhaled three before anyone noticed. Zero regrets.
Let’s Make the Cookies
Prep Time: 15 minutes | Cook Time: 25 minutes | Serving Size: 12 cookies
1. 2 cups whole wheat flour
2. 1 cup rolled oats
3. ½ cup natural peanut butter (no xylitol)
4. 2 tablespoons honey
5. ½ cup water
Preheat your oven to 350°F and line a baking sheet with parchment paper. Mix the dry ingredients first, then work in the peanut butter until crumbly. Add honey and water slowly until a firm dough forms. Roll it to ¼ inch thickness and press your dog breed stamps down with steady, even pressure — this is what gives you those sharp, Instagram-worthy details. Bake 22-25 minutes until the edges turn deep gold.
These treats stay fresh in an airtight container for up to two weeks. And if your girl goes through them faster than that, these homemade 2 ingredient dog treats are a quick backup she’ll love just as much.
Chill your dough for 30 minutes before rolling. Cold dough holds the stamp impressions better and you won’t lose those adorable breed details in the oven.
📸 Photo credit: Instagram @beau_the_chocolate_lab
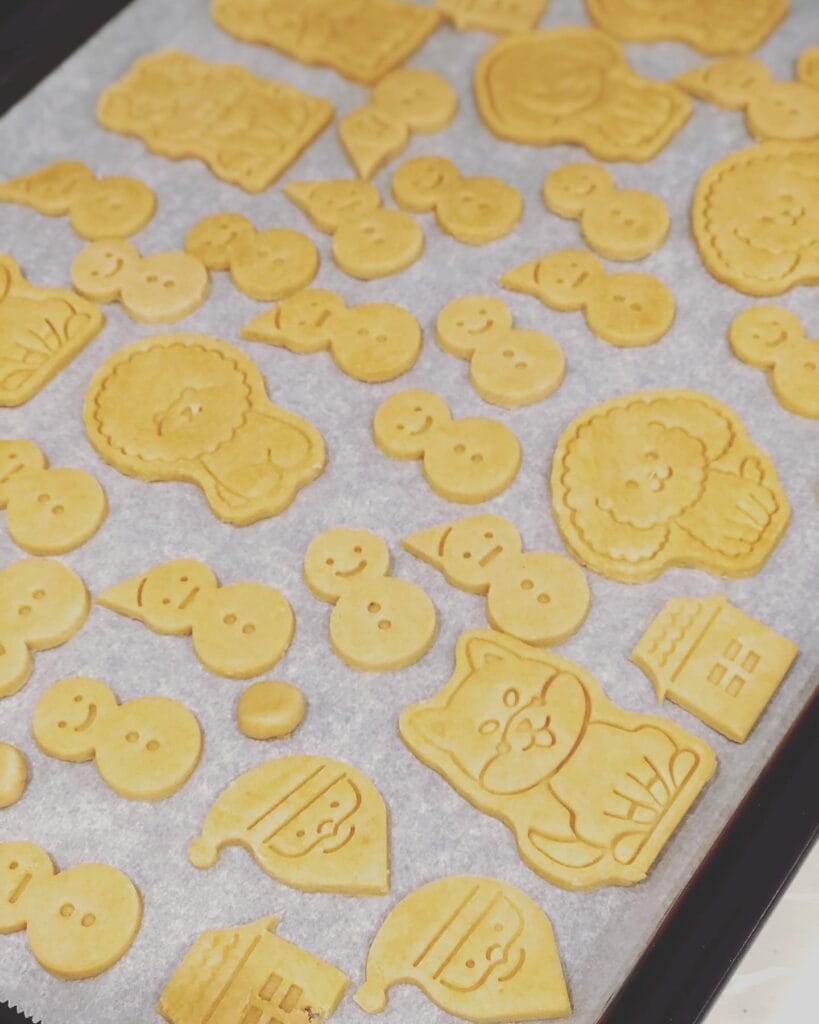
#5: Character-Stamped Sugar Cookies (Snowman, Bear & Sheep Designs)
Okay so picture this — you’re trying to bake something cute for the holidays, your golden is sitting right at your feet doing those big sad eyes, and you just want something that looks like it came off a Pinterest board without losing your mind.
These little stamped cookies are exactly that.
Prep Time: 25 minutes | Cooking Time: 12 minutes | Serving Size: 40–50 cookies
Ingredients:
1. 2 ½ cups all-purpose flour
2. ¾ cup unsalted butter, softened
3. ¾ cup powdered sugar
4. 1 egg
5. 1 tsp vanilla extract
6. ¼ tsp salt
### Here’s How You Make Them
Cream the butter and sugar together until the mixture goes pale and fluffy — this takes about 3 minutes with a hand mixer. Beat in the egg and vanilla next. Slowly add the flour and salt until a soft dough forms. The dough should feel like play-doh, not sticky.
Wrap it in plastic and chill for 30 minutes. Cold dough holds stamp details way better — that’s the thing most people skip and then wonder why their designs look blurry.
Roll to ¼ inch thickness on a lightly floured surface. Press your character stamps — snowman, bear, sheep — firmly and lift straight up. Bake at 325°F for 11–12 minutes until just set but still pale.
Keeping the oven temp lower means the stamped details stay sharp and don’t puff out.
Want an easy win? Chill the stamped, cut-out dough one more time for 10 minutes before baking. The designs come out so much cleaner.
📸 Photo credit: Instagram @sleepingdog.k
#6: Banana Oat Chocolate Chip Dog Cookies
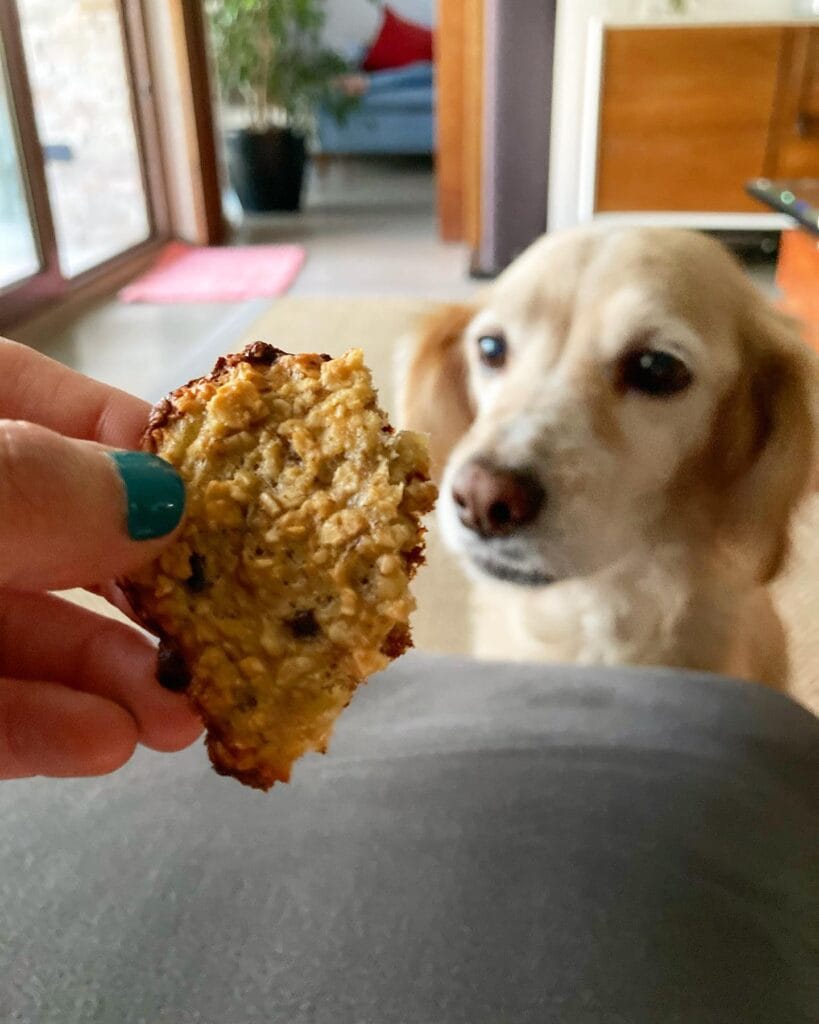
You know that look. Your golden is just sitting there, staring at whatever you’re eating like you personally offended them by not sharing. Mine does it every single time I eat on the couch.
These cookies are stupid easy and your dog will lose their mind over them.
Ingredients:
1. 2 ripe bananas, mashed
2. 1½ cups rolled oats
3. ¼ cup unsweetened applesauce
4. 2 tablespoons peanut butter (xylitol-free)
5. ¼ cup carob chips (never real chocolate)
Let’s Bake These Bad Boys
Preheat your oven to 350°F. Mash your bananas until smooth — the riper, the better, because that natural sweetness is what makes your dog go feral. Mix in the peanut butter and applesauce first, then fold in the oats until everything holds together like a thick dough. Stir in the carob chips last. Scoop golf ball-sized portions onto a parchment-lined baking sheet and flatten them slightly with your palm. Bake for 15-18 minutes until the edges turn golden. Let them cool completely — warm cookies crumble and hot ones can burn their little mouth.
Prep Time: 10 min | Cook Time: 18 min | Serving Size: 14-16 cookies
The oats give these a slow-burning energy boost, which means less zoomie chaos after snack time. Finally a treat that works for both of you.
Store them in an airtight container for up to 5 days, or freeze a batch for later. If your pup also deals with inflammation, turmeric dog treats are worth exploring as a next step.
Slightly underbaking by 1-2 minutes keeps the center chewy instead of crumbly — dogs tend to prefer that softer texture anyway.
📸 Photo credit: Instagram @naife.majluf
#7: Homemade Pumpkin Oat Dog Biscuits (Bone & Paw Shaped!)
Your golden just knocked over your coffee again trying to beg for a treat. And you’re standing there handing her a processed biscuit that smells like cardboard — knowing full well you’d never eat something like that yourself.
These are different.
Pumpkin Oat Dog Biscuits — Ingredients:
1. 2 cups whole wheat flour
2. ½ cup rolled oats
3. ½ cup pure pumpkin purée (not pie filling)
4. 2 tablespoons natural peanut butter (xylitol-free)
5. 2 eggs
6. ¼ cup water (add more if dough feels dry)
Let’s Bake These Beauties
Preheat your oven to 350°F. Mix your dry ingredients first — flour and oats together in a big bowl. Add pumpkin, peanut butter, and eggs, then stir until a thick dough forms. If it cracks when you press it, splash in a little water. Roll the dough out to ¼ inch thick on a floured surface and use bone or paw-shaped cutters to press out your treats. Place them on a parchment-lined baking sheet and bake for 25-30 minutes until golden and firm. Let them cool completely before serving — they harden as they cool, which gives that satisfying crunch.
Quick note: slightly underbaked biscuits go soft fast, so err on the longer side.
The pumpkin adds fiber for digestion, peanut butter keeps your girl coming back, and the oats make these genuinely filling — not just empty snacks. My cousin actually started making these every Sunday like a ritual. Her dog now sits perfectly at the kitchen door the second that oven preheats.
Store them in an airtight container for up to two weeks, or freeze a batch for later. If you want to get deeper into homemade baking for your pup, the Ultimate Guide to Oven Dog Treats: Healthy, Homemade Recipes for Your Pup has everything you need to keep rotating flavors.
Prep Time: 15 min | Cook Time: 30 min | Makes: ~30 medium biscuits
📸 Photo credit: Instagram @spoiledhounds
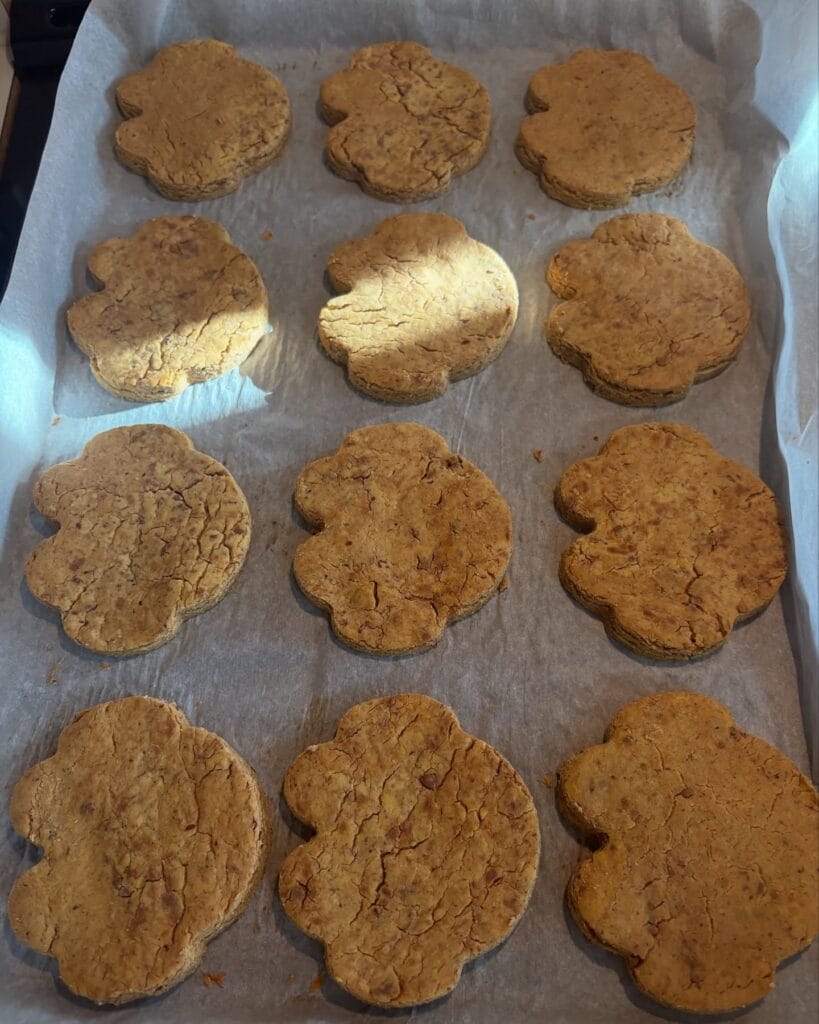
#8: Flower-Shaped Peanut Butter Dog Cookies
Your golden is giving you those eyes again. You know the ones — nose pressed against the kitchen gate, tail going a hundred miles an hour, the second she smells something baking.
These flower-shaped cookies are thick, golden-brown, and packed with wholesome ingredients. No dye, no fuss — just real food your dog can actually enjoy.
Ingredients:
1. 2 cups whole wheat flour
2. 1/2 cup natural peanut butter (xylitol-free)
3. 2 eggs
4. 1/3 cup water (add more if dough feels dry)
5. 1 teaspoon cinnamon
How to Bake These Beauties
Preheat your oven to 350°F. Mix the peanut butter, eggs, and water first — getting a smooth base before adding flour makes the dough way easier to handle. Add flour and cinnamon, then knead until a stiff dough forms. Roll it out to about 1/4 inch thickness on a floured surface. Press your flower cookie cutter firmly — a clean cut gives you those sharp, pretty edges. Place on a parchment-lined baking sheet and bake for 20-25 minutes until golden and cracked on top (that cracking is your sign they’re done).
Prep Time: 15 min | Cook Time: 25 min | Makes: 12 large cookies
Thick dough + low moisture = a crunchy treat that stays fresh longer, which means fewer crumbles on your Pinterest-perfect rug.
Store in an airtight container. If your pup loves fruit-based treats too, apple dog treats pair really well with this rotation.
Let the cookies cool completely on the tray — they firm up as they cool, so pulling them too early gives you soft centers instead of that satisfying crunch.
📸 Photo credit: Instagram @scavysdogtreats
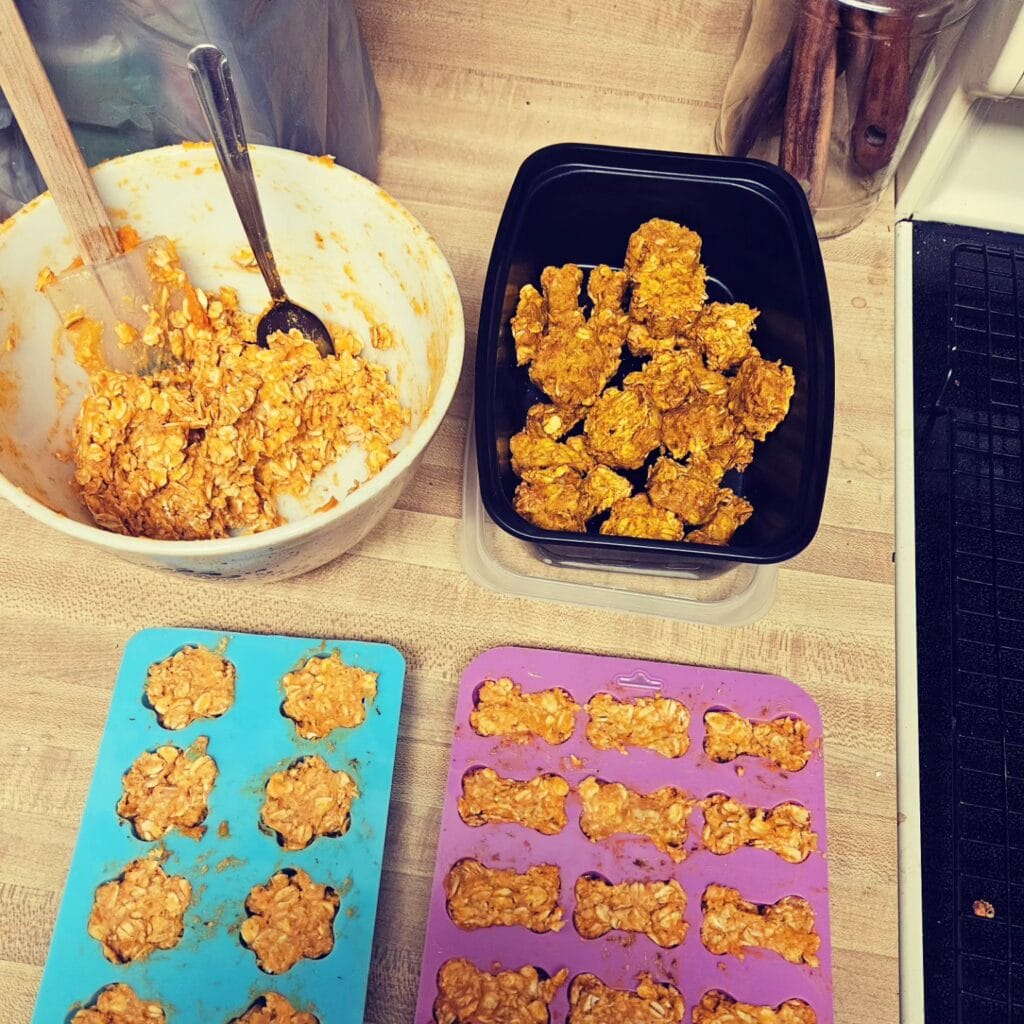
#9: Pumpkin Oat Dog Treats (Bone & Flower Shapes)
Okay so you know that moment when your golden gives you those eyes right before you head to the store? Like full-on guilt trip. That’s literally what started this whole homemade treat situation for me.
Ingredients:
1. 2 cups rolled oats
2. 1 cup canned pumpkin puree (plain, not pie filling)
3. ¼ cup peanut butter (unsalted, xylitol-free)
4. 1 egg
5. 1 teaspoon cinnamon
How To Make These (The Easy Way)
Preheat your oven to 350°F. Mix the pumpkin, peanut butter, and egg in a bowl first until it’s smooth, then fold in the oats and cinnamon. The dough will be sticky and thick — that’s exactly what you want. Press it into your silicone bone or flower molds (like the pink and teal ones in the photo) and bake for 15-18 minutes until firm. Pop them out once cooled.
And here’s the thing — silicone molds release so much easier than metal pans. No broken bones, no crumbles.
These are shelf-stable for 5 days or freeze up to 3 months.
Worth it because: pumpkin supports digestion, oats give slow energy, and your dog gets a treat made with actual ingredients you recognize.
For more ideas like these, Baked Dog Treats: Easy, Healthy, and Homemade Recipes has a whole lineup worth bookmarking.
Store extras in an airtight container — the black storage box in the photo works perfectly for that.
Prep Time: 10 min | Cook Time: 18 min | Serving Size: ~24 treats
📸 Photo credit: Instagram @wondering_starz
The One Baking Swap That Saved My Dog’s Tummy (And My Sanity)
Okay, so here’s the thing nobody tells you when you start making homemade dog cookies — xylitol hides in the most unexpected places.
Peanut butter. PEANUT BUTTER. That classic dog treat ingredient we all reach for without thinking. Some brands sneak xylitol in as a sweetener, and it’s actually toxic to dogs. I learned this after a frantic Google spiral at 11pm when I was batch-baking treats for my neighbor’s pup.
Always flip that jar and read every single ingredient. Always.
Now for my actual pro secret: swap all-purpose flour for oat flour in any recipe. Here’s why this matters — oat flour gives your cookies a softer, chewier texture that holds together without crumbling all over your couch. You know how golden retrievers somehow turn ONE cookie into a crime scene? Oat flour cuts that chaos way down.
Real talk: the dough should feel like thick Play-Doh. Too sticky means add more oat flour, one tablespoon at a time, until it stops clinging to everything it touches.
Roll it to about ¼-inch thickness and your cookies bake evenly every time. No burnt edges, no raw centers.
Your Golden Retriever Deserves a Clean Home Too
Okay, so here’s my honest take — you don’t have to choose between loving your dog and loving your space. Both can exist. I used to think that was impossible until I actually tried the right products.
Pick one thing from this post and start there. Just one. Maybe it’s the enzymatic spray, maybe it’s the washable slipcover. Small wins add up fast.
Your home can smell clean, look Pinterest-ready, and still be the safest, happiest place for your girl to roll around and be herself.
So tell me — what’s the one golden retriever mess that’s been driving you absolutely crazy lately?
Amr Mohsen is a software engineer who traded his keyboard for a leash — at least on weekends. His love for dogs inspired him to share what he learns as a dog owner and enthusiast, bringing a detail-oriented, research-driven perspective to every article he writes. If it’s about dogs, he’s probably already looked it up twice.