
I can just imagine my golden staring at me with those big brown eyes when I’m getting the treat bag out. He knows exactly what’s in those store-bought biscuits and I know it’s not the best.
Fillers. Preservatives. Stuff you can’t even pronounce.
I started making homemade dog biscuits for my sister’s lab after he got really sick from a bag of treats that we had bought from the grocery store. It scared us both so once I saw how easy it was to make them at home we never went back to buying store bought treats again.
Real talk: Your dog deserves better than a big mystery bag of mystery, and your kitchen probably has most of what your dog needs.
These recipes are simple, wholesome, and best of all, they’re golden retriever approved. I’ve put together the best ones so you can stop guessing and start baking something you actually feel good about handing over.
#1: Homemade Dog Bone & Paw Print Biscuits
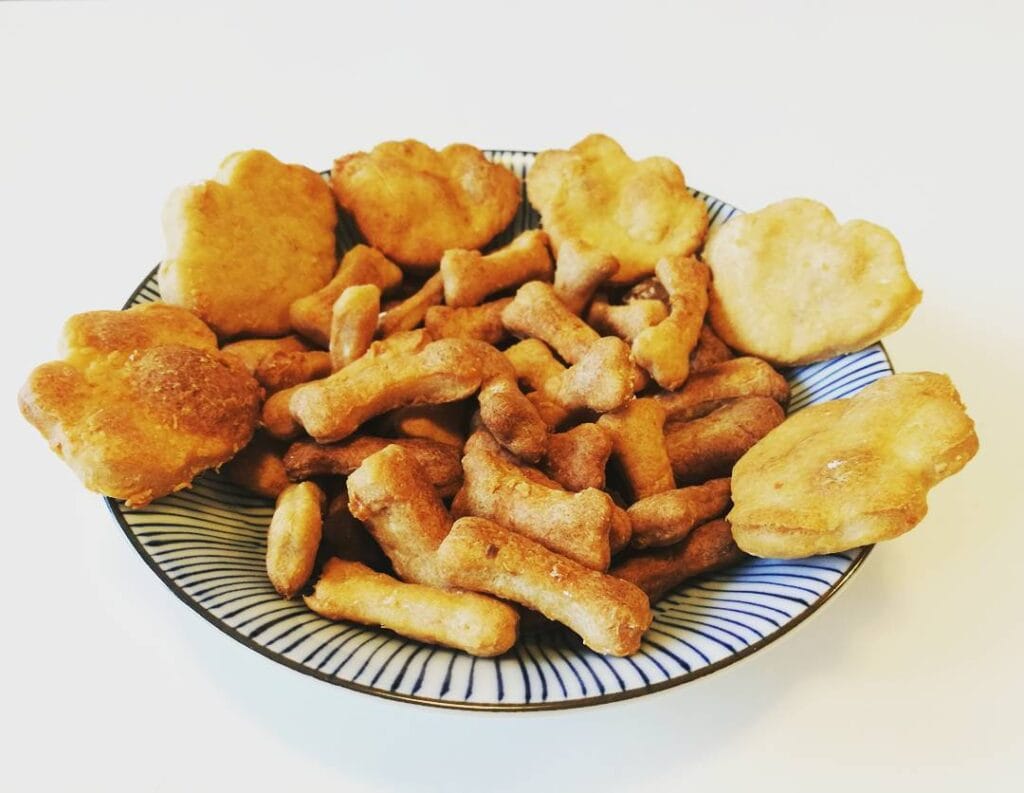
Your golden stares at you from across the kitchen. You notice that “look” she gives you, that head tilt with those soft ears and you can’t help but give in to your golden.
These are the kind of cookies you want sitting on your kitchen counter right now.
Ingredients:
1. 2 cups whole wheat flour
2. 1/2 cup rolled oats
3. 1/3 cup natural peanut butter (no xylitol)
4. 2 eggs
5. 1/4 cup unsweetened applesauce
6. 1 teaspoon cinnamon
How to Bake These (The Right Way)
Preheat your oven to 350 F. Mix peanut butter, eggs and applesauce together. Get that wet mixture smooth and then add flour and oats slowly. The dough will be firm but not sticky. If the dough is sticking to your hands add another tablespoon of flour.
Roll the dough out to 1/4 inch thick on a floured surface. Use the bone and paw cutters to cut the dough. Press the cutters down hard and cut clean so the edges don’t crack after baking. Place on a parchment lined baking sheet. Bake for 25 minutes until golden.
Let them cool completely before serving. Serve them warm, but not so warm that they’re soft inside. The goal is to get that satisfying crunch.
Quick note: I love these with 5 Homemade Pumpkin Dog Treats: Easy & Healthy Recipes for Your Pup… when I’m doing a big baking day!
Prep Time: 15 min | Cook Time: 25 min | Serving Size: ~30 biscuits
Put them in an airtight jar on the counter – they will stay fresh for a week, or freeze a batch for up to 3 months.
📸 Photo credit: Instagram @dachshund_bullet
#2: Bone-Shaped Cheesy Bread Treats Your Golden Will Go Absolutely Wild For
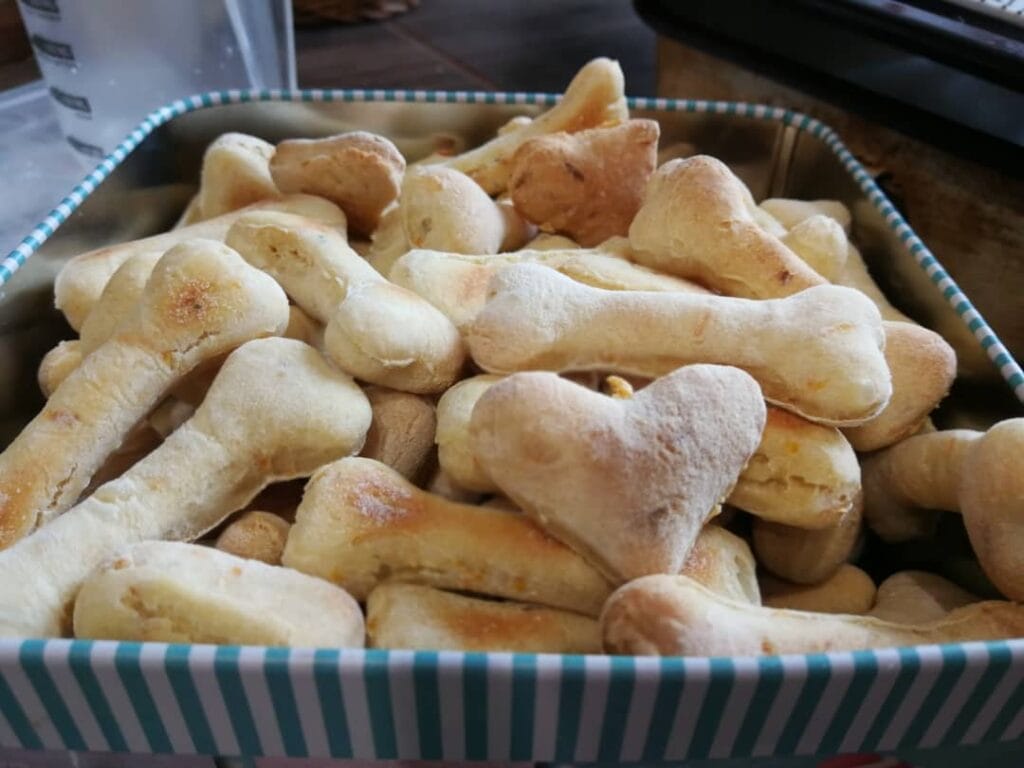
You probably already know that special moment when your golden retriever smells something delicious baking and just loses it! Tail starts going a hundred miles an hour, paws are on the counter, and your big brown eyes are pleading with you.
And yes, these bone shaped cheesy bread bites do exactly that.
They’re soft, golden and shaped like little bones. And, they’re basically the cutest thing I’ve ever seen, but totally safe for your dog to nom on.
Ingredients:
1. 2 cups whole wheat flour
2. ½ cup shredded cheddar cheese
3. 1 egg
4. ½ cup low-sodium chicken broth
5. 2 tablespoons plain Greek yogurt
6. 1 teaspoon baking powder
Let’s Bake These Babies
Preheat oven to 350 degrees. Mix flour and baking powder in a large bowl. I know it seems strange to combine the dry ingredients first but it gives you a much more even texture.
Whisk in the egg, chicken broth, Greek yogurt and cheddar until just combined. The dough will be slightly sticky; turn out onto a lightly floured surface and roll to approximately ½ inch thick.
Cut out the cookies with a bone-shaped cookie cutter (I bought mine from a craft store for about $3 and it has become my most-used kitchen tool). Space the cookies on the parchment-lined baking sheet with about 1 inch between each piece.
Bake for 20-25 minutes or until the edges turn a light golden color. Allow to cool completely before handing one over. Warm bread can upset your dog’s stomach more than you’d think.
The whole wheat flour provides the fiber without the carbs. The cheddar cheese gives them a smell so strong that it hits you as soon as you crack the oven open, and your dog will already be sitting by the kitchen door waiting. The Greek yogurt will keep the inside soft without making it crumbly or dry, so that even older dogs with sensitive teeth can have them.
Store the balls in an airtight container up to 5 days, or freeze up to 3 months.
Try this first: Maketh a double batch on Sunday and stack them in a mason jar on your counter. They look so adorable and you will always have something ready for when your pup gives you that look.
Prep Time: 15 minutes | Cook Time: 25 minutes | Serving Size: About 24 bone-shaped treats
📸 Photo credit: Instagram @daisy.the.bcollie
#3: Personalized Dog Bone Biscuits With Your Pup’s Name Stamped Right In
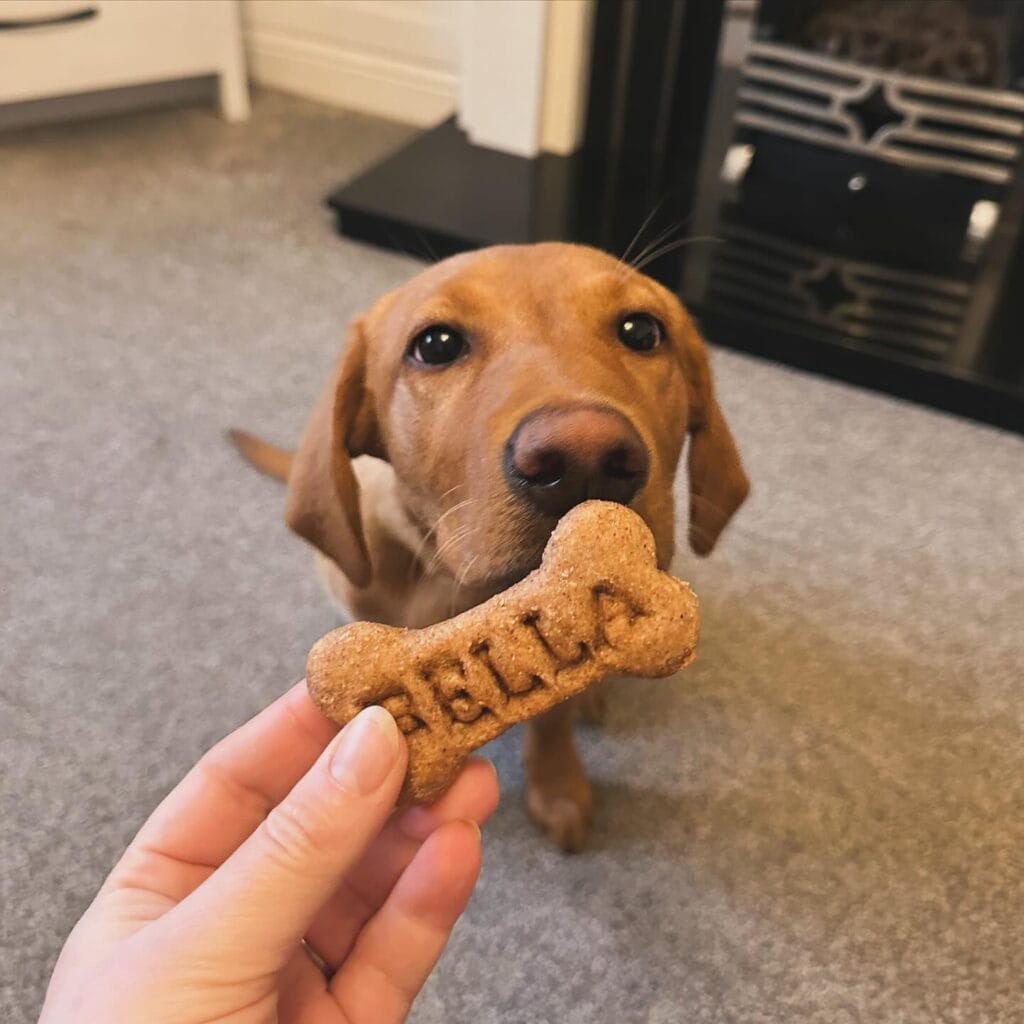
You know that moment when your golden stares at you with those eyes, and she’s got her nose inches from your hand while her tail is a blur, and you just want to give her something that feels special.
I made these for my neighbor’s dog last winter and I couldn’t stop laughing at how fast she inhales this thing.
Ingredients:
1. 2 cups whole wheat flour
2. 1/2 cup rolled oats
3. 1/3 cup natural peanut butter (unsalted)
4. 2 eggs
5. 1/3 cup water or low-sodium chicken broth
6. 1 tablespoon honey
How To Make Bella’s Biscuits
Preheat your oven to 350°F. In a large bowl, mix the peanut butter, eggs, honey, and broth together. Mix the flour and oats in gradually until a firm dough forms. Roll out the dough to a thickness of 1/4 inch.
Cut with a bone-shaped cookie cutter. Press a letter stamp into each biscuit before baking. They hold better in raw dough. Bake for 25-30 minutes until golden and firm. Cool completely before serving.
It turns out that firm biscuits are chewed longer, so it took one very occupied dog to eat those.
Refrigerate in an airtight container for up to 2 weeks.
Prep Time: 15 min | Cook Time: 30 min | Serves: 18-20 biscuits
📸 Photo credit: Instagram @bella_fox_red_lab
#4: Homemade Bone-Shaped Dog Biscuits (Yorkshire Terrier Approved!)
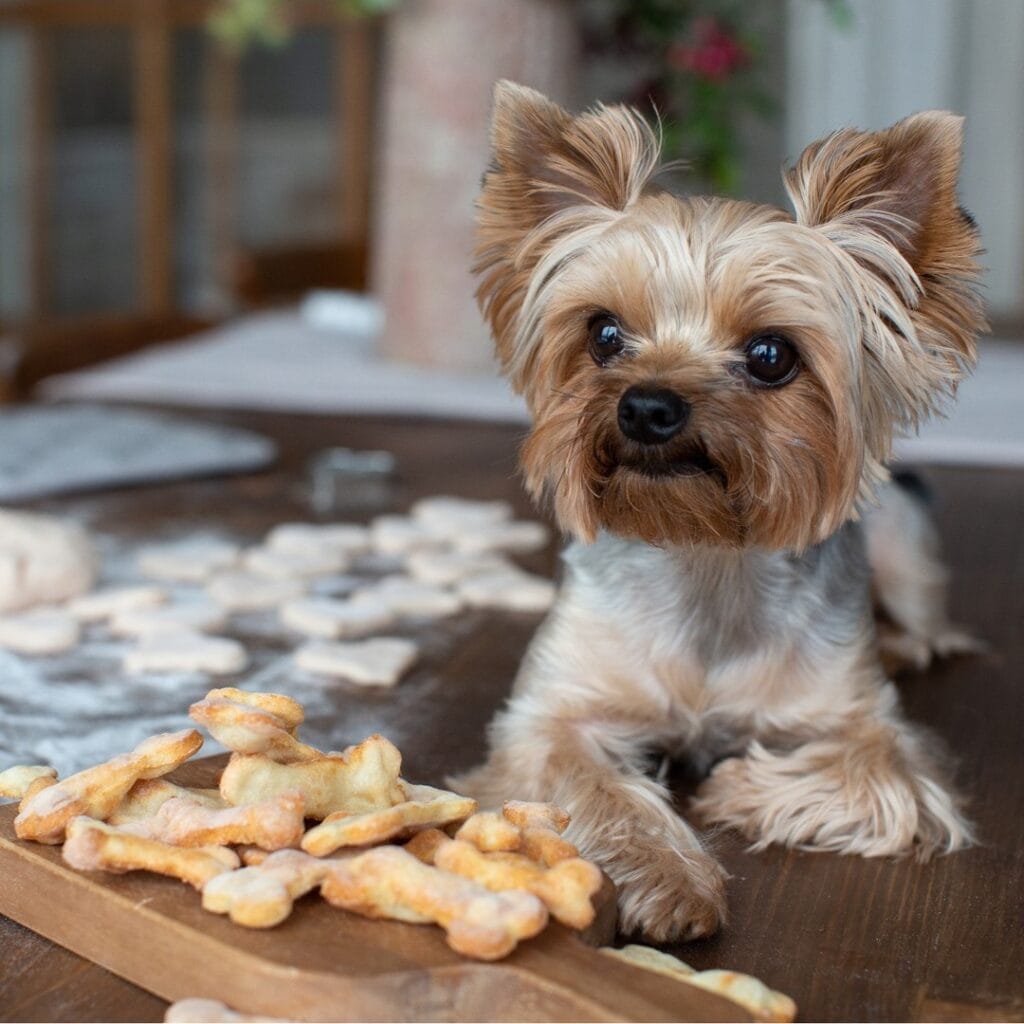
you know that stare that your golden looks at you when you’re eating something and she just stares at you? That’s the look in this picture for me at least.
These little bone-shaped biscuits are made from scratch, cut with a bone-shaped cookie cutter, and baked golden on a wooden cutting board. The unbaked ones in the background are still pale and soft.
Here’s What You Need:
1. 2 cups whole wheat flour
2. 1/2 cup rolled oats
3. 1/3 cup natural peanut butter (unsalted, xylitol-free)
4. 2 eggs
5. 1/2 cup low-sodium chicken broth
Let’s Bake These Things
Heat oven to 350°F. Mix together the flour and oats in a large bowl. Stir in the peanut butter, eggs and broth until a dough forms. The dough will feel a little stiff. Roll out the dough on a floured surface to about 1/4 inch thick. Cut into the bone shapes, and lay them out on a parchment paper lined baking sheet. Bake for 18-20 minutes until firm and golden.
The best part: These biscuits crunch when your dog bites down so your dog stays busy longer than if you were just giving her a soft treat.
Prep Time: 15 min | Cook Time: 20 min | Serving Size: ~30 small biscuits
If you like to keep things simple then these cookies will go perfectly with my simple 2 ingredient dog treats. And there’s always time for something even easier.
Make sure they cool on the pan for at least 10 minutes before handing one over – they firm up as they cool, so the bone shape is much easier to hold.
📸 Photo credit: Instagram @stellaandchewys
#5: Homemade Dog Biscuits in Bone, Star & Heart Shapes
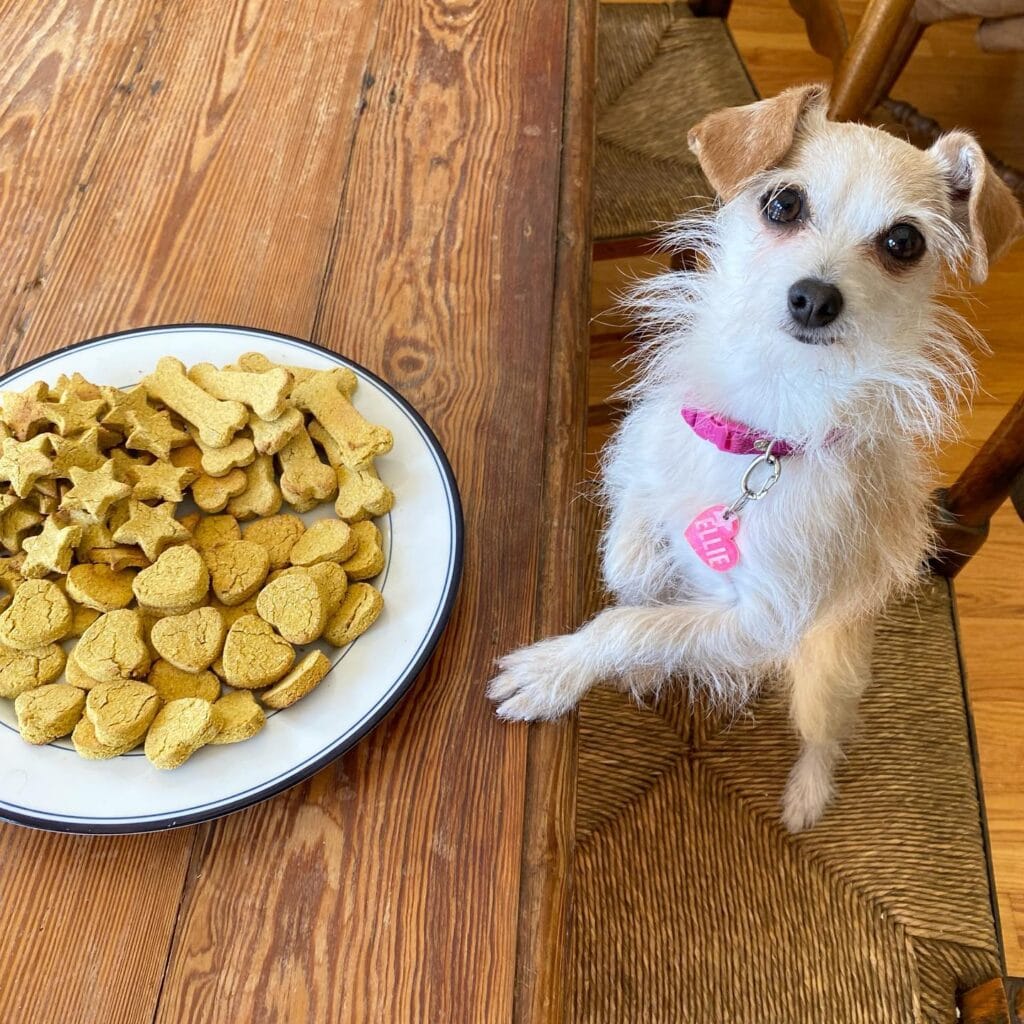
And your golden is sitting at your feet looking at you with that look – you know the one – where she tilts her head and you swear she’s saying “please” – and you just want to hand her something you made yourself, something without a ingredients list you can’t pronounce.
These little biscuits are so cute! They could be bone-shaped, star-shaped, heart-shaped… they’d look cute on a Pinterest board before they’re even put on a plate!
Ellie’s Mixed-Shape Peanut Butter Dog Biscuits
Prep Time: 15 min | Cook Time: 25 min | Makes: ~40 biscuits
Ingredients:
1. 2 cups whole wheat flour
2. 1/2 cup natural peanut butter (no xylitol!)
3. 2 eggs
4. 1/3 cup water
Let’s Bake These:
Preheat oven to 350°F. Mix peanut butter and eggs together until well combined, then slowly add flour until it’s all incorporated. Add enough water to make a firm, but not cracked, dough. Roll the dough out to 1/4 inch thick on a floured surface.
Cut out the shapes and arrange them on a parchment paper lined baking sheet. Bake 20-25 minutes until the cookies are golden brown and firm. Cool completely on a rack. This step ensures that the cookies are crunchy as opposed to soft.
The whole wheat flour gives the biscuits their crunch, helping to clean the dog’s teeth as she chews them. Who knew that was the kind of win you needed on a Tuesday?
If you like keeping things easy, Homemade 3-Ingredient Dog Treats: Easy, Healthy Recipes Your Pup Will Love is a book you’ll want to remember.
Store airtight in jar for up to two weeks. Or freeze half the batch. They thaw quickly.
📸 Photo credit: Instagram @ellie.the.mini.mutt
#6: Homemade Strawberry Peanut Butter Dog Bone Biscuits
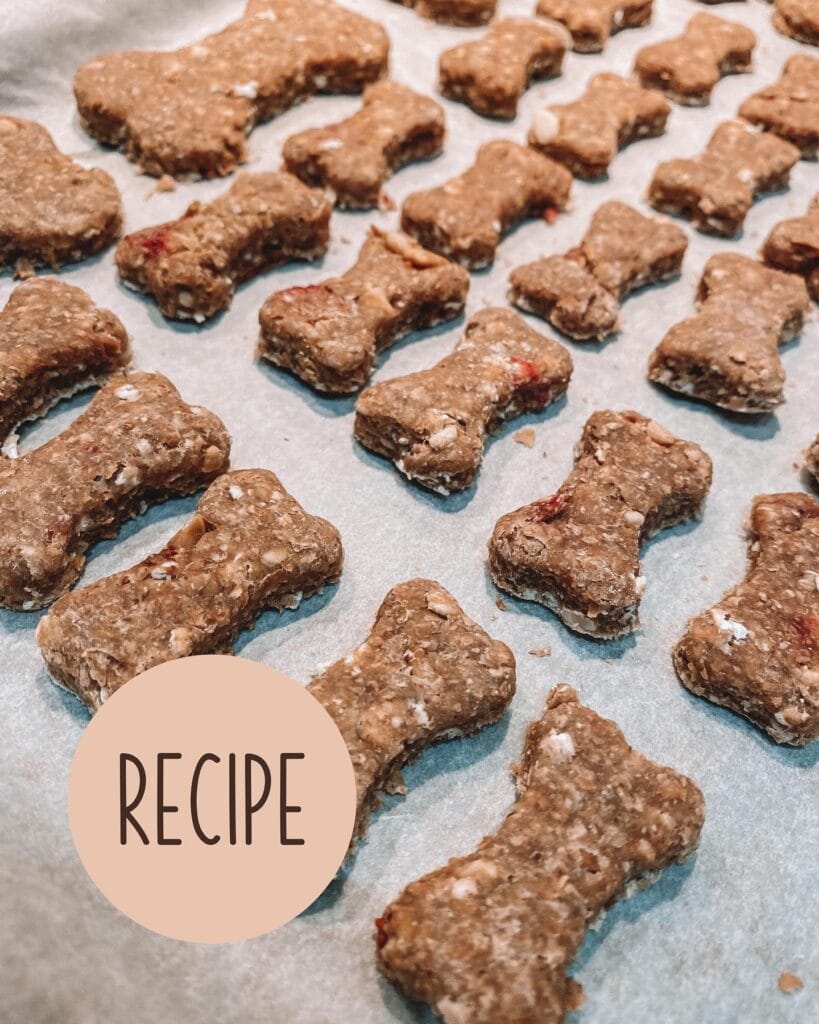
You know that moment when your golden gives you the eyes while you’re eating? Like full on, soul-crushing puppy dog eyes? I made these for my friend’s retriever last fall and the dog lost her mind over them.
These little bone shaped biscuits have bits of real strawberry peeking through the oat base. You can actually see the strawberry fruit inside! They are firm, but not rock hard. You’ll be happy to know these little treats won’t crumble all over your Pinterest-worthy throw rug.
Ingredients:
1. 2 cups whole wheat flour
2. 1 cup rolled oats
3. ½ cup natural peanut butter (no xylitol!)
4. ⅓ cup fresh strawberries, diced small
5. 1 egg
6. ½ cup water (add more if dough feels dry)
Let’s Make Them
Preheat oven to 350 degrees Fahrenheit. Mix the flour and oats together in a big bowl. Add the peanut butter and egg, mixing it together with your hands. You should have thick cookie dough. Fold in the strawberries. Do this gently, because they will turn everything pink.
Roll the dough out to about 1/4 inch thick on a floured surface. Use a bone shaped cookie cutter to cut out the shapes and lay them on a parchment lined baking sheet. Bake for 25-30 minutes until the edges start to brown. Let them cool completely before handing one over — they’re easier on sensitive tummies if they’re cool.
One thing to remember: thinner cuts get crunchier, and the dogs tend to go wild for them.
Prep Time: 15 mins | Cook Time: 30 mins | Makes: ~40 small bones
Oats give these treats some staying power: fiber keeps your girl full longer, which means fewer begging sessions during your dinner. For more fun ideas like this, check out the Ultimate Guide to Oven Dog Treats: Healthy, Homemade Recipes for Your Pup. This book has saved me on busy weeks.
These should be stored in an airtight container in the fridge for up to one week. You can also freeze a batch for up to three months. Make sure you freeze them in a single layer on a tray so they don’t stick together.
📸 Photo credit: Instagram @marnieandmoose
#7: Apple Oat Dog Bone Biscuits in a Paw Print Bowl
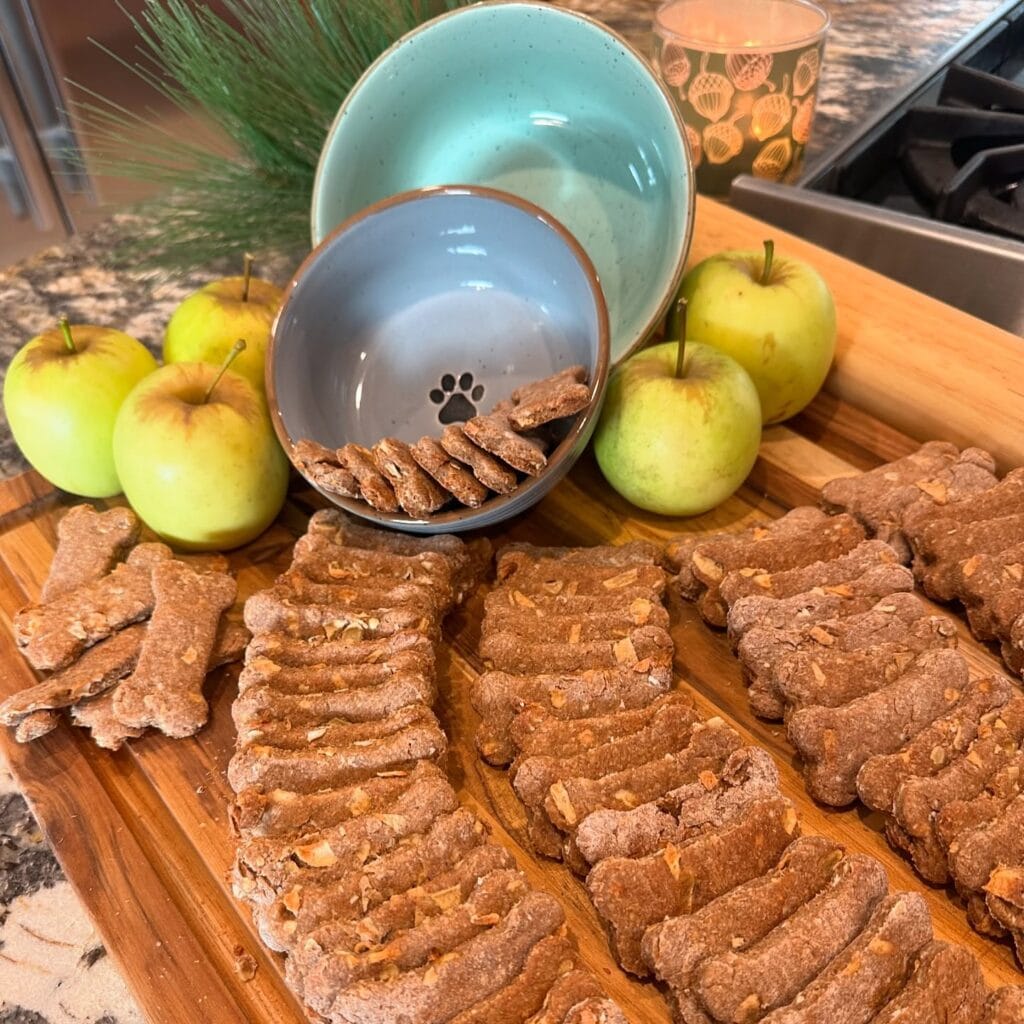
Have you ever gotten that stare from your golden that says “I know you’ve made something and I want it!” Yeah, I get that every time I step into the kitchen.
These bone-shaped biscuits are made with whole wheat flour, rolled oats and fresh green apples, and baked until they are firm and golden brown. The grey ceramic bowl with the cute little paw print on it is a little chef’s kiss to make the setup look something straight out of your Pinterest board.
Here’s How to Make Them:
Ingredients:
1. 2 cups whole wheat flour
2. 1 cup rolled oats
3. 1 medium green apple, peeled and grated
4. 1/3 cup unsweetened applesauce
5. 1 egg
6. 1/4 cup water (add more if dough is dry)
Preheat the oven to 350°F (175°C). Mix together the flour and oats. Add the grated apple and applesauce and the egg. Stir until a firm dough forms. If the dough is crumbly, add water one tablespoon at a time, until the dough forms. Roll the dough out to ¼-inch thickness and cut with bone-shaped cookie cutters. Bake for 25-30 minutes, until firm. Let the cookies cool completely before serving. As the cookies cool, they harden and will last longer.
Prep Time: 15 min | Cook Time: 30 min | Serving Size: ~36 bones
These apple dog treats will store in an airtight container for up to two weeks and you can bake once and be rewarded often. Your girl will never forget you.
I’ve decided to store half of the bowl in the freezer. Frozen clementines thaw in minutes and are still crunchy.
📸 Photo credit: Instagram @realtorj
#8: Bone-Shaped Peanut Butter Dog Biscuits
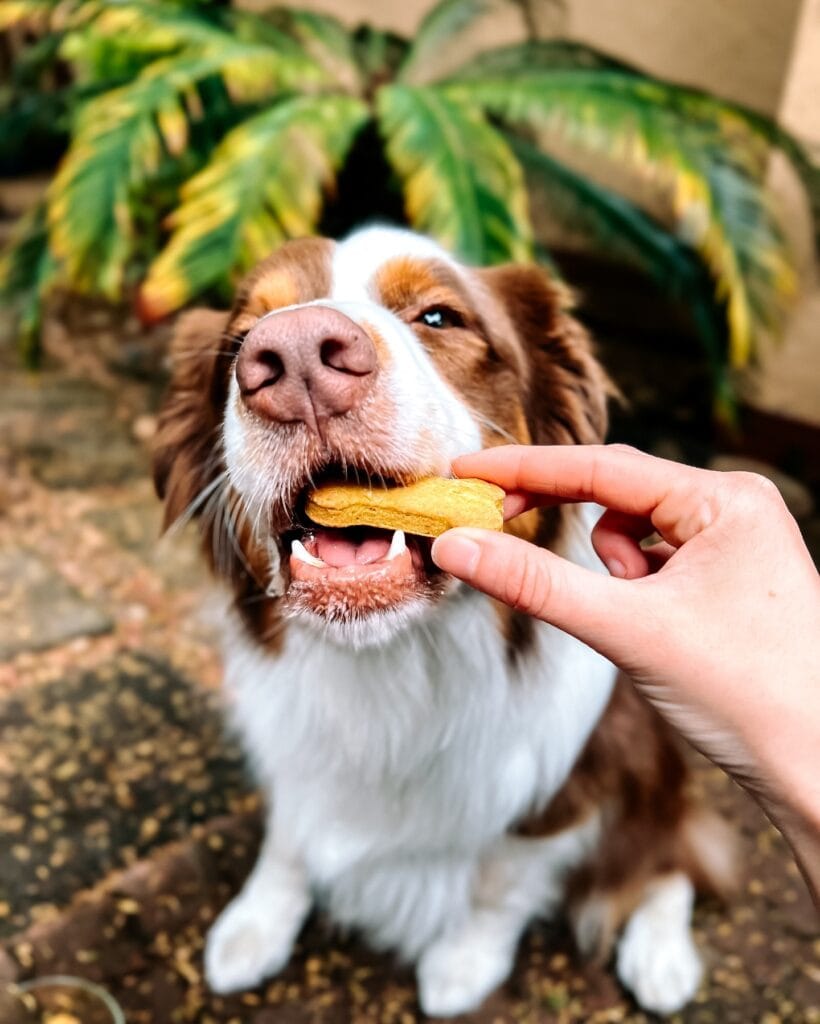
The look: that gorgeous, golden, staring at you like you hung the moon, waiting for something good. These little biscuits give her that look.
And you know what? I made a batch last fall when my cousin’s dog kept begging at the counter, and they were gone in two days.
Ingredients:
1. 2 cups whole wheat flour
2. 1 tablespoon baking powder
3. ½ cup natural peanut butter (unsalted, xylitol-free)
4. 2 eggs
5. ½ cup water (add more if dough feels dry)
Let’s Bake These Little Beauties
Preheat the oven to 350°F. Mix the peanut butter and eggs together until smooth so the dough does not become crumbly. Add the flour and baking powder and mix in. Slowly add the water until you have a firm dough. Roll out to 1/4 inch thick on a floured surface. Cut out with a bone-shaped cookie cutter and place on a baking sheet lined with parchment paper. Bake for 20-25 minutes, or until golden brown and firm. Let the biscuits cool on a wire rack. These biscuits will stay soft if they are warm, so let them cool.
Prep Time: 10 mins | Cook Time: 25 mins | Serving Size: ~24 biscuits
Firm dough makes crunchy biscuits, which helps scrape plaque off teeth. If that sort of thing floats your boat, the 14 Best Homemade Dog Toothpaste Recipes for Happy, Healthy Smiles are a perfect addition to your dog’s biscuit-making routine.
Store them in an airtight jar for up to two weeks, or freeze for later.
📸 Photo credit: Instagram @kai.the.aussie_sa
#9: Homemade Bone-Shaped Dog Treats Baked on Parchment
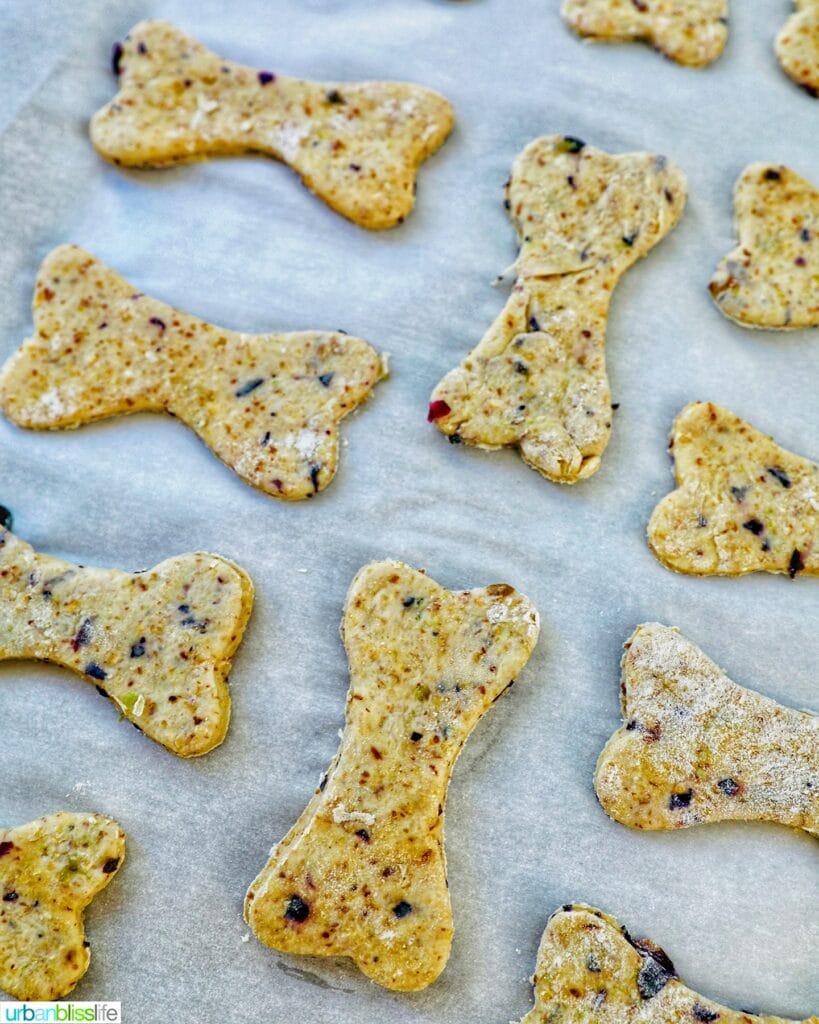
Your golden retriever is staring at you while you eat. It has no shame. Those big brown eyes are designed to make you feel guilty for every single bite you eat.
They are my answer to these bone-shaped treats.
How to Make Them
Ingredients:
1. 2 cups whole wheat flour
2. 1/2 cup rolled oats
3. 1/3 cup finely diced mixed vegetables (bell pepper, zucchini, olives)
4. 1 egg
5. 1/2 cup low-sodium chicken or vegetable broth
6. 2 tablespoons olive oil
Instructions
Mix the dry ingredients (flour, oats and diced vegetables) in a large bowl. Beat in the egg and broth. Add the oil and stir until a firm dough forms. Roll out to about 1/4 inch thick on a lightly floured surface. Cut with a bone-shaped cookie cutter and lay on a parchment-lined baking sheet. Space cookies about 1″ apart.
Bake at 350°F for 25-30 minutes until golden and firm. Let them cool on the pan completely – it is easier to handle the treats when they are cool and you don’t want crumbs on the rug.
Prep Time: 15 mins | Cook Time: 30 mins | Serving Size: 20-24 treats
Store them in an airtight container. They will stay fresh for two weeks, so your golden is happy and you will be the perfect dog mom.
📸 Photo credit: Instagram @urbanblisslife
#10: Cheesy Pumpkin Gougères (The Fancy Dog-Mom Snack That’s Actually Easy)
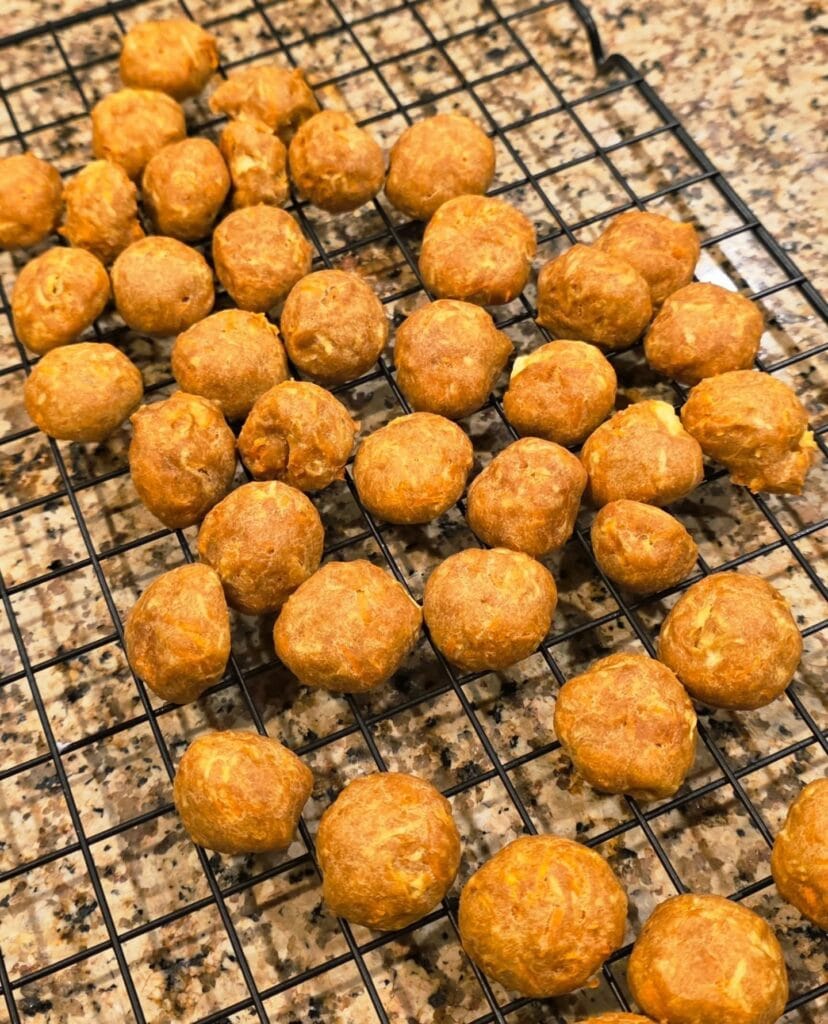
Let’s pretend like you’re having a fall Pinterest party and your golden is somehow sitting still for once, and you pull these little golden puffs out of the oven and the whole kitchen smells like warm cheddar and pumpkin and your guests think you went to culinary school.
You didn’t. You just had 45 minutes and a can of pumpkin purée.
Ingredients:
1. 1 cup water
2. ½ cup (1 stick) unsalted butter
3. 1 cup all-purpose flour
4. 4 large eggs
5. ¾ cup sharp cheddar cheese, shredded
6. ⅓ cup pumpkin purée (not pumpkin pie filling)
7. ½ teaspoon salt
8. ¼ teaspoon garlic powder
9. Pinch of cayenne (optional but worth it)
Prep Time: 15 minutes | Cook Time: 30 minutes | Serving Size: About 35–40 small puffs
—
Here’s How You Actually Make These
Bring the water and butter to a boil in a medium saucepan over medium heat. As soon as it’s rolling, add all the flour at once and stir hard with a wooden spoon until the dough forms a smooth, soft, ball. This will take about 2 minutes. This is oddly satisfying.
I also find it best to remove the pan from heat and let it cool for about 5 minutes so I don’t accidentally scramble my eggs. I then add one egg at a time, while stirring, so that I don’t end up with one large, scrambled omelet. At first, the dough will look very weird and oily, but keep stirring.
Pour the shredded cheddar, pumpkin purée, salt, garlic powder and cayenne in. The dough should turn a pretty orange color. When I was growing up, my aunt used to make regular gougères every Christmas and the first time she added pumpkin I was just standing over the bowl staring at it.
Scoop with a heaping teaspoon onto a parchment-lined baking sheet. Leave them about 1 inch apart, since they will puff up a bit. Bake in the oven at 400°F for 25 to 30 minutes, until they’re deep golden and hollow-sounding when you tap the bottom.
DON’T open the oven before 20 minutes of cooking. The steam inside is doing the job.
These puffs have a crispy outer shell with a cheesy airy center. Because of the crispy outer shell, they are not heavy, so nobody eats just one. The puffs are worth it because they look wildly impressive on a cutting board next to a glass of wine and nobody needs to know that the ingredient list is basically pantry staples.
Cool them on a wire rack, like shown, to avoid the bottoms getting soggy while you finish the rest of the batch.
If you want to reheat leftovers, just pop them into the oven set at 375 degrees for 5 minutes and they will crisp right back up, like they just came out of the oven.
📸 Photo credit: Instagram @whennonnocooks
The One Mistake That’s Making Your Dog Biscuits Crumble (And How to Fix It)
So if you have been following me for a while then you know that I have ruined a good number of batches of soap before I got this down. Well not anymore!
Most people will pull their biscuits out of the oven when they are done, but not dog biscuits. Dog biscuits need a second bake.
When your timer goes off, I like to turn the oven down to 200 degrees and leave them in there another 20-30 minutes. This cooks them really slow and pull out all the moisture and you will get a nice crunchy biscuits. If you skip this step, you will get a soft and crumbly biscuits and will mold within a few days.
Also, you might not think that the flour you use matters, but if your dog has any sort of sensitivity issues (and there are a LOT of dogs that do, you should check out our article, 5 Best Dog Foods for Allergies: Finding the Right Diet for Your Allergic Dog), you should use oat flour. It binds better and is easier on their stomach.
Now for the easy part: once they are fully cooled i put them in a mesh bag not air tight a little bit of humidity will ruin homemade stuff FAST.
Your Golden Deserves a Bowl That Works as Hard as She Does
You’ve already done the hardest part… figuring out what your girl really needs. All you have to do now is pick the bowl and stick with it.
Start with one of the following options, and try it for two weeks. You will see a difference quickly in how she eats. You will notice less gulping and mess and you will see less zoomies around the house after dinner.
And if her stomach has been acting up, a good bowl of food can make a difference as well — food built for sensitive stomachs that is meant for a sensitive stomach.
If you have a golden, what is the one thing he does at mealtime that drives you crazy?

Amr Mohsen is a software engineer who traded his keyboard for a leash — at least on weekends. His love for dogs inspired him to share what he learns as a dog owner and enthusiast, bringing a detail-oriented, research-driven perspective to every article he writes. If it’s about dogs, he’s probably already looked it up twice.