
Okay, so maybe your golden retriever stares at you with those big, brown eyes like you owe him a snack?
Yeah. Mine does the same thing.
I used to just grab whatever was on the pet store shelf and give it to him with a treat, but one day I decided to actually read the ingredients list and was like, no. no no no no no.
I started making oven dog treats at home and the whole process of making them has been such a game changer. My kitchen smells like peanut butter on Saturdays, my dog is LOSING HIS MIND with excitement, and I know what’s actually going into his body.
Real talk: These 8 recipes are stupid simple, use ingredients you already have, and your dog will be in heaven.
Let’s get baking. 🐾
#1: Homemade Pumpkin Dog Bone Biscuits
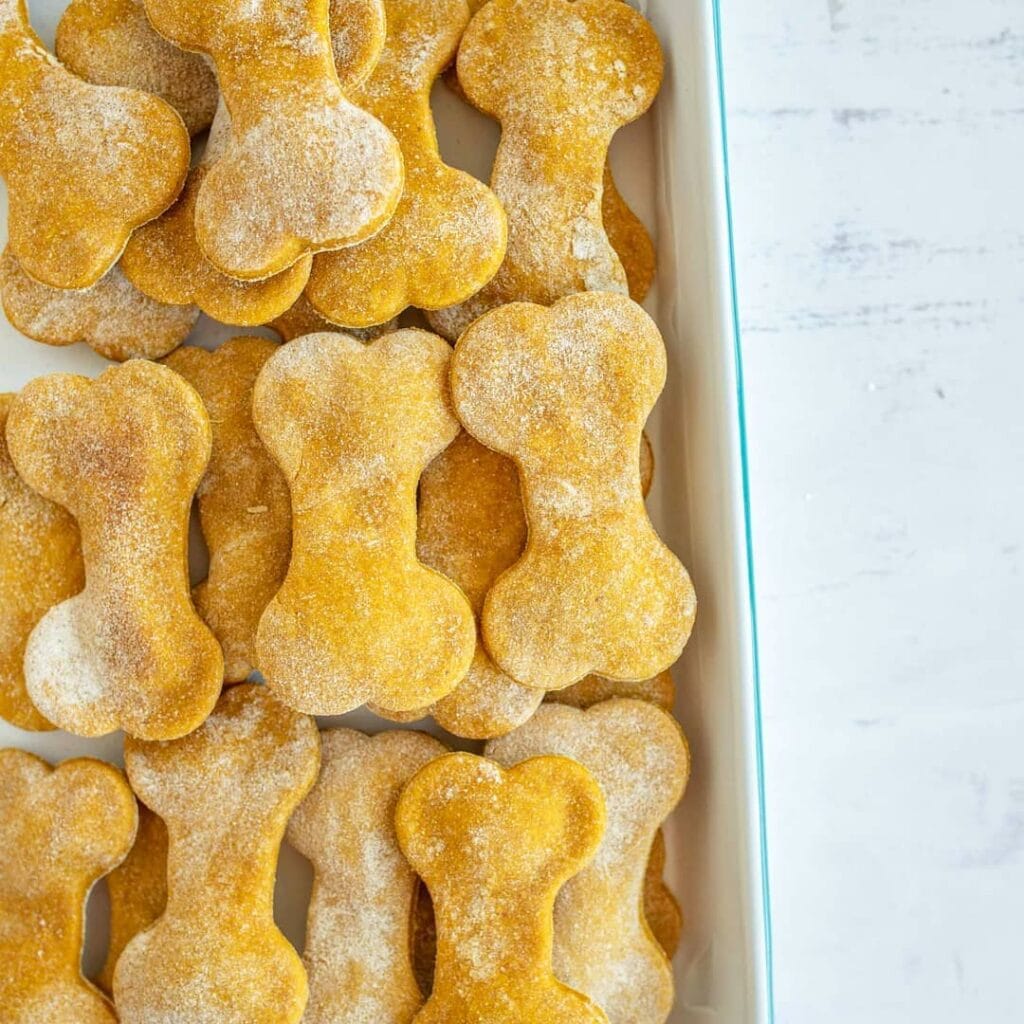
Your golden stares at you with those big eyes of hers again… those eyes that say “treat me like the royalty I am”.
Good news: These pumpkin dog bone biscuits are stupid easy to make and they smell so good baking that you may want one yourself.
Ingredients:
1. 2 ½ cups whole wheat flour
2. ½ cup pure pumpkin purée (not pie filling)
3. 2 eggs
4. 3 tablespoons natural peanut butter (xylitol-free)
5. ½ teaspoon cinnamon
Let’s Make Them
PREHEAT YOUR OVEN TO 350°F. Beat the pumpkin, eggs and peanut butter together in a large bowl. I put the flour in last and stir just until it forms a stiff dough. If the dough feels a little sticky add flour one tablespoon at a time.
Roll out dough to ¼-inch thick on a floured surface. Cut into shape with a bone-shaped cookie cutter and place on a baking sheet lined with parchment paper. Bake for 25-30 minutes or until the edges are golden brown and firm. Let cool completely as the centers will firm up as the cookies cool.
These have a lot of fiber and beta-carotene from the pumpkin which will be nice for your girl’s digestion. If you like spoiling your girl with tasty treats, definitely check out Homemade Dog Biscuits Recipes: Healthy and Delicious Treats for Your Pup.
Store in an airtight container for up to 2 weeks, or freeze for later use.
Prep Time: 15 min | Cook Time: 30 min | Makes: ~30 biscuits
📸 Photo credit: Instagram @blessthismessblog
#2: Homemade Pumpkin Dog Treats (Bone & Paw Shaped!)
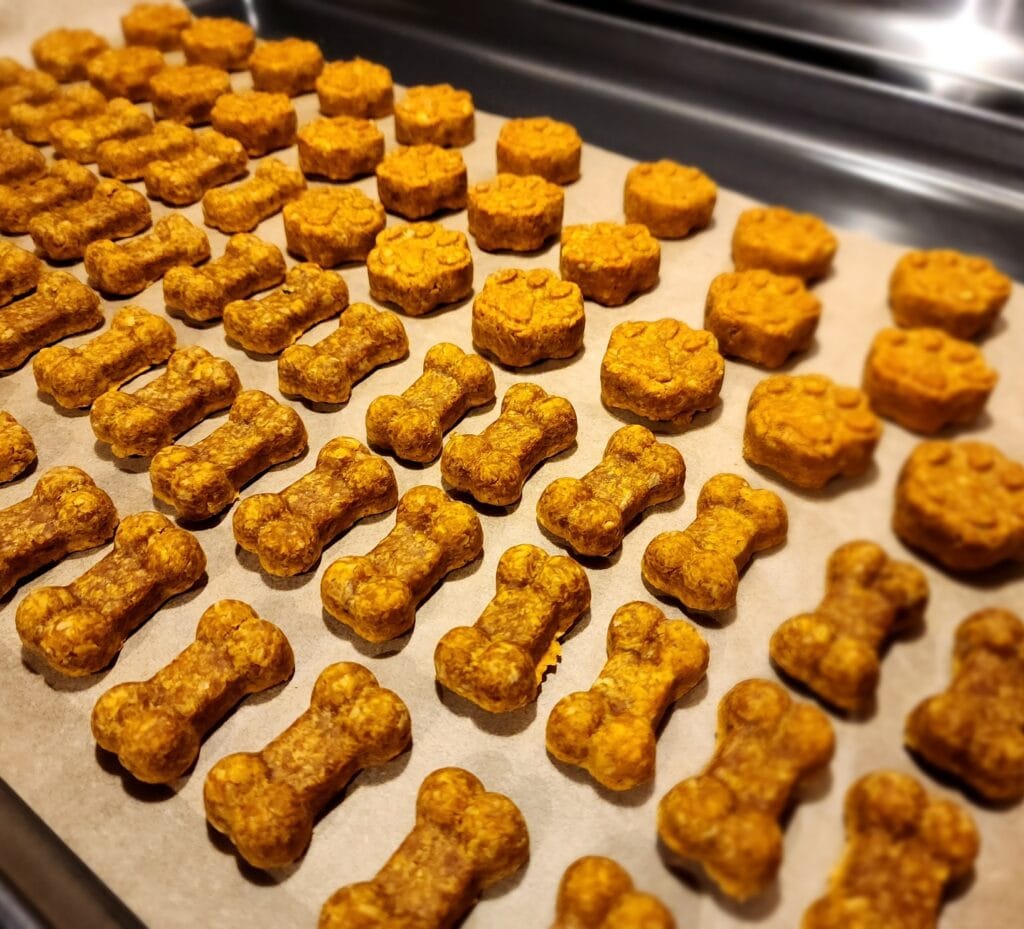
Your goldie just stared at you while you ate breakfast again. I feel like the worst person alive. Maybe I’m just overreacting but I feel so terrible. Ugh.
These little guys are the answer. They’re golden-orange from real pumpkin and come out of the oven smelling like the best fall kitchen (warm, slightly spiced, wholesome).
Pumpkin Oat Dog Treats — Ingredients:
1. 1 cup pure pumpkin purée (not pie filling)
2. 2 cups whole wheat flour
3. ½ cup rolled oats
4. 2 tablespoons natural peanut butter (xylitol-free)
5. 1 egg
6. ½ teaspoon cinnamon
Let’s Bake These Babies
Preheat the oven to 350° F. In a bowl mix the pumpkin, peanut butter and egg. Add the flour, oats and cinnamon and stir together until a firm dough forms. Roll out the dough to ¼ inch thickness on a lightly floured surface. Use your bone and paw shaped cutters to cut out your dog biscuits. Bake in a parchment lined pan for 25-30 minutes until the edges are a deep golden color. Allow the dog biscuits to cool completely before giving one to your pup as a warm biscuit will be crumbly.
Prep Time: 15 min | Cook Time: 28 min | Serving Size: ~60 small treats
Pumpkin helps with digestion and adds fiber so there are less of the special moments on your rug and the oats add the structure without being too hard on her teeth.
I have not tried this, but my friend does and store them in a airtight jar on the counter. They stay fresh for one week at room temp or you can freeze them in a zip-lock bag for up to 3 months. I made a double batch in October and she brought the frozen ones over for my dog in January and every single one was brand new.
📸 Photo credit: Instagram @haligonianvendormarket
#3: Winnie-the-Pooh Bear-Shaped Peanut Butter Dog Cookies
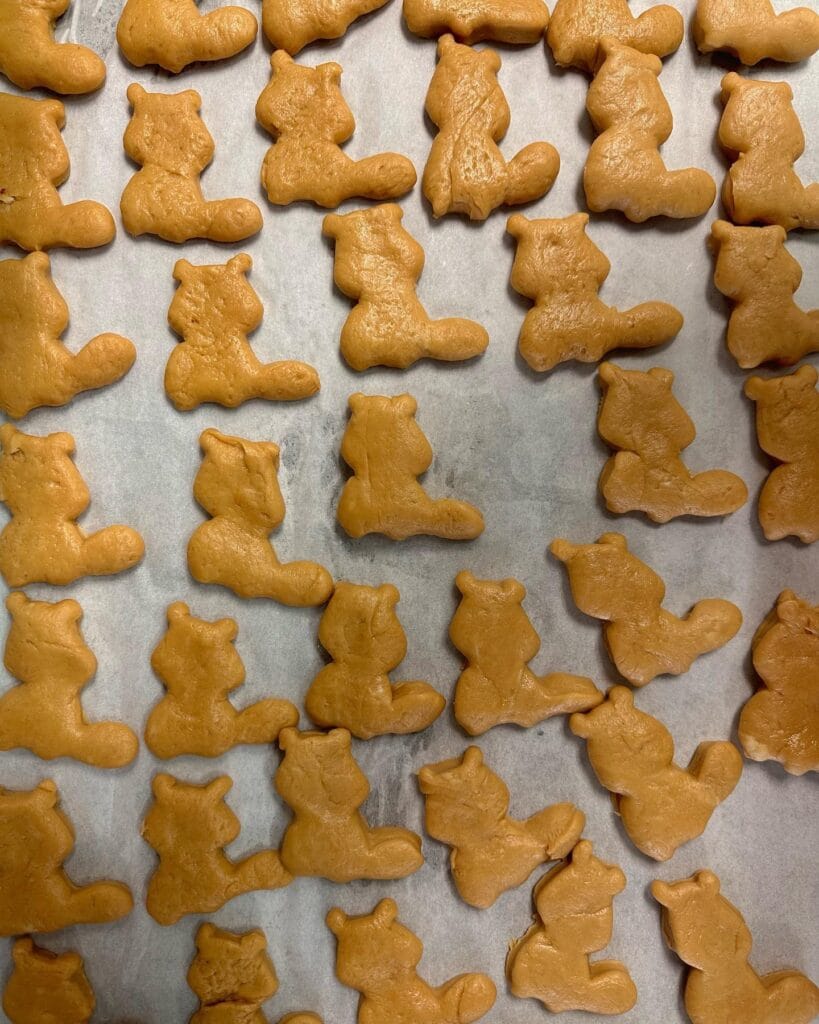
You’ve been there before. Your dog gets those puppy dog eyes on him, and you’re a goner. You give in, every. single. time. I know I do. I made a whole batch of these bear-shaped cookies last Sunday, and I just couldn’t help smiling the whole time.
They are also shaped like little sitting bears, just like Winnie-the-Pooh, and they are baked golden brown on parchment paper. The color is the same honey-tan like a real cookie so it’s almost too cute to give away.
How to Make Them
Ingredients:
1. 2 cups whole wheat flour
2. ½ cup natural peanut butter (unsalted, xylitol-free)
3. 2 eggs
4. ¼ cup water
Bear-Shaped Cookie Instructions
Preheat oven to 350°F. Mix peanut butter and eggs in a large bowl. Stir until smooth. Add flour in a little at a time and a touch of water at a time until a stiff dough forms. Roll the dough to ¼ inch thickness and press a firm, straight-down motion with your bear cookie cutter. Bake 12-15 minutes until edges are golden. Thicker dough makes a chewier treat for your dog to have to work through and will keep him occupied longer.
These pair great with the homemade 2-ingredient dog treats (just a little variety).
It’s best to let them cool completely, or they’ll crumble and stick to the cats’ fur. Ask me how I know.
Prep Time: 15 min | Cook Time: 15 min | Serving Size: ~30 bears
📸 Photo credit: Instagram @juanmuoz6
#4: Fall-Shaped Frozen Pumpkin Peanut Butter Dog Treats
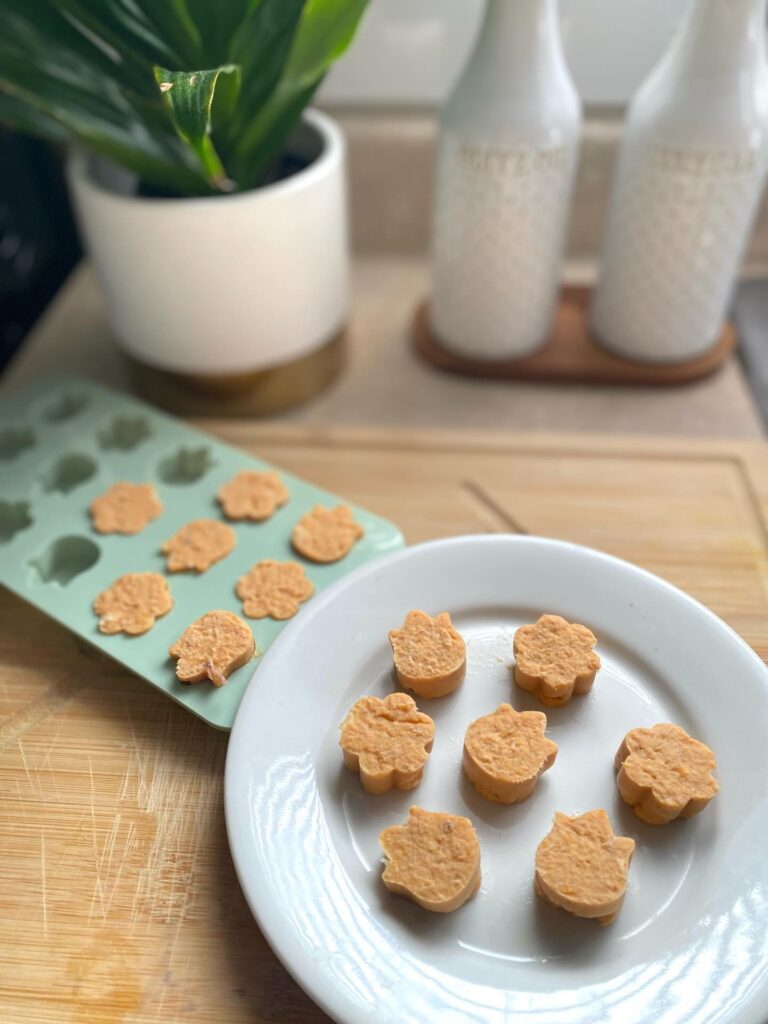
Oh you know what I am talking about! The moment your dog gives you those eyes while you are eating something and you just give in. That is me every single time! I had a hard time giving these little guys away they are so cute!
These little guys are made using a sage green silicone fall mold, then poured into a white ceramic plate for serving. The color of the pumpkin is a warm golden orange from pumpkin puree mixed with peanut butter.
Ingredients:
1. 1 cup pure pumpkin puree (not pie filling)
2. ½ cup natural peanut butter (xylitol-free)
3. 2 tablespoons plain Greek yogurt
How To Make Them
Mix your pumpkin, peanut butter and yogurt together in a bowl until smooth. Spoon your mixture into your silicone fall molds. You can use a small piping bag to help get it in (trust me, you’ll thank me). Freeze the ice pops for at least 4 hours. To remove, gently flex the mold from underneath.
Prep Time: 10 min | Freeze Time: 4 hours | Serving Size: 12–15 pieces
Pumpkin helps with digestion, peanut butter provides protein, and yogurt supplies probiotics. We love that our dog gets a treat that actually does something good for her!
And, if you want some more simple ideas, Homemade 3-Ingredient Dog Treats: Easy, Healthy Recipes Your Pup Will Love is the site for you.
Freezer-safe bags are good for storing extras for up to 3 weeks (they hold their shape better if kept frozen until serving time).
📸 Photo credit: Instagram @leo_the_malshi_
#5: Sleeping Puppy Pancake — The Cutest Fluffy Stack You’ll Ever Make
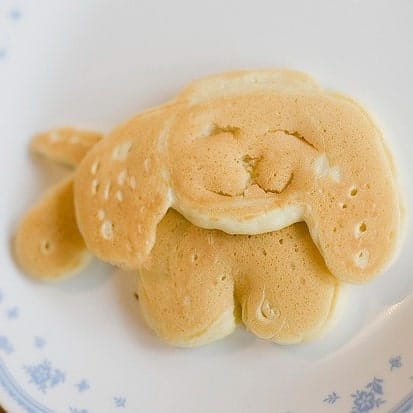
You’re watching your golden snoozing on the couch, one paw over their nose, and you are in the kitchen thinking, “How do I capture this moment forever?”
This pancake does exactly that.
Ingredients:
1. 1 cup all-purpose flour
2. 1 tablespoon sugar
3. 1 teaspoon baking powder
4. ½ teaspoon baking soda
5. ¾ cup buttermilk
6. 1 egg
7. 2 tablespoons melted butter
8. Pinch of salt
How To Shape Your Sleeping Puppy Pancake
Mix the dry ingredients first then whisk in the buttermilk, egg and butter until just combined. Lumps are okay here, over mixing them can make them tough.
Pour into a squeeze bottle. Pipe the body shape first (a rounded oval) and let it bubble for 45 seconds. Add the head, floppy ears, and tiny paws on top and then flip once.
Cook over a non stick pan on medium low heat. You’ll get a adorable 3D sleeping dog shape with the layered piping.
Plus, the timing — 2 minutes for the first side and 1 minute for the second — keeps them nice and golden without drying out.
Let the pancake cool for a bit (just slightly) before serving so the layers don’t all melt together.
Prep Time: 10 min | Cook Time: 15 min | Serves: 4 pancakes
📸 Photo credit: Instagram @littlebigpawpetfood
#6: Corgi Face Dog Biscuits (Peanut Butter & Pumpkin)
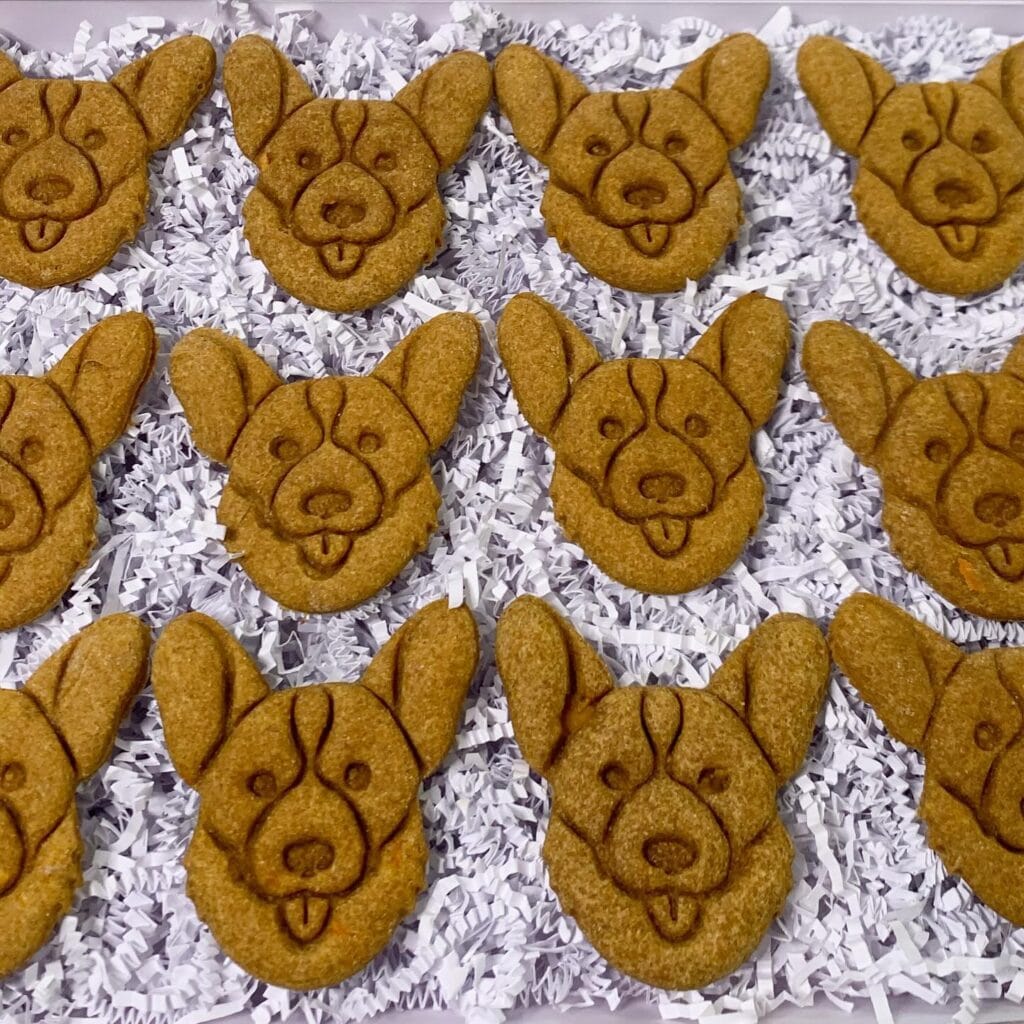
Um, you know how your golden gives you those eyes when you’re eating something and you just cave and give them a little bit? I made these for my cousin’s corgi last fall and her dog lost his mind over them! I make a batch every few weeks now to have on hand.
Ingredients:
1. 2 cups whole wheat flour
2. ½ cup pure pumpkin purée (not pie filling)
3. ¼ cup natural peanut butter (xylitol-free)
4. 2 eggs
5. 1 tablespoon honey
Let’s Bake These Little Faces
Preheat oven to 350°F. Mix the pumpkin, peanut butter, eggs, and honey in a large bowl. Mix well, the wet ingredients combine better before the flour. Add flour a little at a time until a firm dough forms. Roll out on a floured surface to about ¼ inch thick. Use your corgi-face cookie cutter to make the cookies. Place on a lined baking sheet and bake 18-20 minutes until the edges begin to brown. Cool on a rack, as a warm biscuit will be more likely to crumble and lose the adorable ears!
Prep Time: 15 mins | Cook Time: 20 mins | Serving Size: 18-22 biscuits
Also, the firm texture keeps them crunchy longer, which means less mold and a treat your golden actually has to work through – great for slow eaters.
Store these little guys in an open-top jar for up to two weeks (airflow = crunch).
📸 Photo credit: Instagram @shantesfurryloves
#7: Homemade Peanut Butter Dog Bone Biscuits
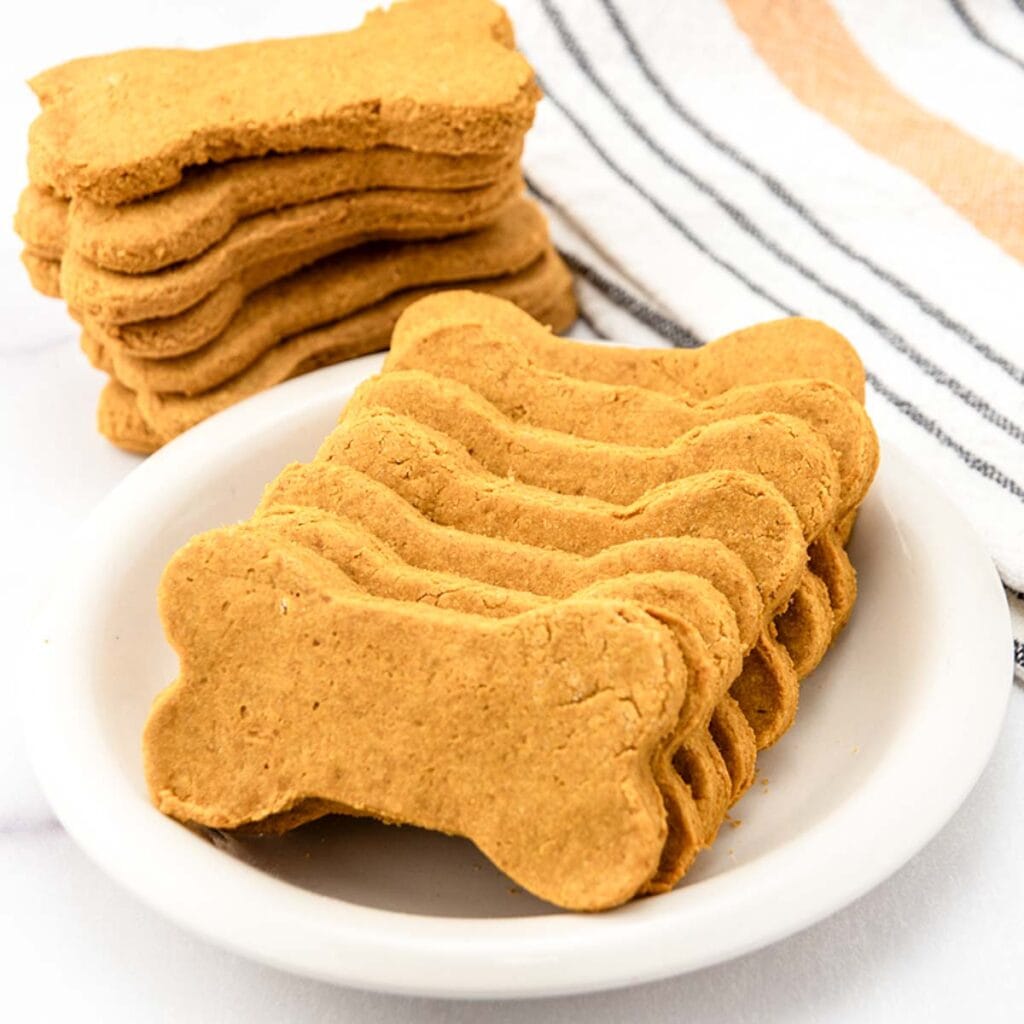
His nose is already in the kitchen, before you even open the oven door. The tail starts going, and he’s up on the counter, with those paws. At 65 pounds, this guy has no chill.
These bone-shaped biscuits are my treat of choice when I want to feel like a good dog mom – and when I want something cute enough to leave out on my kitchen counter.
Here’s What Goes In Them:
1. 2 cups whole wheat flour
2. 1/2 cup natural peanut butter (xylitol-free, always check the label)
3. 2 eggs
4. 1/3 cup water
5. 1 tablespoon honey
Let’s Bake These Things
Set your oven for 350 degrees F. Beat the peanut butter, eggs and honey together. It’ll get thick and sticky, which is exactly what we want. Add the flour slowly, then water a little at a time until you get a dough that sticks together without crumbling.
Roll the dough out to about 1/4 inch thick and then press the bone shaped cookie cutter firmly down. Bake the biscuits on a lined sheet for 18-20 minutes until golden and firm to the touch. Allow them to cool. Warm biscuits are soft, cool biscuits are crunchy. I bake them and then put them in an airtight jar on the counter. They last a while that way.
I rolled my dough a little thicker than normal for a chewier treat for a heavy chewer like my Golden.
If you want a little variety in your dog treat rotation, these go great with Carrot Dog Treats: A Healthy and Delicious Option for Your Pup!
Prep Time: 15 minutes | Cooking Time: 20 minutes | Serving Size: About 24 biscuits
You can store them in an airtight container for up to two weeks at room temperature or freeze a batch for up to three months. I always double the recipe because these suckers don’t last long at our house.
📸 Photo credit: Instagram @spoiledhounds
#8: Peanut Butter Banana Bacon Dog Treats (Paw-Shaped!)
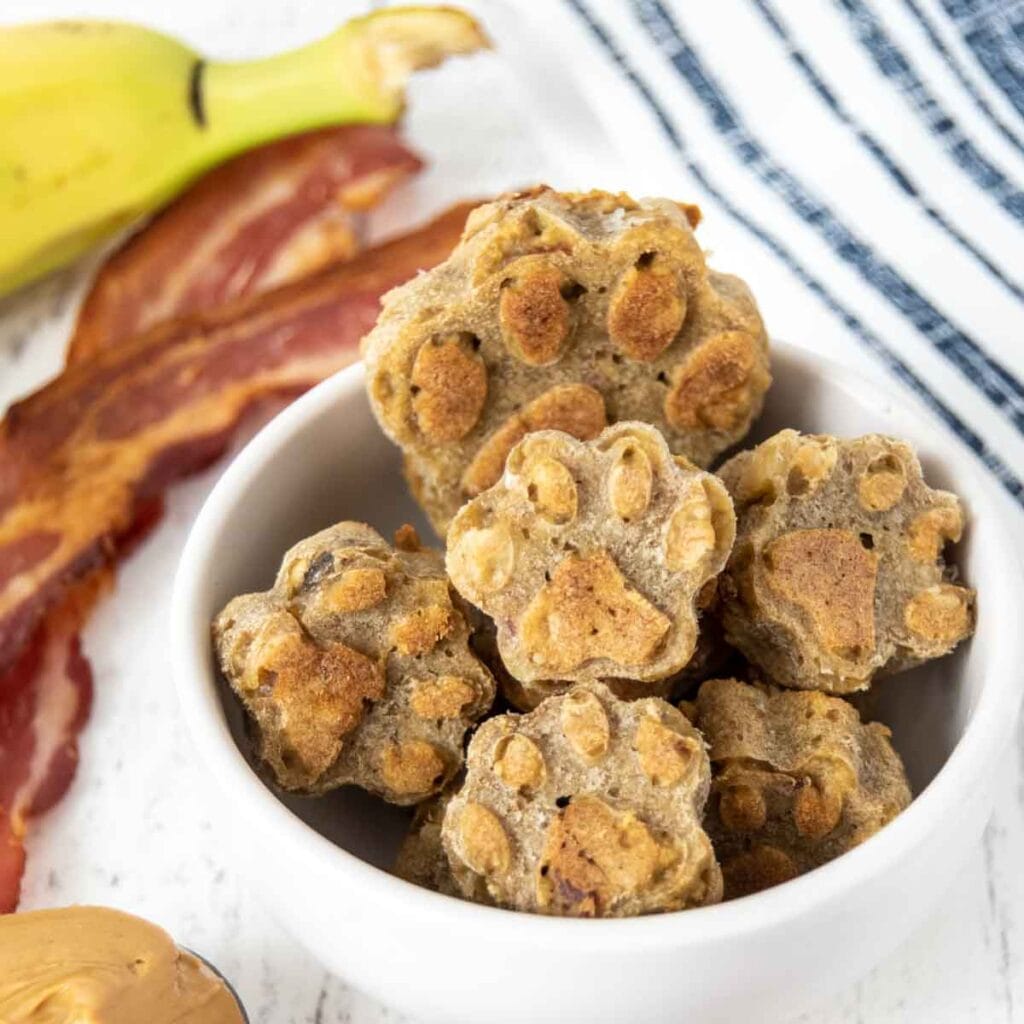
Not only does your golden stare at you while you eat your breakfast, but you get the guilty feeling about it every time. “My dog does the same thing and I feel so bad,” I tell you, girl, because I know exactly what you are going through with your dog Koda.
These little paw-shaped treats are made with whole wheat flour, Rolled oats, ripe banana, peanut butter, and cooked bacon crumbles pressed into the top for the bumpy paw texture.
Ingredients:
1. 2 cups whole wheat flour
2. 1 ripe banana, mashed
3. ½ cup natural peanut butter (xylitol-free)
4. 3 strips cooked bacon, crumbled fine
5. ¼ cup rolled oats
6. 2 eggs
7. ¼ cup water (add more if dough feels dry)
How To Make These Paw Treats
Preheat oven to 350 degrees F. In a large bowl, combine the mashed banana, peanut butter and eggs. Mix well, then gradually add the flour until the dough holds together. Add the bacon crumbles and a little water until the dough isn’t sticky anymore. Press the dough into a paw-shaped silicone mold. Push a few pieces of rolled oats onto each surface of the paw. Bake for 18-22 minutes or until edges are golden brown. Let cool completely before feeding to your dog; warm treats might upset your dog’s stomach.
Prep Time: 10 min | Cook Time: 20 min | Serving Size: ~24 treats
The oats on top not only look cute, but they also provide fiber that can support digestion, which in turn means fewer strange tummy moments on your good rug.
If your golden likes to inhale his treats whole, then you may want to make a slightly thicker mold press so that the treat doesn’t fall apart as quickly.
📸 Photo credit: Instagram @spoiledhounds
The Oven Trick That Changes Everything About Homemade Dog Treats
One thing that people always seem to get wrong when it comes to making peanut butter biscuits is not using enough peanut butter. I learnt this the hard way, when I had to throw away an entire batch of peanut butter biscuits when making it for my cousin’s lab.
Your oven temperature is lying to you.
Most ovens are 25-50 degrees hotter than what the dial says. And since the dog treats are small and dense, that makes for a huge problem. Get a cheap oven thermometer ($8?) and your treats won’t burn on the outside and stay raw in the middle.
The other thing I do, is to pull the treats out of the oven a few minutes early and leave them on the pan. The residual heat from the pan will crisp them up. (Which is why they aren’t soft and crumbly).
your golden girl will go wild for the difference.
Also, I flip the pan halfway through baking so that every cookie gets an even amount of color.
If you want to branch out, try making some baked dog treats with different flavor combos. But be sure your oven is actually correct first!
Your Floors Deserve Better Than Mud Season
Well, you have done the hardest part. You have figured out that the way you are doing things just isn’t working. So, pick one mat and order it. Let it do its job.
Golden retrievers are messy and magnificent. You don’t have to choose between having a dog you adore, and having floors you’re proud of.
Depending on the color of the mat, it can really pull the whole feel of your home together or it can be the eyesore you hide before your friends come over. If you are truly a “great dog mom” I recommend going next level and making homemade soft dog treats that your pup will love!
Mmm, which mat would you like to try first?

Amr Mohsen is a software engineer who traded his keyboard for a leash — at least on weekends. His love for dogs inspired him to share what he learns as a dog owner and enthusiast, bringing a detail-oriented, research-driven perspective to every article he writes. If it’s about dogs, he’s probably already looked it up twice.