
Your golden retriever just did the thing again.
Whether it’s mud on your freshly cleaned throw rug or drool on your couch cushion after you just fluffed it, you know your dog is looking at you like you should give him a treat.
And honestly, you just want to give him one. But lately you’ve been staring at ingredient labels and feeling like you’re feeding him something you can’t pronounce.
That is where I came into the picture, and one of the rabbit holes that I dove down last winter after my sisters dog had a rough reaction to some store bought treats.
These are some simple and clean treats and your pup will lose his mind over them.
Just what exactly are testosterone boosters and why should a boy use them? And, how do you pick the right ones for your boy?
#1: Homemade Chicken Jerky Strips for Dogs
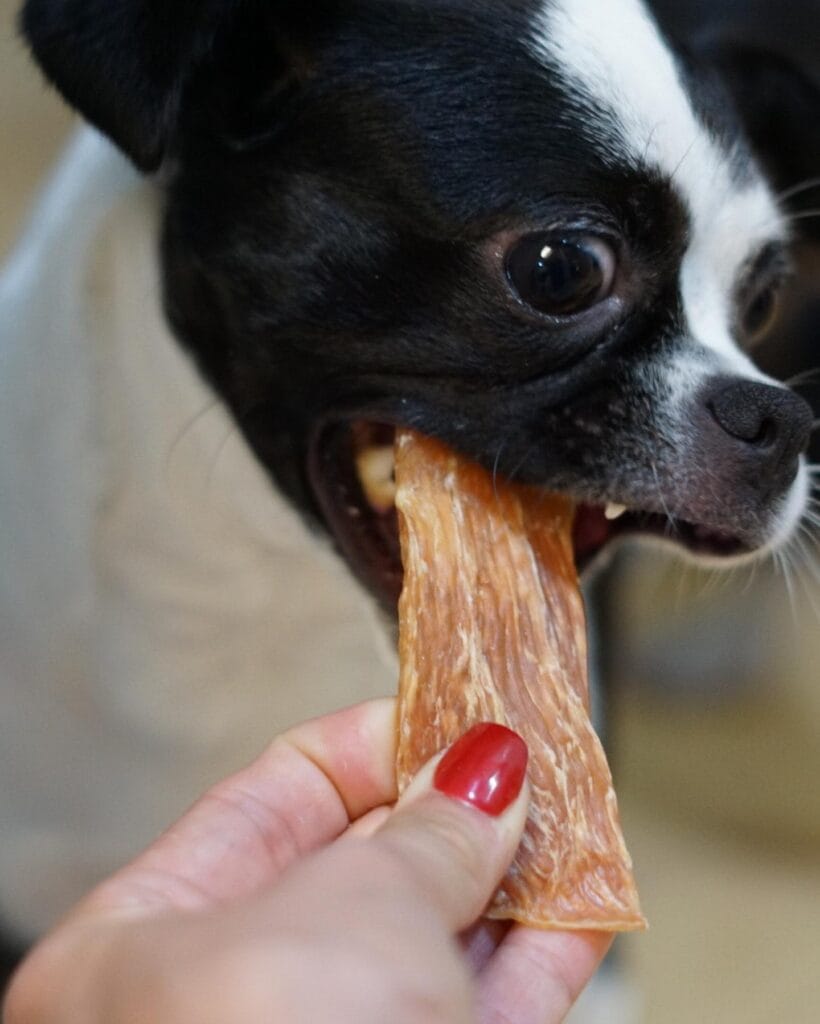
Anyone ever get those puppy eyes from their golden and just give in? Well, I know I have, I used to just grab whatever was at the pet store, but after reading some sketchy ingredients I decided it would be easier to make them myself.
My neighbor got me into this. She’d been making jerky for her dog for years and I thought she was nuts. Turns out, she was just ahead of the pack.
Ingredients:
1. 2 large boneless, skinless chicken breasts
2. 1 tablespoon olive oil(optional, helps with flexibility)
How to Make These Chewy Chicken Jerky Strips
Preheat oven to 200 degrees F. Slice each chicken breast into thin strips (the thinner you slice them, the crispier they’ll be). Place the chicken strips flat on a parchment lined baking sheet (without overlapping). Bake for 2 hours. Flip the chicken strips and bake for 1 hour more. They should be dry and leathery (not moist). Remove from the oven and let them cool completely before serving.
Store in an airtight container in the fridge for up to 2 weeks or freeze them and keep them cool with the recipe in Frozen Dog Treats: Delicious & Easy DIY Recipes to Keep Your Dog Cool.
One thing to remember: Not sure how thick my chicken gets so I check at 2 hours before committing to final hour.
Prep Time: 10 mins | Cook Time: 3 hours | Serving Size: 10–12 strips
📸 Photo credit: Instagram @3pawskitchen
#2: Oven-Dried Eggplant Chips for Dogs
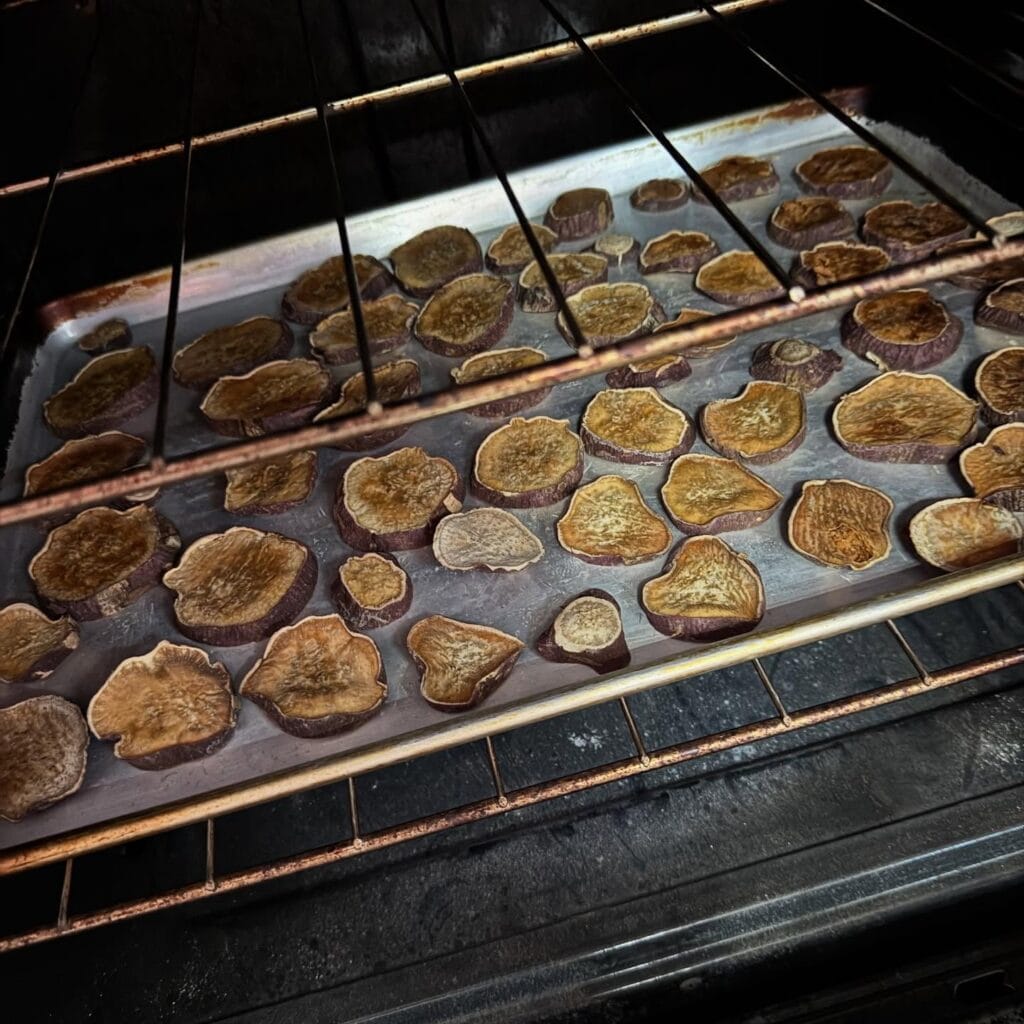
There have been a few times I’ve been snacking and my golden is staring at me so hard I feel guilty, so I started making them just to have something to toss her way without the panic of “can she eat this?”
These are literally just eggplant. That’s it.
Ingredients:
1. 1 medium eggplant
2. Tiny pinch of salt (optional, skip it if your pup has sensitivities)
How to Make Them
Cut your eggplant into 1/4 inch slices. (Thin enough to crisp up, but not too thin that they disappear in the oven.) Place the slices on a bakng sheet lined with parchment paper. (No oil is needed.) Bake in a 225°F oven for 2.5 to 3 hours, flipping them over after about 1.5 hours. (The slices should be shrunken, dry and leathery, not burnt. The low oven heat will draw out the moisture, without harming the vegetables, and give you that satisfying crunch your dog goes crazy over.)
My girl Maple has already knocked the whole tray off the counter, and she doesn’t give a shit.
Prep Time: 5 min | Cook Time: 2.5–3 hrs | Serving Size: 2–3 chips per treat
Place them in a glass jar with the lid slightly cracked for the first day so that any steam can escape and not make them go soft quickly.
📸 Photo credit: Instagram @atreeknows
#3: Crispy Dehydrated Beef Tripe Chips for Dogs
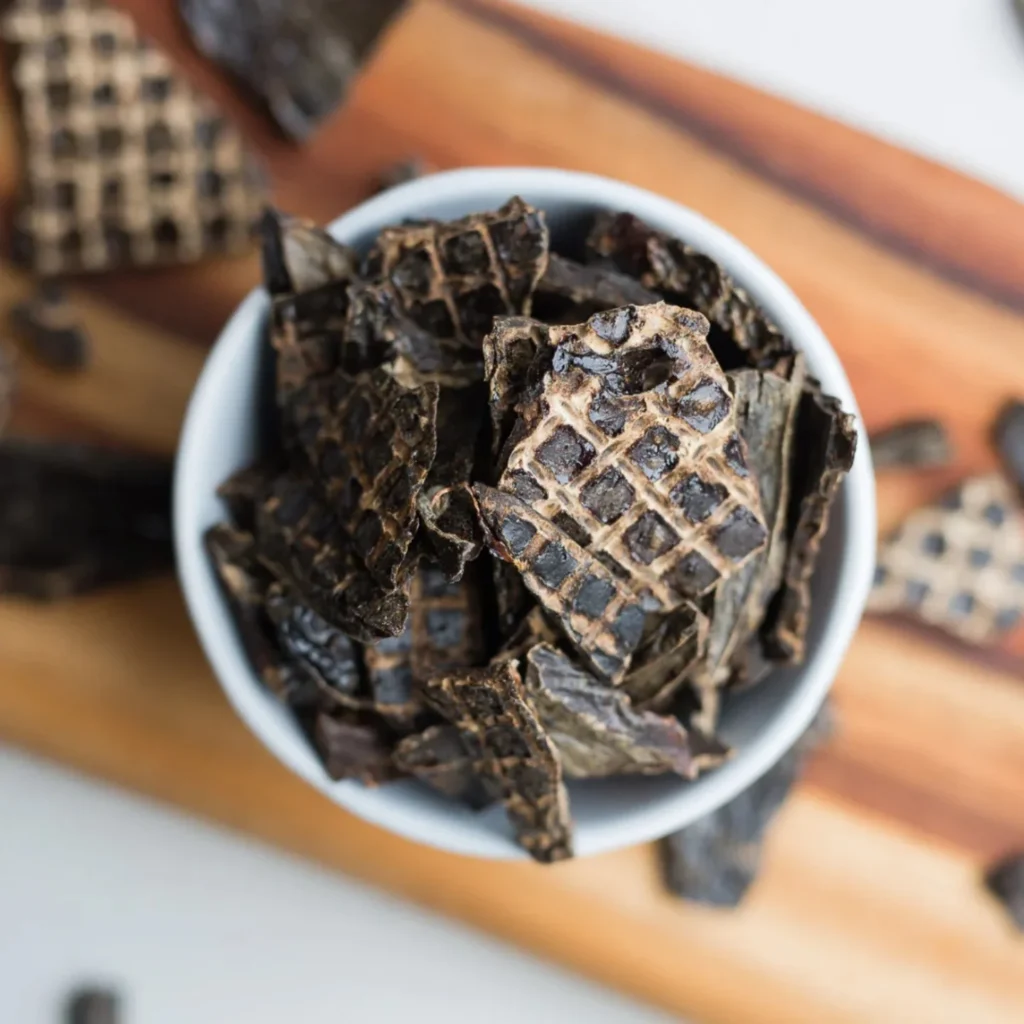
You know how your dog will just stare at you while you are snacking on a bag of chips? I started making these chips for my dog because she kept stealing my crackers off the coffee table. Such a dramatic girl.
These come out crunchy and deep and dark. The honeycomb-textured beef tripe shrinks and crisps into wild little waffle-patterned chips your dog will lose her mind over.
Ingredients:
1. 1 lb fresh green beef tripe, rinsed thoroughly
2. 1 teaspoon coconut oil (optional, for a light coat)
How to Make Dehydrated Tripe Chips
Slice the tripe thinly with a sharp knife, in a crosshatch pattern. This will allow the tripe to dry more evenly, and will give you the grid-like texture you see in the bowl. Cut into 2-inch pieces and pat dry completely with paper towels. It’s crucial to dry the tripe as much as possible since excess moisture will defeat the purpose of crispiness.
If you are using coconut oil, lightly brush the slices with coconut oil. Arrange in a single layer on your dehydrator sheets and dehydrate at 155F for 8-12 hours flipping over halfway through. If you are using an oven, set it to the lowest setting possible with the door cracked.
All the long dehydration pulls out moisture and locks in all the natural protein, and one chip keeps her busy for about five minutes. It’s about time she had something she liked to eat.
Store in an airtight glass jar for up to 2 weeks at room temperature.
Prep Time: 15 min | Cook Time: 8–12 hours | Serving Size: 1–2 chips per treat
📸 Photo credit: Instagram @happydoggoofficial
#4: Blueberry Herb Beef Jerky Dog Treats
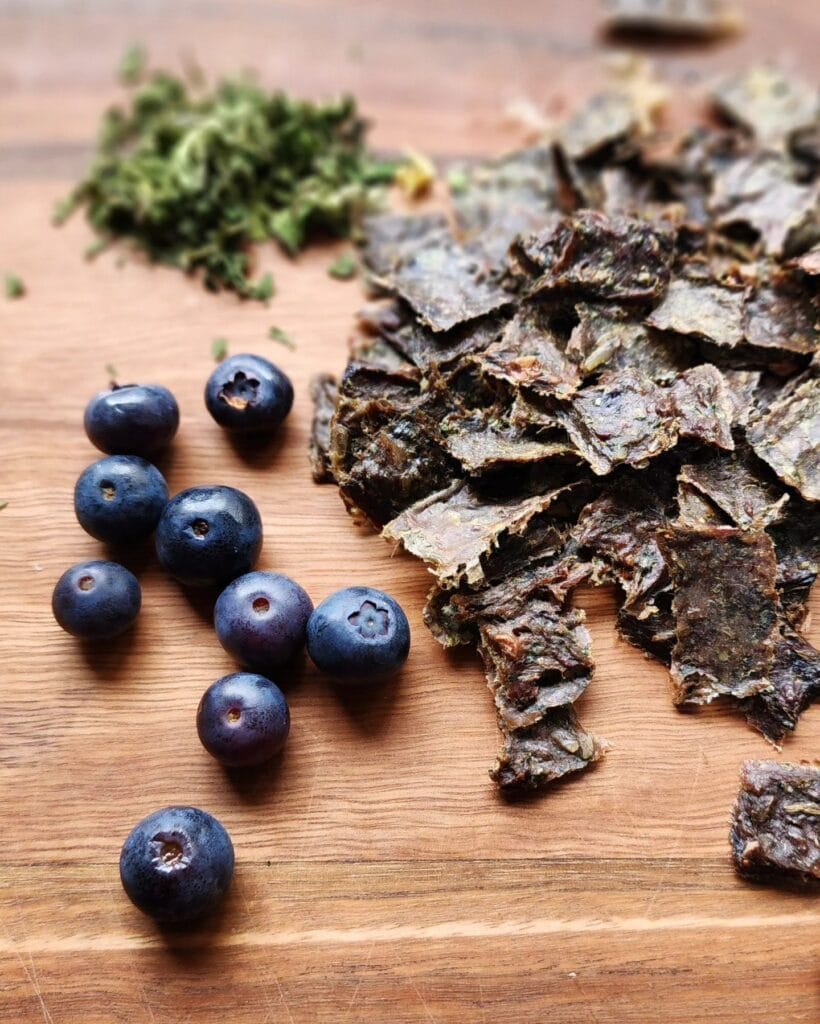
If your golden has given you that look, the one where she is sitting so still and staring at your snack like she’s been training for this, then she deserves something real.
The treats are dark, chewy and smell like a backyard cookout. The blueberries stain the meat a deep purple-brown, the perfect rustic color to make your audience say, “Pinterest Worthy!”
Making Your Blueberry Herb Beef Jerky
Ingredients:
1. 1 lb lean beef (top round or flank steak), sliced ⅛ inch thin
2. ½ cup fresh blueberries, mashed
3. 1 tablespoon dried thyme or oregano
4. 1 teaspoon olive oil
Then, slice the beef against the grain so it’s tender enough that your dog can eat it without struggling to chew. Mash the blueberries in a bowl with the herbs and olive oil and coat each slice of meat. Let the meat marinate for at least 2 hours in the refrigerator.
Place strips on a wire rack on a baking sheet. Bake at 170°F for 4-6 hours, flipping once. The low heat slowly draws the moisture out of the herbs without burning them, locking in the blueberry flavor. The shelf life for these dry herbs is up to 2 weeks if kept in an airtight container.
Prep Time: 20 min | Cook Time: 4-6 hours | Serving Size: 15-20 strips
Thinner slices also dry faster and get crunchier which is a good thing if your girl likes more of a snap treat than a chewy one. These are a lovely partner for some of my 3 ingredient dog treats for a range of homemade treats.
📸 Photo credit: Instagram @masterbowie2016
#5: Dehydrated Chicken Feet — The Crunchy Treat Your Dog Will Go Feral For
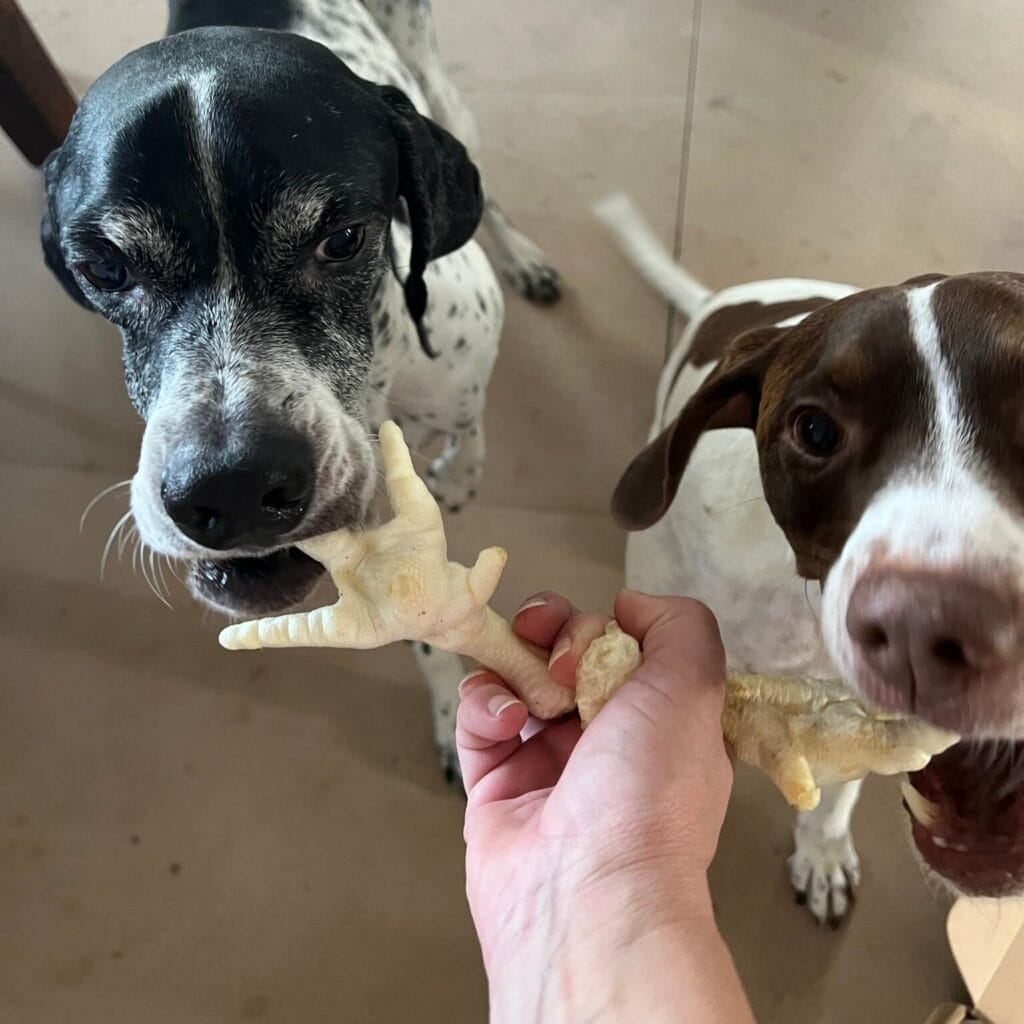
You know that moment when your goldens are staring you down like you owe them something? That is the energy in this photo. Two dogs, one hand, no chill.
Well, chicken feet are great for your dog anyway, because they’re loaded with natural glucosamine, which is great for joint health. So your dog may love the crunch of eating chicken feet, but over time they’ll pay off in mobility.
Ingredients:
1. 4–6 raw chicken feet
2. Water for rinsing
How to Make Dehydrated Chicken Feet
Rinse the chicken feet under cold water and pat dry. If there are any sharp tips of the nails, it might be safer to cut them off with kitchen scissors.
Spread the dates out on your dehydrator tray, spacing them apart. Dehydrate at 160°F (71°C) for 18-24 hours, until completely dry and very rigid. No soft spots, none.
If you don’t have a dehydrator, you can dry your apples in the oven on its lowest setting (usually about 170°F) and keep the door ajar so that air can circulate. Flip your apples every few hours.
Allow them to cool on a wire rack before serving.
Store your garlic in a paper bag or mesh pouch — not airtight, because trapped moisture can cause mold.
Prep Time: 10 min | Dehydrating Time: 18–24 hrs | Serving Size: 1 foot per dog
—
📸 Photo credit: Instagram @naturaltreatseu
#6: Dehydrated Chicken Strips — The Chewy Treat Your Golden Will Lose His Mind Over
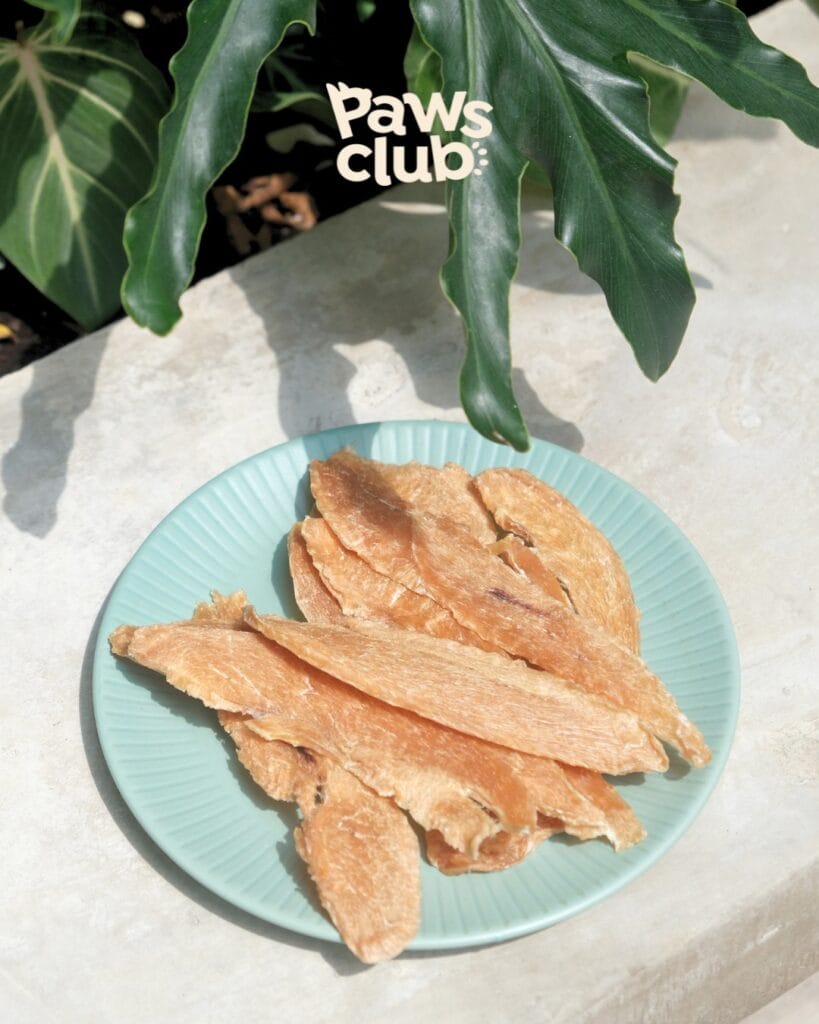
You know that look your golden gives you from across the room? Ears perked up, tail going insane, and eyes locked on your hands as if you’re holding the sun? Every single time I get these out.
These dehydrated chicken breast strips were embarrassingly simple. They were a pale golden orange, thin and slightly chewy. They really do look like something straight off a charcuterie board.
How to Make Dehydrated Chicken Strips
Ingredients:
1. 1 lb boneless, skinless chicken breast
2. 1 tsp olive oil (optional, for a softer texture)
Slice the chicken against the grain into strips about 1/8 to 1/4 inch thick. Thinner strips will be crisper and thicker strips will be chewier. My golden goes absolutely feral for the chewy strips so I aim for 1/4 inch. Lay the strips flat on the dehydrator rack without overlapping. Dry at 165°F for 4-6 hours, flipping them halfway through. They are done when you bend them without hearing a snap and they feel dry all the way through, no moisture in the middle.
Prep Time: 10 min | Cook Time: 4–6 hrs | Serving Size: 2–3 strips per day for a medium-large dog
We love getting our kids these as a treat and know that they are made with only 1 ingredient, no preservatives and loads of protein. Even better is there are no weird, mystery additives to cause any tummy issues. Our son loves them and they are a treat that we feel good giving to him.
Refrigerate for up to two weeks in an airtight container, or freeze portions for up to three months. Freeze in small batches so that you are never left short at treat time.
📸 Photo credit: Instagram @pawsclub.vn
#7: Dried Carrot Chips — The Crunchy, 2-Ingredient Treat Your Dog Will Lose Their Mind Over
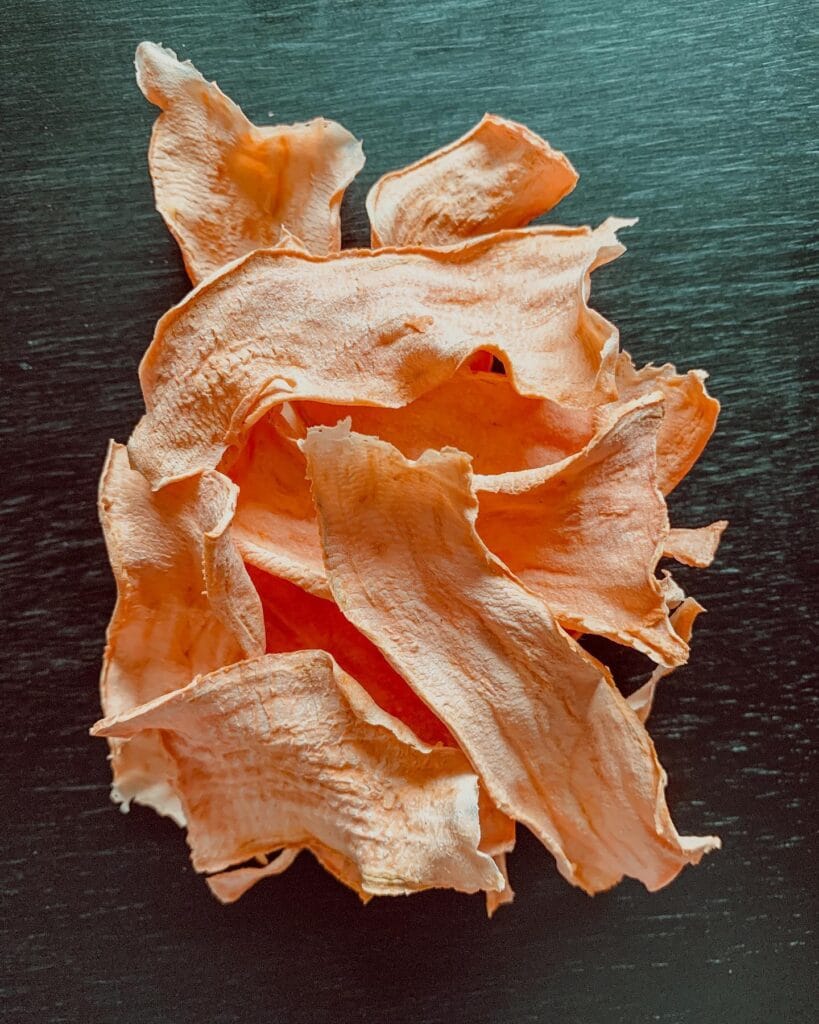
You know that moment when your golden is staring at you, while you’re in the kitchen, tail going a hundred miles an hour, and you just want to toss them something that isn’t garbage?
Yeah. These are for that moment.
I made a batch of these last fall when my sister’s dog came to visit. Both dogs were sitting so pretty I almost cried! It couldn’t be simpler to make, and it takes only two ingredients.
Dried Carrot Chips
Prep Time: 10 minutes | Cook Time: 2–3 hours | Serving Size: About 20–25 chips
Ingredients:
1. 3–4 large carrots, scrubbed and peeled
2. 1 teaspoon coconut oil (optional, for a light coat)
How to Make Them
Preheat oven to 250°F. Slice carrots into ¼-inch-thick rounds — thin enough that they’ll dry out, but not so thin that they burn. If you have a mandoline, you can use that to get the slices nice and thin.
Spread flat in a parchment-lined baking sheet. If using coconut oil, toss the slices with the coconut oil before arranging them on the sheet. Bake for 2 to 3 hours, flipping halfway through, until crisp and leathery on the outside with slightly crispy edges, much like the ones shown in the photo.
Leave them on the pan to cool completely, they get even more firm as they do and that’s where that nice crunch comes from. The crunch means they spend longer chewing them, which is great if your dog inhales treats whole.
This can be stored in an airtight glass jar for up to two weeks. If your dog enjoys these treats and begs for them, I have a few more healthy veggie-based snacks you can try out. Check out Carrot Dog Treats: A Healthy and Delicious Option for Your Pup for some other doggie snack ideas.
If you slice them thick, they will stay on the chewier side. If you slice them thin, they will become more like chips.
📸 Photo credit: Instagram @thebarkbakery.au
#8: Dehydrated Chicken & Bully Stick Wraps
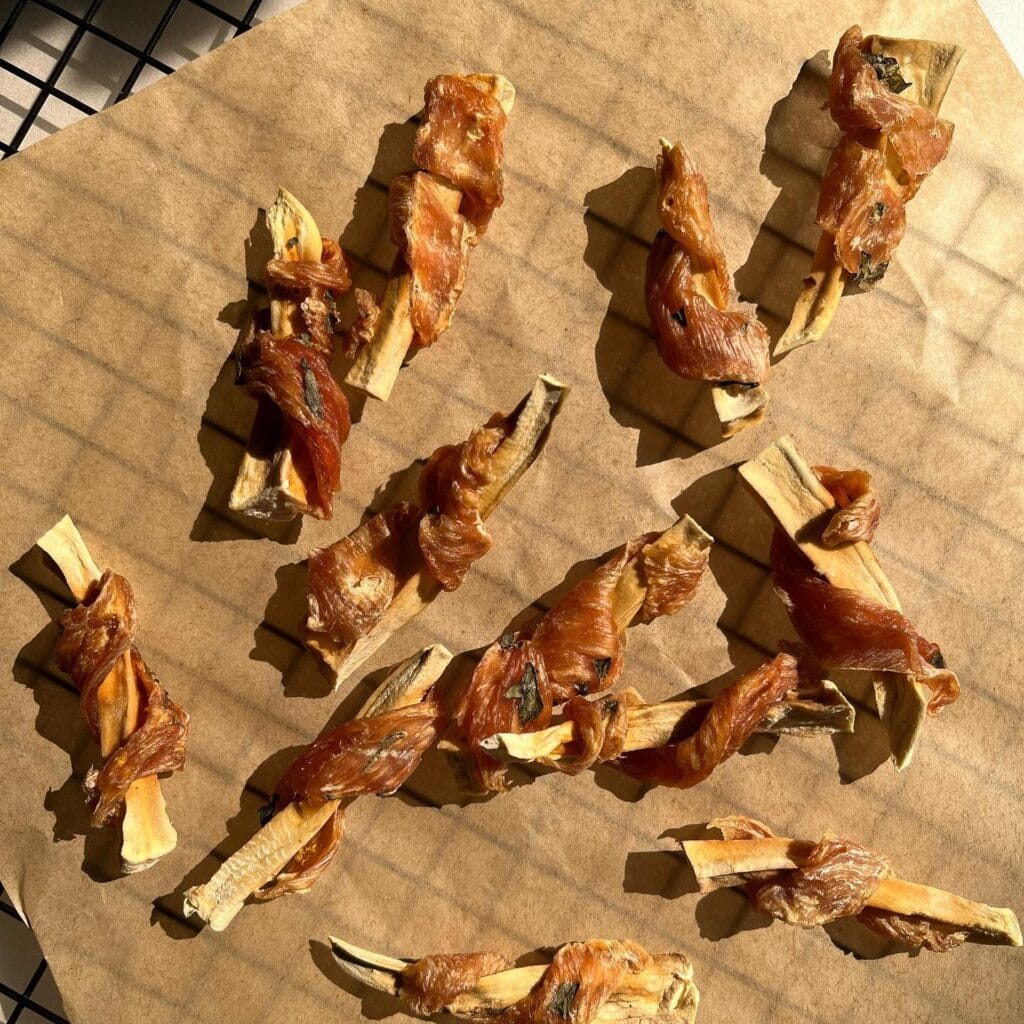
There’s nothing I hate more than being stared at by my golden while I eat and know she wants a bite of everything, so these little wraps were basically her dream come true. And I swear making them felt weirdly satisfying.
Prep Time: 15 minutes | Cooking Time: 6–8 hours | Serving Size: 12–15 wraps
Ingredients:
1. 2–3 large boneless, skinless chicken breasts (sliced into thin strips)
2. 12–15 bully sticks (cut into 3-inch sections as the core)
3. Fresh herbs like parsley or sage (optional — mine grabbed some from the garden last summer and it was chef’s kiss)
How To Make These Wraps
First, cut your chicken into long, thin strips. I went for 1/4-inch thick strips and then wrapped one around each segment of the bully stick. Make sure to overlap each strip a little as you go, so that it sticks together. Lay them flat on a parchment lined dehydrator tray (give them each a little space).
Set your dehydrator to 165F and let them run for about 6-8 hours. Flip them over after 3-4 hours. Chicken should be dry to the touch and slightly stiff, no soft spots.
Store in airtight container for up to 2 weeks, or freeze for up to 3 months.
Before putting on a wrap, the chicken must be pat dry. I found that if the chicken is wet, it will not dry evenly and the wrap can slide off the chicken.
📸 Photo credit: Instagram @waggytalespetsbakery
#9: Dehydrated Chicken Strips for Dogs
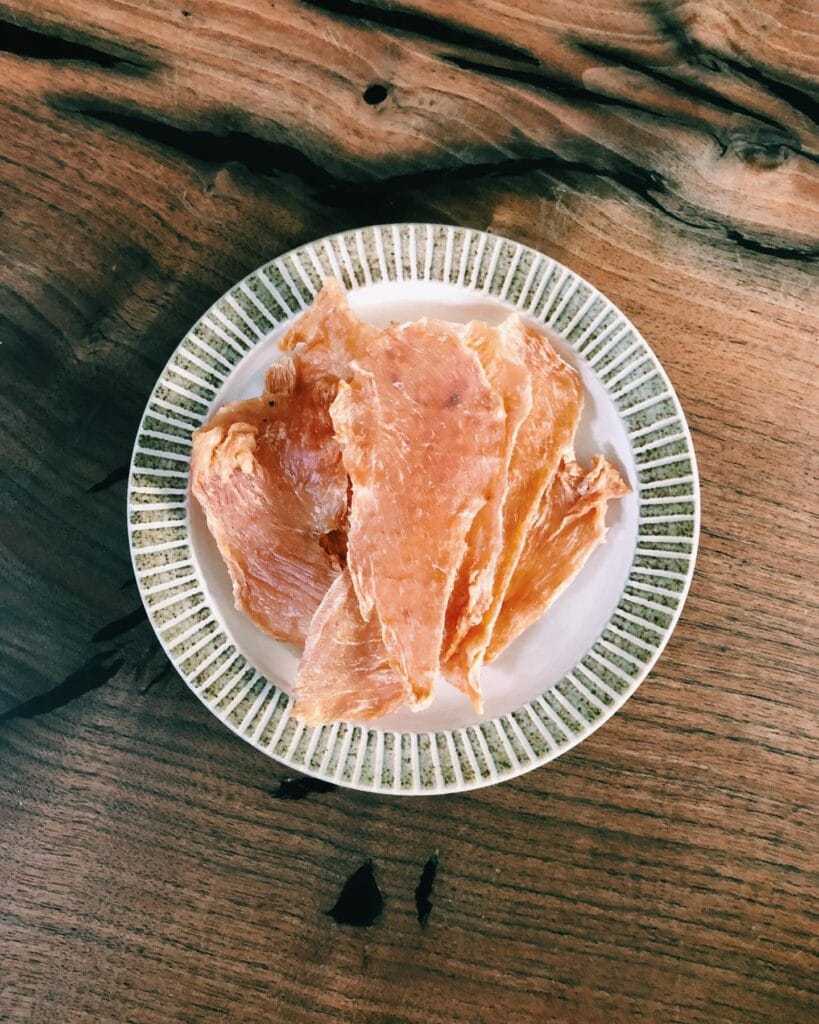
This one is for my golden, who went absolutely nuts when I opened up the store bought treat bag. Now I make these for her and feel so much better about giving them to her. Of course they are so much better for her too!
Dehydrated Chicken Breast Strips
Prep Time: 10 minutes | Cooking Time: 4–6 hours | Serving Size: 20–25 strips
Ingredients:
1. 2 large boneless, skinless chicken breasts
2. Optional: a tiny pinch of turmeric or parsley for added benefits
How To Make Them
Slice the chicken against the grain into strips about 1/8 to 1/4 inch thick. The thinner you make the strips, the crisper they’ll be, and most dogs prefer crisp. Lay the strips flat on a dehydrator tray or a wire rack over a baking sheet so that nothing overlaps.
Set your dehydrator to 165°F, and dry for 4 to 6 hours. If you are using your oven, set it to 170°F and leave the door cracked slightly (so that a little bit of moisture can escape) and dry for 4 to 6 hours.
What this means for you: one batch will last for almost two weeks, stored in an airtight container.
Single-ingredient, zero additives, and your dog knows exactly what she’s getting.
And if you love baking with your dog, Baked Dog Treats: Easy, Healthy, and Homemade Recipes is your next must-read.
Turn the trays part way through drying, so that the strips dry at the same rate and don’t end up too chewy or too brittle.
📸 Photo credit: Instagram @wilderbites_
#10: Homemade Beef Jerky Dog Treats (Dehydrated Beef Strips)
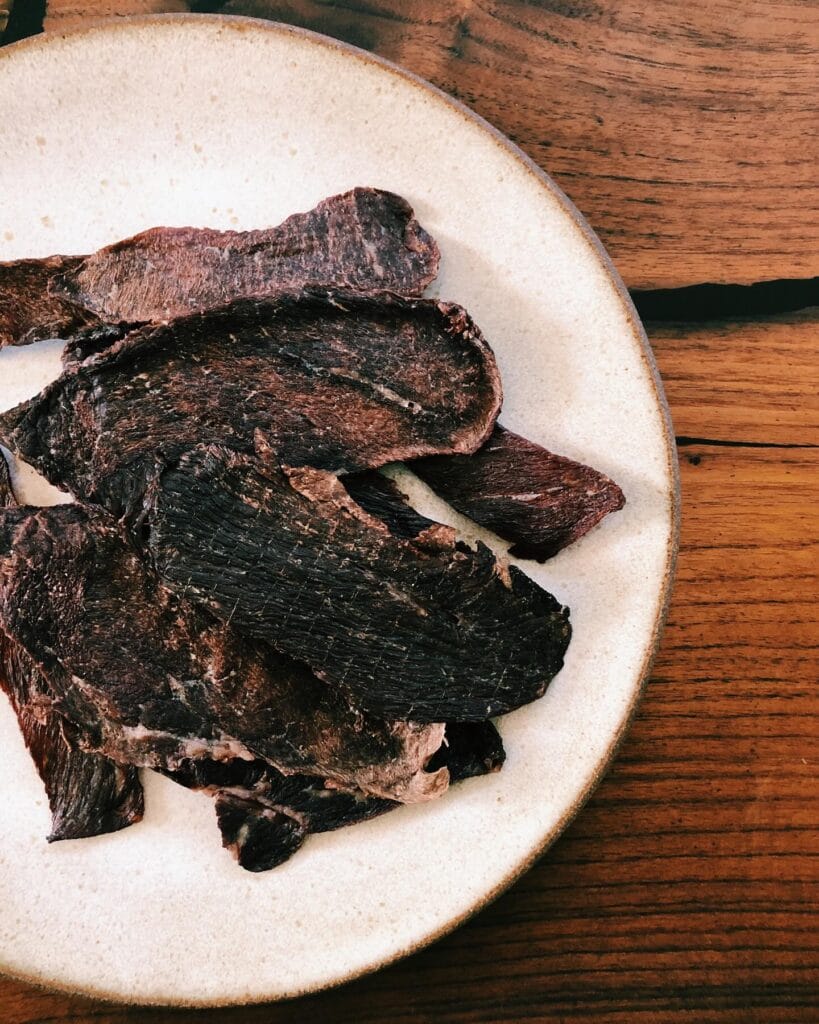
I know you know that moment when your golden retriever is sitting right next to you and she just stares at your snack like it’s the most delicious thing in the world? Yeah, my dog does that too. That is exactly how these beef jerky strips became a weekly thing at my house.
How to Make Dehydrated Beef Jerky Dog Treats
Prep Time: 15 minutes | Drying Time: 6–8 hours | Serving Size: 20–25 strips
Ingredients:
1. 1–1.5 lbs lean beef (top round or flank steak works best)
2. 1 tablespoon low-sodium soy sauce (optional, skip for sensitive stomachs)
3. 1 teaspoon dried parsley
Slice the beef against the grain into 1/4 inch thick strips. Making the beef strips thinner will help them dry more quickly and provide a chew your dog will go crazy for. Slicing thinly will be easier if the beef is slightly frozen. Lay the strips flat on a dehydrator tray or on a wire rack set over a baking sheet. If using an oven, set it to 170F and prop the door slightly open to allow steam to escape. Dehydrate for 6-8 hours, flipping over halfway through. The strips should be dark, firm and dry (no soft spots).
Store in an airtight container for up to two weeks or freeze for up to three months.
Single-ingredient jerky means no preservatives. And why would you want preservatives? A no preservative jerky is a great way to give your dog a tasty, protein packed treat that’s shelf stable.
Cut the slices uniform so that all the treats dry at the same rate. If the slices are not uniform, there are likely to be half-done chewy pieces and half-done crispy pieces, and your girl will eat all of them anyway.
📸 Photo credit: Instagram @wilderbites_
The Dehydrating Temp That’s Secretly Ruining Your Dog Treats
I need to tell you this because no one ever talks about it, but I had a whole batch of sweet potato chews make my friend’s lab sick.
Temperature is everything. Most people crank the heat to get treats done faster. Big mistake.
Above 160°F the enzymes and nutrients you want to preserve are broken down. BUT… going too low (under 130°F) puts the food in the danger zone where bacteria can multiply before the food dries out. You want to aim for 140-155°F every time.
Additionally, if you give him an uneven slice, some of the chew will be over before the others, and your golden retriever may get a under-dehydrated piece, and get a little sick, and we all know what that looks like on the cream-colored rug.
Small Change. A cheap kitchen mandoline slicer enables you to get the same thickness of slices every time, without guesswork.
Patience and low heat are worth more than speed.
Your Golden Deserves a Spot That Doesn’t Wreck Your Space
You’ve done the hardest part: figuring out what actually works for your dog. Now just pick one of those things, and try it! Even if it’s something small like buying a washable cover for a muddy blanket. The end result will feel a little different to your dog at the end of the day.
Once you stop hating your dog’s mess and start designing around it, your whole vibe changes.
Your home can look good and survive a golden retriever. Both things can be true at the same time.
What’s the first thing you’re swapping out this weekend?

Amr Mohsen is a software engineer who traded his keyboard for a leash — at least on weekends. His love for dogs inspired him to share what he learns as a dog owner and enthusiast, bringing a detail-oriented, research-driven perspective to every article he writes. If it’s about dogs, he’s probably already looked it up twice.