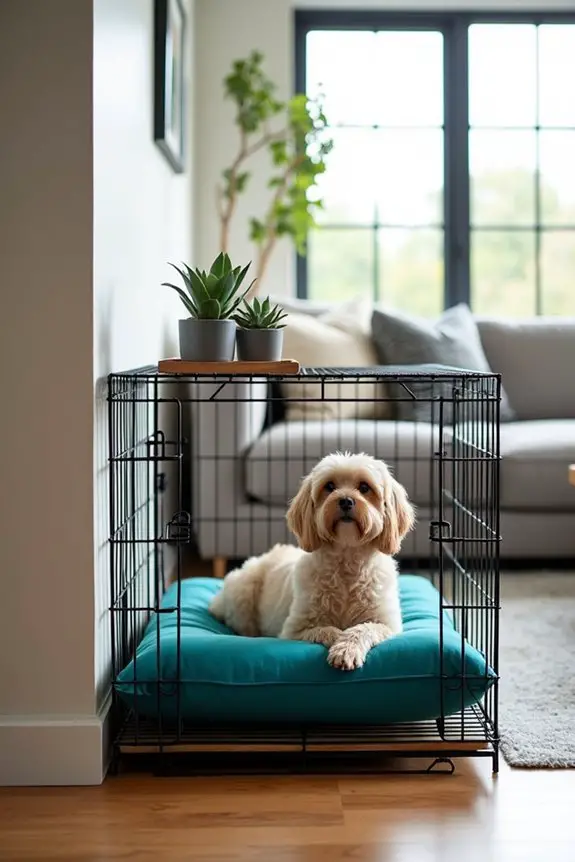
Let’s face it, your dog’s crate doesn’t have to be an eyesore in your living room. You can actually turn it into a stylish piece of furniture that fits your decor. Imagine a cozy retreat for your furry friend that looks good enough to be part of your home’s design. Curious about how to blend function and style seamlessly? Stick around, because I’ve got some creative ideas that’ll make both you and your pup happy.
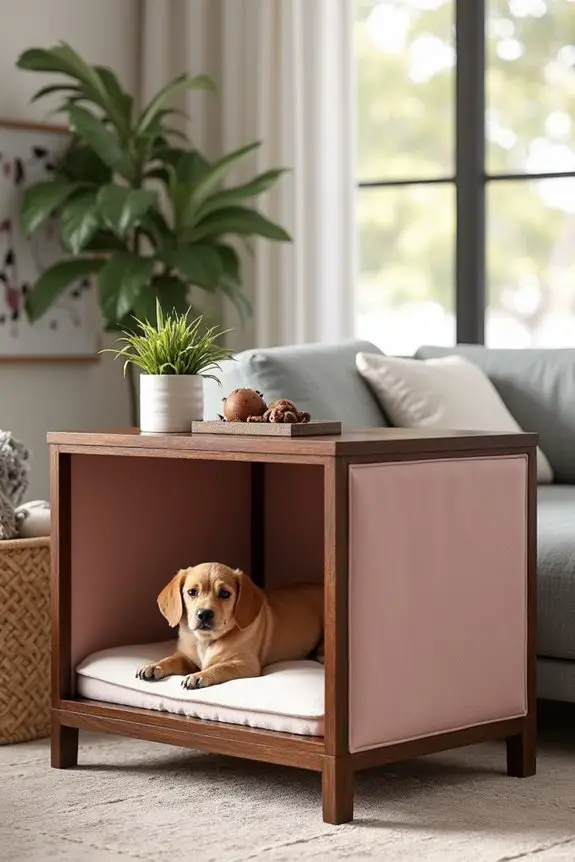
Chic Multi-Functional Designs
Have you ever wondered how to blend style with practicality in your home? You can create chic multi-functional designs that serve both you and your furry friend.
Think about dog crate furniture DIY projects. Imagine transforming a simple crate into a stylish side table or a cozy nightstand. You can easily add a cushion on top for a comfy resting spot, or paint it to match your decor.
It’s a win-win; you get a functional piece while your pup enjoys a cozy nook. Plus, it’s a great conversation starter when guests visit. Who wouldn’t want to admire your craftiness?
Our Collection
When it comes to choosing the perfect crate for your furry friend, our collection has something for everyone.
Whether you’re into rustic wooden designs that bring a cozy vibe, sleek modern metal styles that scream sophistication, or colorful fabric-covered options that add a pop of fun, you’ll find what you need.
And if you really want to spoil your pup, check out our luxury upholstered crates—because why should they’ve all the comfort?
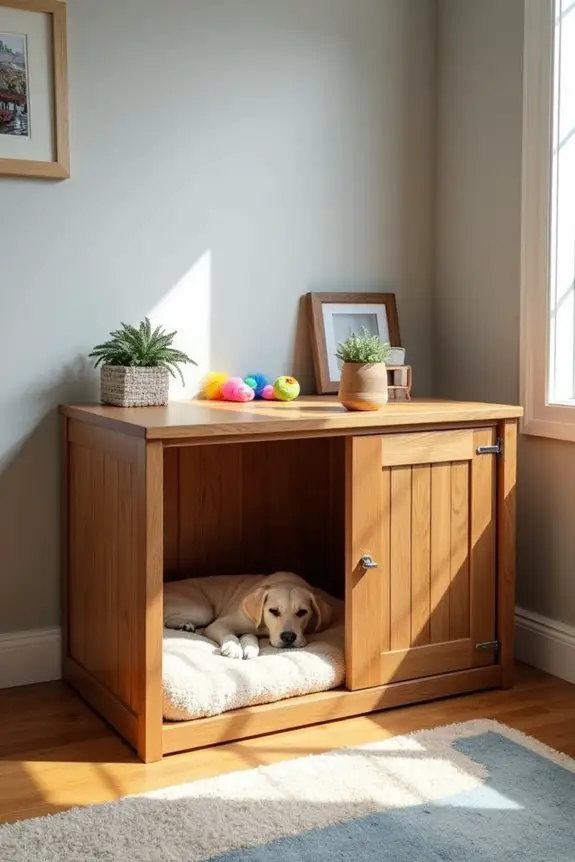
1. Rustic Wooden Crate Design
If you’re a dog owner looking to combine style and functionality in your home, then this DIY rustic wooden crate design is just what you need. Not only does it provide a cozy space for your furry friend, but it also doubles as stylish furniture that enhances your home décor. Plus, making it yourself saves you money while giving your pup a comfy retreat. Additionally, investing in luxury dog furniture can elevate your pet’s comfort while blending seamlessly with your home design.
Materials Needed:
- 2 wooden crates (you can find these at craft stores or online)
- Sandpaper (medium and fine grit)
- Wood stain or paint (choose your favorite color)
- Paintbrush or foam brush
- Wood screws (if needed for assembly)
- Screwdriver
- Measuring tape
- Decorative cushion or blanket (for added comfort)
Step-by-Step Instructions:
- Gather Your Crates: Start by selecting two wooden crates that match in size and style. Look for sturdy ones, as they’ll need to hold up against your pup’s antics.
- Sand the Crates: Use medium grit sandpaper to smooth rough edges and surfaces. Follow up with fine grit sandpaper for a polished finish. Trust me, your dog’s nose will thank you for not scratching it on splinters.
- Stain or Paint: Apply your chosen wood stain or paint with a brush. If you’re feeling adventurous, use a sponge for a distressed look. Let it dry completely per the instructions on the product. Remember, patience is key here.
- Assemble the Crates: If your crates aren’t meant to be stacked, secure them together with wood screws. Make sure they’re stable enough so they won’t wobble when your pup jumps in.
- Add Comfort: Place a soft cushion or blanket inside the crate. This not only makes it a cozy spot for your dog but also adds a pop of color and style to your space.
- Placement: Find the perfect spot in your home for your new piece of furniture. It could be in the living room, near a window, or wherever your pup likes to hang out the most.
- Show Off: Take a moment to admire your work. Snap a photo to share with friends (and maybe brag a little). Your dog will love it, and you’ll have a functional piece of rustic decor.
Optional Add-ons/Variations:
- Different Wood Finishes: Try using a lighter wood stain for a beachy vibe or a darker one for a more dramatic look.
- Personalized Touches: You can stencil your dog’s name on the side or add some fun designs with a paint pen to make it unique.
Pro Tip:
Always check the crates for any nails or sharp edges after sanding. Safety first, right? Also, keep a little extra cushion in your back pocket. If your dog seems to love their cozy crate, a quick refresh of the blanket will keep it comfy and clean.
With just a few supplies and some time, you can create a beautiful, functional piece that your dog will adore and that will make your home feel even more welcoming. Happy crafting!
2. Modern Metal Crate Style
If you’re on the hunt for a chic, contemporary way to house your pup, a modern metal crate style might just be your new best friend. This DIY project not only offers your furry companion a secure and stylish space to relax but also elevates your home’s aesthetic. Plus, crafting it yourself means you save some cash while creating a unique piece that reflects your personal style. Additionally, you can enhance your dog training experience with premium dog training equipment that complements your stylish setup.
Materials Needed:
- Metal wire or mesh panels (enough to form a crate)
- Metal frame (you can use angle iron or pre-made metal crate frames)
- Power drill with metal drill bits
- Metal screws or bolts (depending on your frame)
- Sandpaper (fine grit)
- Paint (optional, for a pop of color)
- Paintbrush or spray paint
- Measuring tape
- Safety goggles and gloves
Step-by-Step Instructions:
- Measure and Cut: Start by measuring the area where you want your crate to go. Cut your metal panels to the desired size, making sure to leave enough room for your pup to comfortably move around.
- Create the Frame: Assemble your metal frame using the angle iron or pre-made crate frame. Use screws or bolts to secure the corners. Verify everything is tight and sturdy—your pup deserves a reliable home.
- Attach the Panels: Use your power drill to attach the metal wire or mesh panels to the frame. Make sure there are no sharp edges sticking out; you don’t want any accidental scrapes.
- Smooth It Out: Take your fine-grit sandpaper and gently sand down any rough edges on the panels or frame. This is essential for keeping your pup safe and comfortable—no one wants a scratched nose.
- Add Color: If you want to jazz it up a bit, now’s the time to paint your metal crate. A bright color can add a fun touch to your living space, while a sleek black or white might give it that modern minimalist vibe. Just let it dry completely before moving on.
- Comfort Inside: Place a soft cushion or a cozy blanket inside for your dog to snuggle up in. Not only does this make it inviting, but it also adds a nice touch of comfort.
- Find Your Spot: Place your new crate in a spot where your dog can see what’s happening but still feel secure. Maybe near a window for some sunshine, or in your living room to keep them company.
Optional Add-ons/Variations:
- Different Paint Finishes: Consider using a metallic spray paint for a shiny, modern look, or even a chalkboard paint so you can draw fun designs or write your dog’s name.
- Decorative Elements: Add a small shelf on top of the crate for plants or books—just make sure it’s stable enough to handle the weight.
Pro Tip:
Always wear safety goggles and gloves when working with metal. Your eyes and hands will thank you. And if you’re using power tools for the first time, don’t hesitate to ask a friend for help. It’s way more fun to DIY when you have a buddy around, and they might even have some tips up their sleeve.
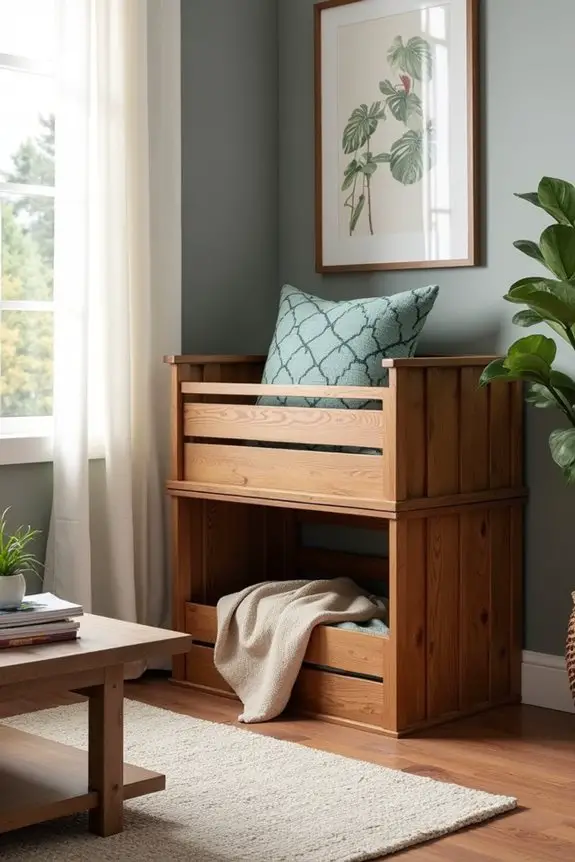
3. Vintage-Inspired Crate Design
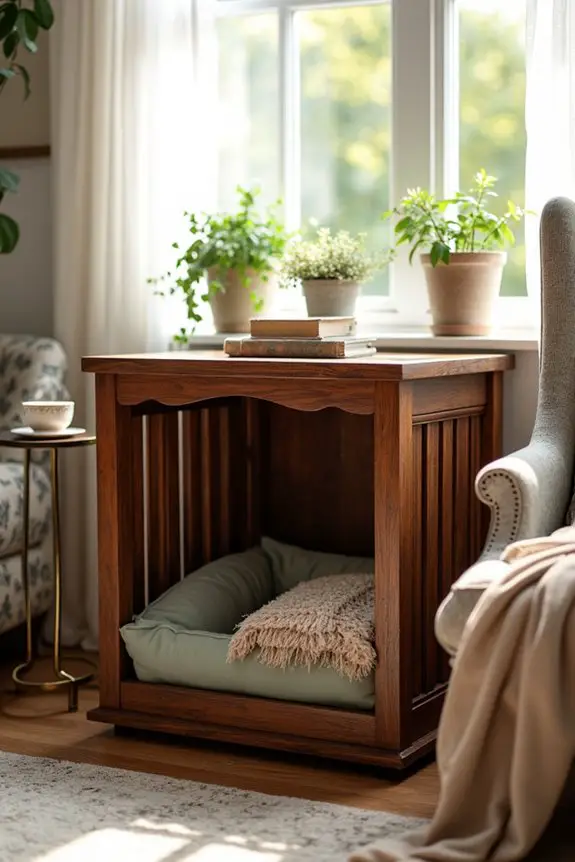
If you’re a dog owner who loves a touch of nostalgia, a vintage-inspired crate might be just what you need. This DIY project not only gives your pup a cozy den but also doubles as a charming piece of furniture that can enhance your home’s decor. Plus, it’s a budget-friendly way to add a personal touch to your living space while keeping your dog comfy and secure. Adding luxury dog kennel furniture to your collection can elevate both style and comfort for your pup.
Materials Needed:
- Wooden pallets or reclaimed wood
- Sandpaper (medium and fine grit)
- Wood screws
- Wood glue
- Measuring tape
- Power drill
- Saw (hand saw or power saw)
- Paint or wood stain (optional for finishing touches)
- Paintbrush or cloth for staining
- Safety goggles and gloves
Step-by-Step Instructions:
- Choose Your Wood: Start by selecting wooden pallets or reclaimed wood that’s sturdy and free from splinters. If you’re using pallets, make sure they’re in good condition and not treated with harmful chemicals.
- Measure and Cut: Measure the space where you want to place the crate and cut your wood to size. Aim for a height and width that allows your dog to stand up and turn around comfortably. No one wants their pup feeling cramped.
- Construct the Frame: Assemble the base and sides of your crate using wood screws and wood glue for extra stability. Remember, this is a cozy home for your furry friend, and a solid structure is key.
- Create the Top: Cut a piece of wood for the top of the crate. You can leave it flat or create a slatted design. If you want to add some flair, consider making the top a little overhanging for a more vintage feel.
- Smooth It Out: Use medium-grit sandpaper to sand down rough edges, then finish with fine-grit sandpaper for a smooth finish. Your dog will appreciate a scratch-free space, and so will you when you’re cleaning up.
- Add Some Color: If you want to jazz it up a bit, paint or stain your crate. A classic white or a deep mahogany can give it that vintage look. Just let it dry completely before moving on to the next step.
- Cozy Up the Inside: Line the bottom of the crate with a soft blanket or a plush dog bed. This makes it inviting for your pup and adds a lovely touch to the crate itself.
- Find the Perfect Spot: Place your new vintage crate in a cozy corner of your home where your dog can feel safe and see the action. Maybe near your favorite reading chair or in the living room so they can be part of the family.
Optional Add-ons/Variations:
- Decorative Stenciling: Add a personal touch by stenciling your dog’s name on the side or some cute paw prints. It’s a simple way to make the crate uniquely theirs.
- Vintage Hardware: Consider adding some vintage-style handles or metal accents for a rustic charm. It’s the little details that can truly elevate the look.
Pro Tip:
Before you start cutting the wood, do a quick inspection for any nails or splinters. You definitely want to avoid any surprise trips to the vet for your pup.
Oh, and if you’re using reclaimed wood, give it a good wash to remove any grime—your dog deserves a clean space, after all.
Creating a vintage-inspired crate can be a fun way to blend function and style, ensuring your dog has a comfortable hideaway that also looks great in your home. Now, isn’t that a win-win?
4. Colorful Fabric-Covered Crate
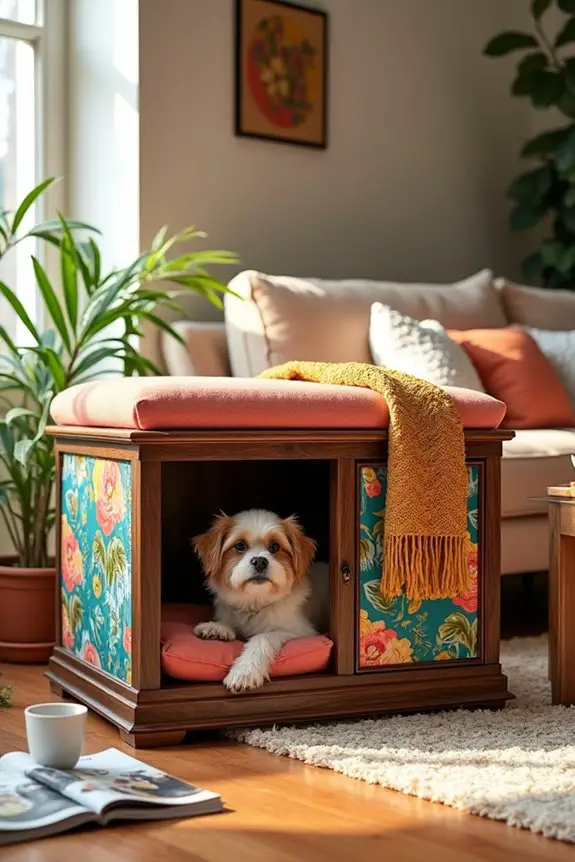
If you want to transform your dog’s crate into a stylish piece of furniture, a colorful fabric-covered crate is an excellent DIY project. Not only does it keep your pup cozy, but it also brightens up your living space and can save you some bucks compared to store-bought options. Plus, you get to show off your personal style. Who knew dog crates could look so good? Elevating your home with luxury dog furniture can enhance both aesthetics and functionality.
Materials Needed:
- A wooden dog crate (or a wire crate with a wooden base)
- Upholstery fabric (choose a fun pattern or a solid color)
- Staple gun and staples
- Scissors
- Measuring tape
- Foam padding (optional for extra comfort)
- Fabric glue (optional)
- Safety goggles and gloves
Step-by-Step Instructions:
1. Measure Your Crate: Start by measuring the dimensions of your dog crate. This will help you figure out how much fabric you need. Don’t forget to measure the height, width, and depth.
2. Choose Your Fabric: Head to your local fabric store or browse online for a colorful fabric that suits your style. Think about patterns that can hide dirt—because let’s be honest, dogs can be messy.
3. Cut the Fabric: Cut your fabric according to the measurements you took, leaving an extra inch around the edges for folding. If you’re feeling fancy, you can use different fabrics for the sides and top.
4. Prepare the Crate: If you want a bit of extra comfort for your pup, lay down foam padding on the bottom of the crate. This makes a cozy spot for your furry friend.
5. Attach the Fabric: Start with one side of the crate. Lay the fabric over the side, and using a staple gun, secure the fabric to the wooden frame on the inside. Pull the fabric tightly to avoid wrinkles, and staple it every few inches.
Repeat this for all sides, folding the edges neatly for a clean finish.
6. Finishing Touches: Once all sides are covered, you can add a layer of fabric on the top if you want it to look more like a piece of furniture. Secure it in place with a few staples, or use fabric glue for a smoother look.
7. Position Your Crate: Find a cozy corner in your home to place your newly covered crate. Make sure it’s a spot where your dog can feel secure but still be part of the family action.
Optional Add-ons/Variations:
- Mix and Match Fabrics: Use different fabrics for each side of the crate for a quirky look. You could even go for a patchwork style if you’re feeling particularly creative.
- Add Decorative Trim: Consider adding some decorative trim or piping along the edges of the fabric for a pop of style. It’s like adding a cherry on top of your dog’s cozy sundae.
Pro Tip:
When using a staple gun, keep your fingers clear of the staple area. Trust me, you don’t want a surprise visit to the ER because you got a little too enthusiastic with your DIY project.
Also, choosing outdoor fabric can make cleaning a breeze, as it’s often more resistant to stains and easier to wipe down. Your dog may not appreciate the effort, but you’ll when it comes to cleanup.
5. Luxury Upholstered Dog Crate
If you’re looking to elevate your dog’s crate from a simple kennel to a glamorous piece of furniture, a luxury upholstered dog crate is the answer. This DIY project not only brings comfort and style to your pet’s space but also enhances your home’s aesthetic. Plus, you can easily find premium dog fashion accessories to complement this stylish upgrade for your furry friend.
And the best part? You can save money while making your furry friend feel like royalty.
Materials Needed:
- A wooden dog crate (preferably one with a flat top)
- Upholstery foam (for extra cushioning)
- Upholstery fabric (choose something soft and stylish)
- Staple gun and staples
- Scissors
- Measuring tape
- Batting (optional for a softer finish)
- Fabric glue (optional for securing edges)
- Safety goggles and gloves
Step-by-Step Instructions:
- Measure Your Crate: Grab your measuring tape and jot down the dimensions of your dog crate. You’ll need accurate measurements for everything from the sides to the top.
- Select Your Upholstery Fabric: Visit a fabric store or browse online to find a gorgeous upholstery fabric that matches your decor. Think about something that will stand up to dog hair and dirt but still looks fabulous.
- Cut the Foam and Fabric: Cut your upholstery foam to fit the bottom of the crate. Then, cut your fabric, allowing an extra few inches around the edges to wrap around the foam and crate. It’s okay to get a little creative here—different patterns can make for a stunning look.
- Prepare the Crate: Lay down your foam in the bottom of the crate. If you want to make it even cozier, add a layer of batting over the foam. This is where your pup will be lounging, after all.
- Attach the Fabric: Start by laying the fabric over the foam, making sure it’s smooth and wrinkle-free. Use your staple gun to secure the fabric to the inside edges of the crate. Pull it taut as you go, and don’t forget to staple every few inches for a neat finish.
- Wrap the Edges: Fold the extra fabric over the edges of the crate and staple it down on the inside. This step is essential for a clean look—it’ll make your dog crate look like it belongs in a high-end furniture store.
- Final Touches: If you want, you can cover the top with additional fabric and secure it with the staple gun or fabric glue for a polished finish. Now your crate not only houses your pup but also acts as a stylish side table or decorative piece.
Optional Add-ons/Variations:
- Choose Bold Patterns: Why not mix it up with bold colors or patterns? A floral design might brighten things up, while a geometric print could add a modern twist. Your dog’s crate can be a true reflection of your style.
- Add a Decorative Trim: Consider adding some decorative trim or piping along the edges for a more finished and upscale look. It’s the little things that make a big difference.
Pro Tip:
Always use a staple gun with a safety feature to avoid any mishaps while crafting. Plus, if you’re worried about durability, opt for heavy-duty fabric that can withstand those playful puppy paws.
After all, comfort and style should go paw in paw, right?
With these steps, your pup will have a luxurious and stylish space to call their own, and you’ll feel proud every time you walk past that fabulous crate. Happy crafting!
6. Customizable Modular Dog Crate
If your pup deserves a space that’s as unique as they are, then a customizable modular dog crate is the perfect DIY project for you. This design not only caters to your furry friend’s needs but also enhances your home’s decor.
Plus, it’s a great way to save money while creating a stylish and functional piece that can adapt as your pet grows.
Materials Needed:
- Wooden boards (choose your preferred wood type)
- Wood screws
- Wood glue
- Sandpaper
- Wood stain or paint (optional for finishing)
- Measuring tape
- Saw
- Drill
- Safety goggles and gloves
Step-by-Step Instructions:
1. Plan Your Design: Start by sketching out a rough design for your modular dog crate. Consider how big your dog is and how much space you want to allocate. Don’t forget to include compartments for toys or blankets.
2. Measure and Cut the Wood: Using your measuring tape, measure the dimensions you need for your crate. Cut the wooden boards according to your plan. Remember, measure twice, cut once—no one wants a lopsided crate.
3. Assemble the Base: Begin by creating the base of the crate. Use wood screws and wood glue to secure the boards together. Make sure it’s sturdy enough to withstand your pup’s playful antics.
4. Build the Walls: Attach the side and back panels to the base. Make sure to leave an opening for the door. If you want a modular design, consider using hinges for the door so it can swing open easily.
5. Create Dividers: If you want separate compartments for toys or a cozy nook, add dividers inside the crate. These can be removable, allowing you to customize the space as needed. Just make sure they’re securely attached!
6. Sand and Finish: Once the structure is complete, take your sandpaper and smooth out any rough edges. This is essential for your dog’s safety—nobody wants a splintered pup.
If you wish, apply wood stain or paint for a polished look that matches your home decor.
7. Final Assembly: After the finish has dried, assemble everything together. Check for stability and make any adjustments. Voilà, you now have a stylish, customizable dog crate that blends seamlessly into your living space.
Optional Add-ons/Variations:
- Color Choices: Want a pop of color? Use bright paint or fun stencils to personalize your dog crate. It’s a simple way to make it truly yours.
- Add a Roof: Consider adding a flat top to the crate, so it can double as a side table or display space for plants or photos.
Pro Tip:
Always wear safety goggles and gloves when working with wood. Not only does it keep you safe from splinters, but it also helps you avoid those “oops” moments when you accidentally drop a heavy board on your foot. Trust me, I speak from experience.
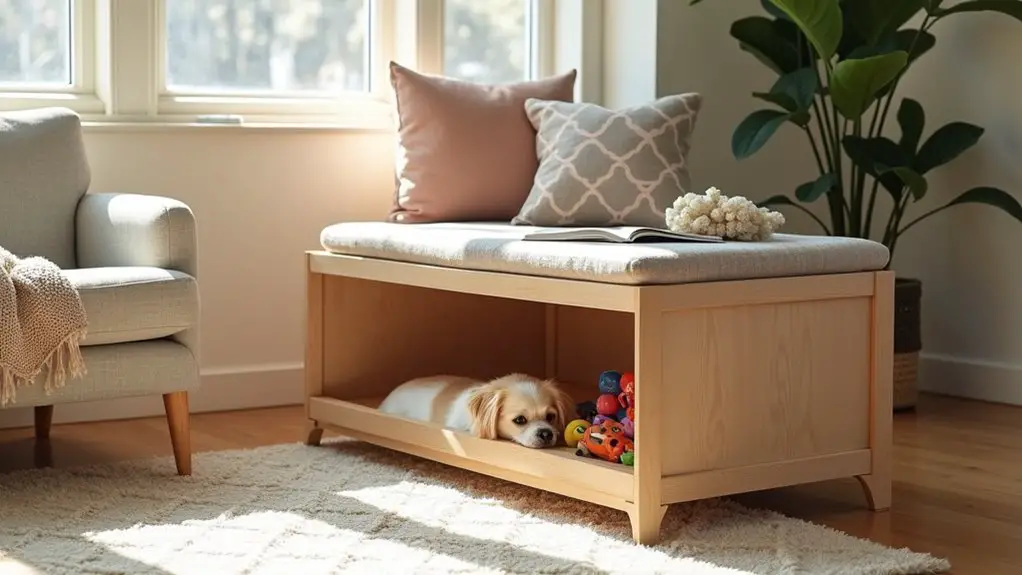
7. Hidden Storage Crate Design
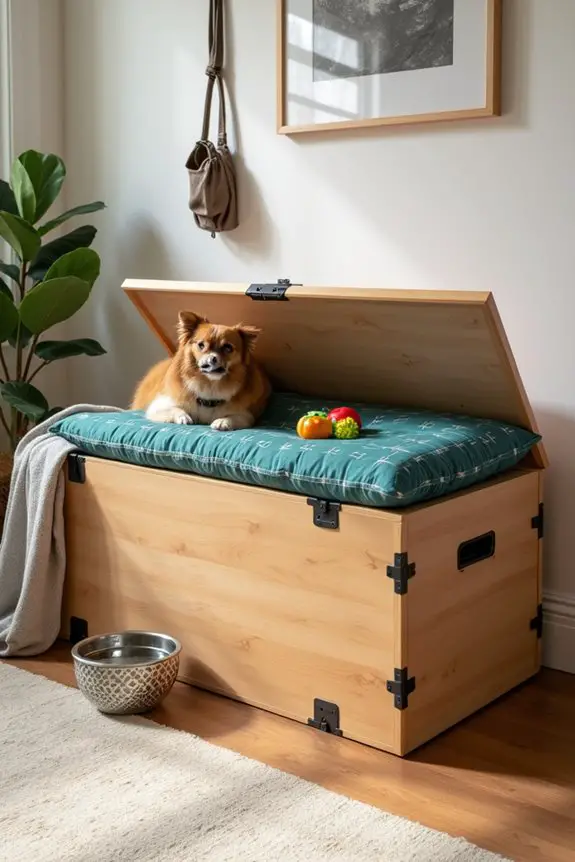
If you’re a dog owner, you know how quickly toys, leashes, and treats can clutter your living space. A hidden storage crate design is a fantastic DIY project that not only keeps your home tidy but also creates a stylish piece of furniture that your pup will love.
Plus, it saves money by transforming simple materials into a functional storage solution—who doesn’t want more room for their dog’s stuff without compromising style?
Materials Needed:
- Wooden plywood sheets (for the crate body)
- Wooden boards (for the crate frame)
- Wood screws
- Wood glue
- Sandpaper
- Hinges (for the top)
- Measuring tape
- Saw
- Drill
- Safety goggles and gloves
- Paint or wood stain (optional for finishing)
Step-by-Step Instructions:
1. Sketch Your Design: Start by drawing a quick sketch of what you want your hidden storage crate to look like. Think about how large it needs to be to hold all your dog’s essentials while fitting nicely in your space. A rectangular shape is usually a winner.
2. Measure and Cut the Wood: Using your measuring tape, mark the dimensions on the plywood sheets and wooden boards. Cut them accordingly—this is where that “measure twice, cut once” mantra really comes in handy.
Trust me, nobody wants a crate that looks like it was made in a funhouse.
3. Build the Base and Frame: Begin with the base. Secure the wooden boards together using wood screws and wood glue. For the frame, attach the sides and back panels to the base, guaranteeing it’s stable enough for your energetic pup.
You don’t want the crate collapsing during a play session.
4. Create the Top: Cut a piece of plywood for the top that fits snugly over the crate. Attach it with hinges, so it can lift up easily. This is where the magic happens—the top opens to reveal a storage space for toys, treats, or whatever your furry friend needs.
5. Sand and Finish: Time to make it smooth. Grab your sandpaper and gently sand down any rough edges. This is super important; we want your pup to be safe from splinters.
If you’re feeling fancy, now’s the time to stain or paint it to match your decor.
6. Final Assembly: Once everything is dry, do a final check of the crate. Make sure it’s sturdy, and that the hinges work smoothly.
You now have a hidden storage crate that looks great and keeps your dog’s items organized—it’s like a secret hideaway for all their goodies.
Optional Add-ons/Variations:
- Personalized Colors: Want to jazz it up? Choose a bright color or trendy pattern for your paint or stain. You can even add fun decals or stencils that reflect your personality or your dog’s character.
- Cushioned Top: Add a comfy cushion on top of the crate so it doubles as a seat or a mini dog bed. Your pup will love having a cozy spot to hang out.
Pro Tip:
Always verify that the hinges are securely attached and that the lid isn’t too heavy for your pup to push open. You want them to be able to access their treasures without getting stuck or hurt.
And if you’re looking to save a few bucks, check out local wood shops or reuse old furniture for supplies—every little bit helps when you’re a dog parent.
Extra Tips & Ideas
While you’re transforming that plain old dog crate into a stylish piece of furniture, don’t forget to sprinkle in your own personality!
Think about colors that make you happy or patterns that pop. You might even want to add a cozy throw or a fun pillow—after all, your pup isn’t the only one who deserves comfort.
Ever tried painting the crate? It sounds intimidating, but trust me, it’s easier than making a soufflé. Just grab some pet-safe paint and go wild.
And how about adding a cute nameplate? It adds charm, and let’s be honest, who doesn’t want a fancy dog crate?
With these tips, your dog’s den can totally blend with your home style.
Frequently Asked Questions
What Size Dog Crate Furniture Is Best for My Breed?
It depends on your dog’s breed and size. Measure your dog while standing and lying down, then choose a crate that provides enough space for them to turn around comfortably without feeling cramped.
Can I Customize My Dog Crate Furniture?
Absolutely, you can customize your dog crate furniture! Consider adding your dog’s favorite colors, styles, or even personal touches like engraving. It’ll make the crate feel more like a part of your home.
How Do I Clean Dog Crate Furniture Effectively?
You can clean dog crate furniture effectively by using a mixture of mild soap and water. Wipe surfaces with a soft cloth, scrub stubborn spots gently, and let it dry completely before placing your dog back inside.
Are There Safety Concerns With Stylish Dog Crates?
Yes, there are safety concerns with stylish dog crates. Have you considered whether the materials are non-toxic? Verify the design doesn’t pose risks, like sharp edges or small parts, to keep your furry friend safe.
Where Can I Buy Affordable Dog Crate Furniture?
You can find affordable dog crate furniture at stores like Amazon, Wayfair, and Walmart. Check local pet stores or thrift shops too; they often have unique pieces that fit your budget and style preferences.
Conclusion
So, you see, turning your dog’s crate into stylish furniture doesn’t just brighten up your home; it transforms it into a pet paradise worthy of a magazine cover. Whether you choose chic designs or rustic vibes, your furry friend will feel right at home, and you’ll get to enjoy the beauty too. Why settle for a plain crate when you can have a masterpiece that makes your living room pop? Remember, happy dog, happy life, right?

Hi, I’m Ali Tarek, the founder of Animalsman. I’ve always been passionate about pets, especially dogs and cats, and I created this website to share practical tips, easy recipes, and helpful care advice for fellow pet lovers. My goal is to make pet care simple, enjoyable, and accessible for everyone. When I’m not writing or curating content, you’ll usually find me spending time with my furry friends or learning new ways to keep them happy and healthy.

