
Your Golden’s store bought bed clashes with the rest of your living room and you don’t have $300 to spend on a designer bed anyway, your dog’s flimsy fabric bed at the pet store already has stuffing poking out from the inside after only three months.
So you’ve been scrolling through Pinterest, and you found these amazing dog beds that actually match your home decor. But those prices are making your stomach drop.
As I’m sure you’re well aware, if you ask your pet to go to the bathroom on a designer bed, you will have to pay the designer price tag. However, I created this dog bed for $40-80 and took about 2 hours on a Saturday afternoon to put it together. You can get the Instagram look without the designer price tag.
If you’re looking for a DIY dog bed, but you’ve already checked out our 7 cozy DIY dog bed frame ideas or even perused 10 creative DIY dog bed ideas, and you’ve discovered that you actually need a DIY dog bed that’s off the ground, we’ve got you covered with these 14 DIY elevated dog beds.
These 9 frame ideas will help you transform your pet-cluttered living room into a Pinterest-perfect space for your retriever. And your living room will still be beautiful!
#1: Mid-Century Raised Platform Dog Bed (Clean Lines, Zero Clutter)

My schnauzer will stare at me while I build this for an hour before jumping up and claiming it as soon as I lay the cushion on it. Not bad for a quick, easy, and inexpensive elevated platform!
This raised wooden bed measures 30×22 inches and has 8-inch legs. The bed is for medium dogs up to 50 pounds. It’s finished with a walnut stain so it matches your coffee table…your friends think it’s designer furniture! It’s not screaming “DOG BED” at everyone who walks into your living room so you don’t have to hide your pet stuff when company comes over!
You will need: 4 pine 2×4 boards. Two boards 30″ long. Two boards 22″ long. 4 8″ legs, tapered or straight. 16 3″ wood screws. One quart of water-based walnut stain. Total cost of materials is $35 at your local hardware store.
2. Cut your frame pieces. Sand the pieces of the frame to 220-grit smoothness. I used an orbital sander. You don’t want your dog’s paws to splinter. Attach the legs to the corners of the frame with wood glue and two screws in each leg. Make sure the frame is level before you tighten the screws completely. Apply two coats of stain with 24 hours drying time in between. The frame should take about 2 hours to complete and one day to dry.
elevated design lets air flow underneath when it gets hot in the summer. my border collie stopped panting at night within 3 days of switching from a floor cushion. she loved the 8 inch clearance under the raised portion so i can store toys and grooming supplies under SO YOU CAN HAVE MORE SPACE FOR CLUTTER IN SMALL APARTMENTS.
I bought a 28×20-inch foam cushion to fit into this frame. It fit snugly so that it would not easily slip out, but left about a 1-inch space on all sides so it would be easy to remove. I put it on top of a zippered washable slipcover (linen or canvas) for easy cleaning. The raised height of this bed would also work well with senior dogs, as my 12-year-old beagle steps on it without struggling, as she did with the lower floor beds.
The look works in just about any room. A bedroom corner, beside your nightstand. A nook in the living room, underneath a window. Or a mudroom, if you’re utilizing this mudroom organization approach. The material quality doesn’t look “home-made.”
I have a very active dog and she flops on this frame (she’s 70 lbs) every day. I have never had it wobble once, not even once. It’s sturdy and supports quite a bit of weight (for my dog, and me, too). Great for cats or dogs who like to jump on from the side, since it’s wide, which makes it unlikely to fall over.
Cleaning is easy. I usually take a few minutes every week to lift the cushion off and vacuum underneath it. I wipe down the wood frame with a damp cloth. Since the wood is sealed I don’t have to worry about my dogs drool. (I have a few spots on my cheap store bought bed that my pomeranian has drooled on.)
If you have a larger breed, you can scale up the dimensions of the frame. For example, a frame that is 42×30 inches with 10 inch legs works well for labs and goldens. See the link below for an example of a DIY bed for large dogs based on your dog’s measurements from nose to tail base plus 6 inches.
Pro tip: Round all the corners with sand paper so that the corners have a 1/4 inch radius. Dogs can get their feet caught in the corners when they jump up on the bed and can also catch their nails and hurt themselves if they accidentally bang their foot into a corner.
📸 Photo credit: Instagram @breezedesignco
#2: Elevated Platform Dog Bed with Wooden Frame (Easy Weekend Build, Fits Any Room)
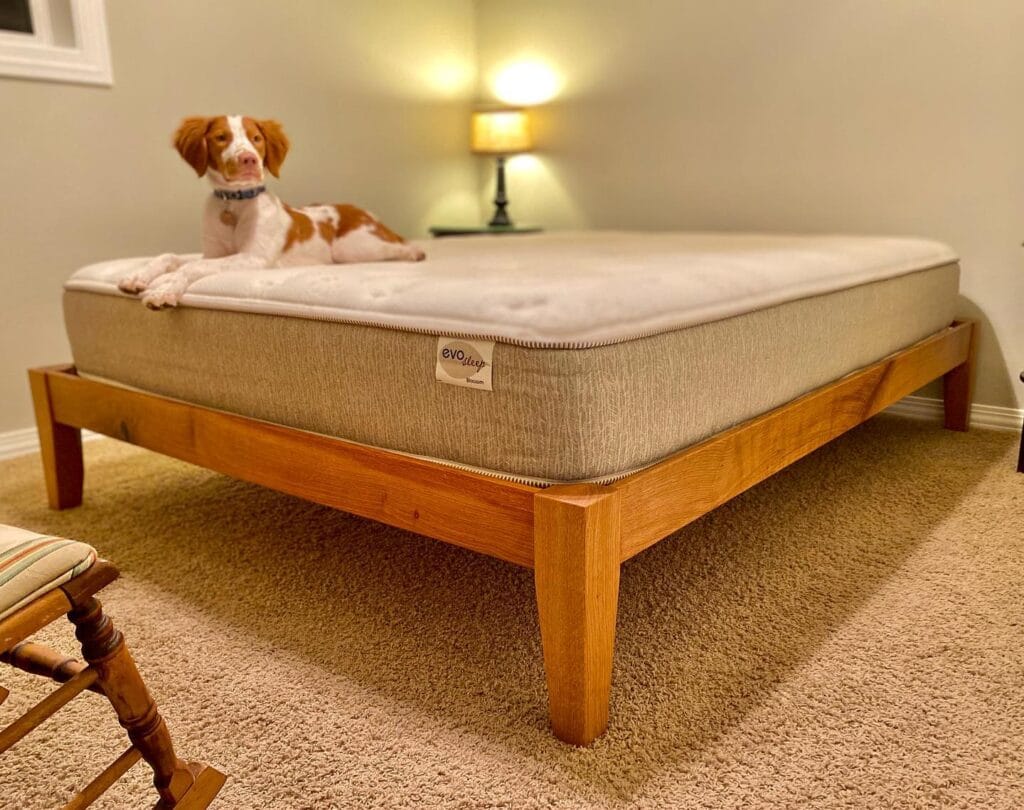
Your dog is dragging his pillow onto the cold floor. He’ll curl up on the tile instead of the fluffy bed you bought him.
A raised platform bed solves that problem, and it can be built under $40 with one 8-foot cedar board, four table legs, and some basic tools. The frame measures 36×24 inches, and is set 8 inches off the ground to allow air to flow underneath for a cool bed in the summer for your pup.
Cut the cedar board into two 36″ lengths and two 21″ lengths. Attach the pieces at each end with wood screws and attach pre-made legs at each end. Sand every edge of the bench smooth with 220-grit sandpaper and apply two coats of water-based stain.
The whole process takes only 2 hours to cut and assemble. Then, you will have to wait for 24 hours for the stain to dry.
I prefer making my own cat tree. The shelf part is built up higher to keep the cats off of the cold drafty floor. This is easy to clean, just need a few seconds to vacuum underneath. I also like that the furniture looks very much like the nightstand and dresser, so if people come over they think you paid $200 for a designer pet tree.
Drop a 4-inch foam cushion on top of the bed. Make the foam 1 inch smaller than the bed’s frame so it’s easy to remove and wash. If you’re building these dog beds for two dogs, check out 7 DIY Dog Bunk Beds Your Pup Will Love for space saving ideas.
The wide base stops tipping when my 60 pound lab does his full body flop in the morning. Mine have survived 3 years of twice daily jumps from an 85 pound shepherd. No loose screws or wobbles.
I’d add tapered mid-century legs to a modern bedroom corner, and chunky farmhouse legs (painted white) to a coastal cottage. If you like a rustic bedroom, stain the legs dark walnut to blend in with your living room furniture.
These bins will slide perfectly under that 8 inch clearance…you can store leashes, toys, and grooming supplies in the space that was usually just a home to dust bunnies. For more clever storage ideas, read on to see 7 Cozy DIY Dog Beds for Pampered Pups!
Old dogs especially appreciate the elevated design. My 12 year old beagle can get up on the low frame without effort, and her old dog bed was too high for her hips. This one gives her back her independence.
Pro tip: Measure from the tip of your dog’s nose to the base of his tail, and add 6 inches. That will be your minimum length for the bed so that he can stretch out all the way without hanging off the edges.
📸 Photo credit: Instagram @wallacewoodworks
#3: Rustic Farmhouse Platform Bed Frame (Elevated Design, Stylish Storage Solution)
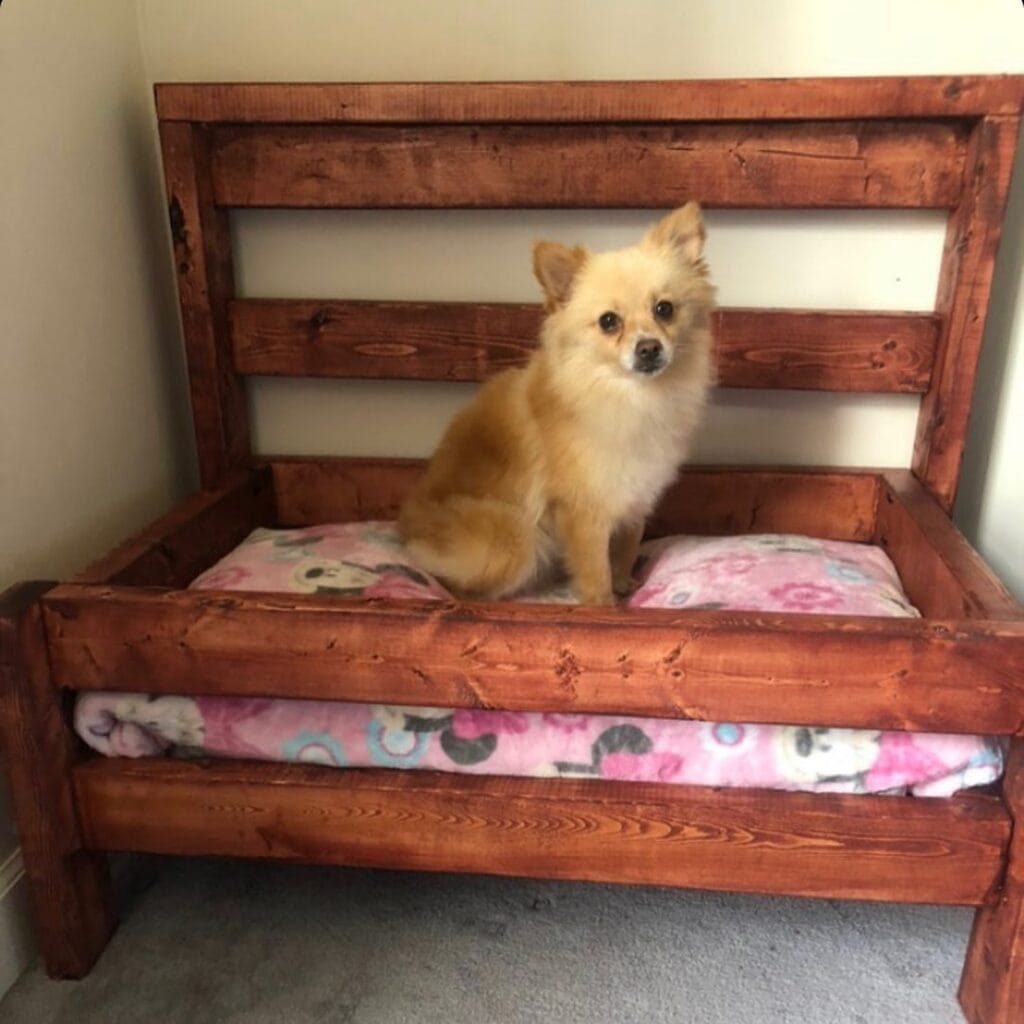
Leave it to your dog to ruin any piece of furniture you set him on. But this [b]elevated wooden platform bed[/b] is made out of real wood, so it will match your farmhouse décor so well, people will think you ordered it custom-made.
The large size measures 36×24 inches which is perfect for any dog up to 50 lbs. The bed is elevated 8 inches off the ground to give you room underneath to store toys and grooming supplies. Your dog will remain cooler because air can circulate underneath.
You will need five 8-foot pine boards, wood screws, and sandpaper. Cut each leg to be 8 inches long. Build the rectangular base of the bench with two 2×4’s at the corners. Attach the legs to the base. Level the bench and screw them down. Add a center support beam if the dog is over 40 pounds. Sand every edge of the bench smooth to prevent splinters. Use 220-grit sandpaper if you can. Apply two coats of pet-safe walnut stain, and let it dry for 24 hours between coats.
Total build time: I set up the entire bed in 2 hours (though I didn’t time myself very well). Let the bed dry for a day, but other than that, it took no time at all. And the best part? You’d never guess the bed was put together by yours truly. It fits in perfectly with the other 15 Best Dog Beds for Every Dog Size and Need.
Place a foam cushion cut 1 inch smaller than the size of the frame in the center of the box. This will keep the pillow in place and away from the edge of the frame. You want to get one that has a zipper so that you can throw it in the washing machine once a week, just like you might do with your Best Homemade Dog Shampoo: Easy DIY Recipes and Tips for Your Dog’s Skin and Coat to make homemade dog shampoo.
The raised design also keeps bugs out of your bed. It also keeps dust off your bed as well. And your vacuum can slide right under for a 30 second cleanup.
My golden watched me build it for two hours straight. Then he curled up on the frame before I even got the cushion on it. Clearly his opinion was that I had done a bang up job without the cushion. Instant approval.
One tip: Round off the corners of the top with a 1/4 inch radius sander. They will hurt if you bump one in the dark.
📸 Photo credit: Instagram @fromthegroundupdiy
#4: Custom Wooden Dog Bed Frame with Personalized Name (Elevated Platform, Furniture-Quality Finish)
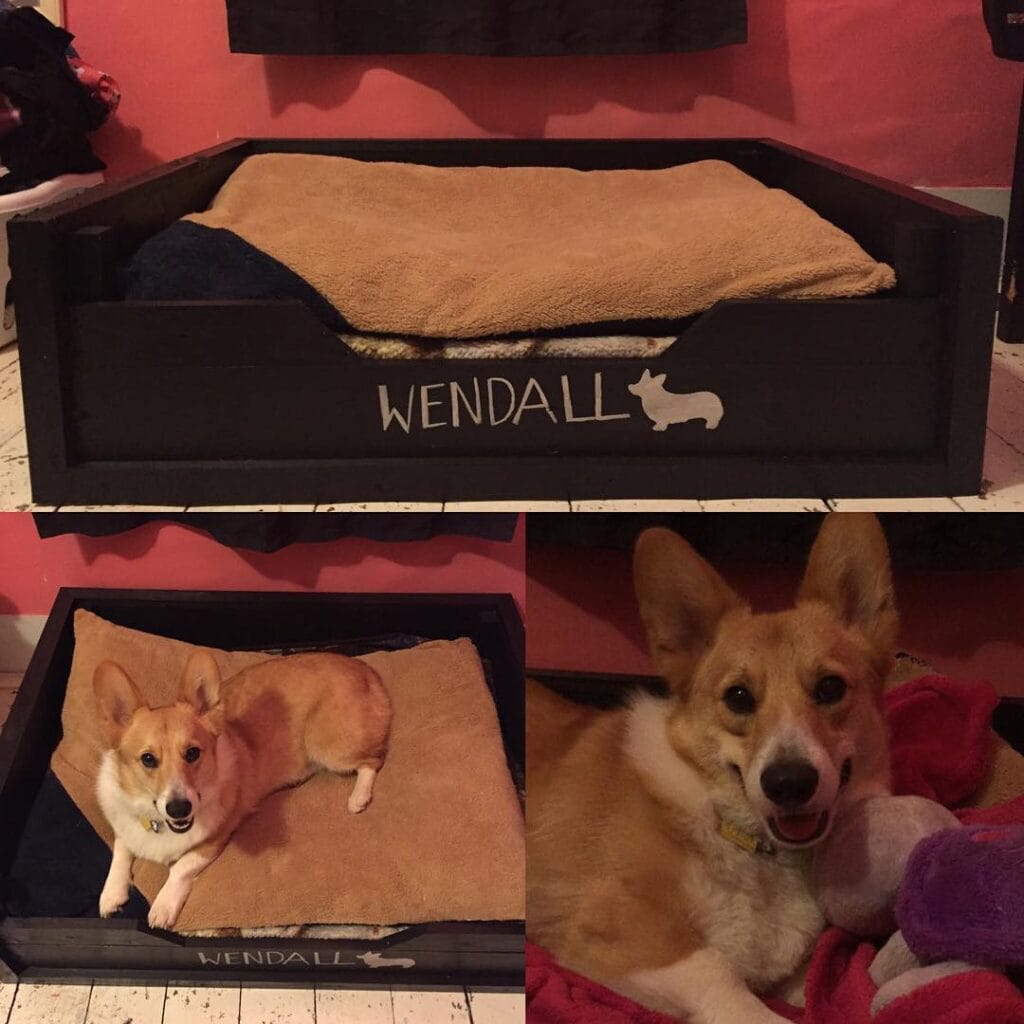
Your corgi doesnt need another flimsy fabric bed that collapses after 3 months. He deserves a custom made wooden frame that looks like furniture and not like some pet product you have to hide when your friends come over.
This box style frame is 36 x 24 x 8 inches. This would be a great way to house your corgi, beagle, or bulldog who weighs up to 40 pounds! The raised design allows air to circulate under the bed which will keep your pup cool on those summer days. This is perfect for dogs who like to circle and dig on their beds – no more flattened beds! This frame has 8 inches of clearance underneath the bed. This is also a great option if you would like to store some bins under the bed for toys, etc.
I used one 8 foot pine board (a 2×4), one sheet of plywood (24×36 inches), wood screws, sandpaper, and pet-safe stain. I picked up all the supplies at my local hardware store for about $25. First cut the 2×4 into four frame pieces and four 6 inch legs. Using the screws, assemble the rectangular base putting a screw in each corner. Attach the legs. Drop the plywood top inside the frame. Sand the entire thing (including inside of the frame) with 220 grit sandpaper. I did not want to leave any splinters. After sanding, apply two coats of stain. Allow 24 hours to dry between coats.
The personalized name makes it official. Route a shallow groove on the front panel. Slide in a painted wooden name sign. My shepherd ignored every bed until I built this one with his name. He claimed it within 10 minutes. If you’re into furniture-grade pet projects, check out these DIY dog houses for outdoor versions. Or try these DIY dog collars that match your custom bed style.
I love the look of the walnut stain on my coffee table. My friends always think I spent $200 on a designer pet bed. It actually took me all of two hours and $25! My 60 pound mix jumped on and off the bed several times a day for three years and not one screw came loose or the bed wobbled. I feel like senior dogs may benefit the most from this low 8 inch entry height. It does not bother my hips to get in and out.
Step 2: Throw in a 4 inch memory foam cushion. Make sure it’s 1 inch smaller than your frame so you can remove it easily. Cover it with a zippered washable case. Remove the cushion every week and toss the cover in the wash. Take 30 seconds to vacuum underneath.
Pro tip: If you do get a dog, it might be good to put a rubber furniture pad under each leg. Otherwise, the dog will scratch your floor up when it does that excited spin before sitting down.
📸 Photo credit: Instagram @wendallthecorgi
#5: Elevated Cot-Style Frame (Industrial Strength, Zero Floor Contact)
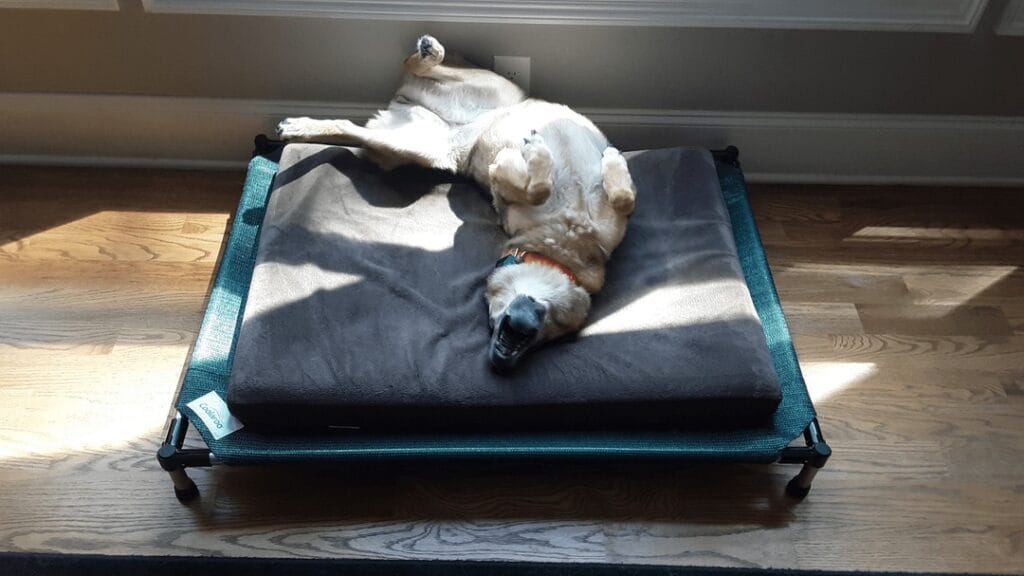
My dog thinks he owns every piece of furniture in the house except his bed. Not anymore. I built a raised frame so it looks like it’s supposed to be there. This cot takes 2 hours to build and will work for up to 100 pounds.
You’ll need four 36-inch corner posts, and two 36″x24-inch panels from the hardware store. Cut your PVC pipes to the desired height, or attach the corner brackets to make for a slightly heavier industrial-style leg. This frame sits 8 inches off the ground, so air flows beneath it. This leaves your dog cool in summer, but off the cold tile in winter.
1. Measure your dog from nose to tail base then add 6 inches for a secure fit. Measure shoulder to shoulder plus 6 inches for a secure fit. 2. Cut out 2 pieces (36×24 inches) for a dog weighing 50 pounds. Make legs 1 inch diameter for 50 pound dog. 3. Attach corner brackets. Then stretch the breathable top over the frame and attach corner clamps.
Sand every edge down to 220-grit smooth. File down all corners so the dog does not scratch the paw while jumping on. Apply two coats of water based stain. Make sure it is safe to lick if they do. Allow 24 hours to dry between coats.
If you have the dog like mine who will drop his toys anywhere in the house then that 8 inch clearance under the bed will be used to slide storage bins under the bed. You can fit toys, grooming supplies and leashes in the space that was otherwise wasted. Plus you can vacuum underneath the bed in less than 30 seconds without dragging anything around. If you are organizing a space for your dog, you can also use the dog room organization tips below to take advantage of vertical space in the room too.
I bought this for my senior dogs with arthritis. It is much easier for them to get onto the 8 inch platform, than climbing onto a thick floor bed. Also, when they are not lying on a hard surface, the pressure on their joints is not as bad. My 12 year old beagle has stopped limping since I bought this elevated frame.
Build the base of the box using 2x4s. At each corner, use wood screws to fasten the wood together. For a very sturdy box, add a center support beam if your dog weighs more than 40 pounds. To test, see if the frame will wobble or tip. I made one for my 80 pound shepherd, and even after three years of full body flops, none of the screws had come loose.
I put a removable cushion on top of the frame that’s 1″ smaller than the opening, so it drops in snugly but pops out for washing the cover once a week. The memory foam is 4″ thick, which works for most dogs, and the orthopedic foam is 6″ for older dogs with hip dysplasia. The gray fabric cover matches my throw pillows so it looks like I bought it at a furniture store.
You can paint the frame to match your rooms color scheme. I chose walnut stain to match my coffee table and TV stand. The hidden screws and smooth corners also give the appearance of furniture rather than a piece you might make for your bedroom.
The raised edge prevents bugs and dust from getting under it. Water won’t pool under it if you use it on a covered patio. Sealed wood with marine-grade finish doesn’t get wet or fade from the sun. My frame sits in the sunroom all year without warping or cracking.
I tighten the screws at least once a quarter to make sure they’re not getting loose from our dog walking on it daily. If it gets dirty, I just wipe it down with a damp cloth (I’ve only had to do that a couple of times in the 3 years we’ve had it). It is heavily stained every 2-3 years. It’s made of solid wood and we have a very active dog who walks on it 2 times a day at least. Much better value than having to buy a cheap bed every year.
Pro tip: I attach them to the bottom of the legs so I can roll the bed between rooms and not scratch up my floors. Or when my dog follows me everywhere and I’m trying out a new recipe in the kitchen.
📸 Photo credit: Instagram @makerpipe
#6: Elevated Platform Bed Frame (Mid-Century Style, Easy Weekend Build)
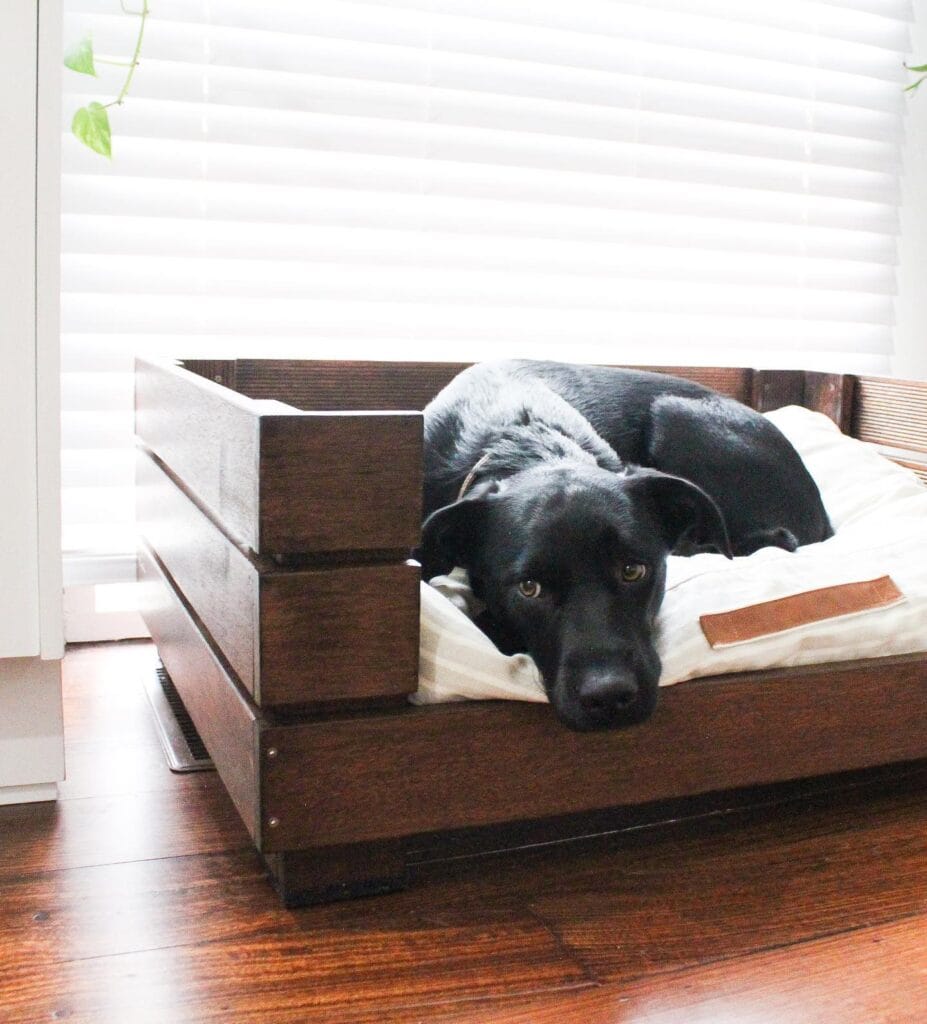
Our raised platform frame lifts your dog’s bed up off the cold floor by eight inches allowing air to flow underneath keeping them cooler in the summer and warmer in the winter.
This dog crate measures 36 inches long by 24 inches wide. This crate is best for medium sized dogs up to 60 pounds. You will need four 8 foot pine boards from the hardware store, wood screws and drill. Materials should cost you around $35.
Cut the boards into pieces – two 36″ side rails, two 24″ end rails, and four 8″ legs. Sand each edge smooth. Make the base, which is a rectangular box, first by screwing the rails together at the corners. Screw the legs into the base, at each corner. Attach a center support to the inside of the base.
The walnut stain goes with my living room furniture. Looks like a store bought project instead of a DIY. If you’re looking for a cheap project check out 10 creative pallet dog bed ideas that use reclaimed wood!
I also have a 4 inch memory foam cushion that drops into the frame and sits on the platform. My dog can lie on it and stretch out or curl into a little ball. This frame allows my senior dog to get on and off easily because it is elevated.
Cleaning up only takes 30 seconds now. I can just vacuum underneath without having to move anything. There is 8 inches of clearance underneath for storage bins. It fits under our table and chairs. Squeak watched me build it for two hours and then claimed it before I added the cushion.
I’d be afraid to put anything up there since I’ve seen some of the other post regarding the collapse of the wood. I’ve put 80lbs of my 80lbs shepherd on the frame from time to time and she likes to do full body flop onto it (which scares the crap out of me) and not one lose screw after 3 years. Also if you want to hide dog treats under it label the dog treat containers.
If you’re painting your pet’s nails, apply two coats of pet-safe water-based stain. Let the stain dry between coats so that your dog doesn’t lick the wet chemicals.
📸 Photo credit: Instagram @januaryrevival
#7: Repurposed Four-Poster Frame Bed (Mint Green Legs, Farmhouse Charm)
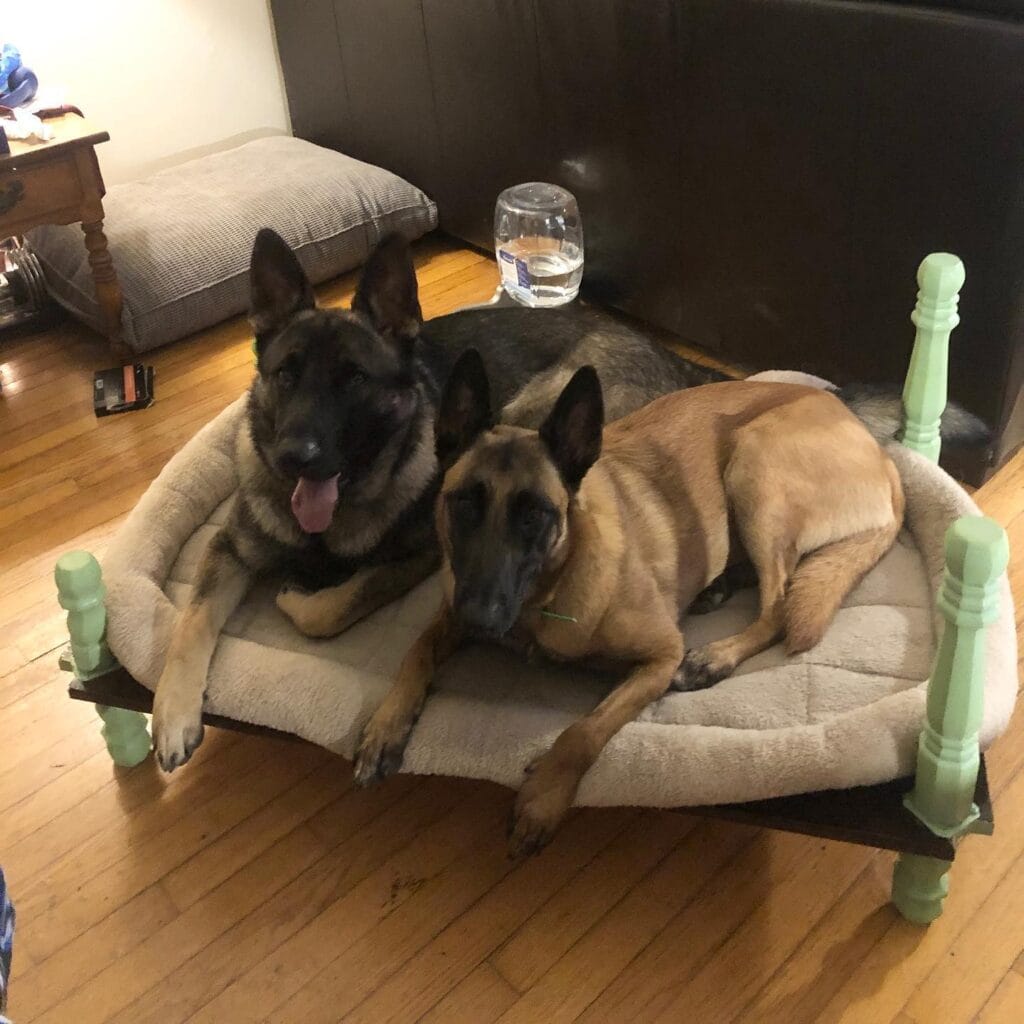
You don’t want to pass up an old toddler bed sitting on the curb. Use the turned spindles to create an elevated dog bed.
This bed frame design uses a salvaged four-poster bed frame cut down to dog size. The legs provide an additional 8 inches of clearance underneath. The headboard and footboard rails are cut to 36×24 inches for medium-sized dogs. Sand the rails to 220-grit sandpaper. Paint the legs mint green or coastal blue to match your throw pillows. The cushion slides right into the frame. You can pull it out for washing.
What You’ll Need
Grab these from your garage or hardware store:
– Four turned wooden legs (10-12 inches tall)
– Four 2×2 rails cut to your dog’s length plus 6 inches
– Eight corner brackets
– Pet-safe paint in your accent color
– 4-inch foam cushion cut 1 inch smaller than frame
– Wood screws (1.5-inch)
– Sandpaper (120-grit and 220-grit)
Build It in 6 Steps
First of all, you will need to measure your dog from the nose to the base of the tail. Add 6 inches to this measurement. This will be the length of your frame.
Second, cut four rails to the exact dimensions of the two longer sides and the two ends.
Third, put the corner brackets on the ends of the rails to make your rectangular frame.
Fourth, place one leg into each corner bracket, and then check the level before tightening it in.
Fifth, sand every surface until smooth. You can round the corners so that the pup doesn’t catch skin.
Sixth, it can be. Just paint the legs, and leave the rails natural or stain them walnut.
Total build time: It took me 2 hours to cut and assemble everything, and 4 hours to dry.
Why Elevation Matters
At 8 inches high, air flows underneath the bed allowing it to stay cool during the summer months. Our raised design also helps senior dogs that may have a hard time stepping on and off the bed.
Vacuuming under your bed will be a breeze! No more dragging your heavy bed around the room, and the storage bins for leashes and toys slide easily under the bed frame. Check out these DIY dog room ideas for keeping your room organized.
Perfect Cushion Integration
Cut the foam mattress about 1 inch smaller than inside the frame so that it will fit snugly but you can take it out to wash the cover. The cover is washable (zippered cover in linen which matches your couch pillows).
I like that the 3″ side rails give the bed a "nest" feeling that the dogs like and that the three-circle routine that my shepherd does before she lies down won’t allow the cushion to slide off the end.
For thicker orthopedic foam, adjust your rail height. Senior dogs need 6-inch memory foam for joint support.
Farmhouse Style That Blends In
These will look adorable in a mint green color. I recommend painting these the same color as your accent wall or even your kitchen island so they feel more like a piece of furniture than a dog bed! The natural wood rails look very nice next to a coffee table.
More importantly, friends and guests have commented on how cute my dog’s bed is. “Where did you get that adorable dog bed?” they ask, to which I reply: curbside trash and $15 worth of hardware.
This cute bed has turned over spindle legs on each corner giving it a furniture-quality style. It looks like one of the beautiful dog beds you might find at West Elm! Check out these stylish wooden dog beds for more inspiration!
Size It Right
This 36×24-inch frame fits small to medium dogs up to 60 pounds. Perfect for your beagle, cocker spaniel, or medium poodle.
If you need a larger size, try 42×30 inches. That will do well with a shepherd or large lab. It is 4 legged so even an 80-pound dog flopping around doesn’t tip the table.
The footprint fits nicely in a 4×3-foot corner of a bedroom. It would not block a door or walkway to a bathroom.
Storage Bonus Underneath
That high design means you’re creating some wasted floor space you could use. Slid two lower bins under the design. One holds all my grooming supplies, the other is for toys and extra leashes.
We cleared out about 8 inches of clearance for me, and that’s enough space to fit most of the bins that we have from the discount store into here. I labeled some of them with a Sharpie so that I can just grab what I need on my morning walk.
maximize vertical space – without adding shelves to your walls. everything stays hidden, but is still accessible.
Durability You Can Trust
It’s very solid and has handled my dog jumping and digging on it daily for the past 3 years. My friend who has a 70 pound pittie has had his on his bed for years and no loose screws or wobbly legs.
Because the corner brackets are distributed evenly over all four legs, a heavy jumper will not tip the frame or damage it.
Check hardware every quarter. Tighten any screws that have worked loose from movement. This is the only maintenance required beyond wiping dust off the hardware.
Weather-Proof for Porches
If you plan to put this out on a covered patio, you will probably want to seal the wood with marine-grade polyurethane (two coats should do the trick to keep out humidity and changes in temperature).
I have used pressure-treated lumber on a couple outdoor projects. You just have to sand it really well and let it dry out completely before painting.
The design of the floors is elevated so that water does not pool underneath during a downpour. Air circulation prevents the building from getting mouldy.
Actionable Tip
Paint only the legs of your dog’s bed in an accent color and leave the rails natural. Your shepherd gets a cozy elevated bed that will actually improve your bedroom’s style.
📸 Photo credit: Instagram @silastheservicedog
#8: DIY Pallet Platform Dog Bed (Rustic Farmhouse Style, Perfect for Golden Retrievers)
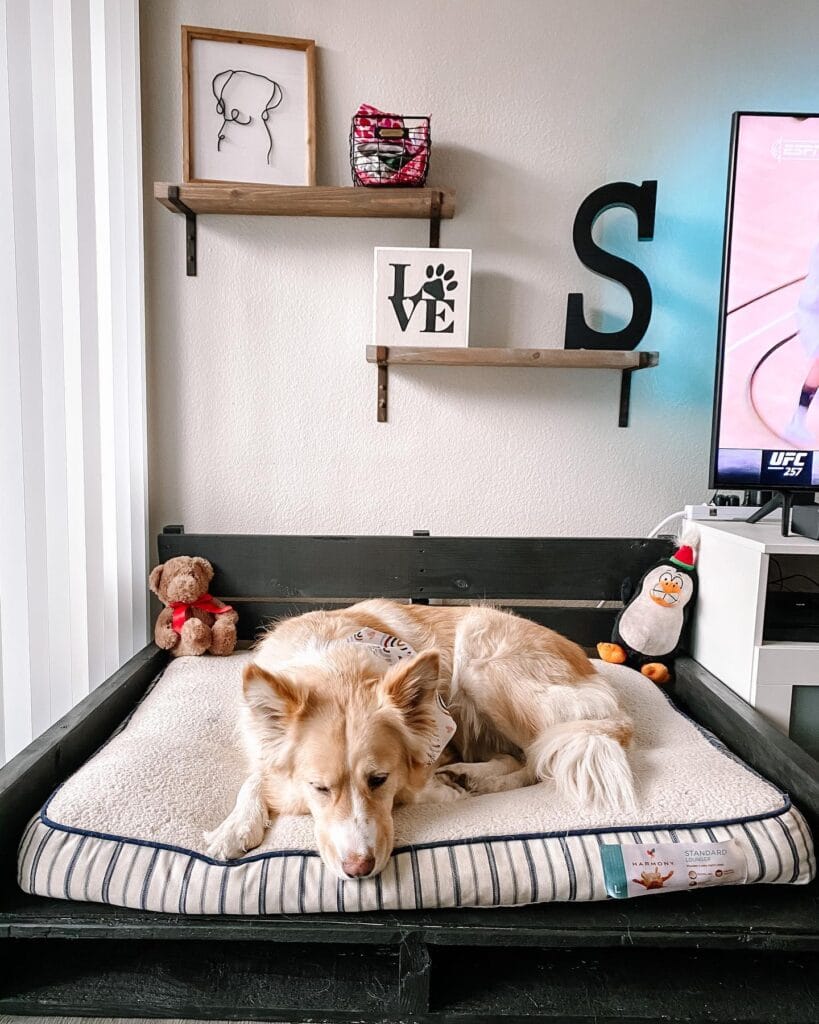
Your golden sprawls around awkwardly on cold tile floors. A simple pallet platform bed changes that. You can build one in two hours using reclaimed wood and basic tools.
Get one 40×48-inch wood pallet from behind your local hardware store. Most places give them away for free. Cut down to 36×30 inches for larger breeds of dogs. Sand every single surface until smooth. Use 220-grit sandpaper and rub your hand across every edge to make sure it is smooth. Stain the wood with two coats of water-based stain in walnut or dark gray. Let each coat dry for 12 hours.
The raised design lifts your dog 8 inches off the floor. Air flows underneath to keep them cool during the summer. You can easily vacuum under it in 30 seconds without dragging anything around. Elderly dogs with joint pain can easily get on and off of this raised platform. My 90 pound shepherd quit limping after I switched him from a floor level dog bed to this raised platform.
Place a 4-inch orthopedic foam cushion on top. Cut the foam 1 inch smaller than the frame. Make it easy to remove! Add a washable linen cover in a color that will match your room decor. In the interest of taste, we’ve chosen to use a cream or gray cover. The natural wood finish blends in well with farmhouse furniture. Your guests will think you’ve splurged on designer pet furniture!
If you are looking for some inspiration on how to put a dog run in your backyard, this list of DIY dog run ideas can help you. If you want to protect your yard from your dog, these DIY dog fence solutions ideas will not only protect it but also add to the overall look of your yard.
Pro tip: Attach hairpin legs to the pallet corners instead of leaving it flat. Adds a mid-century modern flair and another 4 inches of air flow!
📸 Photo credit: Instagram @sadiethegoldenhuskie
#9: Build a Walnut Platform Dog Bed with Slat Support (Furniture-Grade Finish, Weekend Project)
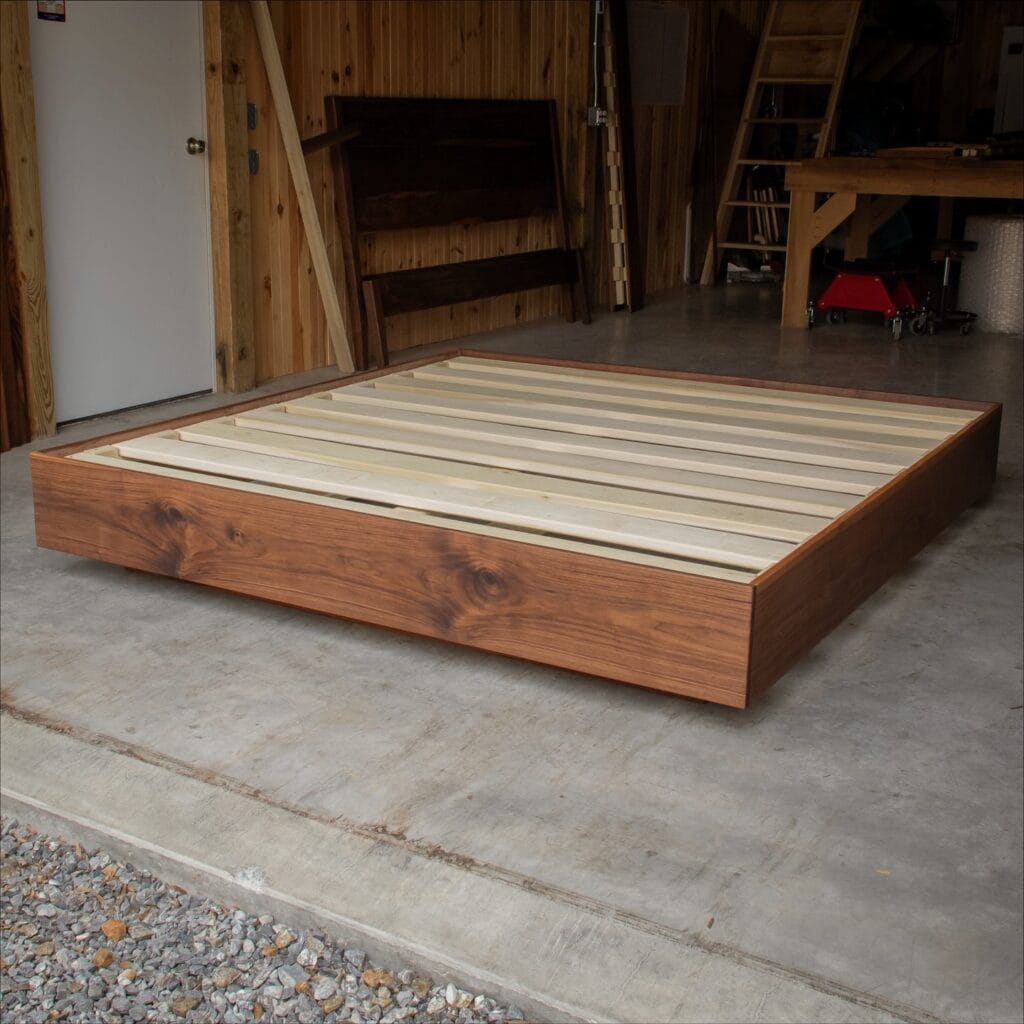
My neighbor made this frame in his garage on Saturday. By Sunday afternoon his German Shepherd was refusing to sleep anywhere else.
This raised platform is designed for large dogs. It measures 42×30 inches. It can be constructed using four 8 foot long walnut (or pine if walnut is too expensive) boards. The frame is elevated six inches from the floor so that air can circulate underneath, keeping your dog cool in the summer and keeping the wood dry. You will need to cut the boards into four frame pieces and nine slats. Use pocket hole screws to assemble at the corners and only see screws at the top.
Sand every surface to 220-grit smoothness. Round all corners with a 1/4-inch radius. Apply two coats of water-based stain and let it dry between coats. This finishes walnut so you can skip the “pet corner” look. This is the perfect finish for any project you are building as a companion to 13 Genius DIY Dog Stuff Every Pet Parent Needs to Try Today.
Put the 4 inch memory foam cushion inside the frame. Cut the cushion 1 inch shorter than the opening, so you can lift it out of the frame easily for washing. The raised slat design of the frame lets you vacuum underneath it in 30 seconds. No more hauling the heavy bed across the room.
Total build time: That’s 2 hours of cutting and sewing, plus the drying time. And, my friend’s guests thought he bought it from West Elm for $400! He only spent $75 for materials. I added a few finishing touches from 11 Cute & Practical Items to Complete Your Dog Bed Room for some cohesiveness in his new dog room!
Pro tip: Add a couple of the adhesive furniture pads (the sticky kind) to the bottom corners of the frame. This will protect your hardwood floors and will stop the frame from sliding when your dog jumps on it.
📸 Photo credit: Instagram @mountainmulehardwoods
Make Your Pup’s Dreams Come True
You’ve got inspiration! Now, it’s time to get building. Take this weekend to build something your dog will actually use every day. Get started with a simple frame to your dog’s favorite spot!
Your home deserves to have furniture that suits your four-legged family member. Check out these 21 Creative DIY Dog House Ideas for Your Dog Friend and 11 Creative Dog Bed Ideas Your Pup Will Love for more pet-friendly design ideas for your home. Don’t forget to check out these 16 Creative DIY Dog Crate Ideas for Pet Lovers if you’re feeling extra crafty.
Find the perfect bed frame design that you like best and pin it so you can go back to it when you are ready to make the bed. Which one do you like better rustic farmhouse or modern? For me, it’s a toss up.

Amr Mohsen is a software engineer who traded his keyboard for a leash — at least on weekends. His love for dogs inspired him to share what he learns as a dog owner and enthusiast, bringing a detail-oriented, research-driven perspective to every article he writes. If it’s about dogs, he’s probably already looked it up twice.



