Your golden retriever deserves a leash that matches your gorgeous entryway—but custom designer leashes start at $85. You’ve scrolled past those beautiful leather and rope leashes on Instagram, knowing your bank account can’t handle another splurge this month.
Store-bought options feel flimsy or look boring next to your carefully curated home decor. You want something that photographs well on your morning walks and holds up when Max spots a squirrel.
These 10 dog leash DIY designs cost under $15 each using materials from your local craft store. You’ll create Instagram-worthy leashes in under 2 hours—no sewing machine required. Pair your new custom leash with a gorgeous name for your next pup, and keep her coat photo-ready with homemade shampoo recipes that won’t strip natural oils. Your walks just became your favorite home accessory.
#1: Bright Pink Braided Rope Leash (Shock-Absorbing Comfort, Instantly Visible at Dusk)
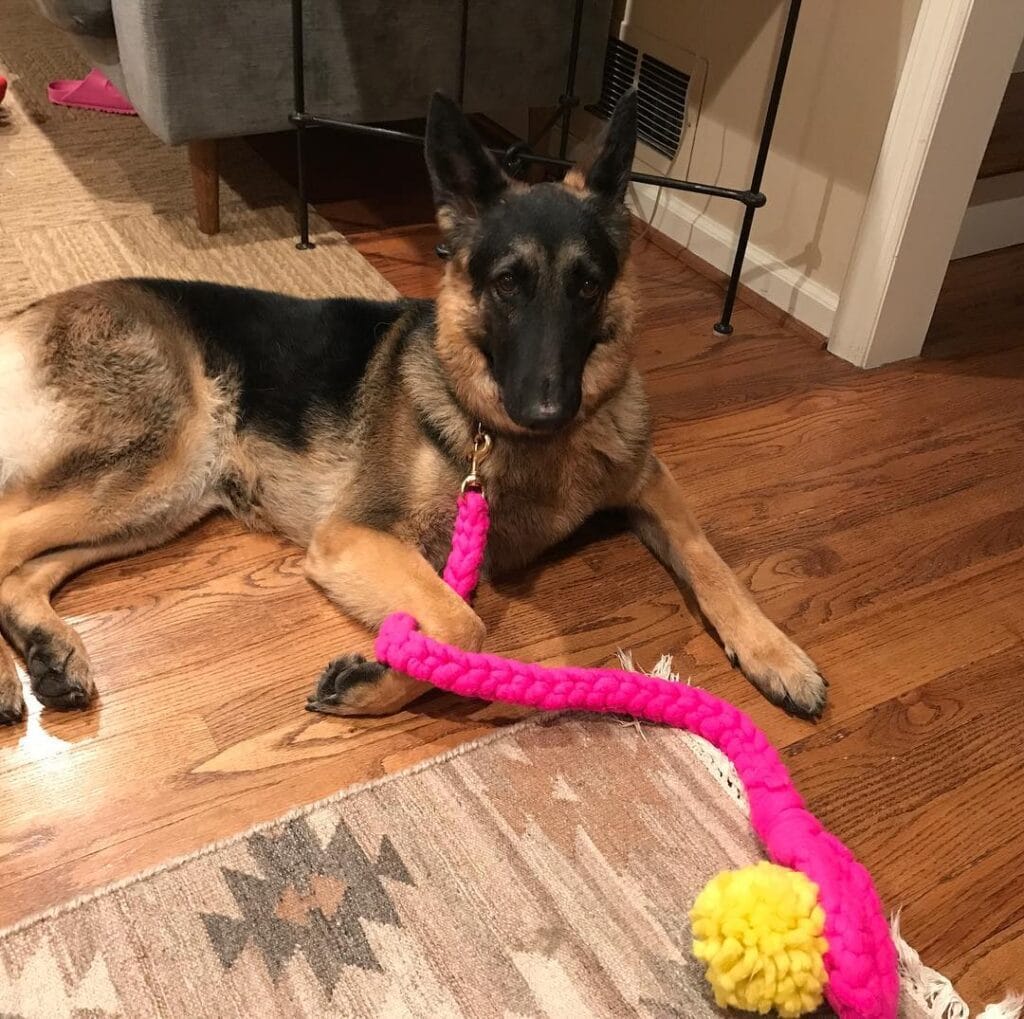
Your neighbor drops $45 on designer leashes that fray in three months. You’ll make this neon pink braided rope leash for $12 in materials and 45 minutes of your Saturday afternoon.
Grab 8 feet of marine-grade climbing rope (1/2-inch diameter works for dogs 15-75 pounds). Add one heavy-duty swivel clip rated for 500 pounds, available at hardware stores for $4. The vibrant pink shows up 50 feet away at twilight, so cars spot you crossing streets before headlights catch the reflective stuff that barely works.
Cut your rope to 6.5 feet total length. Thread it through the swivel clip’s ring, fold back 2 inches, and wrap tightly with waxed thread 15 times around both rope sections. For the handle, create a 6-inch loop at the opposite end. Braid three strands together for 4 inches of padded grip that won’t burn your palm when your dog lunges after squirrels. Seal both cut ends with a lighter flame for 3 seconds each to prevent unraveling.
The rope’s natural stretch absorbs shock when your Shepherd hits the end running. Your shoulder doesn’t jerk forward violently anymore, which means you’ll actually enjoy walks instead of dreading the pulling battles. Plus, this matches the aesthetic you’re building with your Best DIY Dog Collars: A Comprehensive Guide project from last month.
Test your knots by hanging a 20-pound weight from the clip overnight. If it holds, it’ll handle your dog’s pulling power safely.
📸 Photo credit: Instagram @woolandgrace
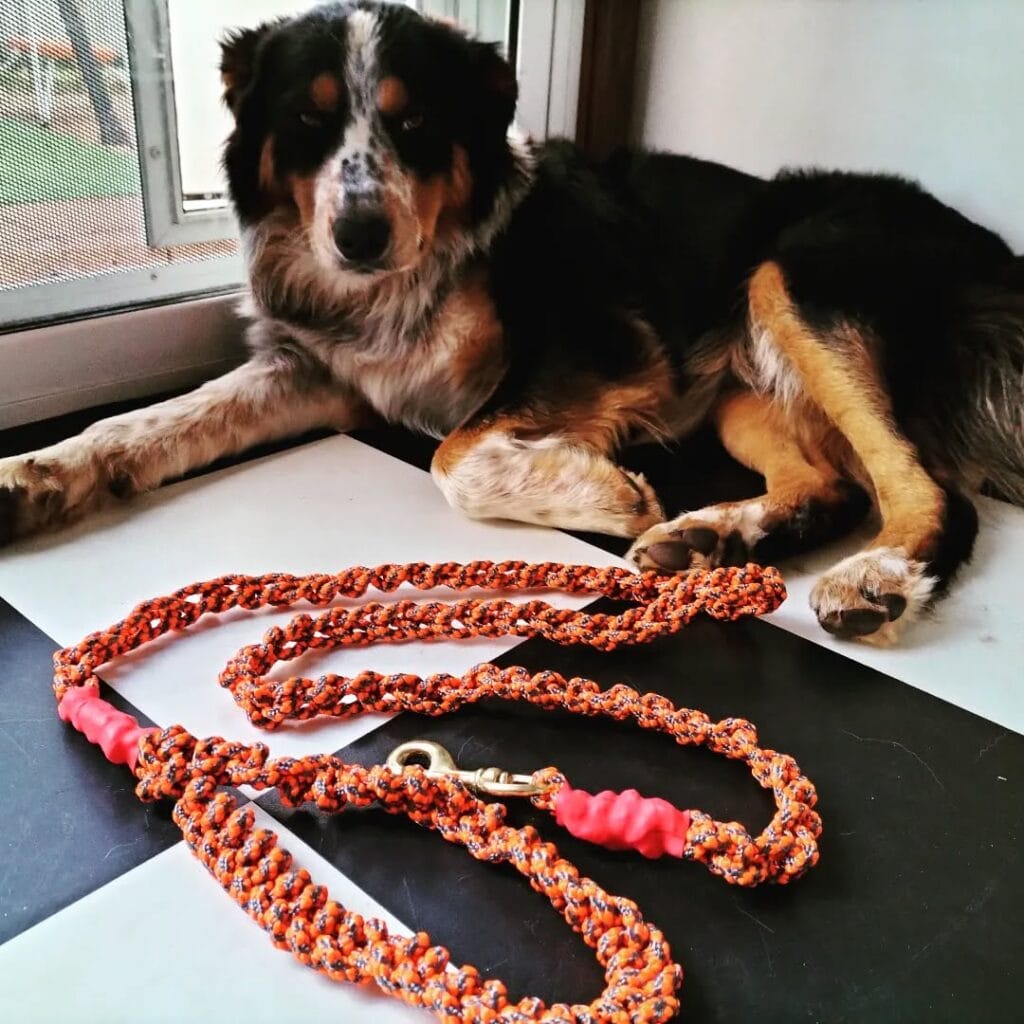
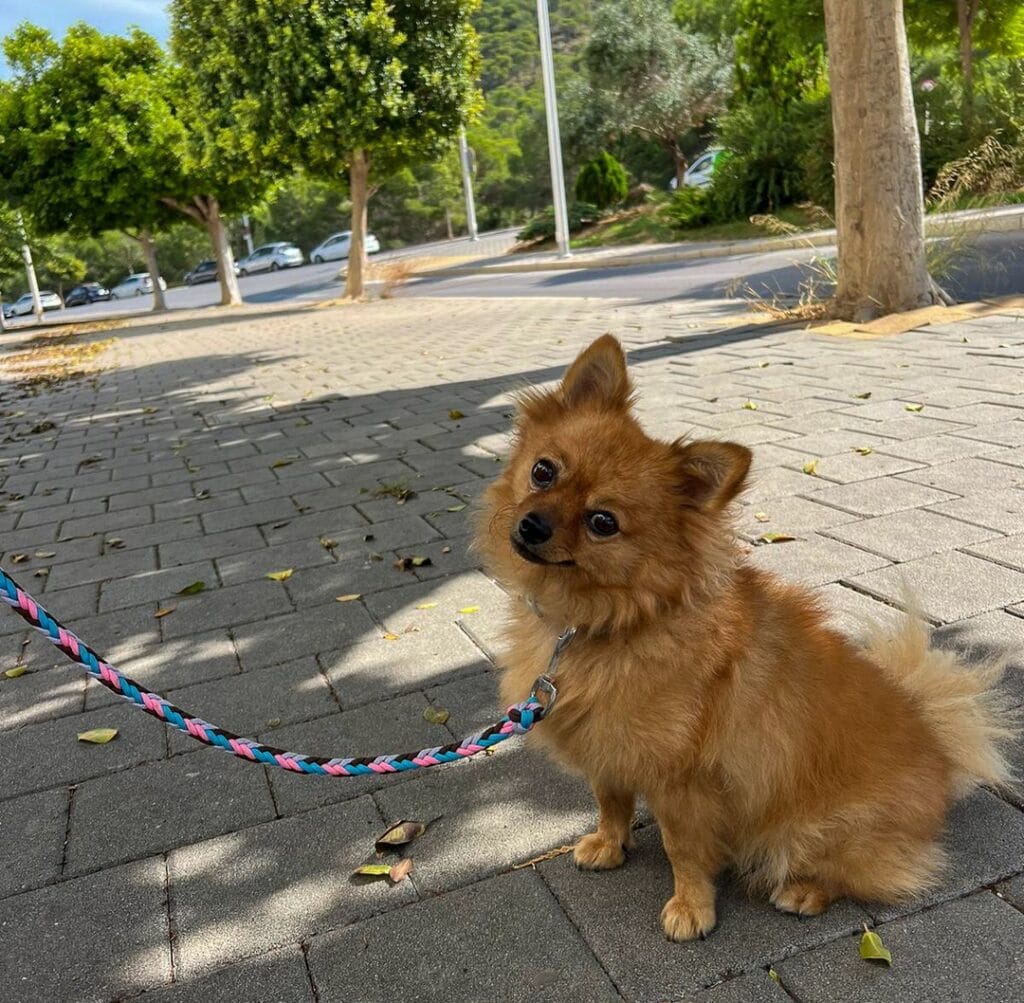
#2: Braided Paracord Leash with Neon Safety Stripe (No-Sew 30-Minute Project, Survives Any Adventure)

Your neighbor asked where you bought that striking black-and-yellow leash. She looked shocked when you said “made it in 30 minutes.” This paracord braided leash needs zero sewing skills—just scissors, a lighter, and 35 feet of 550-grade paracord.
Cut 25 feet of black paracord and 10 feet of neon yellow for the cobra weave pattern. Thread both colors through a heavy-duty swivel clip rated for 500 pounds. The braided design creates a 6-foot leash that’s 3/4-inch thick—perfect for medium to large dogs who pull hard.
Here’s the cobra weave in four steps: Loop yellow cord over black. Thread right strand under center and through left loop. Repeat on opposite side. Pull tight after each knot. The pattern takes 15 minutes once you find your rhythm. Seal all cord ends with a lighter flame for 3 seconds so they won’t fray.
The handle loop gets formed with a simple crown knot—fold the last 8 inches back, weave through itself twice, pull snug. No stitching means no weak points that rip out. The paracord grips comfortably even when wet, unlike slippery nylon that slides through sweaty palms during summer walks. Just like frozen dog treats keep your pup cool on hot days, this waterproof leash handles rain, mud, and beach trips without getting gross.
Hiked 5 miles through creek crossings last weekend. The leash dried completely in 2 hours hanging on the porch. When you’re ready to reward those good walks, try these DIY dog chew treats as training motivation.
Pro tip: Make a matching 18-inch traffic handle using the same pattern—attach it 12 inches from the clip for crowd control at farmers markets.
📸 Photo credit: Instagram @ydueeyeexist
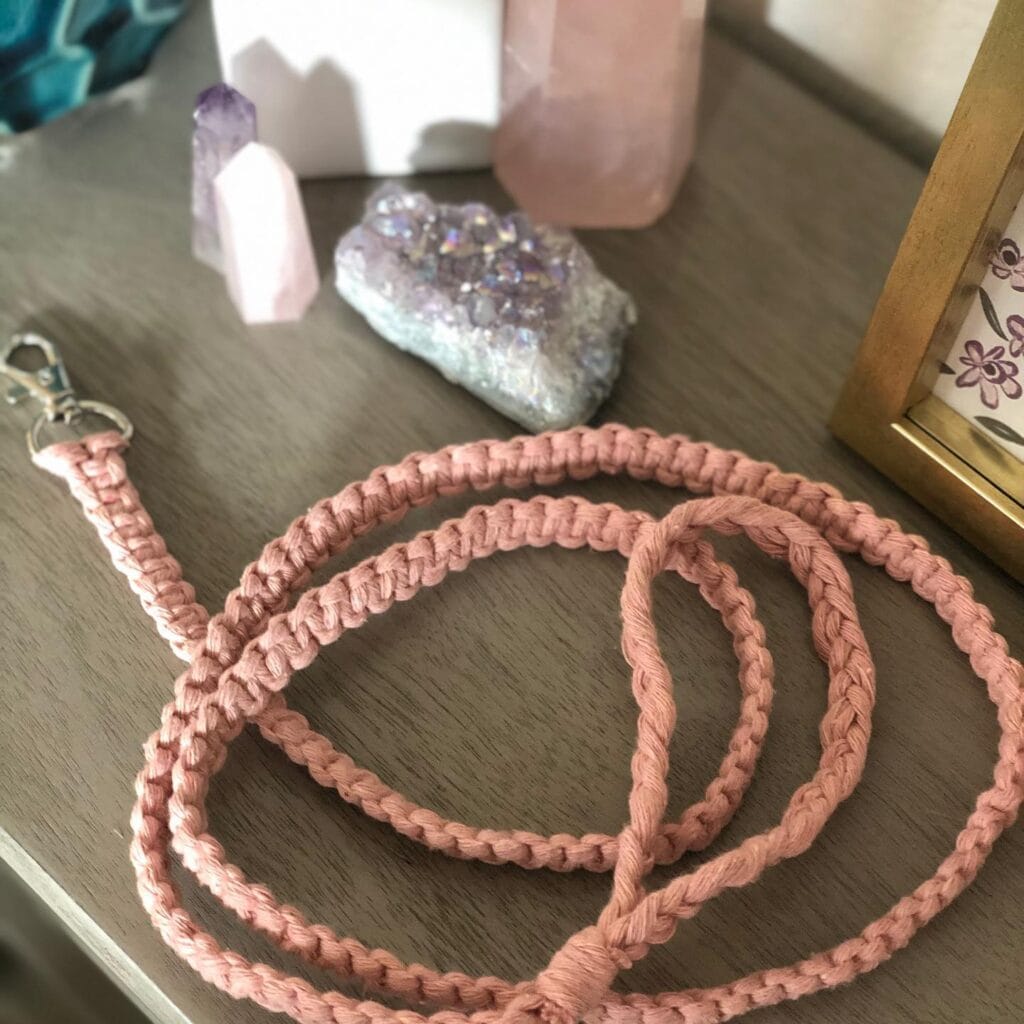
#3: Twisted Cotton Rope Leash (Customizable Colors, Zero-Sew Construction)
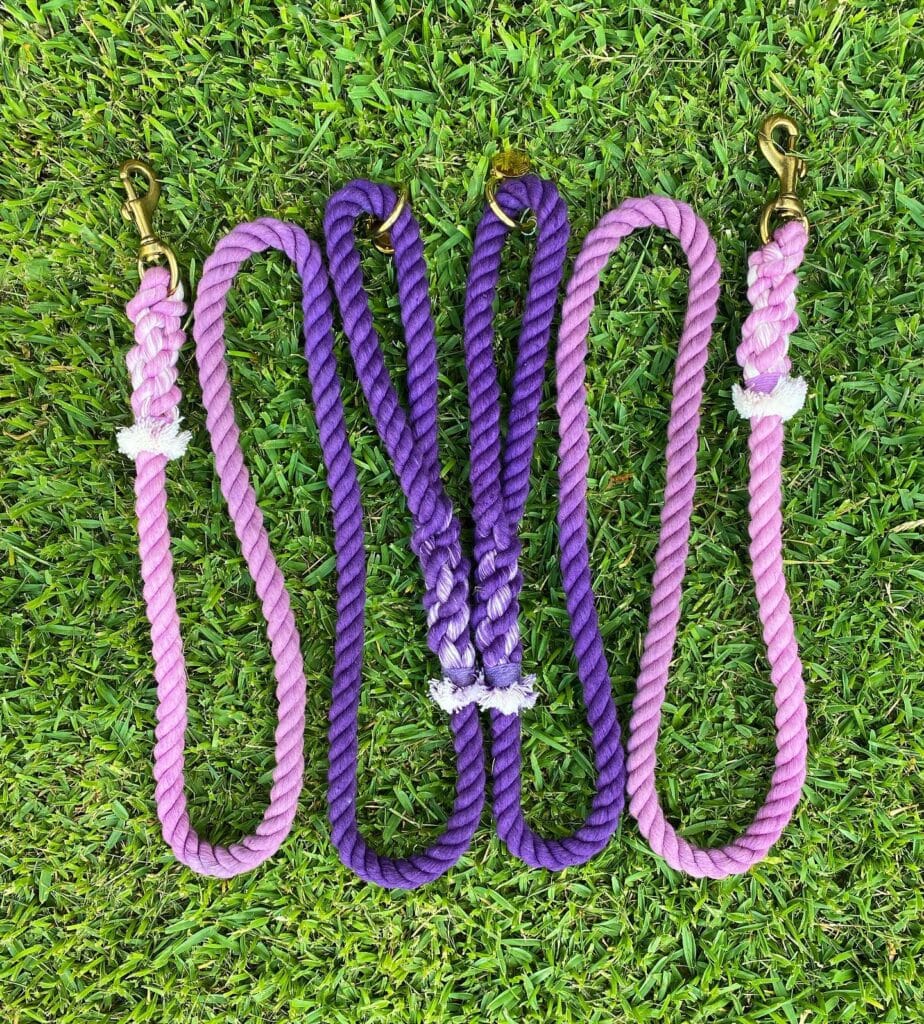
Your neighbor asks where you bought that gorgeous purple leash. You smile and say “made it in 35 minutes.” Their jaw drops. This twisted cotton rope design uses simple knots instead of sewing, so you don’t need any special equipment. Just rope, a swivel clip, and your hands.
Buy 8 feet of 1/2-inch twisted cotton rope from any hardware store for $6. Add a brass swivel clip rated for 300 pounds ($4 online). The navy and pink color options match your home’s aesthetic without looking like cheap pet store neon. Cut the rope to 6.5 feet, seal both ends with a lighter flame for 3 seconds each. Thread one end through the swivel clip ring, fold back 3 inches, and tie a tight crown knot. Form the handle loop by tying the other end into a bowline knot (YouTube it once, remember it forever). This gives you a padded grip that won’t slip from your hand when your dog spots a squirrel.
The twisted texture prevents rope burn during pulling, which means your palm stays comfortable on 30-minute walks. My 60-pound Boxer hit the end running full speed after a tennis ball. The leash held. The knot didn’t budge. If you want more creative projects that combine function with style, check out 10 Creative DIY Dog Bed Ideas for Your Furry Friend for matching bedroom aesthetics. The rope rinses clean with a garden hose after muddy trail hikes and air-dries overnight on your coat hook.
Pro tip: Make three leashes in different colors for $20 total—rotate them like you swap throw pillows seasonally, and keep one backup when the primary is drying.
📸 Photo credit: Instagram @colorme.hippie
#4: Braided Paracord Leash with Bungee Handle (No-Sew 30-Minute Project, Stops Pulling Shock)
You need 25 feet of 550 paracord, one swivel clip, two pink bungee grips, scissors, and a lighter. That’s it. My 65-pound mutt used to jerk my shoulder when she bolted at squirrels. This shock-absorbing design changed everything.
Cut your paracord to 20 feet for a 6-foot finished leash. Thread through the swivel clip, leaving 10 feet on each side. Start a four-strand round braid, pulling tight every few inches. The bungee grip sections absorb pulling force so you can walk comfortably, which means no more dreading the morning routine because your arm hurts. Finish with a cobra knot handle loop, seal all cut ends with flame for 3 seconds.
The orange and black pattern shows up 40 feet away at dusk. Strangers at the park assume I paid $45 online. Total cost was $8 for materials I already had from camping trips. Dragged across concrete 50 times, still looks new except for slight fading on one grip section.
Here’s the strength test that matters: She hit the end running full speed after a rabbit. The paracord held instantly, rated for 550 pounds. My wrist didn’t snap because the bungee sections stretched 3 inches and absorbed the jolt. If you’re building a larger play space, check out 17 Creative DIY Dog Run Ideas for Your Furry Friend for boundary solutions. The swivel clip rotates smoothly after 4 months, never tangles.
Pro tip: Add a traffic handle 18 inches from the clip using a single cobra knot loop. Crowded sidewalks become manageable when you need close control through the farmers market. For perimeter training, 18 Creative DIY Dog Fence Ideas for Your Yard pairs perfectly with leash work.
📸 Photo credit: Instagram @biancajaneartist
#5: Hand-Braided Rope Leash with Swivel Clip (No-Sew Project, 30 Minutes)

Your neighbor asks where you bought your leash every single walk. You smile and say “made it myself in half an hour.” The braided climbing rope catches light beautifully, and that brass swivel clip cost just $4.50 at the hardware store.
You’ll need 8 feet of 1/2-inch climbing rope (around $6 at REI), one swivel clip rated for 400 pounds, scissors, and a lighter. Cut your rope to 7 feet total. Thread one end through the clip’s ring, fold back 3 inches, then wrap tightly with the loose end using a fisherman’s knot. Seal both rope ends with flame for 2 seconds so they don’t fray. Create your handle by making a 6-inch loop at the opposite end, securing with another fisherman’s knot wrapped five times around.
The swivel mechanism prevents tangling so you can walk without stopping every 30 seconds to untwist. Your wrist slides through that handle loop easily, which means you won’t drop the leash when your dog spots a squirrel and you need both hands to grab your phone. The marine-grade rope resists water completely—hosed it down after three muddy park visits, dried overnight on the hook.
This pairs perfectly with other 13 Genius DIY Dog Stuff Every Pet Parent Needs to Try Today! for a complete handmade setup. Match your leash color to your dog’s collar for that coordinated look Instagram loves.
Pro tip: Make two identical leashes in different lengths—6 feet for neighborhood walks, 4 feet for crowded downtown coffee runs where you need closer control.
📸 Photo credit: Instagram @cbknot
#6: Rainbow Ombré Rope Leash (Multi-Color Gradient, Everyday Adventures)
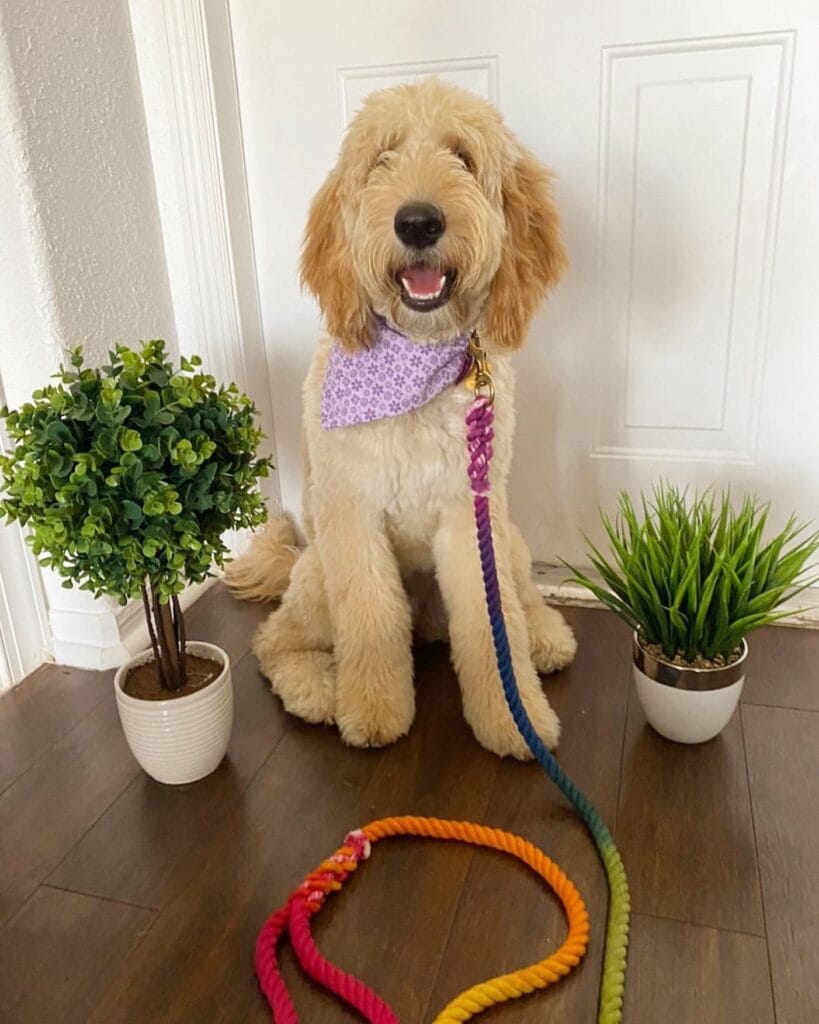
Your neighbor stops you on the sidewalk for the third time this week. “Where did you buy that leash?” She doesn’t believe you made it in 45 minutes. The rainbow gradient climbing rope transitions from hot pink to purple to navy, creating an Instagram-worthy accessory that costs $12 in materials. You’ll turn ordinary walks into style moments while your dog gets a custom-fitted leash that actually works.
This 6-foot design uses 5/8-inch marine-grade climbing rope rated for 600 pounds. Cut 8 feet of rope total (extra length for handle and hardware attachment). Thread one end through a swivel clip with bronze finish, fold back 3 inches, and wrap tightly with matching thread. Sew through the rope 8 times in a box-stitch pattern. For the handle, create a 6-inch loop at the opposite end and reinforce with the same box-stitch. Seal both rope ends with a lighter flame for 2 seconds to prevent fraying. The swivel clip rotates 360 degrees so you can untangle in one smooth motion instead of stopping every block.
The soft-braided texture won’t burn your palm when your dog spots a squirrel and lunges forward at full speed. Unlike flat webbing that cuts into your hand, rope distributes pressure across your entire grip. You can walk for 30 minutes without hand cramping, which means longer adventures and a tired, happy dog. The waterproof material rinses clean under the hose after muddy park sessions and dries completely overnight hanging on your coat hook.
Match your leash to your home’s aesthetic with coordinated gear storage. The vibrant colors look stunning displayed on wall hooks instead of stuffed in drawers. If you’re building custom pet spaces, check out 14 Creative DIY Elevated Dog Bed Ideas You’ll Love for matching furniture projects. For complete home integration, explore 16 Creative DIY Dog Crate Ideas for Pet Lovers to create a cohesive look throughout your space.
Pro tip: Buy 50 feet of rope and make three leashes at once—you’ll spend $35 total instead of $90 for store-bought versions, plus you’ll have backups when one gets muddy beyond recognition.
📸 Photo credit: Instagram @colorme.hippie
#7: Dusty Rose Macramé Slip Lead (No-Collar Needed, One-Handed Control)
Your dog sees the leash hook and bolts for the door before you’ve found their collar. This slip lead design solves that 6am scramble. The rope slides over their head in one motion, tightens gently behind the ears, and you’re out the door in 15 seconds flat.
You’ll need 8 feet of 1/2-inch cotton rope (works for dogs 15-60 pounds), one brass O-ring, and 45 minutes. Cut your rope, thread one end through the ring to create an adjustable loop, then work square knots down 6 feet for the handle section. The knotted texture prevents slipping through sweaty palms during that squirrel-chasing moment. Finish with a hand loop at the end, sealed with tight wrapping and fabric glue.
The slip mechanism tightens only when your dog pulls, releasing instantly when they return to your side. This means gentle, automatic corrections during training walks without choking or constant collar adjustments. Just like the creative projects in 16 Creative DIY Dog Toys Your Pup Will Love, you’re customizing gear to fit your dog’s exact needs.
The dusty rose color coordinates with throw pillows instead of clashing. Hang it on your entryway hook and guests assume it’s intentional décor. The cotton rope machine-washes on gentle cycle, air-dries overnight, and stays soft against your palm through 200+ walks. If you’re already tackling 14 Easy DIY Dog House Ideas for Your Furry Friend, this beginner-level project takes half the time.
Try this: Practice the slip technique three times before your walk so you’re not fumbling with an excited dog dancing at the door.
📸 Photo credit: Instagram @ep_macrame
#8: Macramé Rope Leash with Tassel Handle (Boho Style Meets Bulletproof Strength)

Your neighbor asked where you bought your leash three times last week. She didn’t believe you made it in 45 minutes while watching Netflix. This braided cotton rope leash turns basic craft supplies into a conversation piece that handles 70-pound pulling power without breaking a sweat.
You’ll need 20 feet of 1/2-inch cotton rope (the soft kind, not scratchy), one heavy-duty swivel clip rated for 300 pounds, scissors, and a lighter. Cut your rope to 8 feet for the main length. Thread it through the clip ring, fold back 3 inches, then wrap tightly with spare rope for 2 inches to create a secure attachment point. Seal all cut ends with flame for 3 seconds so they don’t fray into stringy messes.
The handle transforms leftover rope into those Instagram-worthy tassels. Braid three 6-inch sections together, loop them, then wrap the base with rope in a spiral pattern. The result? Soft grip that won’t burn your palm when he spots a rabbit and launches himself across the sidewalk. The macramé design absorbs shock better than flat webbing, which means less jarring on your shoulder during enthusiastic greetings. Just like choosing quality ingredients matters in 12 Easy DIY Dog Treat Recipes Your Pup Will Love, picking the right materials here prevents failures mid-walk.
Machine wash it when muddy (gentle cycle, air dry). The natural cotton softens with each wash instead of getting stiff. One hiker reports her leash survived 30 trail miles in rain, dried overnight, and still looks handmade-boutique after six months.
Quick tip: Add a traffic handle 12 inches from the clip by creating a second smaller loop using the same wrapping technique. You’ll thank yourself in crowded spaces.
📸 Photo credit: Instagram @jennylemons
#9: Braided Paracord Leash (No-Sew Rope Craft, Done in 45 Minutes)
Your hands hurt after twenty-minute walks. Store-bought leashes dig into your palm when your dog pulls. This braided paracord leash uses climber’s knots instead of stitching, so you’ll skip the sewing machine entirely.
Grab 15 feet of 550 paracord (handles 550 pounds), one swivel clip ($3 at hardware stores), and scissors. Cut three 5-foot sections. Thread all three through the clip’s ring, fold back 3 inches, tie an overhand knot to secure. Braid the three strands tightly for 5 feet. Leave 8 inches unbraided at the end, loop into a handle, tie another overhand knot. Seal all cut ends with a lighter for 2 seconds so the nylon won’t fray. The entire project takes 45 minutes, even for complete beginners.
The cobra weave pattern (shown in pink and teal) creates cushioned grip without foam padding, so you can walk for an hour without rope burn. It flexes around your hand naturally, which means no cramping when your pup spots a squirrel. The braided texture actually improves with use—gets softer after 50 walks while maintaining full strength. Similar to other DIY dog projects, customization costs pennies compared to store versions. Just like building outdoor dog spaces, you’ll control every design detail.
Pick paracord colors that match your aesthetic—earth tones for hiking vibes, neon for visibility, or preppy navy-and-pink like this one. Strangers will ask where you bought it.
Pro tip: Make two identical leashes in one session. You’ll have a backup when one’s muddy from trail adventures.
📸 Photo credit: Instagram @123paracord
#10: Braided Paracord Adventure Leash (Adjustable Multi-Position, Built for Your Strongest Puller)
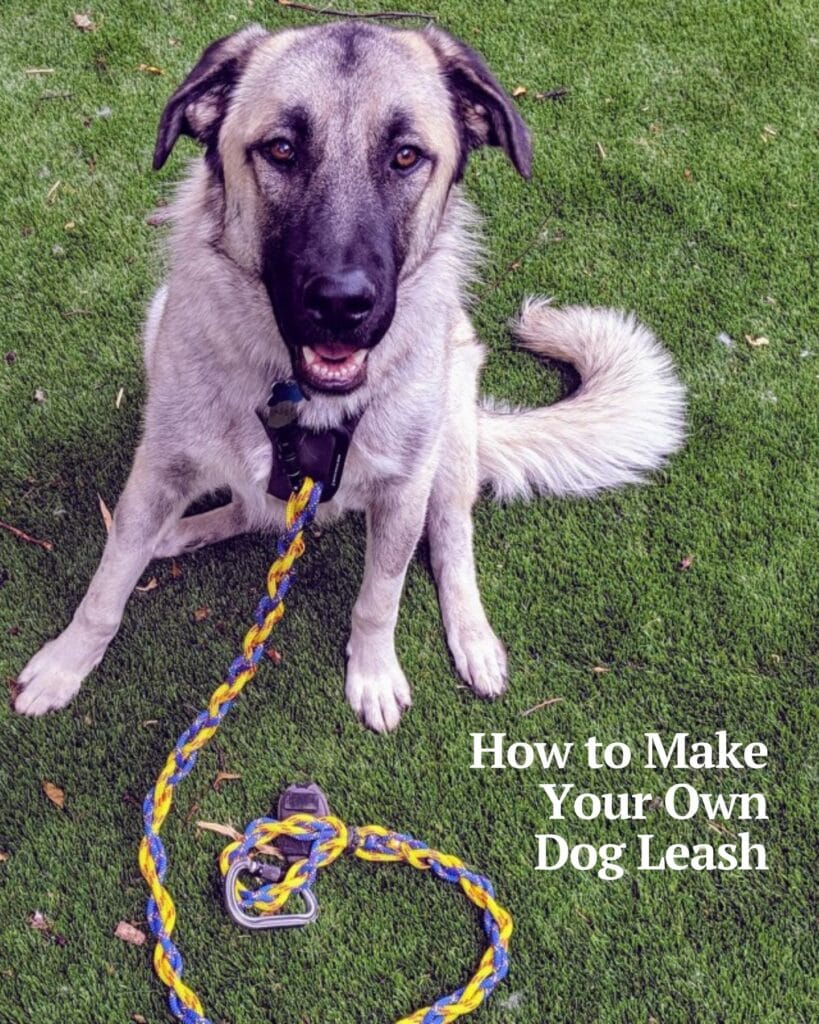
Your 70-pound shepherd mix just dragged you across wet grass again. That flimsy pet store leash frayed in three spots after two weeks. This braided paracord design holds 500 pounds of pulling force, costs $12 in materials, and takes 45 minutes to make.
You’ll need 25 feet of 550 paracord in two colors (navy and gold create the stripe pattern), one heavy-duty swivel clip rated for large dogs, two metal O-rings, scissors, and a lighter. Cut one 15-foot strand and one 10-foot strand. Thread both through the swivel clip, fold back 3 inches, and start your four-strand braid. The pattern’s simple: over-under-over-under, pull tight every few inches. At 6 feet from the clip, thread both O-rings onto the working strands before continuing the braid. These create adjustment points so you can clip for 4-foot training mode or full 6-foot exploring.
The braided texture gives incredible grip even when soaking wet, which means no more rope burn when he lunges at squirrels. Paracord dries in 20 minutes after rain, unlike cotton rope that stays damp for hours. The adjustable clips let you switch from crowded sidewalk control to park freedom in 5 seconds. If you’re looking for more ways to customize your dog’s space, check out 12 Creative DIY Dog Gate Ideas for Your Home for matching handmade solutions. Pair this leash with something equally durable like the ideas in 13 Creative DIY Elevated Dog Bed Ideas for Your Furry Friend.
When you finish the handle loop, fold the last 8 inches back on itself and wrap tightly with leftover paracord for 2 inches. Seal every cut end with the lighter flame for 3 seconds to prevent unraveling. Test your work: clip it to something solid and pull hard. If the hardware doesn’t budge and the braid feels like thick climbing rope in your palm, you’re ready for walks that actually feel controlled.
📸 Photo credit: Instagram @gearoutside
Your Next DIY Dog Project Awaits
You’ve got the skills to create a custom dog leash that matches your home’s vibe perfectly. Why stop there? Check out these 14 Stylish DIY Dog Crate Furniture Ideas You’ll Love to keep your décor cohesive.
Your crafty side deserves more outlets. Try 7 Adorable DIY Dog Clothes Ideas to Try for matching accessories, or build 7 Creative DIY Outdoor Dog Kennel Ideas for your backyard.
Save your favorite leash design for your next craft day. Your pup gets a stylish new accessory, and you get bragging rights.
Which DIY dog leash design will you make first this weekend?

