Wreaths aren’t just for the holidays, right? If you’re a dog lover, why not show it off all year with a dog paw wreath? Imagine creating something that not only decorates your space but also celebrates your furry friend. With playful designs and personalized touches, these wreaths can capture the spirit of your bond. Curious about how to get started? Let’s explore some fun ideas that’ll make your door the talk of the neighborhood.
Dog-Themed Wreath Ideas
When you think about decorating your home for the dog lover in your life, nothing beats a unique dog-themed wreath.
Imagine this: a dog paw wreath DIY masterpiece hanging on their door, instantly elevating the whole space. Start with a sturdy base like a foam or wire frame.
Grab some faux greenery, colorful ribbons, and of course, those adorable dog paw cutouts. You can even trace your pup’s paws to add a personal touch.
Don’t worry if you’re not crafty. If I can make one without it looking like a deformed pancake, so can you.
Just glue everything on and let it dry. You’ve created a delightful piece that celebrates their love for dogs, all while showing off your creative flair.
Our Collection
You’re gonna love our collection of dog paw wreath designs.
Picture a whimsical dog bone accent that brings a playful touch, or a paw print ribbon that adds a charming detail—each piece tells a story of your furry friend.
Let’s not forget the personalized dog tag charm; it’s like giving your pooch a VIP pass to the holiday fun.
1. Dog Bone Accents Design
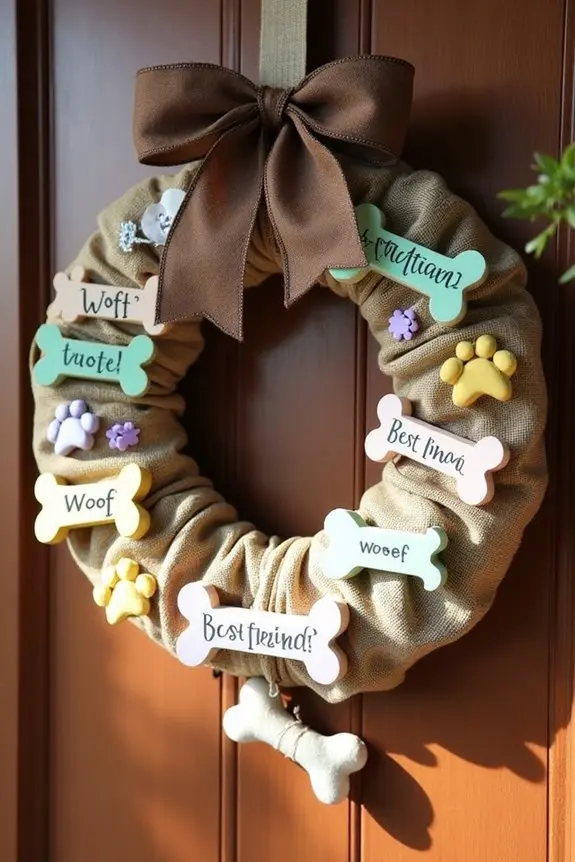
If you’re a dog owner looking to spruce up your home decor and celebrate your furry friend, why not whip up a charming dog bone accents wreath?
This delightful project not only adds a personalized touch to your entryway but also brings a smile to every visitor’s face (and your dog’s butt wiggling with excitement).
Plus, it’s a great way to save some cash on store-bought decorations while showing off your creativity!
Materials Needed:
- 12-inch foam wreath form
- Burlap or fabric of your choice (enough to cover the wreath)
- Hot glue gun and glue sticks
- Wooden or felt dog bones (available at craft stores)
- (Optional) Dog-themed stickers or embellishments
- Scissors
- Twine or ribbon for hanging
- Wire or floral pins for extra security (if needed)
Step-by-Step Instructions:
- Wrap Your Wreath: Take your burlap or fabric and start wrapping it around the foam wreath form. Secure the ends with hot glue as you go. This is the base, so get creative with colors or patterns that complement your home!
- Prepare the Bones: If you’ve got wooden or felt bones, give them a little bit of a fluff if they’re flat. Stickers can be applied at this stage to customize each bone—perhaps even write your dog’s name on one or give it a fun phrase!
- Strategically Glue: Once you have your bones ready, determine where you’d like to place them on the wreath. Use hot glue to secure the bones to the wreath, making sure they’re evenly spaced. If you find you have more bones than space, well, maybe it’s time to rethink your dog’s collection management skills… or just add more to the wreath.
- Adding Details: This is where you can embellish! Add any dog-themed stickers or an extra layer of twine weaved through the bones for additional flair. Get whimsical—maybe even throw in a small toy bone dangling!
- Hang It Up: Use twine or ribbon to create a loop at the top for hanging, and don’t forget to check if it’s securely attached. You wouldn’t want your masterpiece crashing down in the middle of an enthusiastic dog greeting.
- Show It Off: Find a fabulous spot for your wreath. It could be on your front door, or if you’re feeling extra proud, over the fireplace (just keep an eye on those curious paws).
Optional Add-ons/Variations:
- Switch up the fabric: Instead of burlap, why not try a patterned cotton or seasonal fabric to change things up for the holidays?
- Create a mini version of the wreath for your dog’s play area with smaller bones and a cute, matching fabric!
Pro Tip:
Don’t glue your decorations in a place that might catch your dog’s interest too much. If they can reach it, you know there’s a 50-50 shot that the wreath will turn into their new chew toy. Trust me; I learned the hard way.
Now, go forth and create this adorable dog bone accents wreath while giving a little salute to your best buddy. Happy crafting!
2. Paw Print Ribbon Design
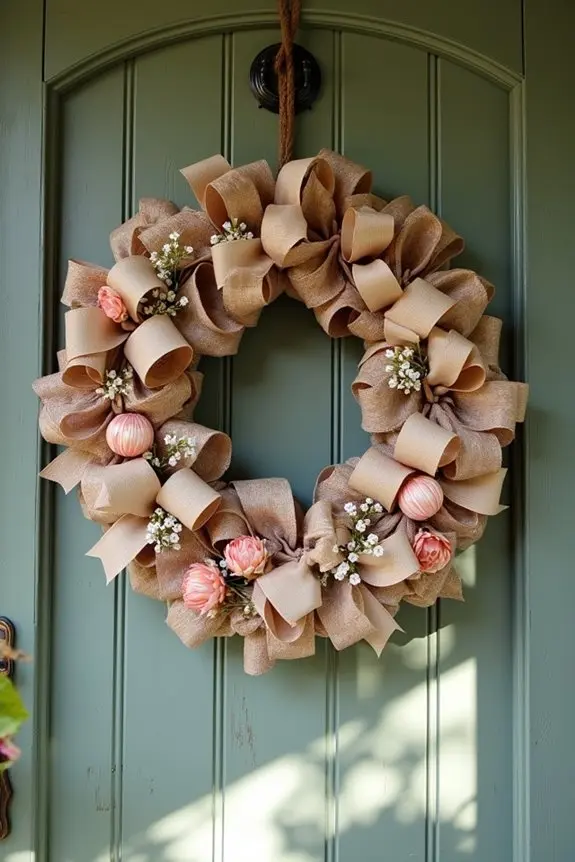
Are you looking for a simple and adorable way to show off your love for your pup? A paw print ribbon wreath is just the thing. Not only does it look fabulous on your door, but it also gives a warm welcome to everyone who visits. Plus, creating this wreath is a wonderful way to save some bucks while keeping your decor uniquely tailored to your dog-loving heart. Additionally, pairing your wreath with premium dog training equipment can further enhance your pet’s well-being and obedience. In addition, consider using premium dog food to support your furry friend’s overall health. Choosing high-quality ingredients is essential; some brands focus on nutritional balance to ensure your dog gets the best.
Materials Needed:
- 12-inch foam wreath form
- Paw print ribbon (look for wired options for extra fluff)
- Hot glue gun and glue sticks
- Decorative embellishments (like faux flowers, dog toys, or more ribbons)
- Scissors
- Twine or ribbon for hanging
- Wire cutters (if you use wired embellishments)
Step-by-Step Instructions:
- Measure and Cut the Ribbon: Start by cutting your paw print ribbon into strips about 6 inches long. You’ll need a lot of them—more than you think, since we want this wreath to be plush and inviting.
- Wrap It Around: Take one ribbon strip and tie it around the wreath form, creating a simple knot. Don’t worry about it being perfect; it should have a relaxed, whimsical vibe. Repeat this with the rest of the ribbon strips, filling in any gaps along the way.
- Secure with Hot Glue: For an extra bit of security, as you tie each knot, add a dab of hot glue to the back of the ribbon to hold it in place. This is especially helpful if your pup is a bit too curious and decides to give it a sniff.
- Add Embellishments: Now, let your creativity shine. Grab decorative items like faux flowers or little dog toys and glue them around the wreath. Maybe even include a dog’s name tag or a photo of your beloved pup—anything that adds that personal touch!
- Hang It Up: With your wreath all dolled up, cut a piece of twine or ribbon long enough to create a loop for hanging. Attach it to the top, making sure it’s secure.
- Show It Off: Find the perfect spot for your new masterpiece—whether it’s the front door, above a mantel, or somewhere in the cozy corner of your living room. Just be ready for everyone to ask about that delightful paw print wreath.
Optional Add-ons/Variations:
- Try different types of ribbons: Go bold with colors or patterns that represent your dog’s breed or personality. Maybe a mix of paw prints and polka dots for a playful twist!
- Add seasonal decorations: Swap out the embellishments based on the seasons—think autumn leaves or Christmas ornaments to keep it fresh year-round.
Pro Tip:
If you’re worried about your wreath falling apart after a few weeks, consider using a spray sealant designed for fabric. Just spray it on once you’ve finished your wreath, and it will help protect the fabric from wear and tear. Plus, this keeps the wreath looking clean and fresh for longer, meaning more compliments and tail wags!
Creating your own paw print ribbon wreath is a delightful project that says, “I love my dog” while adding a touch of charm to your home. So, gather your materials, put on some tunes, and let that creativity flow.
Your furry friend will surely appreciate it; who knows, they might even help manage the ribbon supply.
3. Leash Holder Ornament Design
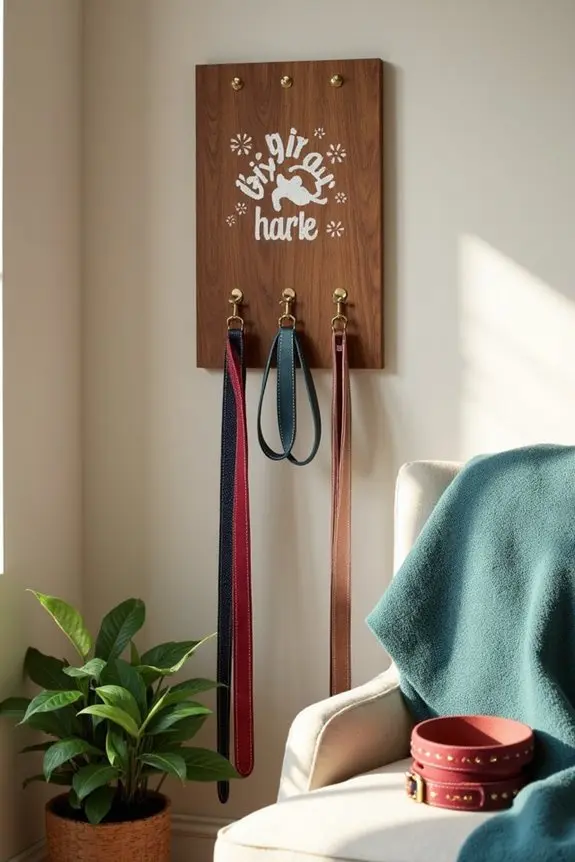
If you’re tired of tripping over tangled leashes or struggling to find a place to hang them up, a leash holder ornament is the solution for you. Not only does it keep your dog’s essentials organized, but it also adds a splash of charm to your home décor. Plus, this DIY project is budget-friendly and super fun to put together. So, let’s get those leashes neatly tucked away.
Materials Needed:
- A wooden plank (about 18 inches long)
- Small hooks or knobs (depending on how many leashes you have)
- Sandpaper (medium and fine grit)
- Paint or wood stain (choose a color that fits your style)
- Paintbrush (if painting or staining)
- Saw (if you need to cut your plank to size)
- Measuring tape
- Level (optional, but it helps)
- Hot glue gun or screws and a screwdriver (depending on hook attachment)
- Wall anchors (if hanging on drywall)
Step-by-Step Instructions:
- Prep the Wood: Start by sanding down your wooden plank to smooth out any rough edges—trust me, no one wants splinters while reaching for a leash. Use medium grit first, and then finish with fine grit for that silky touch. Consider using a plank that can also match luxury dog collars to enhance the overall aesthetic.
- Decide on Hook Placement: Measure out where you want your hooks to go, depending on how many leashes you need to hang. A good rule of thumb is to space them out about 4-6 inches apart to avoid a jumbled mess.
- Attach the Hooks: Use your hot glue or screws to securely attach each hook to the plank. If you’re using screws, make sure to pre-drill holes to prevent splitting the wood. Just remember not to go overboard—you don’t need a million hooks unless you have a doggie daycare going on in your living room.
- Paint or Stain: Now, it’s time to do a little sprucing up. Whether you’re going for a chic rustic look or a vibrant pop of color, use your paint or stain. Apply a couple of coats for more depth, letting each coat dry completely before adding another layer.
- Hang It Up: Once everything is dry and looking fabulously stylish, it’s time to hang your new leash holder. Use wall anchors if your hooks are heavy and make sure it’s level—because a crooked leash holder is just not a good look.
- Show Off Your Style: Time to get your leashes on there and admire your handiwork. It’ll feel great knowing they’re organized, plus it’ll be a handy conversation starter for your guests. Expect lots of compliments. Also, you can accessorize your pup’s style with luxury dog clothing that complements your new leash holder design.
Optional Add-ons/Variations:
- Consider adding a little personalization: a painted paw print or your dog’s name just above the hooks could really make this stand out. Get creative.
- Want to really show off your dog’s personality? Use fun colors or patterns that complement your home decor. Boho chic, anyone?
Pro Tip:
To guarantee your leash holder stands the test of time, consider sealing your painted or stained wood with a clear coat. This not only protects it from wear and tear but also makes it easier to wipe down for any doggy slobber or furry friends. And let’s be real, they might think that shiny new leash holder is a chew toy—so keep an eye on it.
There you go! Not only is this leash holder functional and stylish, but it’s also a lovely reflection of your dog-loving personality. Happy crafting!
4. Personalized Dog Tag Charm
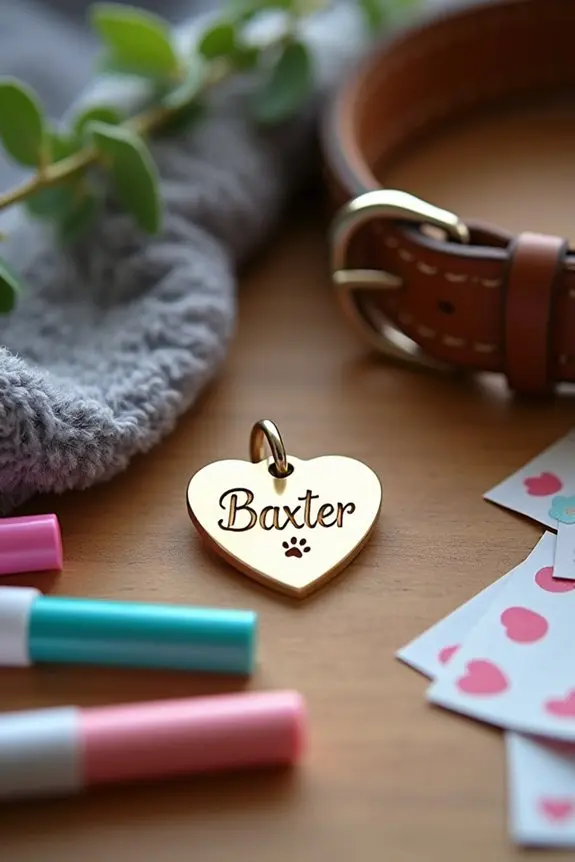
Creating personalized dog tag charms is a delightful and practical project for any dog owner. Not only do these tags keep your furry friend safe by guaranteeing they can be easily identified, but they also allow you to express your pup’s personality. Whether you want something cute, quirky, or downright dazzling, a custom dog tag charm adds that personal touch, helps save money on store-bought tags, and makes your pup the talk of the dog park. Let’s plunge into this fun DIY project.
Materials Needed:
- Blank metal dog tags (available at pet stores or online)
- Permanent markers or engraving tools (as per your preference)
- Jump rings (these are the little metal rings that attach the tag to the collar)
- Chain or leather cord (if you prefer a different style)
- Optional: Decorative stickers or paint (for added flair)
- Soft cloth (for polishing tags)
- Key ring (for easy attachment)
Step-by-Step Instructions:
- Choose Your Tag: Start with selecting a blank metal dog tag that fits your dog’s size and personality. These come in various shapes—round, bone-shaped, heart, you name it. Hold it up and see if it feels right.
- Prep Your Tools: Make sure your markers or engraving tools are clean and ready to go. You want to avoid any unwanted ink smudges, which can put a serious damper on your swanky charm.
- Design It Up: It’s time to get creative. Use the permanent markers to write your dog’s name and a phone number (in case your pup decides to go on an unexpected adventure). You can also draw cute little symbols, like paw prints or hearts—whatever reflects your dog’s personality. If you’re using engraving tools, gently and carefully carve your design.
- Extra Flair: If you want to level up your charm game, add some stickers or paint to your tag. Just make sure everything is securely stuck down and dry, as we don’t want any messy tag mishaps when your dog is out and about.
- Attach the Ring: Use a jump ring to connect the tag to your dog’s collar. This is the moment you see all your hard work pay off—watch that tag sparkle when attached. If you want to go a more fashionable route, consider using a chain or leather cord for a fun twist.
- Polish It Up: Finally, take a soft cloth and give your charm a little polish to remove fingerprints and smudges. Now it’s shining like it’s ready for the runway.
Optional Add-ons/Variations:
- Think about using colored markers or paint for a vibrant design. You could even theme your tags according to seasons—how about a Halloween-inspired tag with a little ghost icon?
- If you want a more rustic look, incorporating wood or fabric elements in your design could add a personal touch that stands out.
Pro Tip:
Make a backup tag as a safety precaution. Attach it to a spare collar or a safety harness, just in case the original charm has a little adventure of its own (and believe me, they do). Keeping one handy is always a good way to guarantee your pup stays safe and sound, especially during those rambunctious park playdates.
5. Dog Silhouette Decoration
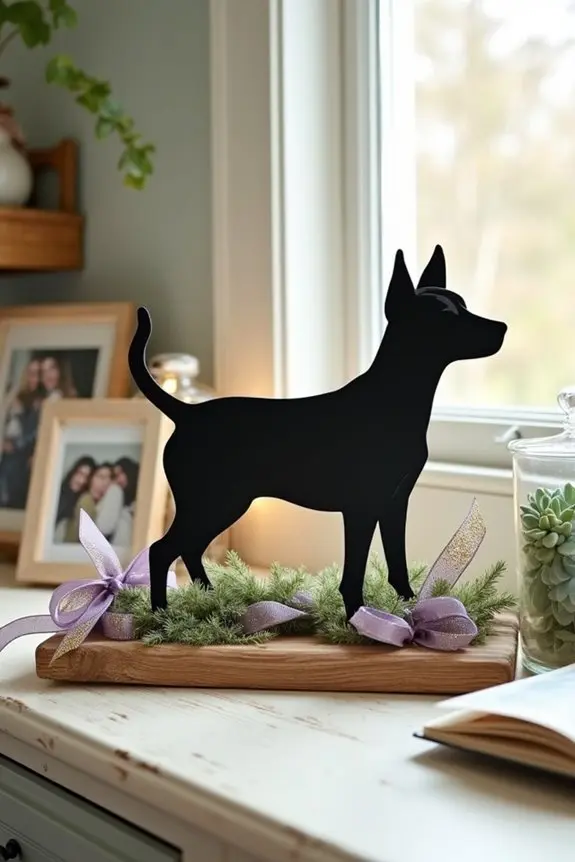
Transforming your love for dogs into personalized home decor is a fantastic way to celebrate your furry friend. Creating dog silhouette decorations isn’t only a creative outlet but also a charming way to add a unique touch to your living space. Plus, it’s a budget-friendly way to elevate your home aesthetics while showing off your pup pride.
Materials Needed:
- Black cardstock or craft foam (for the silhouette)
- Scissors (sharp enough to cut through the chosen material)
- Craft glue or double-sided tape
- Frame or wooden board (to mount your silhouette)
- Pencil (for tracing)
- Optional: Decorative elements like ribbons, glitter, or paint (if you want to jazz it up)
- Craft knife (if you’re feeling adventurous)
Step-by-Step Instructions:
- Choose Your Pup’s Pose: Start by finding a cute picture of your dog or a silhouette online that reflects their personality—maybe a playful stance or a relaxed snooze.
- Trace the Outline: Place the image under your cardstock or foam and trace the outline of the silhouette using a pencil. If you’re using a more advanced approach, you can print the silhouette image directly onto the cardstock. Just make sure the size is right for your space.
- Cut It Out: Carefully cut out the silhouette. If you’re using a craft knife, confirm you’re cutting on a safe surface (hello, crafting mat). Just take your time; this is where the magic starts.
- Prepare Your Background: While you’re at it, prepare the surface you want to mount your silhouette on. This could be a frame or a wooden board. Make sure it’s clean and dry to help the glue stick.
- Attach the Silhouette: Use craft glue or double-sided tape to stick your dog silhouette onto the prepared surface. Make sure it’s centered and securely attached. Give it a moment to set.
- Personalize: Now, here’s where it gets fun. Grab those optional decorative elements and go wild. You could add a pop of color with ribbons, sprinkle some glitter for sparkle, or even paint around your silhouette to create a background scene—think a sunny afternoon or a starry night.
- Display Your Masterpiece: Finally, find the perfect spot in your home to showcase your artwork. Whether it’s by the front door or above your dog’s sleeping space, it’ll make a lovely addition.
Optional Add-ons/Variations:
- If you want to go bigger, consider creating a multi-dog montage silhouette. A mini family portrait of your pups can be a fun project, bursting with personality.
- For a seasonal twist, why not use fall leaves or flowers to create a fun background for your silhouette? It’ll change with the seasons, keeping your decor fresh.
Pro Tip:
To guarantee your silhouette lasts, make sure to use archival quality materials for your background and the silhouette itself. This will help keep it from fading or damaging over time.
Oh, and make sure to hang it up out of direct sunlight—your dog deserves a timeless masterpiece, not a sun-bleached version of themselves.
Creating your dog silhouette decoration is a reflection of your love for your furry friend while also adding a personal touch to your home. So grab those supplies and let your creativity shine. Your doggo might even give you a little paw-some tail wag of approval when they see their likeness displayed proudly!
6. Dog Collar Embellishment Design
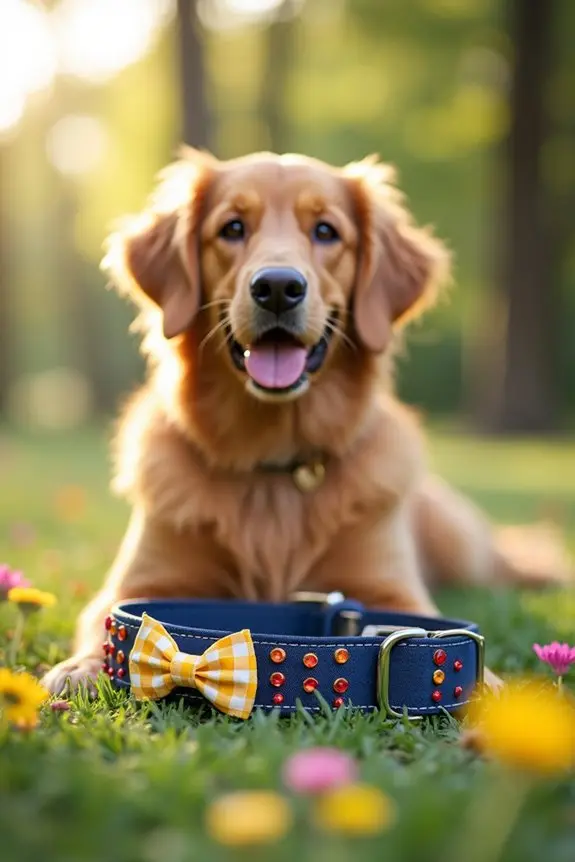
If you’re a dog owner, you know that a collar is more than just a necessity; it’s a fashion statement and a way to express your pup’s personality. This DIY dog collar embellishment project allows you to add a personal touch to your dog’s collar, making it unique and stylish without spending a fortune.
Plus, it’s a fun way to showcase your creative side while guaranteeing your dog stands out on walks (who doesn’t want the most stylish pooch in the neighborhood?).
Materials Needed:
- Basic dog collar (canvas or nylon works great)
- Fabric scraps or colorful ribbon (your choice of patterns)
- Sew-on or iron-on embellishments (like patches or gems)
- Scissors
- Needle and thread (or fabric glue for a no-sew option)
- Measuring tape (just in case)
- Optional: Safety pins (short-term fixes)
Step-by-Step Instructions:
1. Choose Your Style: Decide how you want to embellish your dog’s collar. Are you in the mood for a floral look, or perhaps some funky patches? Get inspired by your dog’s personality and your own taste.
2. Measure Your Collar: Measure the width and length of your dog’s collar to know how much fabric or ribbon you’ll need. It’s easier to have a plan than to wing it. Trust me, I’ve tried winging it before.
3. Cut Your Fabric/Ribbon: Cut the fabric or ribbon into strips. If you’re using multiple colors or patterns, mix and match to create a fun design. Just remember to leave a little extra on each end for attaching.
4. Attach the Embellishments: If you’re sewing, grab your needle and thread, and secure the fabric/ribbon by sewing it onto the collar. Use tight stitches to guarantee it holds during walks or zoomies.
If glueing, apply it where needed and let it dry completely. Your couch may appreciate the no-sew option too (less clean-up!).
5. Add Extra Touches: This is where it gets really creative. Attach any embellishments like patches, beads, or gems. Make sure they’re securely attached because nobody wants to lose a treasured patch mid-walk.
6. Inspect Your Creation: Before putting it on your pup, double-check to guarantee there are no loose threads or sharp edges. Your furry friend deserves the best, and safety is key—plus, it saves you from hearing “oops” later!
7. Show It Off: Put the newly decorated collar on your dog and head outside. Be prepared for compliments and other dog owners asking, “Where did you get that adorable collar?”
Optional Add-ons/Variations:
– Consider using different textures, like lace, faux leather, or even metallic elements for a glam look that can shine in the sun.
Mix and match those fabrics to create something totally original and fun.
– If you have a smaller pooch, try adding a charming bowtie or flower that can be easily attached and detached, so it’s perfect for a date at the dog park.
Pro Tip:
Before you start, snag a fabric swatch to test out your glue or stitches. This way, you’ll know how everything holds up and whether you’ve got a messy situation on your hands before it’s too late.
Plus, it’s an excellent excuse to play with a few different materials without committing to one style!
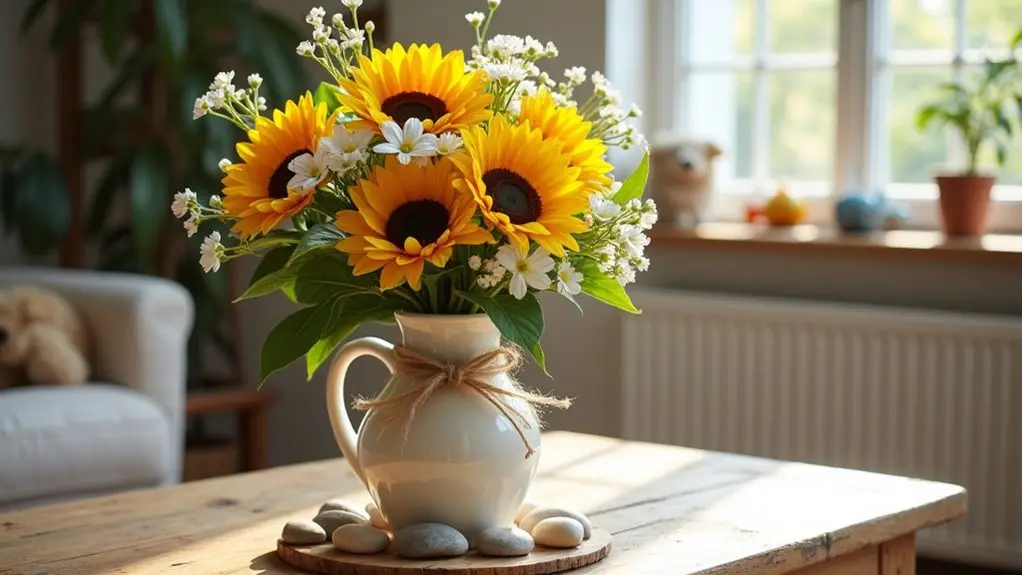
7. Doggy-Themed Floral Arrangement
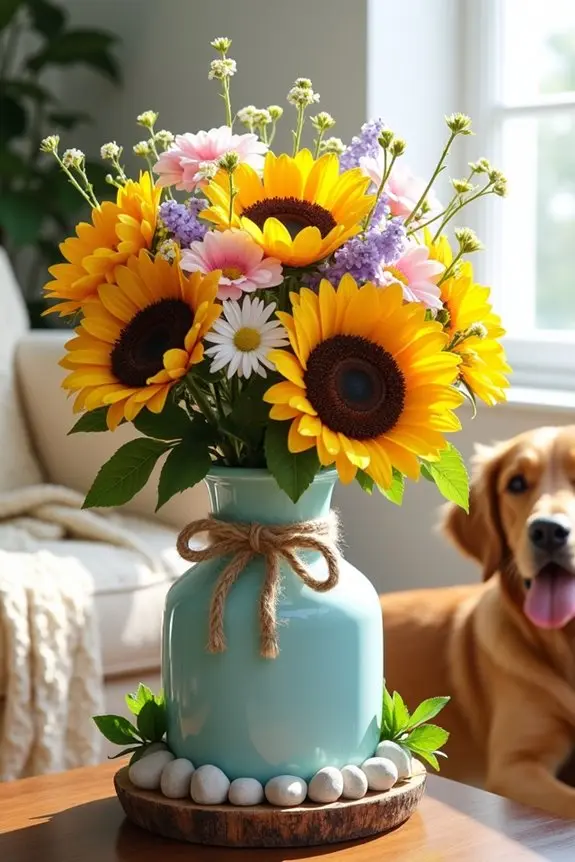
If you want to bring a vibrant pet-friendly touch to your home, this DIY doggy-themed floral arrangement project is perfect for you. It’s not only a delightful way to spruce up your living space but also a cost-effective option to create something special for your four-legged friend.
Plus, it’ll make your home look more inviting, so prepare for compliments from guests asking where you got that charming arrangement!
Materials Needed:
- Faux flowers (dog-safe varieties like sunflowers or daisies)
- A decorative vase or pot (preferably sturdy to avoid spills)
- Green floral foam (optional, for added stability)
- Craft wire or floral tape (to secure blooms)
- Scissors
- Decorative stones or marbles (optional, for added flair)
- Pet-safe foliage (to add a little greenery)
- Ribbon or twine (to tie it all together)
Step-by-Step Instructions:
1. Gather Your Materials: Collect all your supplies and find a clean workspace. You might want to wear an apron unless you’re okay with a little floral confetti all over your favorite shirt.
Believe me, I learned this the hard way.
2. Choose Your Vase: Select a sturdy vase or pot that won’t tip over easily, especially if your pup is curious. Next, you can use floral foam to help hold the flowers in place, but it’s not mandatory—just like that one pair of shoes you own that you swear you’ll wear someday.
3. Prepare Your Faux Flowers: Trim the stems of your faux flowers to your desired length. Think about the height you want in your arrangement—tall, short, or somewhere in between?
It’s your piece of art, so channel your inner florist and have fun with it.
4. Arrange Your Flowers: Begin placing your flowers into the vase or pot. Start with the larger blooms toward the back, moving to smaller ones in the front. This mimics a natural look and gives depth to your arrangement.
As you arrange, think about colors and textures—don’t be afraid to rearrange if something feels off.
It’s like a puzzle, but one that doesn’t have missing pieces… most of the time.
5. Secure Everything: If your flowers are being a bit fussy, use craft wire or floral tape to secure them in place. This guarantees everything stays put, even during that zoomie session your dog decides to have right next to their new centerpiece.
6. Add Some Greenery: Nestle in some pet-safe foliage around the flowers. This not only creates a fuller look but also adds a natural touch that your dog will love sniffing around.
Just make sure nothing in the arrangement is dangerous to them. Double-check those plant names if you’re unsure—better safe than sorry.
7. Final Touches: Optional, but recommended: sprinkle some decorative stones or marbles at the base for an extra pop.
Wrap a cute ribbon around the neck of the vase, and voila! You’ve made an eye-catching piece that emphasizes your love for your furry friend.
Optional Add-ons/Variations:
- Experiment with different color schemes—consider seasonal themes like warm tones for fall or pastels for spring.
- Use real, pet-safe flowers if you want a live touch; just keep an eye on snacking pups.
Pro Tip:
Always double-check if any plants in your arrangement are safe for dogs. If you’re unsure, rely on good old Google, or consult your vet.
Trust me, it’s better to toss those questionable blooms than deal with an emergency vet visit. Plus, you’ll save on potential “oops” moments during playtime!
Extra Tips & Ideas
While creating your dog paw wreath might sound straightforward, there are a few extra tips and ideas that can truly make your design stand out.
First, think about using different textures—mix faux fur or even a bit of real twine to add depth. Got extra dog toys lying around? Tie them into the wreath for a playful touch.
You could also use your dog’s favorite colors for extra personalization, right? Don’t forget seasonal themes; think of leaves for fall or holly for winter.
And here’s a fun idea: hang a small photo of your pup in the center. You’ll be amazed at how much love and personality it brings.
Wreath-making doesn’t have to be perfect; just enjoy the process!
Frequently Asked Questions
What Materials Are Best for Creating a Dog Paw Wreath?
You’ll want to use durable materials like felt, burlap, or wood for your dog paw wreath. Add embellishments like ribbons, faux flowers, or even personalized charms to make it truly special and eye-catching.
How Do I Hang My Dog Paw Wreath Securely?
To hang your dog paw wreath securely, use sturdy command hooks or decorative nails. Imagine it gracefully embracing your door, capturing attention. Adjust its position gently until it finds the perfect spot to shine.
Can I Personalize My Dog Paw Wreath Design?
Yes, you can definitely personalize your dog paw wreath design! Consider adding your pet’s name, favorite colors, or special embellishments that reflect their personality. Get creative and make it a unique tribute to your furry friend!
What Size Should the Dog Paw Wreath Be for My Door?
For your door, a dog paw wreath should typically be 18 to 24 inches wide. Imagine it hanging there, perfectly framing your entrance, welcoming guests with its charm and flair just like your pup!
How Do I Clean and Maintain My Dog Paw Wreath?
To clean and maintain your wreath, gently dust it with a microfiber cloth. For deeper cleaning, use a damp cloth with mild soap. Hang it in a cool, dry spot to prevent wear and fading.
Conclusion
Creating a dog paw wreath isn’t just about the décor; it’s about celebrating the joyful bond with your furry friend. Did you know that around 67% of U.S. households have a pet? That’s a whole lot of wagging tails and puppy cuddles to cherish. So why not pour some of that love into a beautiful wreath? With these designs, you can show off your pup’s personality and make every guest feel the warmth of your home—and your heart.

