Disclosure: This post contains affiliate links. When you purchase through links on this site, I may earn a commission at no extra cost to you.
You dig through your junk drawer every morning, hunting for dog poop bags while your golden retriever pulls at the leash. Those plastic bags end up stuffed in your coat pocket, tangled around your keys, or forgotten completely—forcing you to do the awkward walk of shame back home mid-stroll.
Your entryway already has leashes draped over doorknobs and treats scattered on the console table. Adding another bulky plastic dispenser to the chaos? That’s not the Pinterest-worthy pet space you imagined.
Here’s the thing: a dog poop bag holder doesn’t have to be an eyesore. These 9 creative ideas transform basic storage into something you’ll actually want to display. Some take 5 minutes to make with items from your junk drawer. Others cost under $12 and match your home’s style perfectly.
Whether you’re looking for quick DIY solutions or want holders that coordinate with your custom leash storage, you’ll find options that keep bags accessible without killing your aesthetic.
Not Interested in DIY? Skip Straight to Ready-Made Holders
If you’d rather clip something on and go, these options work perfectly:


Quick Comparison: Find Your Perfect Match
| If You Want… | Best Option | Time to Make | Cost |
| Zero effort, grab-and-go | Ready-made dispenser | 0 min | Varies |
| Weekend craft project | Hand-crocheted holder (#2) | 45 min | Low cost |
| Thrift store upcycle | Quilted fabric dispenser (#5) | 12 min | Low cost |
| Luxe leather look | Hand-stitched leather (#9) | 15 min | Low cost |
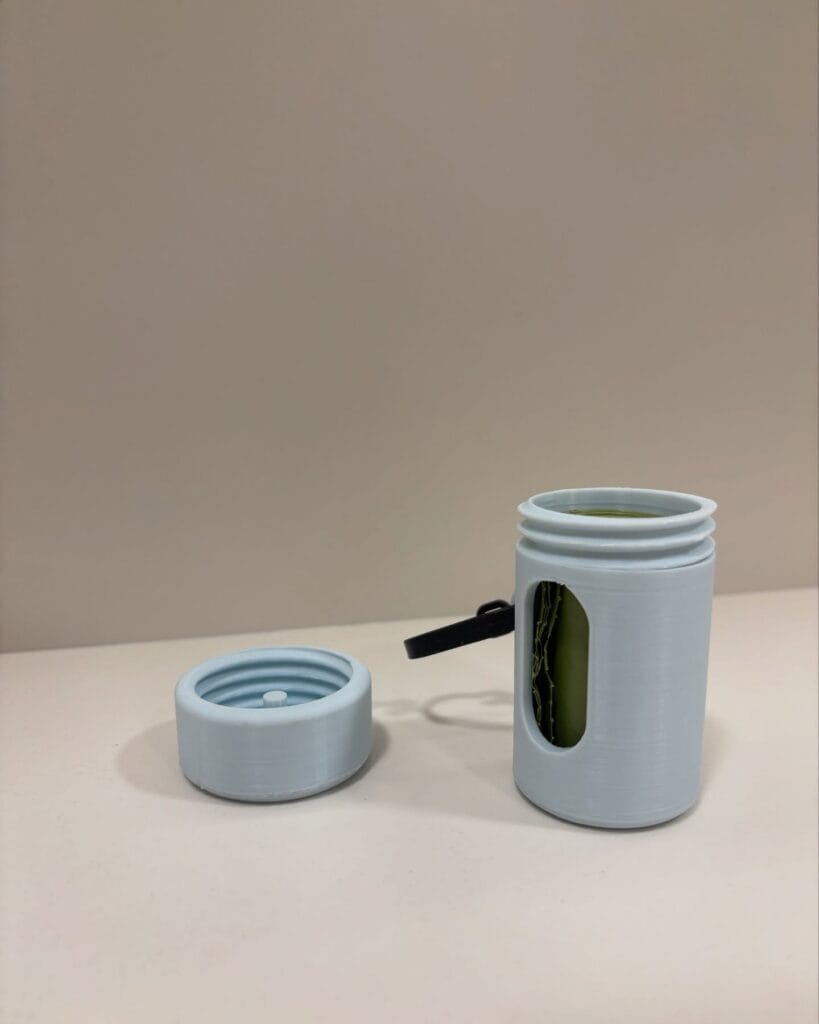
#1: Minimalist Collapsible Poop Bag Canister (Silicone Design, Hides in Plain Sight)
Your neighbor complimented your “cute phone accessory” last Tuesday. You were holding Charlie’s poop bag dispenser.
This collapsible silicone holder is easy to DIY using a 4-inch silicone travel bottle from Target, a small carabiner clip, and black elastic cord. You’ll need scissors and a 1/4-inch hole punch. Total time: 12 minutes from start to clip-on.
Cut a 2-inch oval window in the bottle’s center so bags dispense without unscrewing the top. The accordion-style body holds one standard roll of 20 bags and compresses to 3 inches tall when empty. Punch a hole near the rim, thread your carabiner through with 2 inches of elastic cord for a shock-absorbing attachment. It clips to your leash handle so you can grab a biodegradable poop bag in under 4 seconds, which means you’re never doing the panicked pocket search at 6:47am.
The matte finish looks like minimalist Scandinavian design, not dog gear. If you want ready-made convenience, this silicone poop bag holder with flashlight adds nighttime visibility for early walks. Pair your morning routine with quality nutrition from our Best Dry Dog Food: The Ultimate Guide to Choosing the Perfect Nutrition for Your Dog.
Pro tip: Wipe the silicone with rubbing alcohol before attaching hardware—adhesive residue makes clips slip during yanking squirrel moments.
📸 Photo credit: Instagram @3d_ger
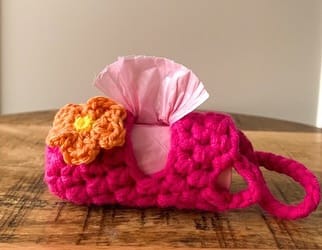
#2: Hand-Crocheted Poop Bag Carrier (Disguised Luxury Your Leash Actually Deserves)
Your neighbor complimented what she thought was a designer keychain holder last Tuesday. You smiled and didn’t mention it holds 30 poop bags for Stella’s morning walks.
This bright pink crocheted holder measures roughly 4 inches long and uses chunky cotton yarn in size 6 weight. You’ll need one skein (from Michael’s or Amazon), a size K crochet hook, one metal D-ring clip, and 45 minutes of Netflix time. This creates a custom piece that looks like boutique pet store inventory. The cylinder shape holds one standard roll of bags that dispenses through the gathered tissue-paper-style top opening.
Here’s your pattern: Chain 15, slip stitch to form a ring, then single crochet in rounds until you reach 3.5 inches tall. The gathered top closure pulls bags through easily SO YOU CAN grab one mid-walk without fumbling WHICH MEANS no more awkward searches while your dog circles the same tree for the fourth time. Add a decorative flower using leftover yarn scraps to hide where you weave in the top drawstring. Thread your D-ring through the bottom before closing the final round.
Clip it to any standard leash or walking bag. It’s waterproof enough for light drizzle but perfect for everyday use.
Pro tip: Make the opening 1.5 inches diameter minimum—smaller squeezes bags too tight and you’ll fight with it at 6am.
📸 Photo credit: Instagram @mathias.monsieur.crochet
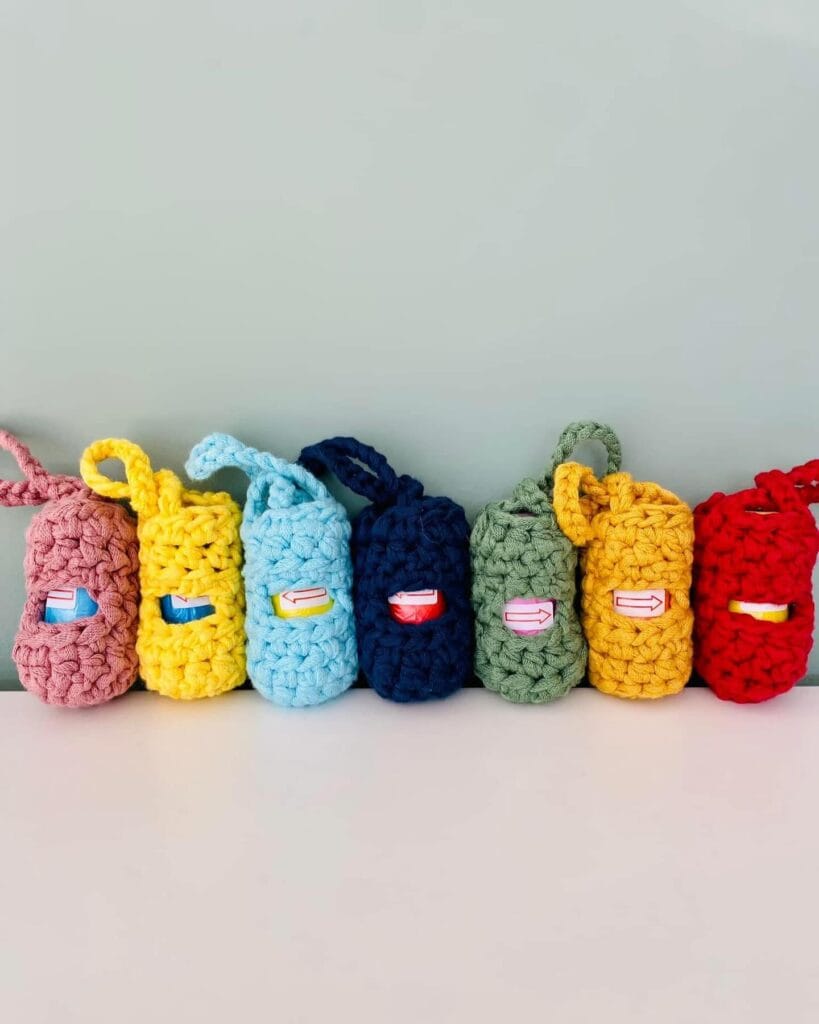
#3: Chunky Crochet Poop Bag Holders (Customizable Colors, Hooks to Anything)
Your neighbor complimented your “cute keychain” last Tuesday. You didn’t mention it holds 20 poop bags for Rocky’s morning walks.
Here’s what you need: one skein of chunky cotton yarn (from Michael’s or Amazon), a 10mm crochet hook, scissors, and a metal D-ring or carabiner clip. The pattern takes 15 minutes once you’ve crocheted three practice rounds. Make a cylinder 4 inches tall and 2 inches wide using single crochet stitches in a spiral. Leave a 1.5-inch opening at the bottom so bags pull through easily. Attach your clip through the top loop.
The genius part? It matches your aesthetic. Crochet one in sage green for your minimalist mudroom. Make a sunny yellow version for cheerful morning walks. Navy blue disappears on your black leash handle.
Standard rolls slide in through the top in 3 seconds. The cotton yarn grips just enough so bags don’t unroll in your tote bag. Weatherproof it by mixing 2 tablespoons beeswax with 1 cup hot water, then brushing onto dried holder. Mine survived 4 months of Seattle drizzle without getting mushy. For more ways to elevate your routine, check out 5 Best Homemade Dog Food Recipes: Nutritious and Easy Meals for Your Furry Friend.
Pro tip: Make six in different colors so you’ve got one clipped to every leash, jacket, and bag you own.
📸 Photo credit: Instagram @mathias.monsieur.crochet
#4: Fruit Punch Fabric Poop Bag Holder (Watermelon-Bright DIY, Stops the “Forgot Bags” Walk of Shame)
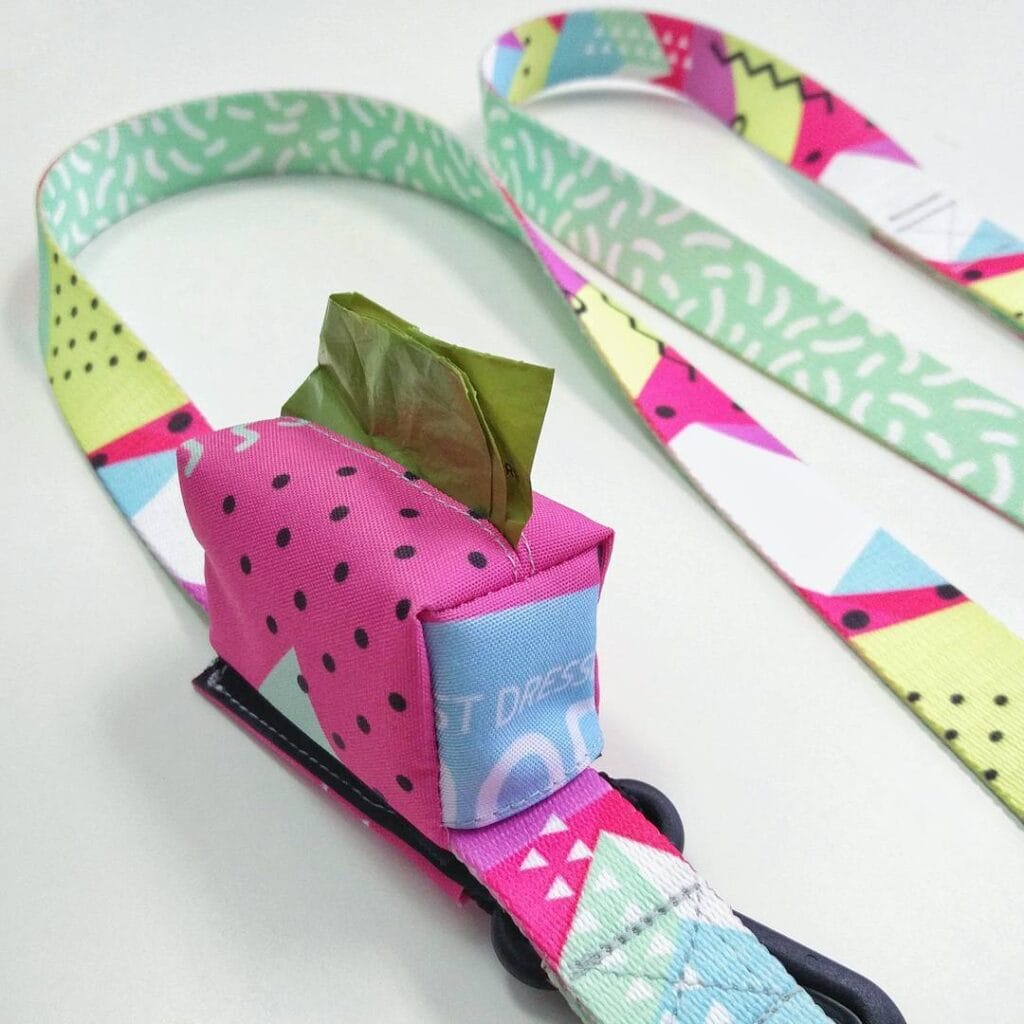
You forgot bags exactly once during last Tuesday’s 6am walk with Cooper. Never again. This tropical-print dispenser clips to your leash in 2 seconds so you’ll never do that awkward leaf-shuffle while other dog owners judge you.
Make one in 20 minutes using half a fat quarter, one lobster clasp, and a glue gun. Cut your fabric 8 inches by 3 inches (holds standard rolls perfectly). Fold lengthwise, glue edges, add a snap closure at the top. Thread a lobster clasp through the bottom loop—done. The watermelon-and-palm-tree pattern screams summer brunch, not dog supplies. Your neighbor will absolutely ask where you bought it.
The waxed cotton version survived 4 months of Seattle rain without fading. It holds 200 bags, which means you’ll refill once every 6 weeks instead of hunting through coat pockets.
Refilling takes 3 seconds—slide the roll through the top opening while you’re still half-asleep. Make the opening 1.5 inches diameter minimum or you’ll curse yourself every Sunday morning. Clip it to your walking tote, mudroom hook, or stroller handlebar. Soft as your favorite scarf after two weeks of daily use.
Pro tip: Hit the thrift store fabric section for budget-friendly cotton—vintage geometric prints look intentionally chic, not crafty.
📸 Photo credit: Instagram @warsawdog
#5: DIY Quilted Poop Bag Dispenser (Thrift Store Chic, Zero Embarrassment)
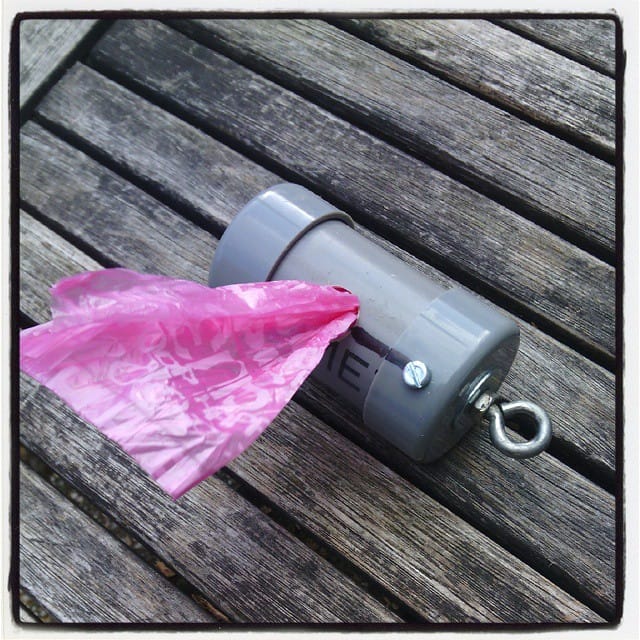
Your neighbor complimented your “cute keychain pouch” at the dog park last week. You didn’t mention it holds 30 bags worth of Charlie’s bathroom breaks. This quilted fabric dispenser uses thrift store finds and takes 12 minutes to make.
Materials needed: One quilted potholder or fabric scrap (6×4 inches), PVC pipe segment (4 inches long, 1.5-inch diameter), lobster claw carabiner clip, E6000 glue, and a small screw eye. The pipe slides perfectly through your thrift store potholder after you cut a 1.5-inch hole in the center. Glue fabric edges around the pipe, attach the screw eye to the top cap, and clip your carabiner through. Total assembly time: 12 minutes plus 2 hours for glue to cure.
It holds one full roll of unscented poop bags in bulk or lavender-scented options if you prefer something floral. The quilted cotton repels light rain so you don’t end up with soggy bags after morning walks, which means no more stuffing wet paper in your jacket pocket.
Clip it to your mudroom command center between walks. Refilling takes 8 seconds—pop the cap, drop in a fresh roll, thread one bag through. It matches your farmhouse aesthetic better than neon plastic ever could, just like choosing quality nutrition from Best Wet Dog Food: Top Choices and What to Consider beats guessing at the pet store.
Pro tip: Make the opening 1.75 inches if you use biodegradable bags—they’re slightly thicker and jam in smaller tubes.
📸 Photo credit: Instagram @lex_ph2Ib
#6: Pink Checkered Fabric Poop Bag Dispenser (Clip-On Charm That Doesn’t Scream “Dog Supplies”)
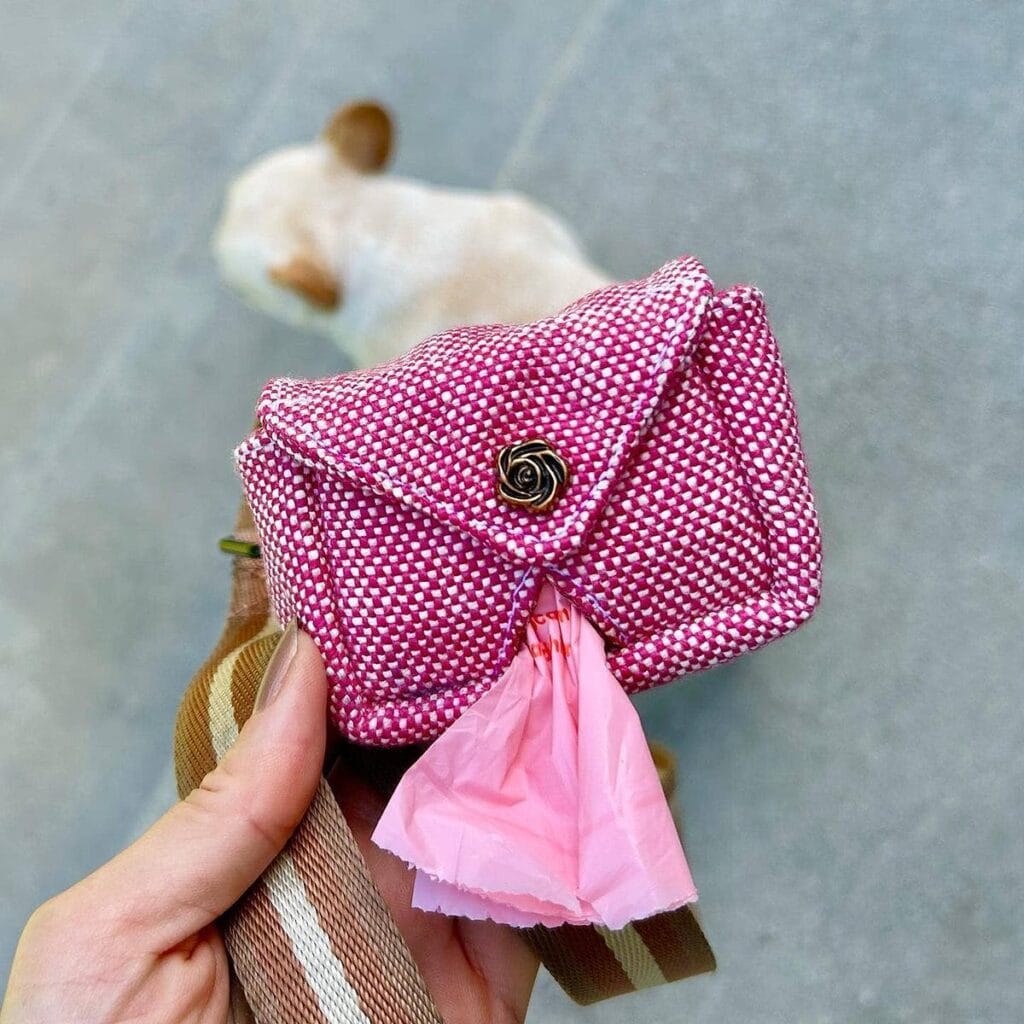
Your neighbor complimented what she thought was a cosmetic pouch on your leash last Tuesday. It’s actually where you stash compostable poop bags, but she doesn’t need to know that.
You’ll need: 8×6 inches of tight-weave cotton fabric (pink gingham from an old pillowcase works perfectly), one brass snap button, 1.5-inch lobster clasp, scissors, and fabric glue for crafts. The whole project takes 25 minutes, including drying time.
Cut fabric into a rectangle, fold edges inward to create a 4×3-inch pouch, and glue three sides shut. Attach the brass snap to the flap so it stays closed when Luna pulls toward squirrels. Thread the lobster clasp through the top seam before sealing. The opening needs to be exactly 1.5 inches wide—smaller than that and your biodegradable poop bags with handles won’t fit through.
It holds 30 folded bags and clips onto your leather leash handle without adding bulk to your pocket. Wipe with a damp cloth after muddy walks, then air dry on your entryway hook. The checkered pattern hides dirt better than solid colors—yours will still look crisp after two months of daily park trips, which means you’re not constantly replacing dingy-looking accessories.
Pro tip: Add a tiny loop of ribbon to the pull tab so you can yank out bags with gloves on during January walks.
📸 Photo credit: Instagram @spottedbyhumphrey
#7: Newspaper Plant Pot Liner (Biodegradable, Hides Your Poop Bag Stash)
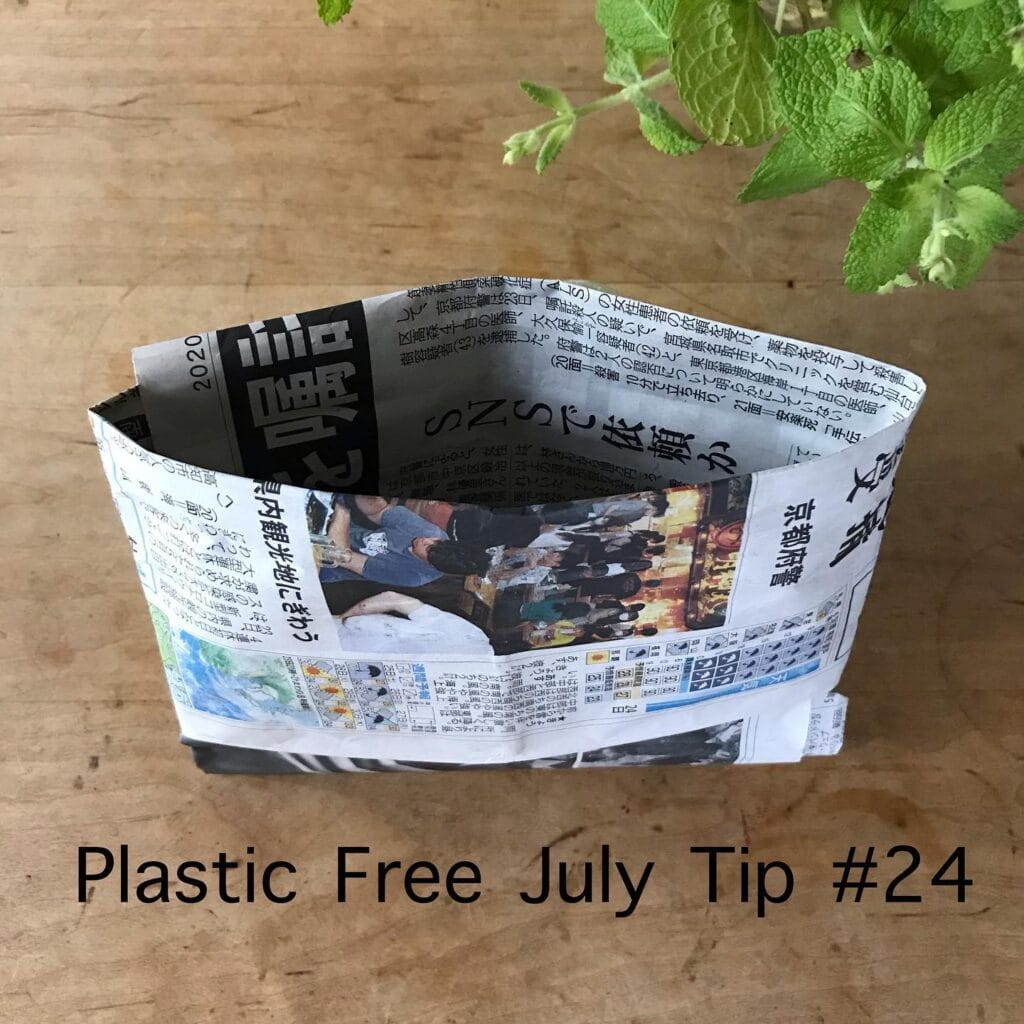
Your mudroom basket holds everything from leashes to treat pouches, but those bright green poop bag rolls scream “dog mess” to every dinner guest. Here’s a 10-minute fix using yesterday’s newspaper that doubles as a biodegradable planter liner.
You’ll need 5 sheets of newspaper, scissors, and 30 seconds of folding. Overlap three sheets in a brick pattern, fold the bottom up 4 inches, then wrap the ends around a soup can to create the cylinder shape. The whole thing costs zero dollars if you grab free papers from your coffee shop.
Tuck your heavy-duty extra-thick poop bags inside so you can grab bags without digging through your entire walking bag, which means you’re out the door in half the time.
The newsprint blends into farmhouse-style baskets better than plastic dispensers, and guests assume it’s holding herb seedlings. After 2-3 weeks, toss the whole liner in your compost bin and fold a fresh one while your coffee brews.
Pro tip: Make the opening 1.75 inches wide so standard poop bag rolls slide out without catching on the paper edges.
📸 Photo credit: Instagram @zerowaste.japan
#8: Fabric Poop Bag Holders You Can Sew in 15 Minutes (Match Every Leash You Own)
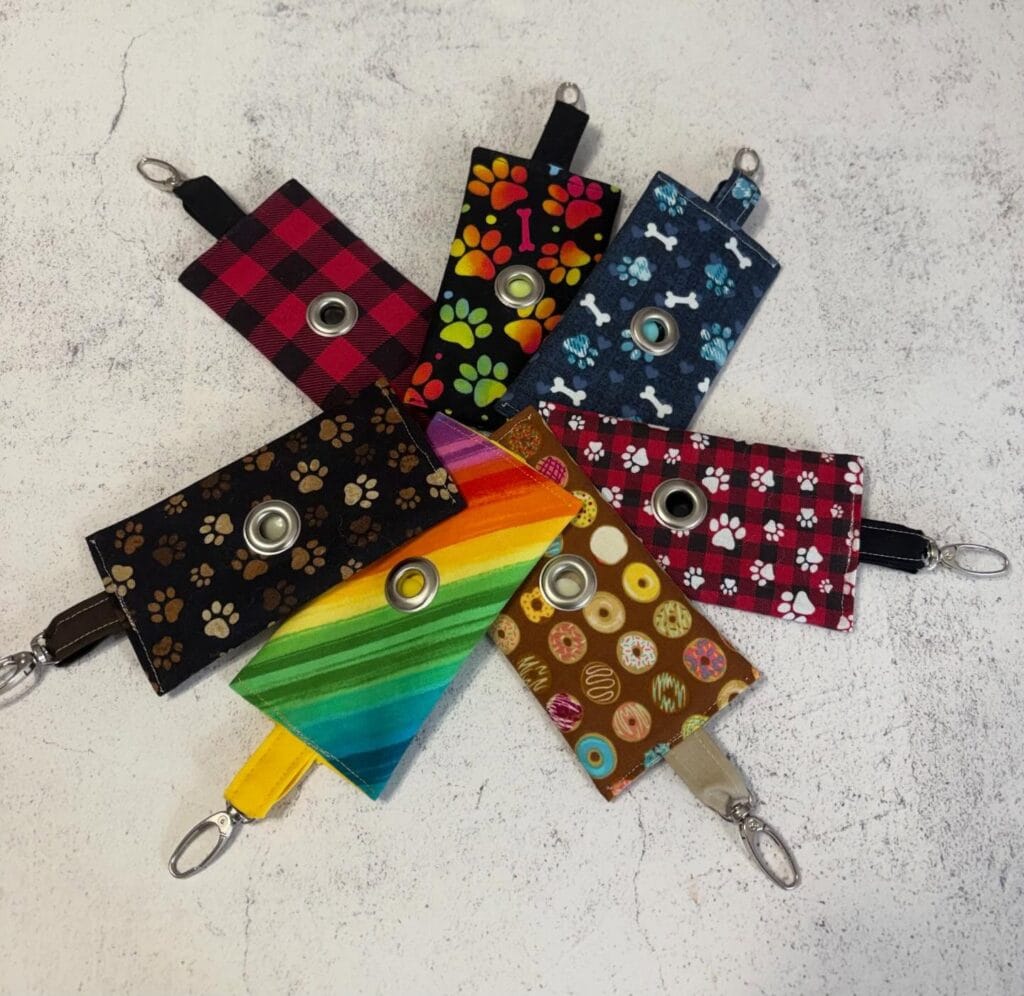
Your neighbor compliments your “cute keychain” on the dog park trail. You smile and pull out a poop bag from the rainbow-striped pouch clipped to Milo’s leash. She had no idea your bag dispenser could look this good.
You’ll need one 5×4-inch fabric rectangle, one metal grommet kit from the hardware store, a lobster clasp, and black elastic trim. The whole project takes 15 minutes if you’re hand-sewing, 8 minutes with a machine.
Fold your fabric in half with the pattern facing out, then stitch three sides closed. Punch a grommet hole 1.5 inches from the bottom center so bags pull through easily—smaller openings jam every single time. Thread your elastic through the top, knot it around the clasp, and you’re done. It holds one standard 50-count roll that slides in through the open top in three seconds.
The buffalo plaid version hanging in my mudroom matches my red leash so perfectly that it looks intentional, not like dog supplies. Clip it to your jacket pocket during morning walks, and you’ll never do the panicked pat-down again.
Pro tip: Seal the fabric edges with clear nail polish before sewing—fraying stops instantly, and your holder survives 6+ months of daily park trips without looking ratty.
📸 Photo credit: Instagram @poppypawsshop
#9: Hand-Stitched Leather Poop Bag Holder (Fits in Your Pocket, Looks Like a Designer Keychain)
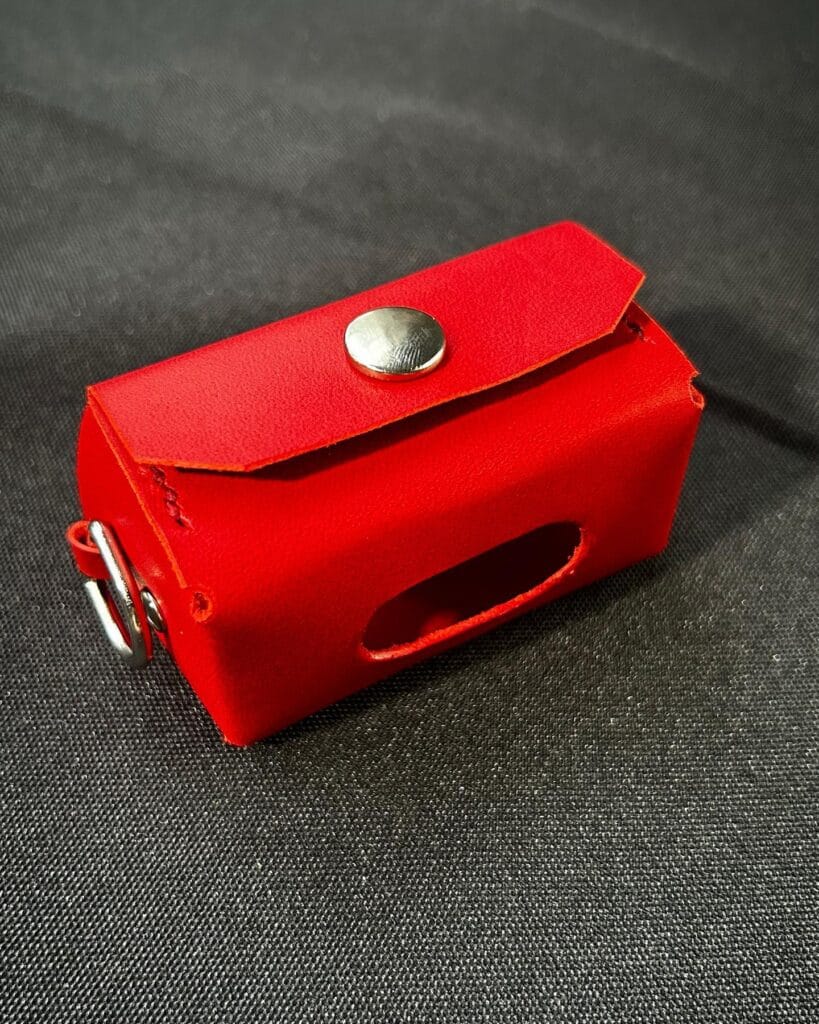
Your neighbor complimented what she thought was a vintage coin purse clipped to your jacket—then watched you pull out a dog poop bag. This bright red leather holder measures exactly 4 inches long and uses a metal snap closure from the craft store.
You’ll need one 10-inch leather strip (3 inches wide), one silver snap button, a belt hole punch, scissors, and leather glue. Cut the leather into a rectangular pouch shape, fold the bottom third up, glue the side edges, attach the snap to the flap, and punch a carabiner hole on the left side. The whole project takes 15 minutes with no sewing required.
It holds one standard roll of 200 bags so you can refill it once a month instead of jamming loose bags in your coat pockets. The snap closure means bags don’t unroll inside your entryway organizer. Waxed leather repels morning dew during 6am walks.
Clip it to your leash handle, belt loop, or mudroom hook for grab-and-go convenience. Just like choosing the right nutrition matters (check out our Best Dog Food for Chihuahua Guide for smart feeding choices), your walking accessories deserve thoughtful design.
Pro tip: Make the bag opening at least 1.5 inches wide—I learned this after wrestling with a too-tight opening for three frustrating minutes on a busy sidewalk.
📸 Photo credit: Instagram @columbuscraft
Your Poop Bag Holder Questions, Answered
Q: Do biodegradable bags work with all dispensers?
A: Yes, but they’re slightly thicker than standard plastic bags. Make your DIY opening 1.75 inches instead of 1.5 inches, or grab biodegradable bags designed for standard dispensers.
Q: How many bags fit in a homemade holder?
A: Most DIY holders fit one 50-200 count roll. For bulk storage at home, keep extras in your mudroom basket with this refill pack of 900 bags.
Q: Can I wash fabric holders?
A: Hand-wash with mild soap and air dry. For waterproofing, treat with the beeswax method mentioned in #3.
Q: Which holder works best for early morning walks?
A: The silicone holder with built-in flashlight (#1) is perfect for dawn walks when visibility is low.
Your Stylish Solution Starts Now
Ready to Never Forget Bags Again?
Grab your supplies and make one this weekend, or skip the craft store and get a ready-made holder that ships tomorrow. Stock up on extra-thick leak-proof bags while you’re at it—you’ll need refills anyway.
Your setup doesn’t stop at the leash. Check out Best Family Dog Breeds: Your Guide to Finding the Perfect Pet for Your Home for more pet-friendly inspiration. If you’re exploring breeds, browse The Ultimate Guide to the Best Dog Food for Pitbulls or Best Service Dog Breeds – The Ultimate Guide to Choosing the Perfect Companion for complete care guides.
Which holder matches your aesthetic—minimalist leather or bold patterned fabric? Drop a comment with your pick!

Amr Mohsen is a software engineer who traded his keyboard for a leash — at least on weekends. His love for dogs inspired him to share what he learns as a dog owner and enthusiast, bringing a detail-oriented, research-driven perspective to every article he writes. If it’s about dogs, he’s probably already looked it up twice.

