Imagine your dog’s wagging tail whipping through the air like a flag of joy. That’s the kind of energy you’ll see when you introduce some fun, creative enrichment to their daily routine. But how do you keep your pup entertained without splurging on pricey toys? There’s a world of DIY projects waiting for you, and I’ve got some clever ideas that are just as rewarding for you as they are for your furry friend. Ready to get started?
Instant Ideas for Dogs
Looking for a quick way to spice up your dog’s day? You can try some DIY dog enrichment ideas that are simple and fun.
Grab an old cardboard box, fill it with your pup’s favorite toys, and let them dig around for a treasure hunt.
Or, take some treats, hide them inside a muffin tin, cover each treat with a tennis ball, and watch your dog figure out the puzzle. It’s like a mini mastermind challenge.
Don’t worry if they get a little messy; that’s part of the fun. Just make sure you’ve got a good vacuum ready.
You’ll find yourself laughing as your dog becomes a certified champion in creativity. Trust me, they’ll appreciate the effort more than that fancy new toy.
Our Collection
We’ve got some fantastic stuff in our collection that’ll keep your pup busy and happy.
Think interactive puzzle feeders, DIY snuffle mats, and tug toys that even you might want to play with.
Trust me, your dog won’t just thank you for it; they might challenge you to some serious sniffing competitions.
1. Interactive Puzzle Feeders
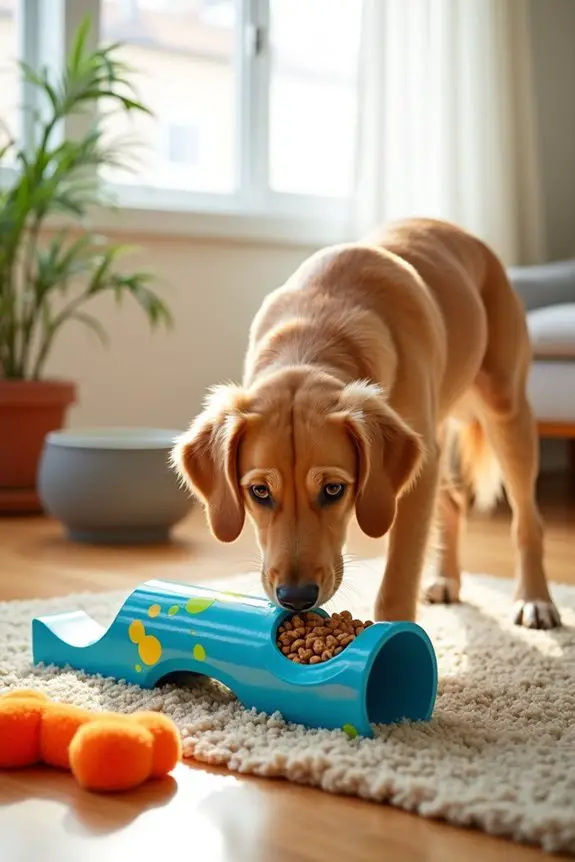
Are you ready to transform your furry friend’s mealtime into an engaging game of problem-solving? If you’ve ever watched your pup lick their bowl clean in seconds, then you know how rewarding and fun it can be to create a puzzle feeder from simple PVC pipes. Not only is this an affordable, DIY option that can save you money on store-bought enrichments, but it also gives your dog a far more stimulating way to enjoy their kibble. Additionally, offering your dog luxury dog toys can enhance their playtime experience even further, making it an essential part of their overall dog adventure gear premium. Using interactive dog toys can further encourage mental stimulation and challenge for your pet. To elevate the fun, consider adding a luxury automatic dog toy dispenser that can keep your dog entertained even when you’re not home.
Materials Needed:
- 1 large piece of PVC pipe (about 4 inches in diameter and 2 feet long)
- 1 PVC pipe cap (same diameter)
- 2 PVC elbow joints
- Non-toxic glue (make sure it’s dog-safe)
- Drill with a drill bit (1 inch recommended for the holes)
- A marker
- Dog kibble or treats
- Sandpaper (optional, for smoothing edges)
Step-by-Step Instructions:
- Mark the Holes: Start by laying your PVC pipe flat. Using the marker, draw several circles around the pipe, spaced apart. Keep in mind that the holes should be big enough for kibble to fall out, but not too big that all the food spills at once. A diameter of about 1 inch works nicely.
- Drill the Holes: Using the drill, carefully drill through the pipe where you made your marks. Take your time with this step; you definitely don’t want a personal injury story from a DIY gone wrong. If any edges feel sharp after drilling, just use the sandpaper to smooth them out. Safety first, right?
- Attach Elbow Joints: Now, connect the two elbow joints to either end of the pipe. This will create a fun zig-zag shape that will make it even more challenging for your pup. Use non-toxic glue to secure them in place, guaranteeing they won’t be easily wiggled off during playtime.
- Seal One End: It’s time to cap the feeder. Simply place the PVC cap over one end of the pipe and glue it down to prevent any kibble from escaping. This way, your dog will have to work to get their treats out.
- Fill ‘Er Up: Now for the fun part! Fill the pipe with your dog’s favorite kibble or treats. Leave some space at the open end so they’ve to roll it around to get the food out.
- Leave it for Fido: Finally, give it a test run (always supervised at first). Place the feeder down and watch your furry friend’s eyes light up as they figure out how to paw and nudge it for those tasty rewards.
Optional Add-ons/Variations:
- Colorful Decor: Paint your PVC pipes with non-toxic spray paint or use colorful duct tape to wrap them. This can make your DIY puzzle feeder not only functional but also a stylish addition to your home.
- Length Variation: If you’re feeling adventurous, you could use longer pipes or cut your pipe into shorter segments for a different challenge! Just make sure all ends are capped securely.
Pro Tip:
Always supervise your dog while they play with their new puzzle feeder. Some pups might get a little too enthusiastic, trying to chew on the PVC. Offering it as a fun activity during mealtime can’t only enrich their experience but also gives you peace of mind knowing they’re safely engaging with their playtime puzzle.
2. DIY Snuffle Mat
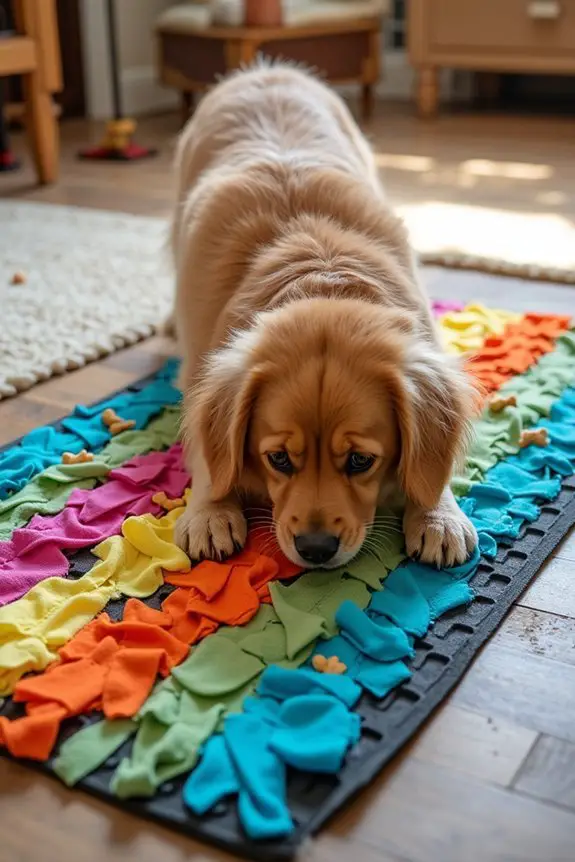
Looking for a fun way to keep your dog entertained while also encouraging their natural foraging instincts? A snuffle mat is a perfect solution. This DIY project isn’t only budget-friendly but also provides mental stimulation for your pup, making it a fantastic addition to their daily enrichment routine. Plus, it’s a delightful way to add a splash of color and creativity to your home. Incorporating premium dog wellness products can enhance your pup’s overall health and happiness during playtime.
Materials Needed:
- Medium to large-sized rubber mat with holes (like a bath mat) or thick cardboard as a base
- Fleece fabric or old t-shirts (in various colors for a fun look)
- Scissors
- Ruler or measuring tape (optional)
- Non-toxic fabric glue (optional, though tying knots works great)
Step-by-Step Instructions:
1. Cut the Fleece: Start by cutting your fleece fabric or old t-shirts into strips. Aim for about 1 inch wide and 6-8 inches long. Don’t worry about being perfectly precise; a little variation adds character to your mat.
If you’re feeling particularly adventurous, try to match your colors for a fun pattern.
2. Prepare the Mat: If you’re using a rubber mat, lay it flat on a surface. If you’re opting for cardboard, select a sturdy piece that can withstand some wear and tear from your pup’s nose.
3. Weave the Strips: Take the fleece strips and start pushing them through the holes of the rubber mat or tie them onto the cardboard. Simply fold a strip in half, threading it through a hole, then pull the ends through the loop.
You can tie them in knots for extra security if you’d like. Give yourself a break if you end up wrestling with a particularly wily piece of fabric. Just take a deep breath and keep going.
4. Fill it Up: Continue filling the mat with strips until it looks full and inviting. The trick is to leave enough space for the kibble or treats to hide within all those colorful bits without it being impossible for your dog to find.
Get creative! Consider layering colors or patterns for visual interest.
5. Add the Treats: Once your mat is all put together, it’s time to add the fun part. Sprinkle your dog’s favorite kibble or treats in and among the fleece pieces. Watch as they dive nose-first into their new adventure—snuffling around for all the goodies you’ve hidden.
6. Supervision is Key: Always keep an eye on your pup during playtime. This way, you can make sure they’re safely exploring their new snuffle mat and not staging a riot with its components.
Optional Add-ons/Variations:
- Personalized Patterns: Use fleece in different patterns to make a snuffle mat that matches your decor or reveals your dog’s unique style. Think polka dots, stripes, or your favorite sport’s colors.
- Add a Challenge: You can sew pockets or little pouches on the mat’s surface to include additional challenge spots, asking your dog to find treats that are hidden in these snazzy compartments.
Pro Tip:
If you’re concerned about bits of fleece being swallowed, double-check the safety of the materials you use.
Also, consider keeping an eye out for durable fleece that can handle some vigorous snuffling. And who knows? You might just want to sneak a treat or two for yourself during this crafting adventure. The best creations come from a little inspiration, right?
3. Interactive Tug Toy
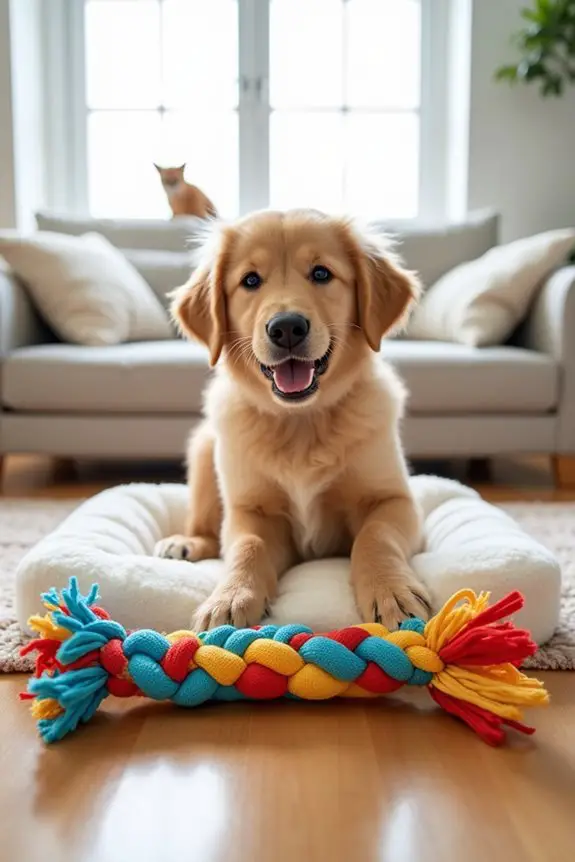
Imagine a tug toy that not only provides endless fun but also strengthens the bond between you and your furry friend. This DIY interactive tug toy is easy to make, inexpensive, and serves as an exceptional outlet for your dog’s energy. Say goodbye to ripped-up socks and muddy shoes because this handy little creation gives your pup the playtime they’re looking for — and keeps you on their good side.
Materials Needed:
- An old rope or thick fabric (an old towel works beautifully)
- Scissors
- A sturdy knot (or a dog’s favorite squeaky toy to attach)
Step-by-Step Instructions:
- Gather Your Materials: Before diving in, collect your old rope or towel. If you’re using a towel, cut it lengthwise into strips about 3-4 inches wide. This will give you several strong pieces to work with.
- Make the Bulky Center: Take three strips of fabric or rope and tie them together at one end with a knot as tightly as you can manage. This knot will serve as the grip for tugging, so make it good! If you’re feeling fancy, you can create a loop here by tying another knot at the end.
- Braid It Up: Now, separate the three pieces and start braiding them. Just like you’d braid hair, take one strip from the outside and cross it over to the middle. Repeat this, alternating sides until you’ve braided the strips together for about 12-18 inches, depending on how long you want the tug toy to be.
- Secure the End: Once you’ve reached your desired length, tie another firm knot at the end to secure everything in place. Trim any excess fabric if needed to keep things neat.
- Personalize It: Want some extra fun? If you’re using a towel, you can sew or tie on a squeaky toy at the braided end to add an exciting surprise for your pup. This way, they’ll not only tug with intensity but also get a delightful squeak!
- Time to Play: With the toy ready, it’s playtime! Engage your dog in a game of tug-of-war. Just remember – play gently. While it’s about fun, you don’t want to overdo it or risk any accidental injuries.
- Check for Wear and Tear: Dogs can be surprisingly resilient when it comes to tearing toys apart. Keep an eye on your DIY tug toy and replace it if it starts to wear out. After all, we want to keep tugging safe and enjoyable.
Optional Add-ons/Variations:
- Color Fun: Use multiple towels or fabric colors for a bright, eye-catching design that shows off your pup’s personality.
- Paw Prints: If you want to go the extra mile, you can create paw print patterns using fabric paint before braiding. This turns your tug toy into a true piece of art.
Pro Tip:
Always supervise your dog when they play with their tug toy. If it gets too frayed or worn, it’s best to retire it to avoid any possible choking hazards.
Also, consider making multiple tug toys to swap them out for variety—because who wouldn’t want to give their dog an excuse for extra playtime?
4. Boredom-busting Scent Trails
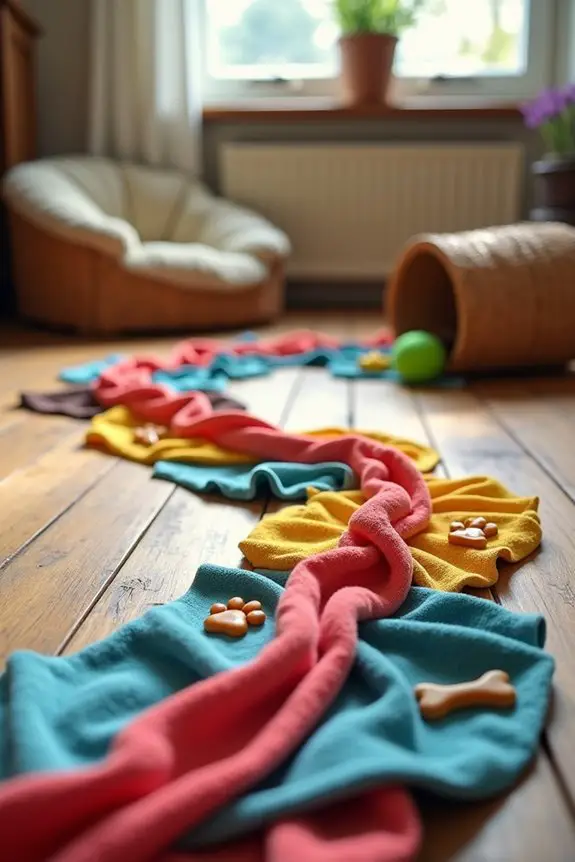
Is your dog sniffing around the house like they’re on a wild adventure? Well, we’ve got the perfect DIY project for you. Creating a Boredom-Busting Scent Trail isn’t only a fantastic way to engage your dog’s sense of smell but also a stimulating activity that can keep them entertained for hours. Best of all, you can easily whip this up from items you already have at home, saving you money on fancy toys!
Materials Needed:
- Old towels or cloths (the stiffer, the better!)
- Dog-safe treats (smelly treats work wonders)
- Scissors
- A sturdy basket or container (for hiding treats)
- Optional: Essential oils safe for dogs (like lavender or chamomile) or your dog’s favorite toy
Step-by-Step Instructions:
- Prepare Your Cloths: Grab those old towels or cloths and cut them into strips about 2-3 inches wide. You’ll want enough strips to create a trail, so don’t be shy—minimize that fabric stash while you’re at it!
- Hide the Treats: Take your dog-safe treats and hide them inside some of the cloth strips. Just fold or roll the strips around the treats, making sure they’re secure but not too tight. The goal is to excite their nose and encourage them to sniff out their treasure.
- Create the Scent Trail: Now, grab your basket or container and start laying out the cloth strips in a trail format. You can make it as long as you like, weaving back and forth, or even spiral it a bit—your dog will have a blast figuring it out.
- Introduce Some Variety: If you want to make it extra enticing, splatter a few drops of dog-safe essential oils onto the trail (if using) to supercharge their sniffing power. Just a tiny amount will do, and bonus: your house might smell great too!
- Let the Sniffing Begin: Once your scent trail is ready, show it to your pup and let them get to work. Encourage them with excited phrases like, “Find it!” and watch their nose go into overdrive. You’ll be amazed at their focus!
- Observe and Adjust: As your pup works through the trail, observe their interest level. If they seem to breeze through it too quickly, create a more complex trail next time. Think of it like a sniffy puzzle—challenge accepted!
- Clean Up and Reuse: Once the fun is done, gather the strips and treats (and don’t forget to refill with new treats for next time). You can even wash the cloths to keep them fresh, ready for another adventure.
Optional Add-ons/Variations:
- Color Coordination: Use cloths in different colors to visually mix things up. Maybe make a rainbow trail next time. Dogs mightn’t care about the color, but it’ll make for a pretty picture on your social media feed.
- Toy Incorporation: Tuck a small toy amongst the trail along with the treats to add excitement. They’ll get to search for both yummy goodies and their favorite squeak!
Pro Tip:
Safety first! Always monitor your dog as they’re sniffing out the treats, especially if you’re using essential oils. Some oils can be potent for their sensitive noses. Stick to safe choices, like dog-friendly scents, and if in doubt, consult your vet.
Plus, keep an eye on those cloths. Treats sometimes have a way of disappearing from sight… and a curious pup might just think it’s a buffet!
5. Treat Dispenser Ball
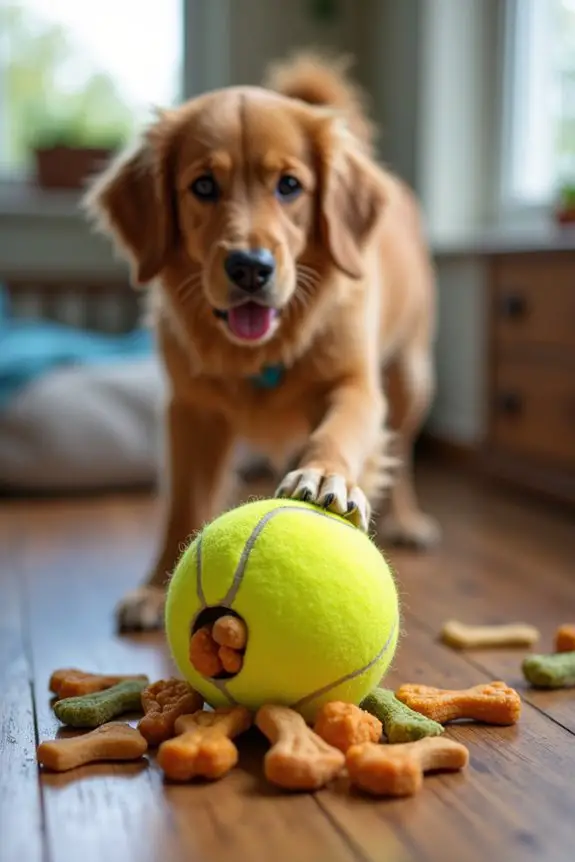
Looking for a handy tool that keeps your pup entertained while also rewarding them for their efforts? A Treat Dispenser Ball is an excellent DIY project to engage in! Not only is it a practical way to keep your furry friend busy, but it can also save you money on store-bought toys. Plus, it’s a delightful blend of fun and mental stimulation that keeps your dog engaged and happy. Who wouldn’t want some DIY satisfaction in their life anyway?
Materials Needed:
- A tennis ball or a similar rubber ball
- A sharp knife or utility knife (handle with care)
- Dog-safe treats or kibble (the smaller, the better)
- Optional: Sandpaper (if you need to smooth out any rough edges)
Step-by-Step Instructions:
- Prepare Your Ball: Start with that trusty tennis ball. Use your sharp knife to cut a small slit in the side of the ball. Aim for about an inch or so, big enough to fit a treat but not too big that they just spill out.
- Fill It Up: Now, grab those dog-safe treats and start stuffing them into the ball through the slit. It’s a bit like packing a suitcase, but way more fun. You can use kibble or small training treats—whatever gets your pup’s tail wagging.
- Seal It Up: If your cut opened too wide, you might want to tape it up a bit after filling to prevent those treats from rolling out too easily. Just make sure it’s done safely so your pup doesn’t choke on any tape—definitely not the goal.
- Get the Energy Flowing: Give the ball a little shake and watch the treats rattle inside. This will surely pique your dog’s curiosity—always a good sign. You might even toss it around a bit to really build the hype.
- Let the Fun Begin: Show the ball to your dog and encourage them to roll it around. You might say, “Get it!” or just keep your voice playful—dogs are excellent at picking up on enthusiasm. Watch as they discover how to get those tasty treats out!
- Observe and Adjust: As your pup learns how to work the ball, you can adjust the number of treats inside or the size of the slit. If they’re figuring it out too quickly, make it a little tougher next time by reducing treat access. Think of it as a canine challenge, so they think extra hard to get their rewards.
- Cleanup and Refill: When the ball’s empty, simply clean it out, refill it with fresh treats, and get ready to do it all over again. Your pup won’t even know it’s the same old toy!
Optional Add-ons/Variations:
- You can personalize your Treat Dispenser Ball with non-toxic paint, adding a splash of color that matches your dog’s personality or your home decor. Just make sure the paint is safe for pets.
- If you want a creative twist, consider using other types of balls (like rubber) or even those squeaky toys you have lying around, just remember to make sure they’re durable enough for dogs who may be tough on toys.
Pro Tip:
Always keep an eye on your dog while they’re playing with their new treat ball. Dogs can sometimes be sneaky about chewing or trying to swallow pieces, so it’s safer to supervise their playtime. Plus, you’ll get all the entertainment from watching them work for their treats. It’s like having your own live show starring your pup!
6. Suspended Treat-Dispensing Toys
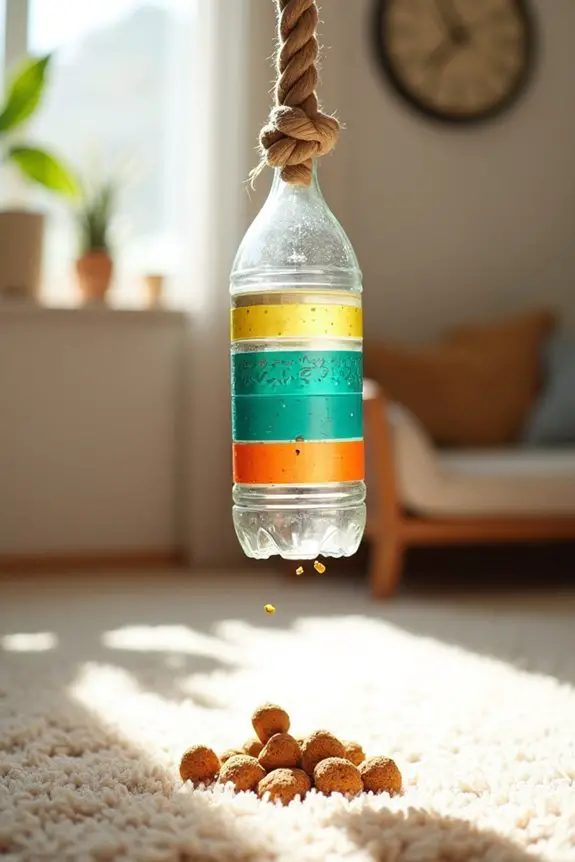
If you’re on the hunt for an engaging way to keep your pup entertained and stimulated, a Suspended Treat-Dispensing Toy might just be the project you need. This DIY toy not only occupies your dog for hours but also helps them exercise their mind and body. Plus, it’s budget-friendly—goodbye overpriced store-bought toys!
Ready to get your hands a little dirty? Let’s get started.
Materials Needed:
- A sturdy rope or bungee cord
- A medium-sized plastic bottle or a dog-safe treat container
- Dog-safe treats (think kibble or small training bites)
- Scissors
- A hook or ceiling anchor (for hanging)
- Optional: Decorative tape (for personalization)
Step-by-Step Instructions:
- Prepare Your Bottle: Grab that plastic bottle or treat container, and if it has a lid, remove it. You want your dog to be able to easily access the treats inside, but don’t worry, we’ll secure it later.
- Cut Your Rope: Measure a length of rope or bungee cord. You’ll want it to be at least 3 feet long, so it can dangle enticingly for your pup. Cut the rope to your desired length. Remember, you can always trim it shorter later if needed.
- Make the Hole: Use the scissors to poke a few holes in the sides of the bottle or container. These holes should be big enough for treats to fall out when your dog nudges or paws at it.
- Fill Up with Treats: Now comes the fun part! Fill the bottle with those yummy dog-safe treats. Don’t overpack it; you want to leave enough space for them to shake and roll the toy.
- Attach the Rope: Pull the rope through the holes you made, securing it well. Tie a strong knot to make sure it doesn’t slip out. Double knotting it’s a good idea—after all, we want it to withstand some serious tail wagging!
- Hang It Up: Find a sturdy spot in your home, like a beam or a strong tree branch outside, and use the hook or ceiling anchor to securely hang the toy. Make sure it’s at a height your dog can reach with their paws but not so low that they can easily grab it with their mouths.
- Let the Games Begin: Now that it’s all set up, show your pup the hanging treat-dispensing toy. Encourage them to jump, paw, or wiggle to get those treats to fall out. Don’t be surprised if they think of this as their new favorite puzzle!
Optional Add-ons/Variations:
- Colorful Twist: Use decorative tape to wrap the bottle in fun colors or patterns. Not only does it look great, but it also gives your dog a little visual challenge.
- Multi-Treat Challenge: Experiment with different types of treats or even add small squeaky toys inside for extra interest. Dogs love surprises.
Pro Tip:
Always verify the hanging toy is at a safe height and secure enough so it won’t fall and injure your furry friend. You can also periodically check the rope for wear and tear; you want this toy to last through many treat-hunting sessions.
And hey, clean it regularly to avoid any icky buildup—your dog deserves only the best.
Get ready for some playful pup moments, and enjoy crafting something that enhances both playtime and snack time for your four-legged pal. This DIY project is sure to have tails wagging in no time.
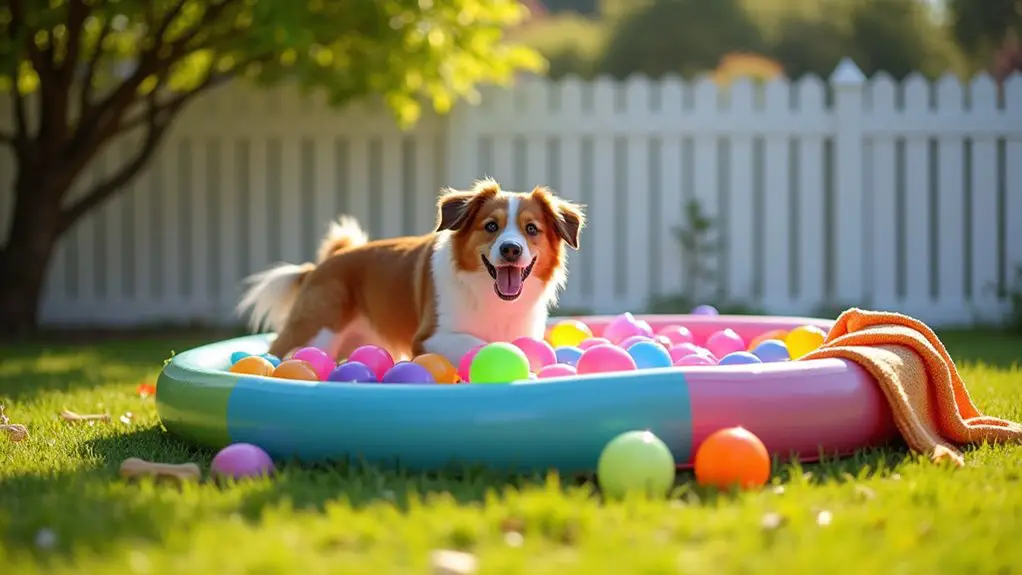
7. Ball Pit of Balls
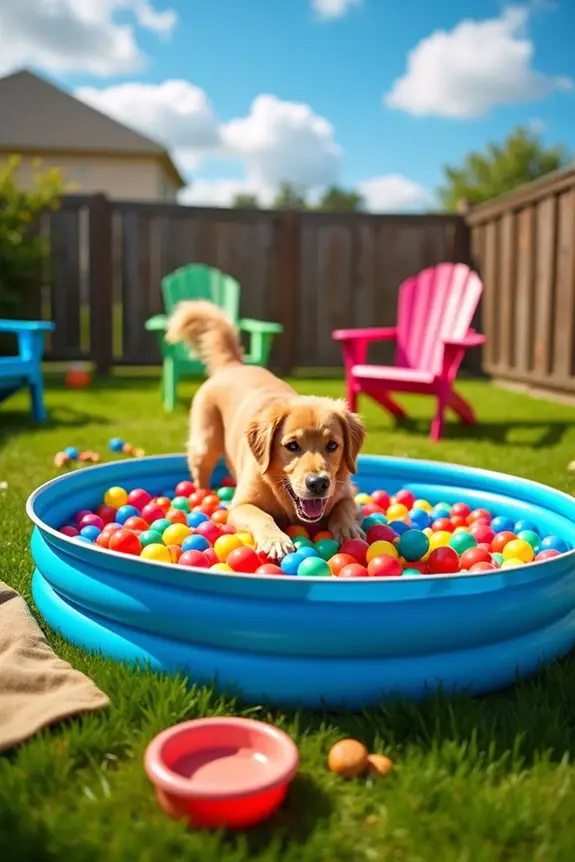
Looking for a way to turn your living room or backyard into a doggy wonderland? A ball pit is a fantastic, budget-friendly idea that will keep your furry friends entertained to the max.
This DIY project isn’t just fun; it provides a safe space for your pup to play, explore, and release energy without needing to go to the dog park. Plus, it’s super easy to set up, making it a win-win for dog owners.
Materials Needed:
- A large, inflatable kiddie pool or a plastic container
- 100+ colorful plastic balls (you can find these at dollar stores or online)
- A hose (for outdoor setups)
- Optional: outdoor tarp (if you prefer a more stable surface)
Step-by-Step Instructions:
1. Choose Your Spot: Decide where you want to set up your ball pit. If it’s outside, make sure it’s a flat and safe area for your dog. If you’re using an inflatable pool, double-check there are no sharp objects nearby.
2. Inflate Your Pool: If you went for the inflatable kiddie pool, pull out that air pump and blow it up. If you got a plastic container, you can skip this step and just set it down in your chosen area.
3. Fill with Balls: Pour the colorful plastic balls into the pool or container until it’s filled to your desired level. The more balls, the more fun your dog will have digging through them.
4. Introduce Your Pup: Show your dog their new play area. You could throw in a few treats or their favorite toy to entice them to jump in. Watch their excitement as they plunge into a sea of colorful balls!
5. Play Time: Spend some time with your dog in the ball pit, tossing the balls around or playing hide-and-seek. Dogs love a little interactive playtime, and you’ll have a blast too.
Just be cautious of any overly excited tail wags; you don’t want to be a casualty of a canine ball game.
6. Clean When Done: Once the play session is over, consider giving the balls a quick rinse if they’ve been outside or in the backyard. It keeps everything fresh and ready for another day of fun.
Optional Add-ons/Variations:
- Color Themes: Get balls in different colors to match your dog’s collar or your home decor. You can even choose seasonal colors to change it up for the holidays. Who wouldn’t want a holiday-themed ball pit?
- Floating Fun: If you have a kiddie pool, toss in a few water-safe toys to make a splash zone for those warm days. Just be prepared for the soggy wet doggie that comes out afterward.
Pro Tip:
When selecting your plastic balls, verify they’re large enough so your dog can’t swallow them, but lightweight enough for them to toss around easily.
A mix of textures can also enhance your dog’s sensory experience—some balls that squeak, some that crinkle—think of it as a miniature amusement park right at home.
Who needs a professional dog trainer when you have the joy of a DIY ball pit?
Extra Tips & Ideas
Creating a stimulating environment for your furry friend doesn’t have to be rocket science, though some days it can feel like it – especially when you’re wrestling with a hyper pup who just found a squirrel outside.
Try using household items for creative puzzles. A muffin tin and some tennis balls? Easy! Hide treats under the balls and watch your dog figure it out.
Ever thought about DIY scent games? Just take a towel, sprinkle some kibble, roll it up, and let your pooch unroll their new treasure hunt.
If it’s rainy, indoor fetch using soft toys is a lifesaver. You’ll thank me later when your dog’s too pooped to pounce!
Frequently Asked Questions
How Can I Assess My Dog’s Enrichment Needs?
To assess your dog’s enrichment needs, observe their behavior and interests. Note what excites them, how they play, and their energy levels. Provide a variety of activities to see what they enjoy the most.
What Materials Are Safe for DIY Enrichment Toys?
For DIY enrichment toys, use materials like durable rubber, untreated wood, cotton rope, and recycled cardboard. These safe options engage your dog’s senses, encourage play, and promote healthy chewing habits while sparking creativity in your designs.
How Often Should I Rotate Enrichment Activities?
You should rotate enrichment activities every few days to keep your dog engaged. Changing things up prevents boredom and maintains your pup’s interest, ensuring they stay mentally stimulated and excited about their playtime.
Can Enrichment Help With Behavioral Issues in Dogs?
Yes, enrichment can definitely help with behavioral issues in dogs. It stimulates their minds, reduces boredom, and directs their energy positively, leading to improved behavior and a happier, more well-adjusted pet.
How Do I Clean and Maintain Enrichment Toys?
You can clean enrichment toys by rinsing them with warm soapy water, scrubbing with a brush, and rinsing again. For tougher stains, try vinegar or baking soda. Regular maintenance keeps them safe and enjoyable for your dog.
Conclusion
So there you have it—ten fun ways to keep your pup entertained without emptying your wallet. Who knew a cardboard box could turn into a treasure trove? It’s like finding a hidden gem in your living room. Plus, every dog deserves a good challenge, right? Get those creative juices flowing and watch your furry friend’s tail wag with excitement. Just remember, while your dog’s having a blast, you can always snap a pic for Instagram—or just to prove you’re not a total dog novice.

Hi, I’m Ali Tarek, the founder of Animalsman. I’ve always been passionate about pets, especially dogs and cats, and I created this website to share practical tips, easy recipes, and helpful care advice for fellow pet lovers. My goal is to make pet care simple, enjoyable, and accessible for everyone. When I’m not writing or curating content, you’ll usually find me spending time with my furry friends or learning new ways to keep them happy and healthy.