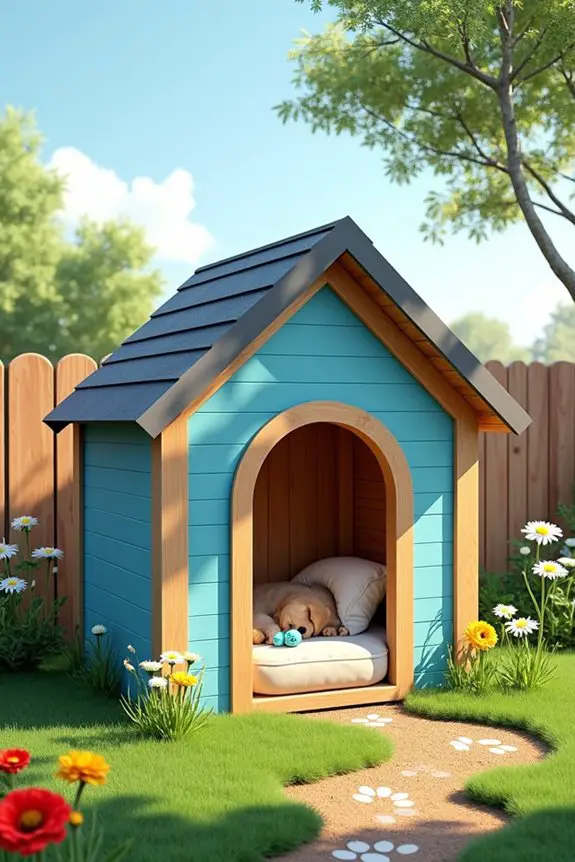
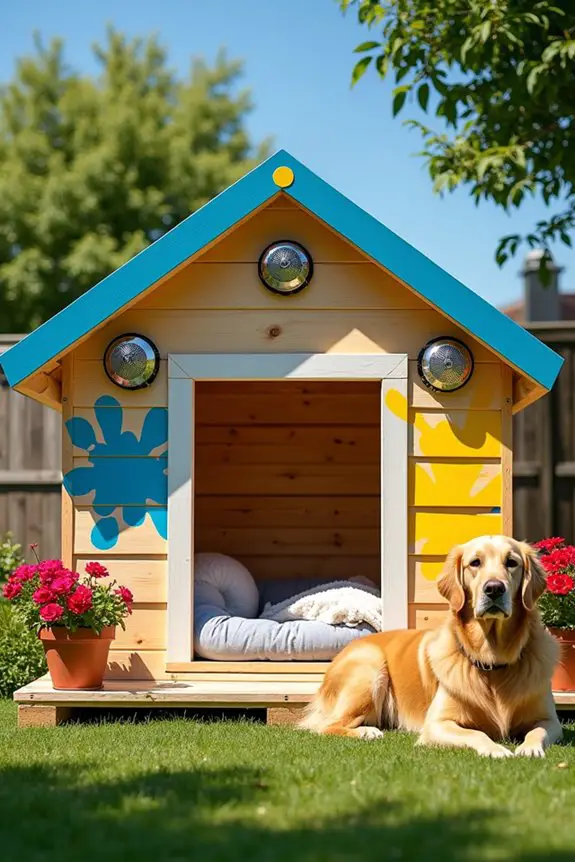
Imagine your furry friend lounging in a cozy dog house that reflects their personality while keeping them safe and comfy. You’ve got options—think customizable designs, raised platforms, and even eco-friendly builds. There’s even a chance to get creative with unique roof styles and playful touches. How do you want to transform your outdoor space for your pup? Stick around, because I’ve got some fantastic ideas that might just inspire your next DIY project.
Unique Roof Designs
When you’re thinking about building a dog house, why not start with a roof design that turns heads? A slanted roof not only looks snazzy but also helps with rain drainage.
Want something a bit funky? Go for a gabled roof, giving your dog an architecturally impressive abode. You can even get creative with shingles—it might even inspire Pinterest envy among your friends.
Just imagine your pup lounging under a unique roof that’s the talk of the neighborhood. Plus, these designs can turn your DIY outside dog house into a cute little outdoor feature.
Don’t stress if it seems tricky; just take it one step at a time. Your four-legged friend deserves a stylish place to chill, right?
Our Collection
Now, let’s check out our collection of dog houses that are just begging for your personal touch.
You’ve got options ranging from customizable pallet designs to eco-friendly straw bale houses, which might just make you the eco-warrior of the dog world.
Trust me, your furry friend will appreciate the effort, and who knows, you might even impress your neighbors with your DIY abilities.
1. Customizable Pallet Dog House
If you’re looking for a cozy and adorable place for your furry friend, building a customizable pallet dog house might just be the perfect project for you. Not only does it save you money compared to store-bought options, but it’s also a fun way to add a personal touch to your outdoor space.
And let’s be honest, who doesn’t love a project that gets your creative juices flowing? Plus, your pup will feel extra special having a home that reflects their human’s style. Additionally, incorporating a luxurious dog house design could elevate your DIY project beyond the usual aesthetics.
Materials Needed:
- Wooden pallets (enough to create the desired size)
- Hammer and nails (or screws, if you prefer a more secure hold)
- Saw (hand saw or circular saw)
- Sandpaper
- Wood sealant or outdoor paint (to protect against weather)
- Measuring tape
- Pencil
- Drill (optional, for pilot holes)
- Paintbrush (if painting/sealing)
- Dog bedding or old blankets (for comfort)
Step-by-Step Instructions:
1. Measure Your Dog: Start by measuring your dog while they’re standing. You want a snug fit, but enough space for them to turn around comfortably. Jot down those dimensions.
2. Select and Prep the Pallets****: Choose your pallets, making sure they’re not damaged. Give them a good sanding to avoid splinters—both for you and your pup. It’s tough being a DIY dog owner with splinters.
3. Cut the Pallets: Using your saw, Cut the Pallets to create the walls, floor, and roof of your dog house based on the measurements you took. It can be a bit of a puzzle, but trust me, it’s much easier than assembling IKEA furniture.
4. Assemble the Base: Start with the floor. Lay two pallets side by side to form a solid base. Nail or screw them together securely. If your dog’s a digger, consider reinforcing the base with some scrap wood for added durability.
5. Build the Walls: Attach the wall pieces vertically around the base. Nail them together at the corners and secure everything tightly. You want your dog house to be sturdy enough to withstand those spirited tail wags.
Oh, that tail is a force to be reckoned with.
6. Create the Roof: For the roof, you can use a single pallet laid flat or two halves tilted like a triangle. This allows rain to slide off easily. Fix the roof in place and then give a light sanding to the edges for safety.
7. Finish Up: Apply a coat of wood sealant or paint to protect it from the elements. Allow it to dry completely before adding any cozy bedding inside.
Optional Add-ons/Variations:
– Personalized Colors: Why not paint the dog house in your pup’s favorite color? Okay, maybe they don’t have a favorite color, but you can choose from bright yellows to calming blues.
You could even add stenciled paw prints or their name for a little added flair.
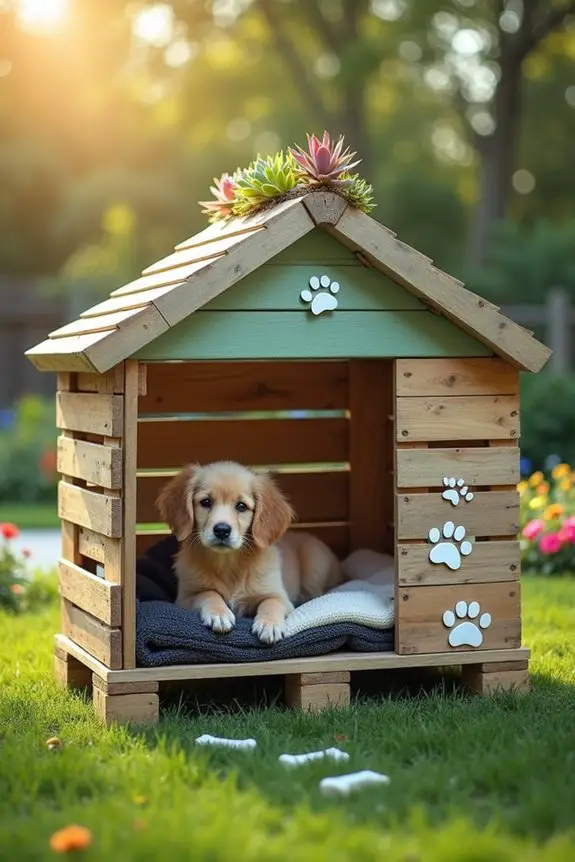
– Roof Garden: Feeling adventurous? Consider creating a small, shallow garden on the roof using succulents that require minimal care. It’ll add a unique look and a pop of greenery.
Just make sure it’s safe for your dog—no toxic plants allowed.
Pro Tip:
Always keep your dog’s safety in mind. If your dog is a chewer, confirm there are no sharp edges or nails sticking out.
You can also line the inside with some old blankets for added warmth in colder months. Plus, your pup will appreciate the luxurious touches. Because honestly, who wouldn’t appreciate a snuggly setup?
2. Raised Platform Dog House
If your pup enjoys lounging in the sun—or staying dry during rains—then a raised platform dog house is a fantastic DIY project to reflect on. Not only does it elevate your furry pal off the cold ground, but it also provides better ventilation and drainage. Plus, it’s an affordable way to add style to your outdoor area while giving your dog a cozy retreat. Who wouldn’t want their pooch to be living in style? Additionally, incorporating some outdoor dog playground equipment can further enhance your dog’s play area and overall happiness.
Materials Needed:
- 4 wooden pallets (or more, depending on the desired size)
- Hammer and nails (or screws for extra strength)
- Saw (hand saw or circular saw)
- Drill (for pilot holes)
- Sandpaper
- Measuring tape
- Pencil
- Wood sealant or outdoor paint
- Level (to guarantee stability)
- Dog bedding or old towels (for added comfort)
Step-by-Step Instructions:
- Measure and Decide on Size: First, figure out how big you want the dog house to be. Measure your furry friend while they’re standing to confirm it’s just the right size. They should have enough room to lay down, turn around, and, of course, nap in peace.
- Choose and Prepare the Pallets: Look for sturdy pallets and give them a good sand down to smooth any rough edges. Trust me, no one wants your dog getting splinters while enjoying their home sweet home.
- Cut and Assemble the Base: If you want a larger floor area, you may need to cut and combine pallets. Stack them to the desired height and use your hammer (or screws) to secure them tightly. Make sure it’s level—don’t want your pup rolling out the door during nap time!
- Build the Walls: Attach vertical planks around the base, again using nails or screws to keep everything secure. Leave a space for a door—your pup should have easy access crafted just for them.
- Create the Roof: You can use one whole pallet laid flat for the roof or two pieces at an angle to help rain run off. Confirm it’s firmly attached to withstand wind (and those enthusiastic tail wags, remember).
- Finish Touches: Now, it’s time for some style. Apply a wood sealant or outdoor paint to protect it from the elements. Choose a color that complements your home; your dog’s house deserves to look cute too. Let it dry completely before adding soft bedding inside—think of it as making a comfy bed for your furry companion.
Optional Add-ons/Variations:
- Color Your Style: Paint the dog house in fun patterns or bright colors to make it pop in your yard. Use outdoor fabric to create a colorful awning or sunshade overhead—your pooch will love lounging underneath it.
- Personalize It: Grab some letter stencils or stickers to spell out your dog’s name on the side. Nothing says “my dog lives here” like a personalized touch.
Pro Tip:
Before you get started, double-check your materials. It’s better to pick sturdy, treated pallets that can withstand the weather rather than cheap ones that could splinter.
Don’t forget to add a few cozy blankets inside; keeping your pup warm and comfy is the ultimate goal. Remember, a happy dog equals a happy owner!
3. Eco-Friendly Straw Bale House
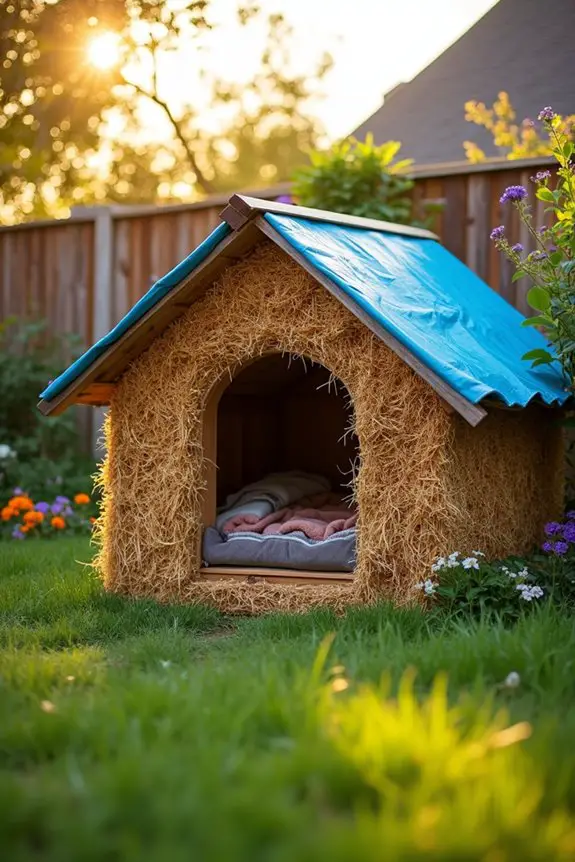
If you’re looking for a unique and eco-friendly way to give your dog a cozy outdoor space, why not try building a straw bale house? This DIY project is perfect for dog owners who want to save money, reduce their carbon footprint, and create a comfortable retreat for their furry friends. Plus, it adds a rustic charm to your backyard that’s sure to impress your guests and maybe even your dog. It’s also worth considering that premium dog food can help keep your Goldendoodle happy and healthy while they enjoy their new outdoor haven.
Materials Needed:
- Straw bales (enough for the desired size)
- Sturdy wooden planks or plywood (for the base and roof)
- Hammer and nails (or screws)
- Saw (hand saw or circular saw)
- Measuring tape
- Rope or twine (for securing the bales)
- Weatherproof tarp or waterproof paint (for roof protection)
- Dog bedding or soft blankets (for comfort)
Step-by-Step Instructions:
- Choose a Location: Start by picking a shady spot in your yard that’s well-drained. A little natural shade will help keep your dog cool during those hot summer days.
- Build the Base: Cut your wooden planks or plywood to create a firm base that’s slightly larger than the footprint of your straw bales. Make sure it’s level so your dog doesn’t feel like they’re on a boat.
- Stack the Straw Bales: Begin laying the straw bales on the base, stacking them in a rectangular shape to create the walls. Don’t forget to leave an opening for the door—your dog shouldn’t have to go through a maze just to get in! Use the rope or twine to secure the bales together; think of it as giving your dog a gentle hug.
- Create the Roof: For the roof, use two pieces of plywood or wooden planks to create a slant. This will help rain runoff, keeping the straw dry and cozy inside. Secure the roof down well, so it doesn’t get blown away on a windy day—nobody wants to chase a flying doghouse.
- Weatherproof the Roof: Cover the roof with a weatherproof tarp or apply waterproof paint to protect it from the elements. This step is essential; otherwise, your pup may end up with a surprise shower during the rain.
- Add Personal Touches: Once the structure is complete, it’s time to add soft bedding or blankets inside. Make it as cozy as possible—think fluffy clouds for your pup to snuggle into after a long day of barking at squirrels.
Optional Add-ons/Variations:
- Bale Color Fun: While straw bales are naturally golden, feel free to add some color with outdoor-safe paint or fabric. You could even create a “welcome” sign to hang outside.
- Green Thumb Extra: Consider planting some flowers around the house or even on the roof for a delightful touch. Who wouldn’t love a house that blooms?
Pro Tip:
Be sure to monitor your straw bale house for any moisture and replace bales as needed. Straw does tend to attract moisture—so frequent checks can prevent any unwanted sogginess.
Want an easy cost-saving trick? Look for straw locally and buy in bulk, which can make this eco-friendly choice even more budget-friendly.
Building an eco-friendly straw bale dog house may just become your new favorite project. It’s practical, affordable, and your dog will absolutely love their new hangout spot. Happy building!
4. Indoor-Outdoor Transition Dog House
Looking for a way to give your dog a cozy spot that feels like home, whether they’re lounging indoors or enjoying the great outdoors? The Indoor-Outdoor Conversion Dog House is the perfect project for dog owners. This DIY dog house not only provides your furry friend with a comfortable space to retreat to, but it also adds charm and versatility to your backyard. Plus, it’s a great way to save a bit of cash while crafting something special just for them. To complement your new dog house, consider adding some delightful dog-themed kitchenware that celebrates your love for your canine companion.
Materials Needed:
- Plywood sheets (for the walls and roof)
- Wooden beams (for the frame)
- Hinges and latches (for the door)
- Outdoor paint or sealant (to weatherproof the house)
- Hammer and nails (or screws)
- Saw (hand saw or circular saw)
- Measuring tape
- Sandpaper
- Dog bedding (for comfort)
- Optional: decorative paint or fabric (to personalize)
Step-by-Step Instructions:
- Choose the Right Spot: Select a location in your yard that’s flat, free from debris, and has some shade. Trust me, your pup will thank you during those hot summer months when they’re not baking in the sun.
- Cut the Plywood: Measure and cut your plywood sheets into pieces that will make up the walls, roof, and floor. You want your doghouse to be tall enough for your dog to stand up comfortably, so keep their height in mind.
- Build the Frame: Using the wooden beams, create a sturdy frame for your doghouse. This will give it structure and durability. Trust me, nobody wants a doghouse that tips over at the first breeze.
- Attach the Walls: Secure the cut plywood sheets to the frame using nails or screws. Start with the walls, then add the back and finally the front. Don’t forget to leave an opening for the door—your dog will need access, right?
- Create the Roof: Consider a slanted roof that’s easy for rain or snow to slide off. Attach it securely to the top of the structure. And remember, a well-placed overhang can help keep the entryway dry.
- Add a Door: Attach a playful flap door using hinges. Make sure it’s easy for your dog to move, yet sturdy enough to keep the elements out when your pup isn’t inside.
- Finish with Paint: Grab some outdoor paint or sealant to protect your doghouse from the rain and sun. You can even get creative and add some fun colors, patterns, or a cute name for your pup to personalize their outdoor abode!
Optional Add-ons/Variations:
- Want to spice things up? Use outdoor-safe fabric to create colorful curtains on the doorway, giving your pup the option to peek out while still nestled inside, looking adorable.
- You can also paint paw prints leading to the door or stick on vinyl decals to bring a touch of personality to the pup parlor.
Pro Tip:
When it comes to comfort, consider adding a thermal dog bed inside. It’s like a cloud for your pup, ensuring they stay warm during chilly nights. And here’s a tip: elevated dog beds can help with airflow and keep them cool during summer. Everyone wants a happy, comfy dog, right?
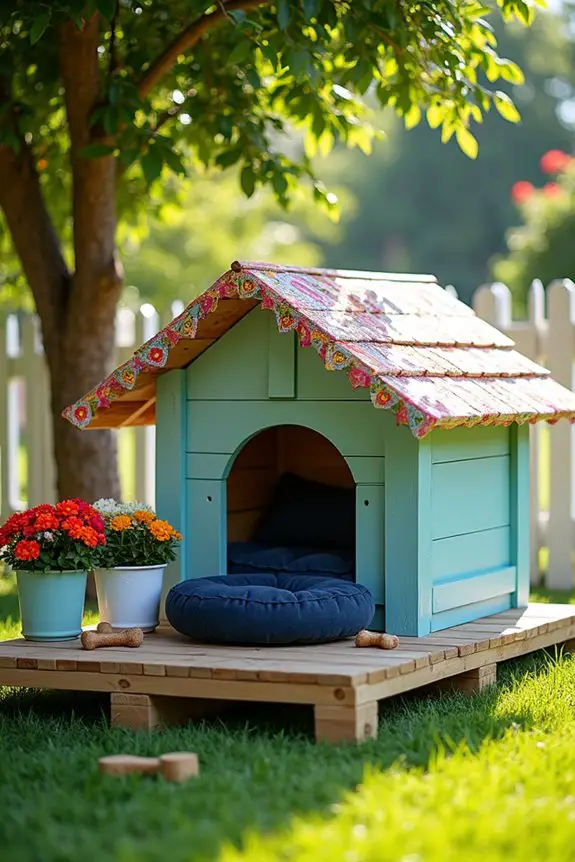
5. Convertible Canopy Dog House
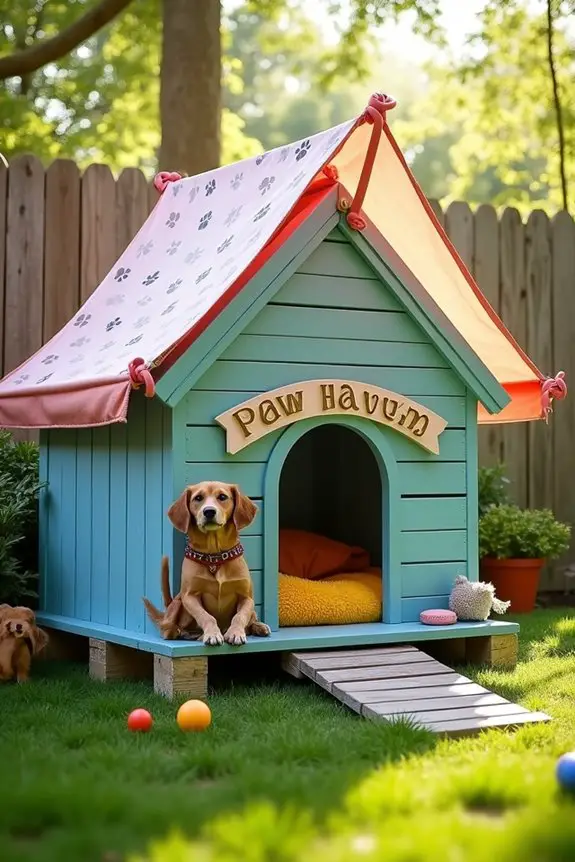
Looking for a great way to keep your pup comfortable and stylish? The Convertible Canopy Dog House is a fantastic DIY project that provides your four-legged friend with a cozy space to call their own, while also looking great in your backyard.
Plus, it’s a cost-effective alternative to store-bought houses that mightn’t suit your dog’s needs or style. Let’s create a little doggy retreat that gets your canine companion wagging their tail in excitement.
Materials Needed:
- 4 wooden pallets (for the base and sides)
- A canvas tarp or outdoor fabric (for the canopy)
- Rope or bungee cords (to secure the canopy)
- Hammer and nails (or screws)
- Measuring tape
- Saw (if needed to modify pallets)
- Sandpaper (to smooth out rough edges)
- Optional: paint or wood stain (to add a little charm)
Step-by-Step Instructions:
1. Choose a Spot: Find a flat area in your yard that has some shade. Dogs are like us; they want to lounge in comfort, minus the blazing sun.
2. Prepare the Pallets: Lay two wooden pallets side by side to form the base of the dog house. If you want it a little taller, you can stack another two pallets on top for added height. Just remember to sand any rough spots because nobody likes splinters, right?
3. Build the Sides: Stand the other two pallets on their sides and position them as walls. You can nail or screw them to the base for extra stability—no point in having a doghouse that collapses if your pup leans on it.
4. Cut and Attach the Canopy: Measure the height you want for your canopy and cut the canvas tarp to size. Drape it over the top of your doghouse and secure it with rope or bungee cords. This canopy will provide shade for those hot days and can be folded back for cooler months.
5. Personalize Your Dog House: If you’re feeling crafty, grab some paint or wood stain to decorate your doghouse. You could add some fun colors, patterns, or even a sign with your dog’s name on it.
After all, who wouldn’t want their own mansion?
6. Set It Up: Place some comfy bedding inside for your furry friend to snuggle in, and voila! Your Convertible Canopy Dog House is ready for its first occupant.
Optional Add-ons/Variations:
– Consider using bright outdoor fabric for the canopy to add a pop of color, or choose patterns that match your home’s vibe. Don’t be afraid to get artistic—your dog will love their custom space.
Pro Tip:
Before you start, think about weather-proofing your pallets. Applying a sealant or choosing treated lumber can prevent moisture damage over time, ensuring your doghouse stands strong against the elements.
Plus, a sturdy doghouse means your pup can enjoy their space in all seasons, which is a win-win for everyone involved! Elevate your pet’s style with luxury dog ramp furniture to complement their new cozy retreat.
6. Insulated Winter Dog House
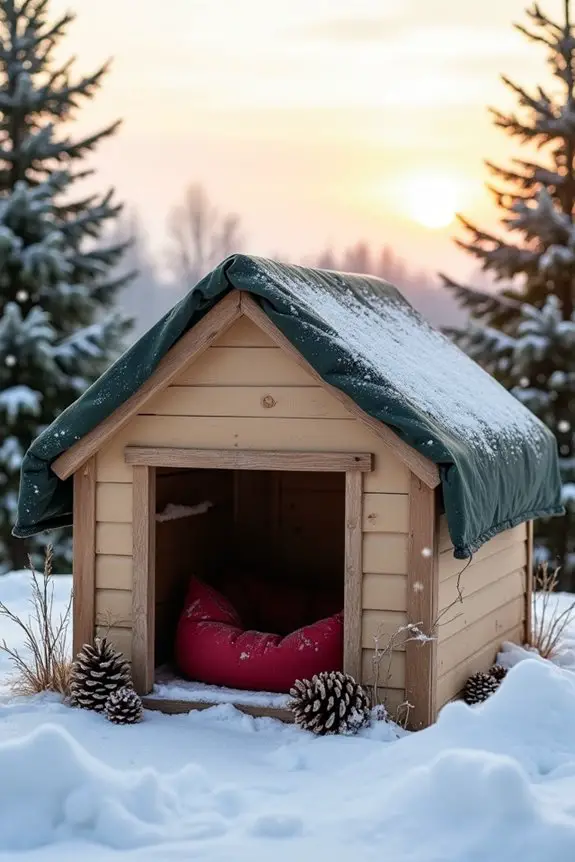
As the temperatures drop and winter rolls in, your furry friend deserves a warm and toasty retreat from the chilly outdoors. Enter the Insulated Winter Dog House. This DIY project not only keeps your pup snug and cozy but also saves you money compared to buying a fancy dog house designed specifically for winter.
Plus, creating a custom home for your dog means you can cater to their unique needs and style. Let’s make certain your best friend has a comfortable shelter, even when the temperature dives.
Materials Needed:
- 1 large wooden shipping crate or plywood (for the walls)
- Styrofoam insulation panels (for insulation)
- Heavy-duty waterproof tarp or vinyl (for the roof)
- Wood screws or nails
- Measuring tape
- Saw (if cutting wood)
- Hammer or drill
- Sandpaper (for smooth edges)
- Optional: wood paint or stain (for aesthetics)
- Optional: a soft, warm dog bed (for ultimate comfort)
Step-by-Step Instructions:
1. Select a Location: Find a sheltered area in your yard that’s protected from the wind; this could be next to a wall or under a sturdy tree. Dogs appreciate a little windbreak just like we do.
2. Build the Base: Start with the wooden shipping crate as a base. If using plywood, cut it to size and confirm it’s large enough for your dog to stand up and turn comfortably.
Nail or screw the corners together for stability.
3. Insulate the Walls: Measure the walls and cut the Styrofoam insulation to fit snugly inside. Attach the insulation panels to the inside walls using wood screws or glue.
This step is essential; it keeps the warm air in and the cold air out.
4. Attach the Roof: Cover the top of your dog house with the heavy-duty waterproof tarp or vinyl to create a barrier against rain and snow. Make sure it overhangs slightly to prevent water from entering.
You can secure it with screws or ropes.
5. Build a Door: Cut a flap in the front of the dog house for an entrance, ensuring it’s not too big to let in drafts.
You can even hang a piece of heavy fabric to create a flap door that swings open for easy entry.
6. Personal Touches: If you’re feeling artsy, use wood paint or stain to add some flair to your dog house.
Maybe include a fun nameplate for your pup, too. Every little detail makes the house feel like home.
7. Add Comfort Inside: Finally, lay down a plush dog bed or blanket inside the house to give your dog a super comfy spot to curl up on when it gets chilly.
Trust me, they’ll appreciate this cozy touch.
Optional Add-ons/Variations:
– Consider using eco-friendly paint or natural wood finishes if you want to go green.
Your pooch won’t mind how it looks, but you’ll feel good knowing you’re being environmentally conscious.
– If you want to level up your dog house, you could add an insulated door flap or a small heating pad that’s safe for pets, giving your dog an extra cozy corner on those frosty nights.
Pro Tip:
Before you start, double-check that the house is elevated slightly off the ground.
A few inches can prevent moisture or snow from seeping in, keeping your dog dry and warm throughout the winter months.
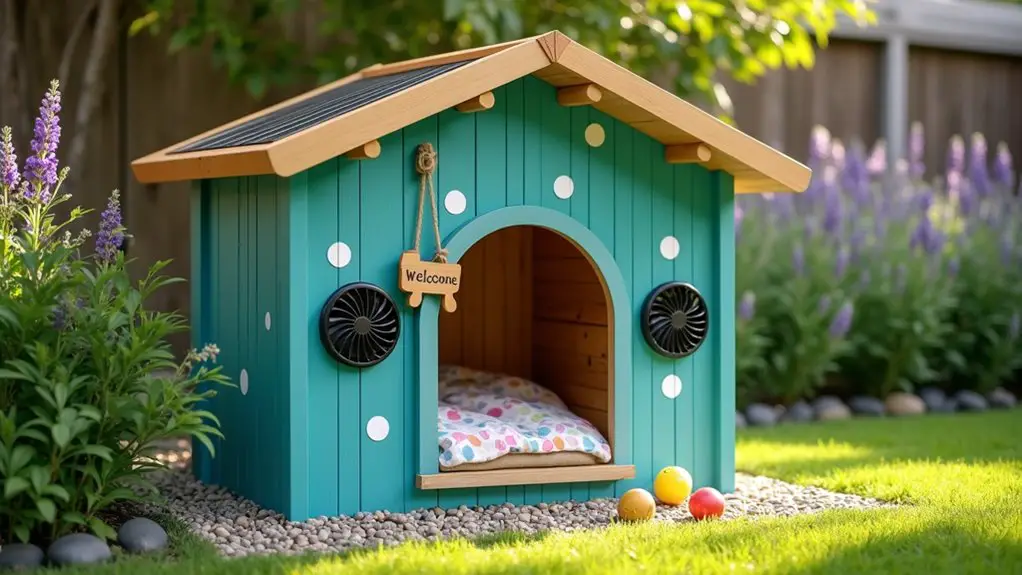
7. Solar-Powered Ventilation Dog House
Imagine this: It’s a sweltering summer day, and the sun is roasting everything in sight. Your furry friend trots outside, searching for a cool spot but only finds a baking pavement. Enter the Solar-Powered Ventilation Dog House—an ingenious solution that’s not just a roof over their heads. This DIY project offers your dog a comfy, quiet retreat while keeping them cool without breaking the bank on electricity bills. Not to mention, it spruces up your yard, almost like giving your dog a spa getaway.
Materials Needed:
- 1 large wooden pallet or plywood (for the base)
- 2 or more solar-powered fans (small size)
- Ventilation ducts (plastic or metal)
- Heavy-duty waterproof paint (for weatherproofing)
- Wood screws or nails
- Measuring tape
- Saw (for cutting wood)
- Hammer or drill
- Sandpaper (for smooth edges)
- Optional: decorative paint or wood stain (for personalization)
Step-by-Step Instructions:
- Find the Perfect Spot: Choose a well-shaded area in your yard to reduce direct sunlight hitting the dog house. It should be away from direct wind and have a bit of natural shelter.
- Create the Base: Use your wooden pallet as the foundation. If you’re using plywood, cut it to about 4 feet by 4 feet for the base, ensuring it’s sturdy enough to support the house. Secure the corners with nails or screws for added stability.
- Build the Walls: Attach walls made from plywood (at least 4 feet high) around the base. Leave a gap for the entrance at the front, which should be about 2 feet high and 1.5 feet wide for easy access.
- Install the Ventilation System: Cut holes in the upper part of the walls and install the ventilation ducts to allow heat to escape. Attach the solar-powered fans inside the ducts, ensuring they face outward. With the sun powering these, they’ll create a breeze when it’s needed most.
- Weatherproof the House: Give the exterior a good coat of heavy-duty waterproof paint to protect the wood from rain and moisture. This will keep your dog house looking sharp and lasting longer—no one wants a soggy dog house.
- Personalize Your Pup’s Space: If you’re feeling creative, paint the walls in fun colors or patterns that match your style. Throw in a cozy dog bed to make it ultra-inviting.
Optional Add-ons/Variations:
- Custom Colors: Feel free to customize the paint colors. Bright reds, blues, or even polka dots—whatever screams “happy dog house.”
- Use Upcycled Materials: Consider making the base from old tires or wooden pallets for a sustainable twist that adds character.
Pro Tip:
Before starting, make sure the solar-powered fans you choose are rated high enough to cool your dog house effectively.
And don’t forget to check if they’re securely mounted, so they stay in place even during a summer storm.
Oh, and here’s a thought: consider putting a little extra padding in that dog bed. After all, isn’t your dog just a royal snoozer at heart?
Extra Tips & Ideas
While your pup is sure to love their new outdoor dog house, there are plenty of ways to add that extra touch of comfort and style.
Think about putting down a cozy bed or blankets—they’ll appreciate a soft spot to curl up. You could hang a few toys inside; after all, a dog house needs some fun, too.
Don’t forget about some tasty treats—maybe a little treat jar attached outside? How about painting the house in fun colors or adding their name to show off their personal space?
And if you’re feeling crafty, consider building a small roof garden.
Picture it—a dog house with style and flair, perfect for your pup’s outdoor adventures. Trust me, they’ll love it.
Frequently Asked Questions
What Materials Are Best for Building a Durable Dog House?
Use weather-resistant materials like treated wood, plywood, or metal for durability. Insulation, such as foam boards, helps regulate temperature, while waterproof roofing materials protect against rain. Non-toxic finishes or paints add an extra layer of protection.
How Much Space Does My Dog Need Inside the House?
Your dog needs enough space to stand, turn around, and lie down comfortably. For small breeds, aim for 24×24 inches; medium dogs require about 30×30 inches; large dogs might need around 36×36 inches or more.
Is Ventilation Important for Outdoor Dog Houses?
Absolutely, ventilation’s essential for outdoor dog houses—like oxygen for a fire! It keeps your dog cool in summer and prevents moisture buildup, ensuring a comfortable environment. Don’t overlook proper airflow; your pup’s happiness relies on it!
Can I Insulate My Dog House for Winter Use?
Yes, you can insulate your dog house for winter use. Adding foam board insulation, straw, or thermal blankets helps keep your pup warm and comfortable, ensuring they stay cozy during chilly months. Your dog’s comfort matters!
How Do I Keep My Dog House Clean and Pest-Free?
Keeping your dog house clean and pest-free is like tending a garden. Regularly clean out food scraps, apply natural repellents, and inspect for damage. A tidy space helps your furry friend thrive and stay healthy.
Conclusion
In the end, creating the perfect dog house isn’t just about shelter; it’s about crafting a cozy retreat your furry friend will adore. Did you know that dogs, like humans, can feel the temperature changes? A well-insulated house can keep them comfy in both the heat and cold. So, whether you go for a stylish canopy or a cozy pallet design, remember—it’s all about making their outdoor time as snuggly as possible. Your pup will thank you, trust me.

Amr Mohsen is a software engineer who traded his keyboard for a leash — at least on weekends. His love for dogs inspired him to share what he learns as a dog owner and enthusiast, bringing a detail-oriented, research-driven perspective to every article he writes. If it’s about dogs, he’s probably already looked it up twice.

