Ever notice how your dog can be a little whirlwind of energy? It’s like they’ve got a secret stash of batteries hidden somewhere. But don’t worry, I’ve got your back. With a few simple DIY enrichment projects, you can turn that energy into fun, engaging activities that make your pup wag their tail in delight. From puzzle toys to treat-dispensing balls, these ideas are not only easy but also a great way to bond with your furry friend. Ready to get started?
Interactive Puzzle Toys
When you think about keeping your pup entertained, have you ever considered interactive puzzle toys? These clever contraptions can turn your living room into a bustling doggy amusement park.
You can easily create your own dog enrichment ideas DIY style. Grab an empty muffin tin, toss some treats in the cups, and cover them with tennis balls. Voilà! Your pup’s got a new challenge.
Or, take a sturdy cardboard box, fill it with crumpled paper, and hide their favorite toys inside. Watching them dig through is like seeing a kid at a treasure hunt.
Just remember, the mess is part of the fun. Who knew keeping your dog busy could lead to a mini construction zone in your home?
Our Collection
Let’s talk about some fun ways to keep your pup engaged.
From snuffle mats that turn mealtime into a treasure hunt to treat-dispensing balls that make playtime delicious, our collection has something for every furry friend.
And don’t forget those homemade frozen treats—perfect for hot days and even better than that store-bought stuff you’ve been eyeing.
1. Snuffle Mat for Scent Work
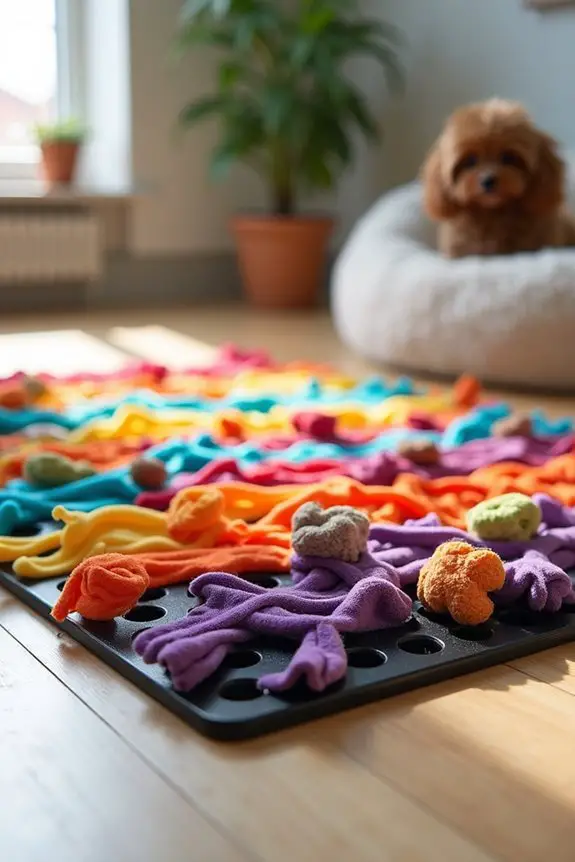
If your pup loves to sniff and explore, a snuffle mat is the perfect DIY project for you. These mats are designed to engage your dog’s natural foraging instincts, making mealtime more than just a quick chow-down. Plus, they save you the cost of store-bought versions and can be customized to match your home decor. It’s a win-win for you and your furry friend. Additionally, using a premium automatic dog feeder can complement your dog’s enrichment activities by ensuring they receive their meals on time, allowing for more play and exploration.
Materials Needed:
- A rubber sink mat (with holes, about 12×18 inches)
- Fleece fabric (in various colors, at least 1 yard)
- Scissors
- Ruler (optional)
- Pencil or fabric chalk (optional)
Step-by-Step Instructions:
- Cut the Fleece: Start by cutting your fleece into strips. Each strip should be about 1 inch wide and 6-8 inches long. Don’t worry about making them perfect; a little variety adds character, right?
- Prepare the Mat: Take your rubber sink mat and lay it flat on a surface. This is where the fun begins!
- Tie the Strips: Take a strip of fleece and poke one end through a hole in the sink mat. Pull it halfway through, then tie a simple knot. Repeat this process in different holes until the mat is nicely filled. Aim for a mix of colors for a visually appealing mat.
- Fill It Up: Continue tying strips until the mat is full. Don’t be shy—more fleece means more sniffing fun for your dog. You want it to be a challenge but not impossible.
- Test It Out: Once you’re done, toss a handful of kibble or treats onto the mat and watch your dog go to town. It’s like a treasure hunt, but without the pirate hat.
Optional Add-ons/Variations:
- Colorful Combinations: Feel free to use different types of fabric, like cotton or even old T-shirts, to give your mat a unique flair.
- Size it Up: Want something bigger? Just use a larger rubber mat and more fleece strips. Your pup will thank you for the extra sniffing area.
Pro Tip:
To keep your snuffle mat fresh and clean, toss it in the washing machine on a gentle cycle. Just be sure to air dry it afterward, as the rubber mat isn’t a fan of heat.
Plus, keeping it clean helps maintain your dog’s interest in the game. After all, who wants to dig through a stinky mat for treats?
Now that you’ve got your snuffle mat ready, watch your dog engage their brain and nose. It’s a simple project that brings joy to your pet while adding a touch of creativity to your home. Happy crafting!
2. Treat-Dispensing Ball
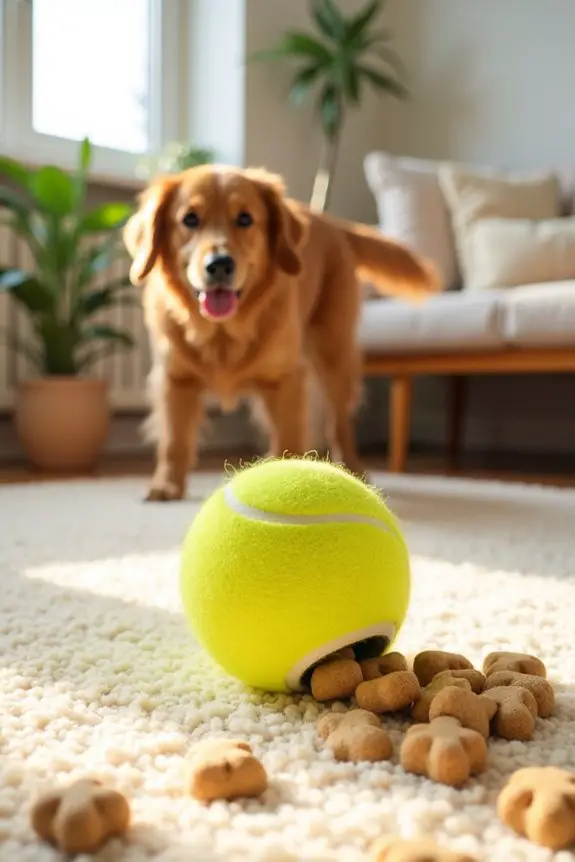
Looking for a way to keep your dog entertained and mentally stimulated? A DIY treat-dispensing ball is just what you need! This simple project isn’t only a fun activity for your pup but also saves you money compared to store-bought versions. Plus, it engages your dog’s natural instincts to hunt and forage, turning treat time into an exciting game.
Materials Needed:
- A clean plastic tennis ball (or a similar-sized rubber ball)
- A utility knife or scissors
- Dog treats (small enough to fit through the hole)
- Sandpaper (optional, for smoothing edges)
Step-by-Step Instructions:
- Prepare the Ball: Start with a clean tennis ball. If you’re using an old one, make sure it’s free from dirt and grime. You don’t want your pup munching on a germy ball, right?
- Create an Opening: Using your utility knife or scissors, carefully make a small slit or hole in the ball. Aim for about 1 inch in length—just big enough for the treats to fall out but not so big that they spill everywhere.
- Smooth the Edges: If you used a knife, the edges might be sharp. Take a little sandpaper to smooth them out. You definitely don’t want your furry friend getting a nasty surprise while trying to get their treats.
- Fill It Up: Pop some of your dog’s favorite treats inside the ball. Make sure they’re small enough to fit through the hole but large enough that your pup can’t just gulp them down in one bite.
- Seal it Up: Give the ball a little shake to mix the treats around, then toss it to your dog and watch them go! They’ll have to roll, nudge, and paw at the ball to get those tasty rewards.
Optional Add-ons/Variations:
- Decorate It: Want to jazz up your treat-dispensing ball? Use non-toxic paint or colorful tape to decorate it! You can turn that plain old ball into a funky piece of art that matches your dog’s personality or your home decor.
- Add More Holes: If your pup’s a pro at this game, try making a few more holes. More openings mean more challenges, and who doesn’t love a little extra brain workout?
Pro Tip:
If you’re worried about your dog chewing through the ball, consider using a thicker, more durable rubber ball instead. They’re less likely to get destroyed, and they can handle a bit more adventure.
Plus, always supervise your pup during playtime, especially with DIY toys. You want the fun to be safe! Essential tools for baking will help you create even more exciting homemade treats to fill your new toy.
Now that you have your treat-dispensing ball, get ready for some serious tail wagging. It’s a simple, cost-effective way to keep your dog entertained, and you might just get a kick out of watching them figure it out. Happy crafting and playing!
3. Kong Stuffing Recipes
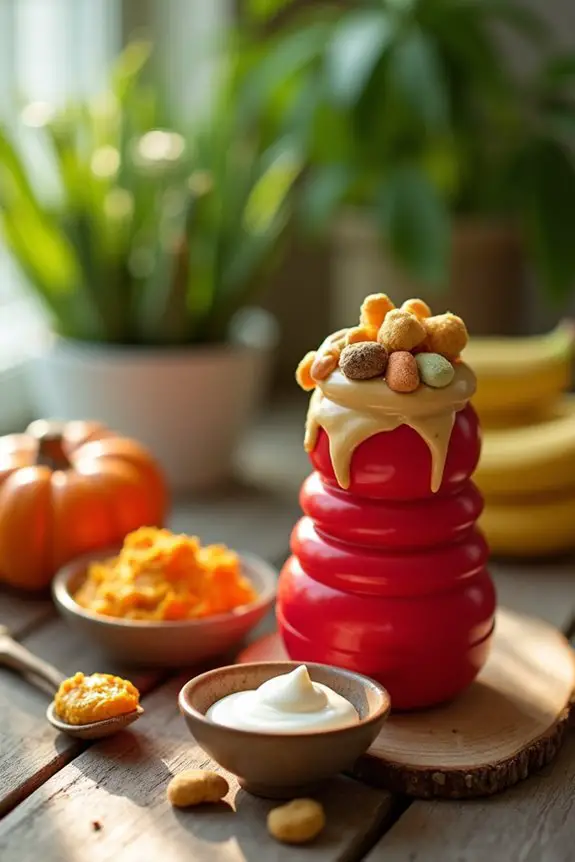
If you want to keep your dog engaged and satisfied, stuffing a Kong toy with tasty treats is an absolute game-changer. Not only does it provide hours of entertainment, but it also helps reduce anxiety and boredom in your furry friend.
Plus, making your own stuffing recipes can save you some cash while letting you control what goes into your pup’s snack. So, let’s turn that Kong into a doggy delight! Premium dog supplies can enhance your pup’s playtime experience even further!
Materials Needed:
- A Kong toy (size appropriate for your dog)
- Peanut butter (make sure it’s Xylitol-free)
- Dog-safe yogurt (plain, unsweetened)
- Canned pumpkin (not the spiced pie filling)
- Dog treats (small bite-sized pieces)
- Optional: mashed bananas, grated carrots, or cooked sweet potatoes
Step-by-Step Instructions:
- Choose Your Base: Start with a base for your stuffing. Peanut butter and yogurt are excellent options. Grab your Kong and scoop some peanut butter into the bottom. This sticky goodness will keep your pup motivated to dig deeper.
- Add Some Flavor: Next, layer in a spoonful of dog-safe yogurt or canned pumpkin. Both are nutritious and add a tasty variety to the mix. Just think of it as a little gourmet meal for your pup—how fancy!
- Mix It Up: Now, toss in some dog treats. You can use small kibble, crunchy biscuits, or even bits of your dog’s favorite treats. This will give your dog a reason to work for their snack, and it’s oh-so-fun to watch them figure it out.
- Top it Off: Finish your Kong by adding another layer of peanut butter or yogurt on top. This seals in all the deliciousness and makes the stuffing extra enticing. Plus, it gives your pup a real challenge to lick it all out.
- Freeze for Extra Fun: For an added challenge, pop the stuffed Kong in the freezer for a few hours. This makes the stuffing last longer and adds a delightful chill, perfect for warm days. Just remember to supervise your pup as they enjoy their icy treat.
Optional Add-ons/Variations:
- Fruity Twist: Want to get fancy? Mash up a ripe banana and mix it with the yogurt for a sweet, fruity treat. Dogs love bananas, and it’s a great way to sneak in some extra nutrients.
- Veggie Delight: Feeling adventurous? Grate some carrots or mix in mashed sweet potatoes for a healthy, colorful twist. Your dog won’t know what hit them.
Pro Tip:
Always check the ingredients of any food you use. Some human foods can be harmful to dogs, even in small amounts.
And remember, moderation is key; make sure the Kong stuffing fits into your dog’s daily calorie intake to keep them healthy and happy.
4. DIY Agility Course Setup
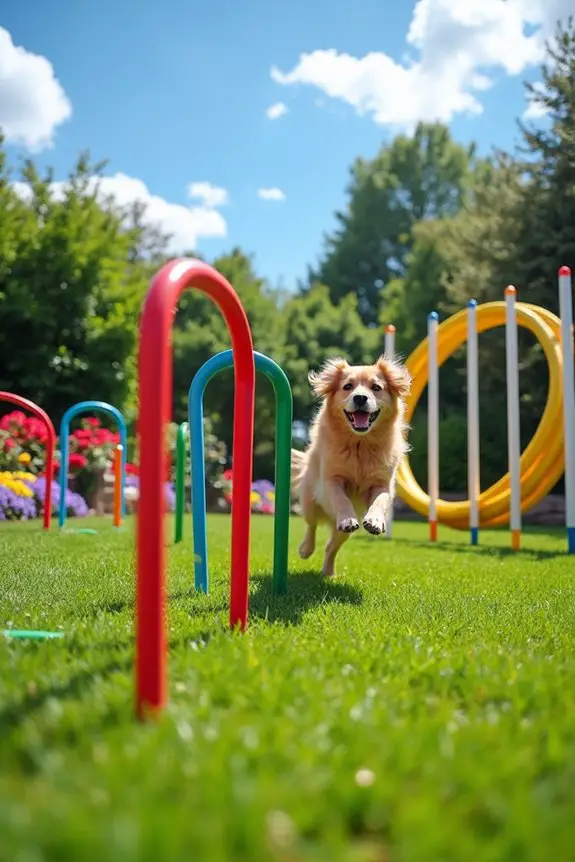
Creating a DIY agility course for your dog can be a fun and exciting way to bond with your furry friend while keeping them physically active. Not only does it provide a great outlet for their energy, but it also helps improve their skills, focus, and confidence.
Plus, building your own agility equipment can save you money compared to purchasing it pre-made, and it allows you to customize the setup to fit your backyard or living space. Let’s get started on turning your yard into a doggy playground!
Materials Needed:
- PVC pipes (1-inch diameter)
- PVC elbows and T-joints (matching diameter)
- Plastic cones or buckets (for weaving)
- Jumping hoops (you can make them with hula hoops)
- Tape measure
- Saw (for cutting PVC pipes)
- Pipe cutter or hacksaw (safety first)
- Outdoor space (your backyard or a local park)
Step-by-Step Instructions:
1. Plan Your Course Layout: Before you start building, visualize what you want your agility course to look like. You might want to include jumps, weave poles, and tunnels. Sketching it out can help you see how everything will fit together.
2. Cut the PVC Pipes: Based on your design, cut the PVC pipes into various lengths using a saw. For jumps, you might want 4-6 pieces that are about 3-4 feet long; for weave poles, cut about 6 pieces to 3 feet long.
Remember, measure twice, cut once—no one likes a wonky jump.
3. Assemble the Jumps: Using the T-joints and elbows, create jump bars by connecting the cut pipes. Make sure they’re sturdy and spaced appropriately for your dog’s height. If your dog is a small breed, you may want lower jumps; for larger breeds, a bit higher works best.
4. Set Up Weave Poles: Insert the remaining cut pipes into the ground in a straight line, spaced about 2-3 feet apart. This will serve as your weave poles. If your yard is soft, you can simply push them into the ground; if it’s hard, make a small hole first.
5. Create the Hoops: For the jumping hoops, take a hula hoop and secure it to the ground using stakes or weights. You can also create a hoop using two pieces of PVC bent into a circle.
Make sure they’re stable so they don’t fall over when your dog jumps through.
6. Test the Setup: Once everything is assembled, walk your pup through the course before you let them loose. Show them what to do, and encourage them with treats.
This way, they won’t think you’ve turned the yard into a doggy obstacle course just to confuse them.
Optional Add-ons/Variations:
- Colorful Course: Use colorful spray paint to decorate your PVC pipes. You can even use different colors for each obstacle to make it visually appealing for you and your pup.
- Add a Tunnel: If you’re feeling adventurous, make a tunnel using a large cardboard box or a kids’ play tunnel. Your dog will love the added challenge of crawling through.
Pro Tip:
Always verify that the equipment is sturdy and safe for your dog. Check for any sharp edges on the cut PVC and smooth them down.
And remember to supervise your dog during their agility training sessions to prevent any accidents. If they’re anything like my dog, who thinks he’s a professional athlete after just one jump, you’ll want to keep an eye on their enthusiasm!
Additionally, choosing the right premium dog food brand can enhance your dog’s overall health and energy levels, which is crucial for their performance during agility training.
5. Homemade Frozen Treats
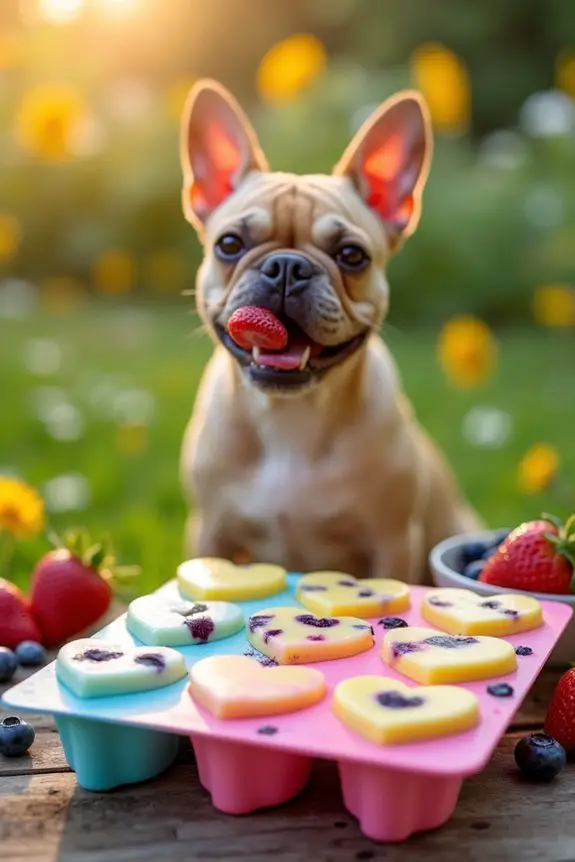
As the temperature rises, there’s nothing quite like a cool, invigorating treat to keep your furry friend happy and hydrated. Making homemade frozen treats for your dog isn’t only a delightful way to show them you care, but it also allows you to control the ingredients and avoid any harmful additives found in store-bought options. Additionally, these treats can complement a diet of premium dog food for French bulldogs, ensuring your pup gets the best nutrition while enjoying a tasty snack.
Plus, it’s a fun way to bond with your pup as you whip up some tasty goodies together.
Materials Needed:
- Dog-safe yogurt (plain, unsweetened)
- Peanut butter (make sure it’s xylitol-free)
- Bananas (ripe ones work best)
- Ice cube trays or silicone molds
- Mixing bowl
- Spoon or spatula
- Freezer
Step-by-Step Instructions:
- Prepare Your Ingredients: Start by gathering all your ingredients. If you’re using bananas, peel and slice them into small pieces. This is a perfect time to use those overly ripe bananas that you keep saying you’ll use for banana bread—sorry, banana bread, but the dogs need a treat today.
- Mix It Up: In a mixing bowl, combine about 1 cup of dog-safe yogurt with 1/4 cup of peanut butter. Use a spoon or spatula to mix until well blended. If you want to add a little flair, toss in a few banana pieces for texture and flavor.
- Fill the Molds: Spoon the mixture into your ice cube trays or silicone molds. You can get creative here—if you have different molds, you can make fun shapes. Just be careful not to overfill them; you don’t want a yogurt explosion in your freezer.
- Freeze: Place the trays or molds in the freezer and let them chill for at least 4 hours, or until solid. This is a good time to take a break, sip some iced tea, and let your pup wonder why they can’t have any yet.
- Serve and Enjoy: Once frozen, pop the treats out of the molds and let your dog enjoy a cool snack. You might want to take them outside for this, as things can get a little messy—yogurt dribbles don’t mix well with your living room carpet.
Optional Add-ons/Variations:
- Fruit Fusion: Try adding different fruits like blueberries, strawberries, or apples (without seeds) to the yogurt mixture for a burst of flavor and nutrition. Just make sure they’re dog-safe.
- Meaty Goodness: For a savory twist, blend in some low-sodium chicken or beef broth instead of yogurt. Just be sure to check that all ingredients are safe for your pup.
Pro Tip:
Always keep an eye on your dog while they enjoy their frozen treat—some pups can be a bit too enthusiastic and end up with a brain freeze.
Also, remember that moderation is key. Too many treats can lead to an upset tummy. After all, you want to keep those tail wags coming, not a sad pup with a case of the rumbles.
6. Cardboard Box Treasure Hunt
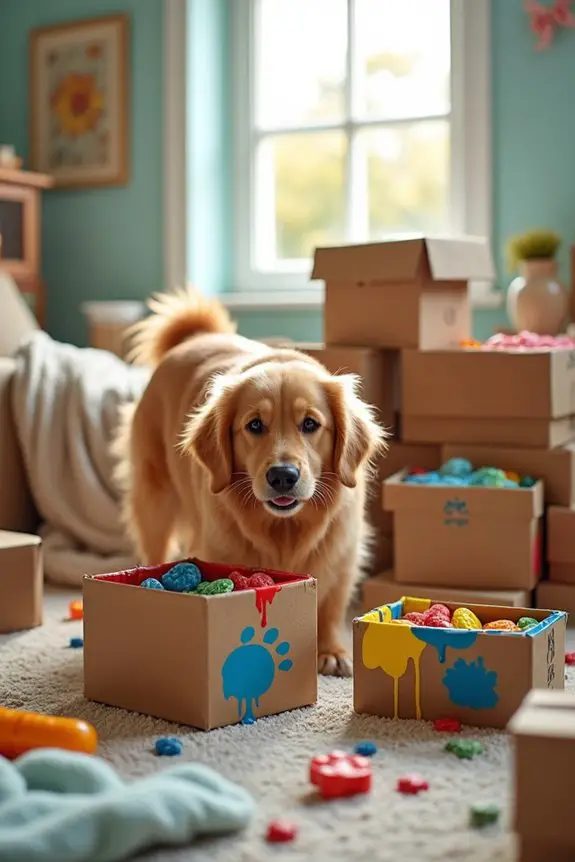
Who doesn’t love a good treasure hunt? This DIY cardboard box treasure hunt is a fun and engaging way to keep your dog entertained and mentally stimulated. Not only does it save you money by repurposing old boxes, but it also provides a great outlet for your pup’s natural instincts to sniff, explore, and dig. Plus, watching them figure out the hunt is sure to bring a smile to your face.
Materials Needed:
- Empty cardboard boxes (various sizes)
- Scissors or a box cutter
- Treats or favorite toys
- Blankets or towels for added texture (optional)
- Dog-safe paint or markers (optional for decoration)
Step-by-Step Instructions:
- Gather Your Boxes: Start by collecting a few empty cardboard boxes. Different sizes make the hunt more interesting. Aim for at least two or three boxes to create a mini treasure trove.
- Prepare the Boxes: If you want to get fancy, you can use scissors or a box cutter to cut holes or flaps in the boxes, creating fun entry points for your dog. Just be careful—no one wants a cardboard paper cut.
- Hide the Treats: Place some of your dog’s favorite treats or toys inside the boxes. You can sprinkle some treats at the bottom or hide them under blankets for an added challenge. The goal is to entice your pup to use their nose and paws to uncover the goodies.
- Set the Scene: Arrange the boxes in an area where your dog usually plays, like the living room or backyard. They can be stacked, spread out, or even placed in a “maze” formation to keep things exciting.
- Let the Hunt Begin: Bring your dog over to the setup and encourage them to explore. You can use phrases like “find it!” or “go hunt!” to get them excited about the treasure hunt. Be ready for the adorable chaos as they dig and sniff.
- Celebrate the Discovery: Once your dog finds a treat or toy, celebrate their success with lots of praise and maybe even a little dance. Trust me, your dog will love the fanfare just as much as the treats.
Optional Add-ons/Variations:
- Decorate the Boxes: Get creative by using dog-safe paint or markers to decorate the boxes. You could turn them into treasure chests with colorful designs or even add your pup’s name for a personal touch.
- Create a Challenge: For an extra challenge, add a layer of difficulty by placing some boxes inside larger boxes. This way, your dog has to figure out how to get to the prize.
Pro Tip:
Always supervise your dog during the treasure hunt. Some dogs might be tempted to chew on the cardboard, so keep an eye out for any potential munching. If they’re heavy chewers, consider reinforcing the boxes with tape or opting for sturdier cardboard. Happy hunting!
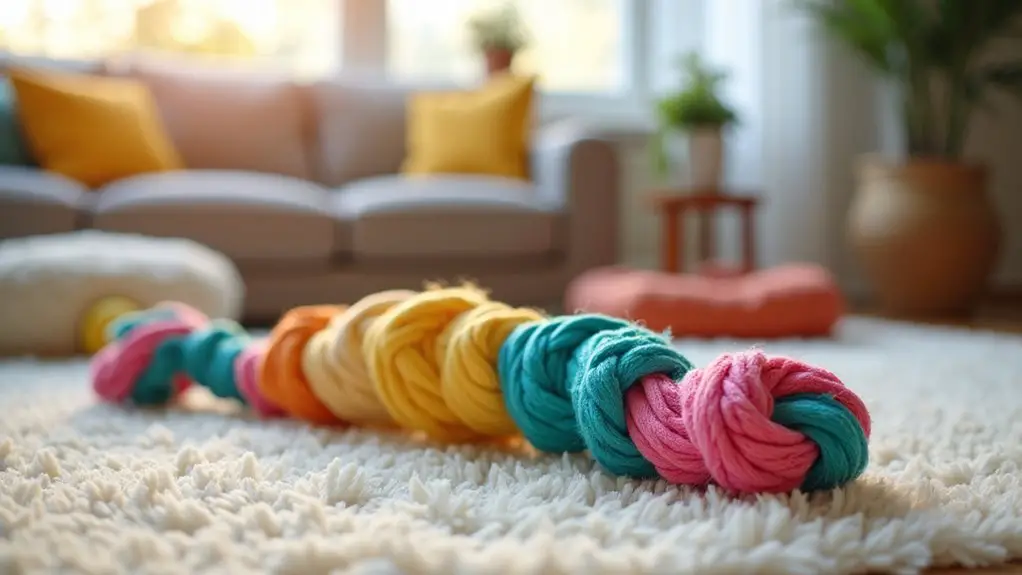
7. Scented DIY Tug Toys
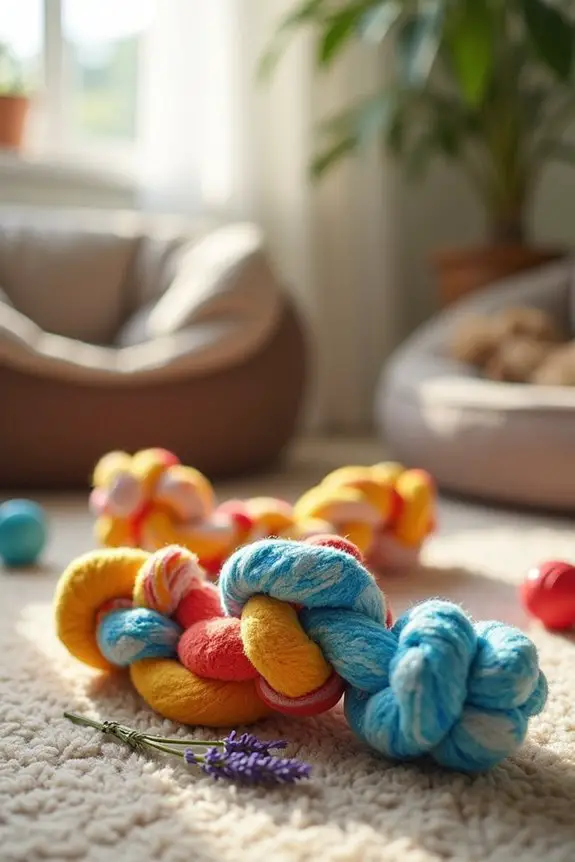
If your pup loves to tug and play, then these scented DIY tug toys are a fantastic way to keep them engaged while saving a few bucks. Not only are they simple to make, but they also add a personal touch to your dog’s toy collection.
Plus, the added scent can make playtime even more exciting, stimulating their sense of smell and keeping them entertained for hours. Let’s get crafting!
Materials Needed:
- Old t-shirts or towels (soft and durable fabric)
- Scissors
- Dog-safe essential oils (like lavender or chamomile)
- A bowl (for mixing oils, optional)
- A small spray bottle (optional, for easier application)
Step-by-Step Instructions:
1. Cut the Fabric: Start by cutting your old t-shirts or towels into strips about 2 inches wide and 12-16 inches long. The more strips you have, the thicker your tug toy will be.
And yes, I know it feels a bit like a DIY fashion show gone wrong.
2. Mix the Scent: In a bowl, mix a few drops of your chosen dog-safe essential oil with a bit of water. If you’re using a spray bottle, pour the mixture in there for an easy application.
3. Scent the Strips: Take each fabric strip and lightly spritz or rub the scented mixture onto them. Be careful not to soak them; just a little scent goes a long way.
Just think of it like giving your fabric a little spa day.
4. Braid the Strips: Take three strips and tie a knot at one end to secure them. Then, braid them together tightly. If you have extra strips, you can add them in to create a thicker toy.
Once you reach the end, tie another knot to finish it off.
5. Let It Dry: If you’ve used a lot of liquid, let your tug toy air dry for a bit. You want it to be ready for some serious tugging and chewing without sogginess.
6. Introduce the Toy: Once your tug toy is ready and smelling divine, it’s time for the ultimate introduction. Show it to your dog, encourage them to tug, and watch the fun unfold.
Just be prepared; you might end up as the tug-of-war referee.
Optional Add-ons/Variations:
- Colorful Combinations: Use fabric in different colors or patterns to create a vibrant tug toy. You could even use seasonal themes—think reds and greens for Christmas or pastels for spring.
- Add a Squeaker: For an extra layer of excitement, consider inserting a squeaker toy from an old plush toy into the middle of your braid before tying off the ends. Your dog will go wild for the surprise.
Pro Tip:
Always supervise your pup while they play with their new tug toy to guarantee they don’t chew off any pieces.
And if you notice any wear and tear, it’s best to replace it before it becomes a choking hazard. Your dog will appreciate a fresh toy, and you’ll be the hero of playtime.
Extra Tips & Ideas
While you may think your dog’s enrichment routine is pretty solid, there’s always room for a little creativity.
Have you tried a DIY scavenger hunt? Just hide treats around the house and watch your pup turn into a furry detective.
Or how about a homemade puzzle feeder? Grab a muffin tin, toss in some kibble or treats, and cover each cup with a tennis ball. It’s simple, fun, and keeps them guessing.
If you’re feeling adventurous, make a frozen treat by mixing peanut butter with some yogurt and pouring it into an ice cube tray. Trust me, your dog will think you’re a culinary genius.
Frequently Asked Questions
What Materials Are Safe for DIY Dog Toys?
You can use materials like cotton fabric, old t-shirts, tennis balls, and natural rope. Avoid anything with small parts, toxic substances, or sharp edges. Make sure everything’s clean and safe for your furry friend!
How Long Should Enrichment Sessions Last?
Enrichment sessions should last about 15 to 30 minutes. You’ll want to keep sessions engaging but not overwhelming, allowing your pup to stay focused and enjoy the experience without losing interest or becoming fatigued.
Can I Use Household Items for Dog Puzzles?
Absolutely, you can use household items for dog puzzles! Items like cardboard boxes, old towels, or plastic bottles can stimulate your pup’s mind. Just make certain they’re safe and supervise your dog during playtime.
Are There Any Breeds That Need More Enrichment?
Yes, some breeds like Border Collies, Australian Shepherds, and Jack Russell Terriers thrive on more enrichment. They’re highly intelligent and active, so you’ll need to provide them with challenging activities to keep them happy and engaged.
How Often Should I Change Enrichment Activities?
You should change enrichment activities every few days to keep your dog engaged and excited. Regularly introducing new challenges helps prevent boredom and stimulates their mind, ensuring they stay happy and mentally active.
Conclusion
So, there you have it—seven fun DIY enrichment ideas that’ll keep your pup entertained and happy! Think of it as a way to turn your living room into a canine playground. Whether you’re stuffing Kongs or setting up a cardboard treasure hunt, remember, your dog’s happiness is just a project away. And hey, if you end up with more dog treats stuck to your hands than in the toys, you’re not alone. It’s all part of the fun, right?