Your golden retriever just knocked over the water bowl — again — and he’s been staring at you with those big eyes for the past hour like you personally canceled his favorite show.
I get it. A bored dog is basically a tiny, fluffy tornado with a grudge.
My girl Luna used to chew through everything when she didn’t get enough mental stimulation. Pillows, socks, one very expensive throw blanket I got from a Pinterest rabbit hole at 2 AM. It was a lot.
Here’s the thing nobody tells you — your dog doesn’t need expensive gadgets or a fancy trainer. He needs his brain turned on.
Good news: these 7 DIY dog enrichment ideas cost almost nothing and take maybe 20 minutes to throw together. Your pup gets the mental workout he’s been begging for, and your throw blankets? Safe at last.
#1: The T-Shirt Rope Tug Toy Your Golden Will Absolutely Destroy (And You’ll Love Making It)
You know that moment when your golden drops a slobbery tennis ball on your lap for the seventh time and just… stares at you? Like, full eye contact, tail going a hundred miles an hour. Yeah. That’s the moment this project was made for.
I made my first batch of these on a Sunday afternoon with a pile of old blue t-shirts I’d been meaning to donate for months. Sitting on the kitchen floor, cutting fabric into strips — it was actually kind of meditative.
Materials & Tools:
– 2-3 old cotton t-shirts (blue, striped, or any color)
– Sharp fabric scissors
– A ruler or cutting mat (optional but helpful)
– Your hands — that’s genuinely it
Prep Time: 10 minutes | Active Project Time: 20-30 minutes | Difficulty Level: Beginner
Instructions
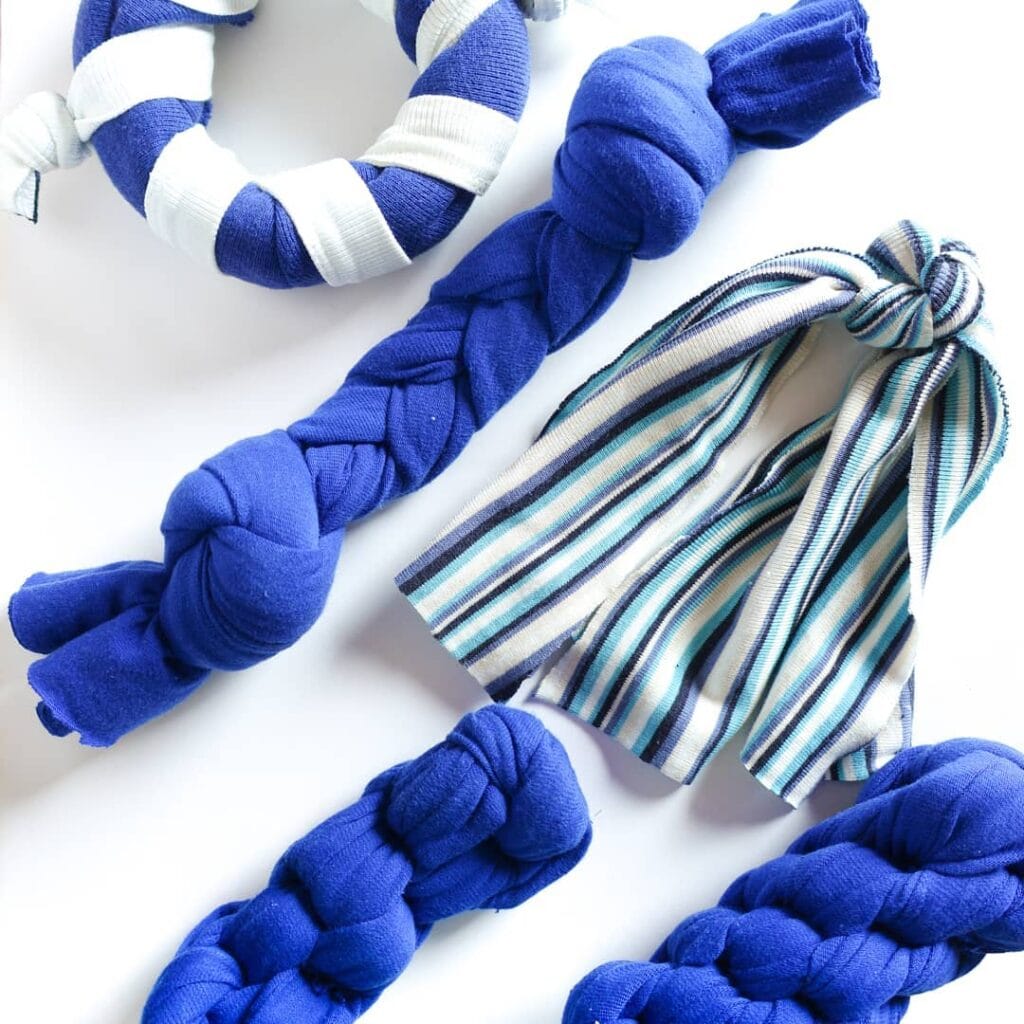
Cut each t-shirt into 1.5 to 2-inch wide strips along the body of the shirt, going around the circumference so you get long continuous loops. Then cut each loop open so you have individual long strands. For the braided rope toy you see in the image, gather six strands cut to about 24 inches each and tie them together in a tight overhand knot at one end.
Braid them in two sets of three, pulling firm after each cross so the braid stays dense and holds up to serious tugging. When you reach the end, tie another big overhand knot — make it chunky, because that’s what your dog actually grabs onto. For the knotted bone-style toy, take four strands at 30 inches each, knot one end, then tie a knot every 4-5 inches down the length.
The cotton-on-cotton texture gives your dog’s teeth something to really grip — that resistance during tug-of-war builds jaw strength and gives her a mental outlet, so she’s genuinely worn out after a play session instead of still bouncing off the walls at 9pm.
For the striped version in the image, mixing a solid blue t-shirt with a multi-stripe cotton shirt creates visual contrast your dog won’t care about but you absolutely will when it’s sitting in your entryway basket.
Toss the finished toys in a mesh laundry bag and machine wash on cold when they get gross. Which they will. Quickly.
📸 Photo credit: Instagram @khaleesi_theblackgsd
#2: DIY Yak Chew Holder for Dogs Who Guard Their Treats Like It’s Their Job
You know that moment when your girl drops her chew on the rug, then loses her mind trying to pin it down with one paw while it slides everywhere? Yeah. My dog did that for months before I found this fix.
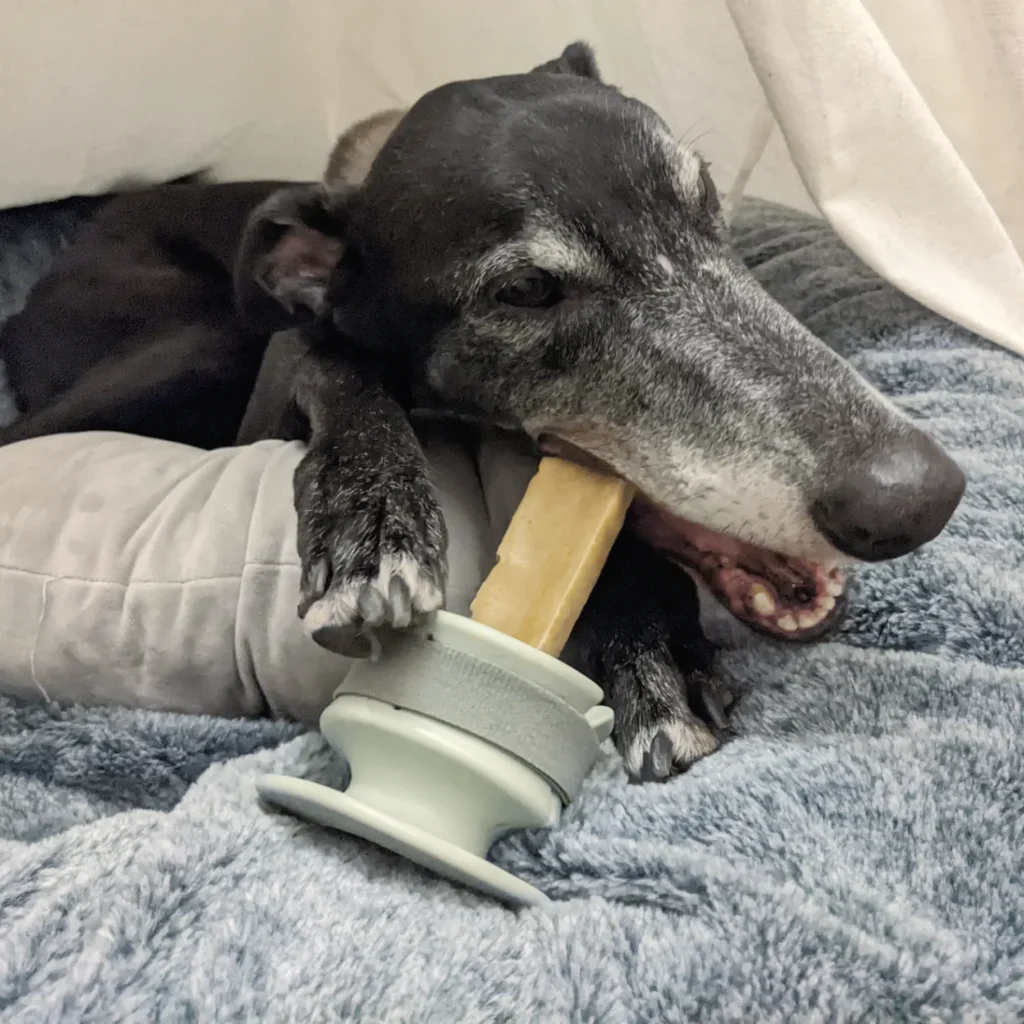
This is a 3D-printed yak chew holder — and it’s a game-changer for senior dogs especially.
Materials & Tools:
– 3D printer (or order the print file online through Etsy or Printables.com)
– PLA or PETG filament in any color (white/sage green shown here)
– Yak cheese chew (medium or large size)
– Sandpaper (220 grit) to smooth edges
Instructions
Print the holder base with a wide suction-cup-style bottom — this keeps it from sliding across your floors or fuzzy blankets. The design has a cylindrical insert tube that grips the chew from the bottom up, holding it upright at the perfect angle for your dog to gnaw without wrestling it.
Sand any rough edges before you hand it over. The wide base distributes pressure — which means zero sliding, zero frustration, and your dog actually finishes the chew instead of abandoning it under the couch.
The best part: this holder keeps your dog mentally locked in for 20-30 minutes of focused chewing, which is real enrichment — not just a snack.
Prep Time: 15 min | Active Project Time: 3-4 hours print time | Difficulty Level: Easy
If your pup is older or has joint issues, prop the holder on a non-slip mat so they can chew lying down comfortably, just like the sweet senior in this photo.
📸 Photo credit: Instagram @lunoji.co
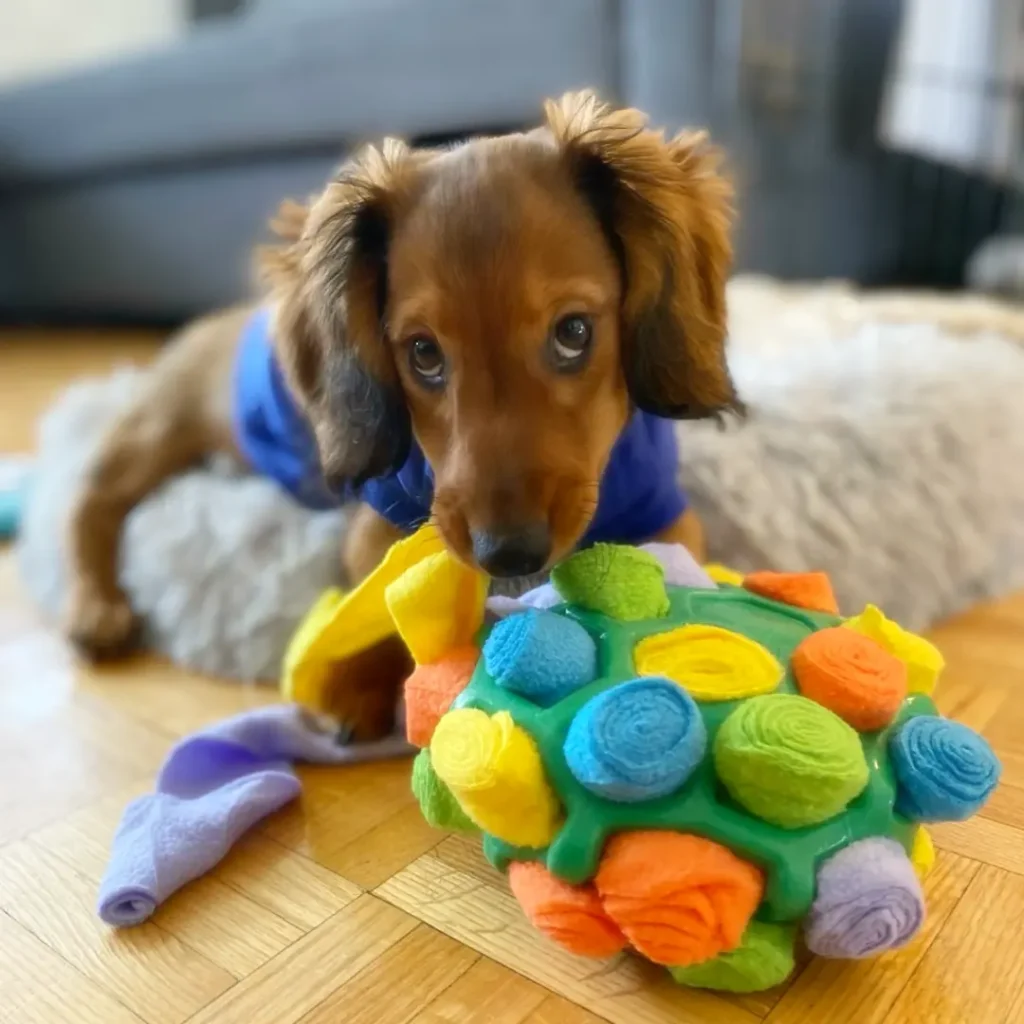
#3: DIY Snuffle Mat — The Fabric Puzzle That Keeps Your Dog Busy for Hours
Your golden is staring at you again. That intense, unblinking “entertain me” stare while you’re just trying to drink your coffee in peace.
This snuffle mat is exactly what fixes that.
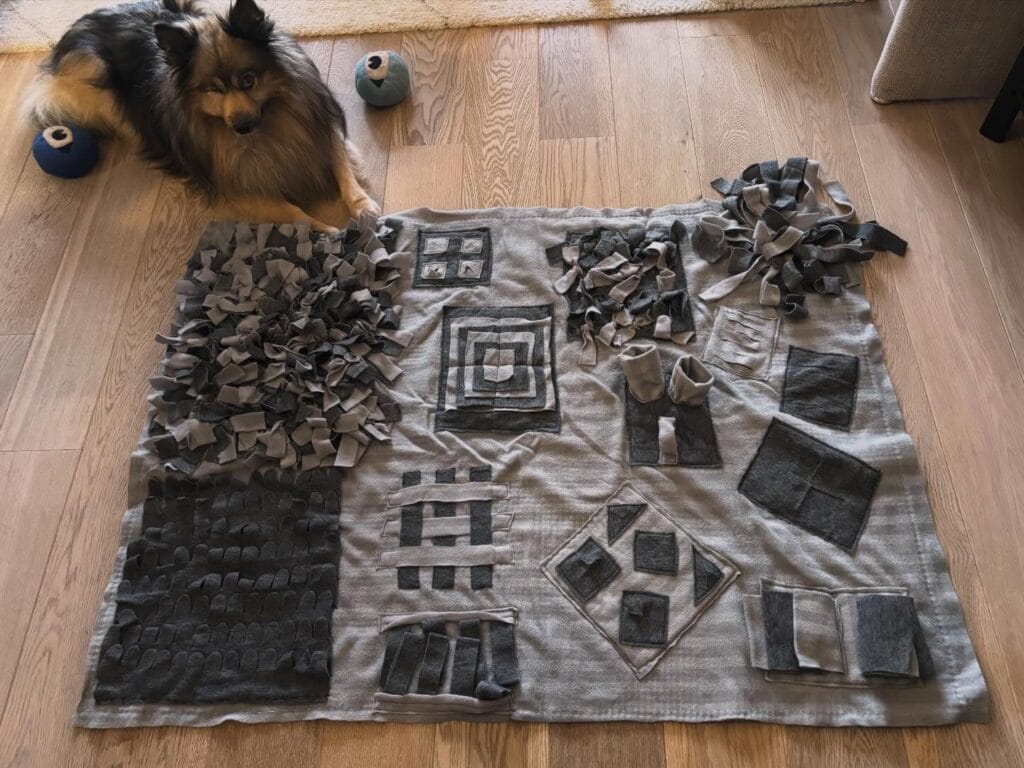
It’s a fleece-and-fabric base mat layered with dozens of knotted strips, folded pockets, woven panels, and little fabric tunnels — all hiding kibble or treats your dog has to sniff out. The nose work alone tires them out faster than a 30-minute walk. That’s the payoff nobody talks about enough.
I made mine after my cousin’s dog destroyed two throw pillows in one afternoon. She tried this, and her dog was completely knocked out within 20 minutes of snuffling.
Materials & Tools
– 1 rubber sink mat (with holes, approx. 12×16 inches) or a thick fleece blanket base
– 2-3 yards of gray/charcoal fleece fabric (no-sew, won’t fray)
– Scissors
– Ruler
– Optional: felt squares in dark gray and light beige for pocket panels
Instructions
Cut your fleece into 1-inch wide, 8-inch long strips. Push each strip through a hole in the sink mat and tie a knot so it stands upright — this creates those shaggy snuffle clusters you see on the left side of the mat.
For the flat puzzle panels in the center, cut felt into 4×4 inch squares and layer them in concentric square patterns, stitching or gluing the edges down but leaving the centers loose enough for treats to tuck underneath.
The woven ladder sections use 2-inch wide strips looped back and forth in a basket-weave pattern — kibble falls between the layers and your dog has to work to flip each strip. And the little fabric tube pouches? Just roll a felt rectangle into a cylinder and stitch the bottom closed. Drop a treat inside.
Vary the textures across sections so your dog can’t just memorize one strategy. That’s what keeps them engaged session after session.
Toss the whole mat in a cold gentle machine wash when it gets slobbery — fleece holds up fine.
Prep Time: 15 min | Active Project Time: 1.5–2 hours | Difficulty Level: Beginner–Intermediate
📸 Photo credit: Instagram @pomskyshiba
#4: DIY Puzzle Feeder Box for Your Golden’s Busy Brain
Your golden drops their soggy tennis ball right on your freshly vacuumed rug, then stares at you with those big brown eyes like, now what? You know that look. It’s the “entertain me or I’m eating your throw pillow” look.
This puzzle feeder is exactly what you need.
Materials & Tools:
– Teal silicone storage box (approximately 9″ x 7″) with orange rubber handles on all four sides
– 6 white bone-shaped silicone knobs (each roughly 1.5″ wide)
– Purple braided rope (about 24 inches long), threaded through the side handles
– Strong food-safe adhesive or silicone sealant
– Scissors
– Small dog treats or kibble
Instructions
Attach each bone-shaped knob to the top of the teal silicone lid in a 2×3 grid pattern, pressing firmly and letting the adhesive cure for 24 hours. Thread the purple rope through the two side orange handles on opposite ends, knotting each side so it won’t slip. Tuck treats underneath the lid before snapping it shut. Your golden has to nudge, paw, and mouth the knobs to figure out the opening — that nose-to-the-ground problem-solving burns mental energy fast, which means a calmer dog by evening.
The rope handles let you tug and drag the box during play, turning a solo puzzle into a bonding game.
Swap treats for part of their daily kibble. That way you’re not adding extra calories — just making mealtime actually work for them.
Prep Time: 15 min | Active Project Time: 30 min | Difficulty Level: Easy
📸 Photo credit: Instagram @nina_ottosson
#5: DIY Waterproof Dog Raincoat (No-Sew, No Stress)
You know that moment when your golden comes barreling through the door after a walk in the drizzle — and suddenly your couch smells like wet dog for the rest of the day? Yeah. That’s the moment this project was made for.
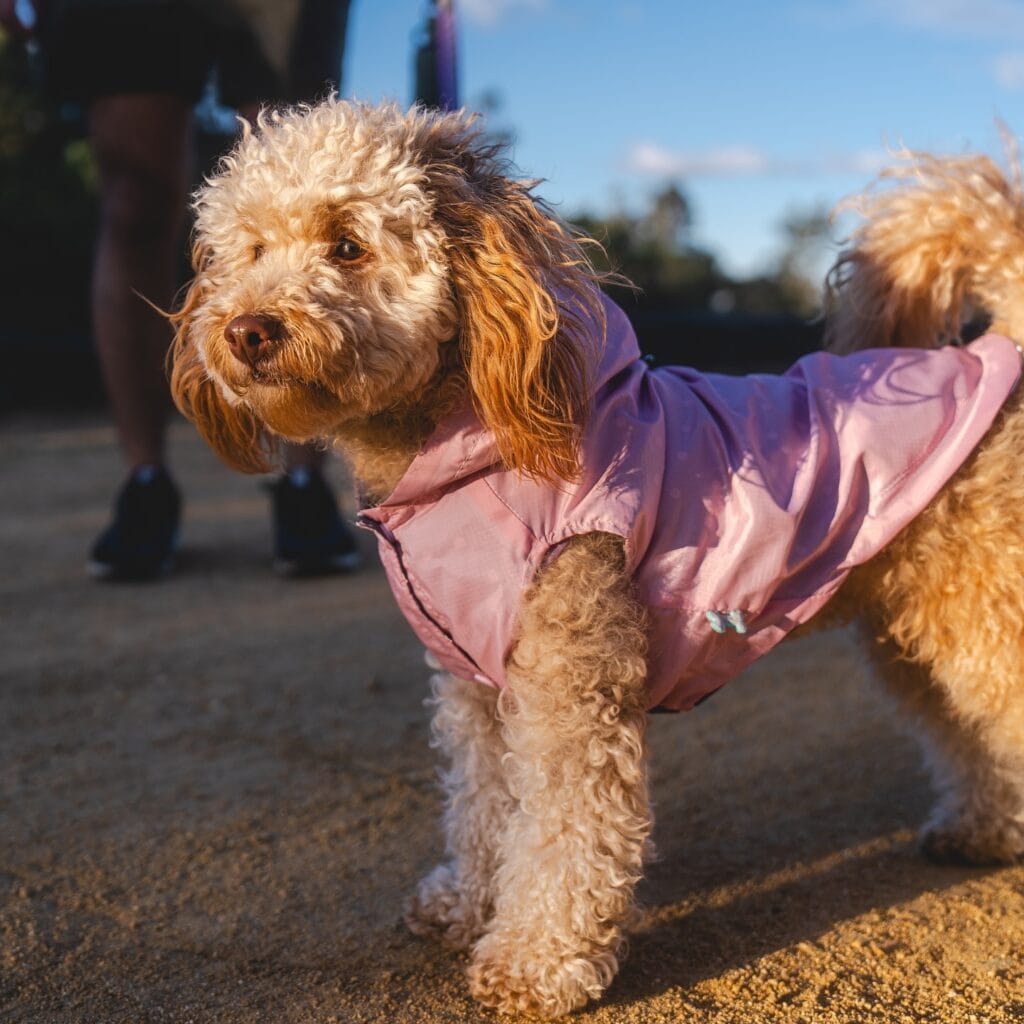
This no-sew raincoat uses iridescent ripstop nylon fabric (that pink-to-purple color shift is everything) and keeps your dog dry without a single stitch.
Materials & Tools
– ½ yard iridescent ripstop nylon (blush/lavender colorway)
– Iron-on hem tape (¾ inch wide)
– Fabric scissors
– Measuring tape
– 2 adjustable velcro belly straps (1 inch wide)
– Fabric marker
– A warm iron
Instructions
Measure your dog from the base of their neck to the base of their tail — that’s your length. Add 2 inches on each side for the hem fold. Cut your nylon panel into a rectangle first, then round the front corners slightly so it drapes over the chest without bunching.
Fold each edge 1 inch inward and press your hem tape along the fold. Run a warm iron over it for 10 seconds per section. The heat-bonded edge prevents fraying even after repeated puddle runs.
Attach your velcro belly straps 4 inches apart underneath, centered on the panel. Press firmly for 30 seconds each.
The waterproof nylon sheds rain instantly — keeping your dog dry means keeping that wet-dog smell off your furniture for good.
Cut a small ½ inch slit near the back for leash access before finishing the rear hem.
Prep Time: 10 min | Active Project Time: 30 min | Difficulty Level: Beginner
The ripstop nylon is so lightweight your dog won’t even notice it’s on — and you’ll notice the difference the second they walk back inside smelling like nothing at all.
📸 Photo credit: Instagram @the_orangebabies
#6: DIY Snuffle Puzzle Board for Dogs (Bone Tile Enrichment Tray)
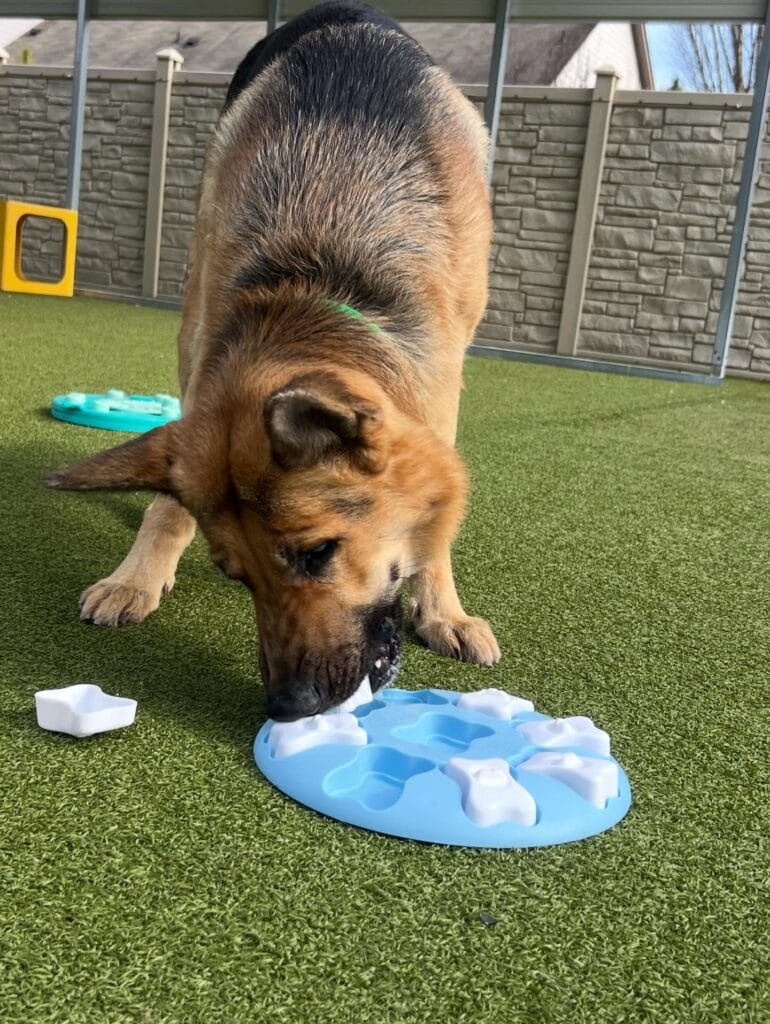
Okay, you know that moment when your golden is staring at you with those big eyes, practically vibrating with boredom, and you’ve already thrown the ball like forty times? Yeah. That’s exactly where this comes in.
This is a blue plastic puzzle tray loaded with white bone-shaped sliding tiles — each one hides a treat underneath. Your dog uses their nose and paws to nudge the tiles around and find the reward. It’s basically a board game for dogs, and it is so satisfying to watch.
Materials & Tools:
– 1 round puzzle enrichment tray (like the Nina Ottosson Dog Brick, approx. 12 inches diameter)
– White bone-shaped plastic slider pieces (usually 8-10 included with the tray)
– Small soft treats or kibble
– A flat, non-slip surface (artificial turf works great — less sliding)
Instructions
Load a small treat under each white bone tile and press them flat into their slots. Set the tray directly on the grass or turf — the texture slows the tray from skidding while your dog works. Let your dog sniff freely without guiding them. That nose-led searching triggers problem-solving instincts, which burns mental energy faster than a walk burns physical energy — meaning a calmer dog by evening.
And honestly? Starting with every tile loaded builds confidence. Once your dog figures out the pattern, leave a few tiles empty so they can’t just memorize it.
Prep Time: 2 minutes | Active Project Time: 5–10 minutes | Difficulty Level: Beginner
📸 Photo credit: Instagram @petsuitesatlantajohnscreek
#7: DIY Puzzle Feeder Board That’ll Keep Your Golden Busy for Hours
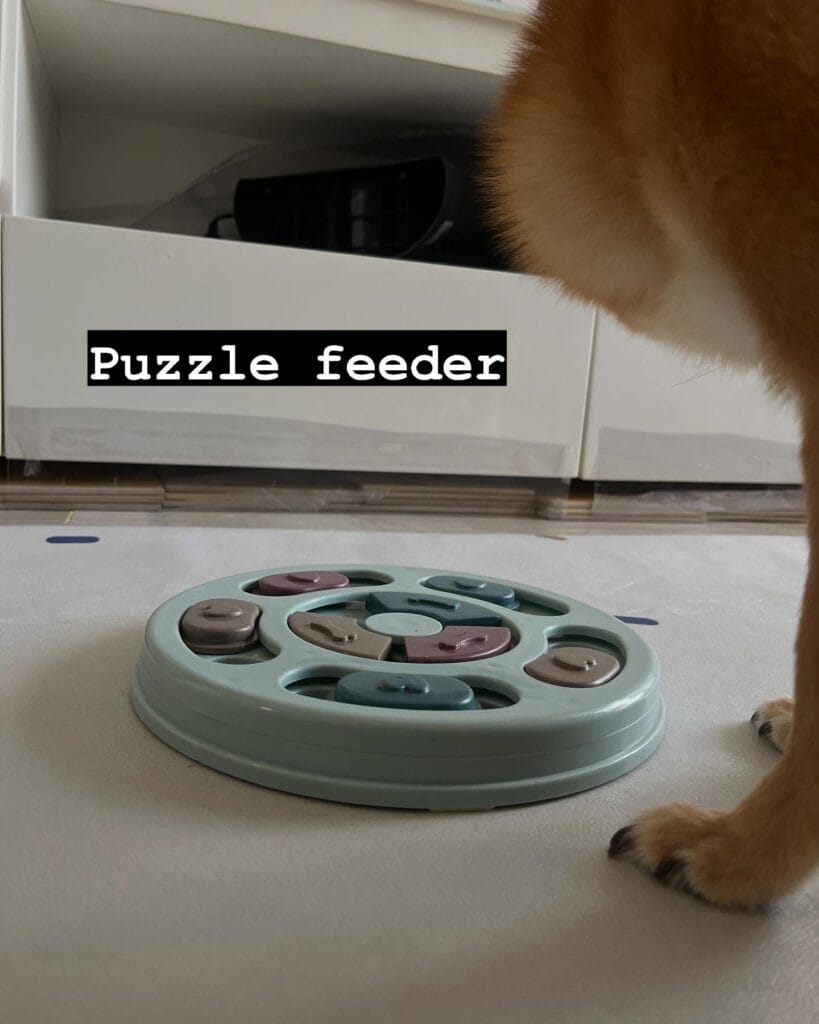
You know that moment when your golden is absolutely losing her mind at 3pm — zooming, barking at nothing, knocking your throw pillows off the couch? Yeah. That’s boredom talking.
I made one of these for my dog and honestly couldn’t believe how fast she calmed down.
Materials & Tools:
– 1 round wooden board (12–14 inches diameter)
– Mint green, dusty rose, and slate blue non-toxic acrylic paint
– 4–6 silicone muffin cups or small plastic containers
– Wooden knobs or drawer pulls (assorted shapes — square, round, bone-shaped)
– Non-toxic wood glue + screws
– Sandpaper (medium grit)
– Drill with small bit
Prep Time: 20 min | Active Project Time: 1.5 hours | Difficulty Level: Beginner
Instructions
Sand your board smooth first — no splinters near that sweet face. Paint the base mint green and let it dry completely before touching anything else.
Arrange your knobs and containers in a circular pattern, leaving a spinning disc space in the center. Drill small pilot holes, then screw each knob down tight. Glue the silicone cups between them.
Hide kibble or small treats under the knobs and inside the cups. That’s the whole magic — your dog has to nose and paw each piece to find the reward. The searching behavior — feature — drains mental energy — benefit — so she actually naps after instead of destroying your sofa cushions — that’s the payoff.
Paint the knobs in those dusty rose and slate blue tones. And honestly, it looks cute enough to leave on your kitchen floor without ruining your aesthetic.
Start with treats she already loves so she figures out the game fast. Once she’s got it, switch to her regular kibble and watch mealtime go from 30 seconds of inhaling food to a 15-minute focused session.
📸 Photo credit: Instagram @woofer_the_pomshi
The DIY Enrichment Mistake That’s Actually Boring Your Dog More
Here’s the thing nobody tells you — rotation beats variety.
I see it all the time. Someone makes five amazing DIY puzzles for their dog, puts them all out at once, and then wonders why their pup loses interest by Thursday. Your golden’s brain habituates fast. Once she’s solved something a few times, it stops being enrichment and starts being background noise.
My neighbor did this with her lab mix and couldn’t figure out why he was still destroying her couch cushions after she’d spent a whole weekend crafting.
The fix is a “enrichment library” system. Build 8-10 simple DIY activities — muffin tin puzzles, frozen herb sniff boxes, snuffle mats from old fleece — then rotate only 2-3 at a time. Pull something out after a week and reintroduce it a month later. Boom. It’s brand new to her nose again.
And here’s your real pro tip: scent-based enrichment always wins over physical puzzles. A dog’s nose tires them out faster than any obstacle course ever will.
Start there. You’ll notice a calmer dog by day three.
Your Dog-Proof Home Starts Right Now
Okay, so here’s the truth — your home doesn’t have to choose between looking good and surviving golden retriever chaos. You can have both. Pick one product from this list and just try it this week. That’s it.
Honestly, once I switched out my old rug for a washable one, I stopped dreading muddy paw prints. Game changer. And if your pup needs their own cozy corner too, these 7 DIY dog bed frame ideas are so Pinterest-worthy.
Start small, start somewhere. Your future self — sitting in a clean, gorgeous living room with your girl snoozing nearby — will thank you.
So tell me, which room in your house needs the most help right now? 🐾

Amr Mohsen is a software engineer who traded his keyboard for a leash — at least on weekends. His love for dogs inspired him to share what he learns as a dog owner and enthusiast, bringing a detail-oriented, research-driven perspective to every article he writes. If it’s about dogs, he’s probably already looked it up twice.