Funny coincidence—you just stumbled upon this treasure of dog obstacle course ideas just as your pup’s energy is through the roof. Could this be the solution to those playful chaos moments? Picture your dog conquering a wobbly balance beam or digging for treasures in a kiddie pool. Sounds fun, right? Let’s explore a mix of creativity and excitement to keep your furry friend entertained and engaged in a whole new way.
Innovative Digging Stations
When it comes to dogs, digging is often their version of a treasure hunt. You know that look—once they get going, there’s no stopping them.
So, why not channel that energy into something constructive with a dog obstacle course DIY? Create an innovative digging station! Grab a kiddie pool, fill it with sand or soil, and hide some toys or treats inside. Your pup will feel like a digging champion. Just imagine the joy on their face as they unearth their treasures.
To make it more fun, add a few tunnels or hoops around the station! Trust me, you’ll end up laughing as they jump from digging to maneuvering, all in one exciting course.
Our Collection
You’re in for a treat with our collection of dog obstacle course ideas.
Picture your pup buzzing through the Tire Tunnel Challenge or leaping over the Jumping Hurdles Station—doesn’t that just make you smile? From the Balance Beam Adventure to the Water Fetching Zone and the Agility Weave Pole Course, each section is packed with fun and excitement, just waiting for your furry friend to conquer it all.
1. Tire Tunnel Challenge
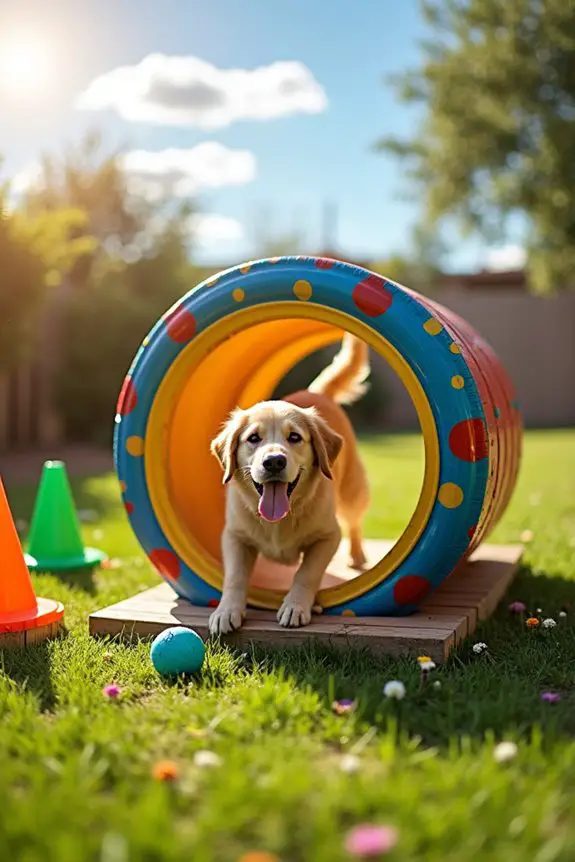
Looking for a fun way to get your pup moving? The Tire Tunnel Challenge is a fantastic DIY project that not only provides your dog with a stimulating outdoor activity but also saves you money on expensive agility equipment. Plus, it’s a great way to spruce up your backyard while keeping your furry friend active and engaged. Using a quiet grooming dryer can be a perfect way to dry your pup after a fun outdoor session, ensuring they stay comfortable and happy.
Materials Needed:
- Old tire (used, no significant damage)
- Wooden planks (to create a platform, optional)
- Drill
- Tug rope or sturdy leash
- Outdoor paint (optional, for extra flair)
- Sandpaper (for smoothing edges)
- Measuring tape
- Safety goggles
Step-by-Step Instructions:
- Choose Your Tire: Start by finding an old tire—preferably, one you’re ready to part with. Ask around; your neighbor might’ve one stashed in their garage.
- Prep the Tire: Give your tire a good scrub to remove any dirt or residue. If you’re feeling fancy, sand down any rough edges to make it safe for your dog’s paws.
- Create a Safer Entrance: Consider cutting a small flap at each end of the tire. This allows for easier entry and exit, especially for smaller dogs. Just make sure it’s not a hole too big, or else your pup might end up flopping through it like a pancake.
- Set It Up: Place the tire on a flat surface, ideally on grass or dirt, to avoid any bumps. If you want to elevate the challenge, you can build a simple wooden platform for the tire to sit on. Just make sure it’s stable.
- Get Them Used to It: Before turning the tunnel into a challenge, encourage your pup to sniff and explore the tire. Use treats to coax them through the tunnel until they understand that this is a fun escape route.
- Time for the Challenge: Now, bring out the tug rope or leash. Guide your dog through the tunnel, rewarding them with treats or praise when they make it to the other side. Repeat, and soon they’ll be zooming on their own!
- Add Some Fun: Let your dog try out the tire tunnel with toys or other surprises to keep motivation high. Maybe leave a few of their favorites on the other side as a reward.
Optional Add-ons/Variations:
- Color It Up: Give your tire a splash of color with outdoor paint. Pick your favorite shade or go wild with patterns—a polka-dotted tire could be the new talk of the dog park.
- Enhanced Challenge: Add obstacles around the tire, like cones or jumps, to spice things up and encourage your pup to weave in and out.
Pro Tip:
Before you let your pup go tunnel crazy, make certain the area is free from sharp objects. It’s also a good idea to inspect the tire regularly — wear and tear can sneaky creep up! And hey, if you’ve any concerns about how the tire will hold up, remember that a little TLC can go a long way.
In addition to this, consider incorporating an indoor dog potty system for days when outdoor fun isn’t possible.
Now, grab that tire and get ready to watch your pooch have the time of their life! It’s a great bonding activity and guarantees some tail-wagging fun—all in the name of good old DIY spirit.
2. Jumping Hurdles Station
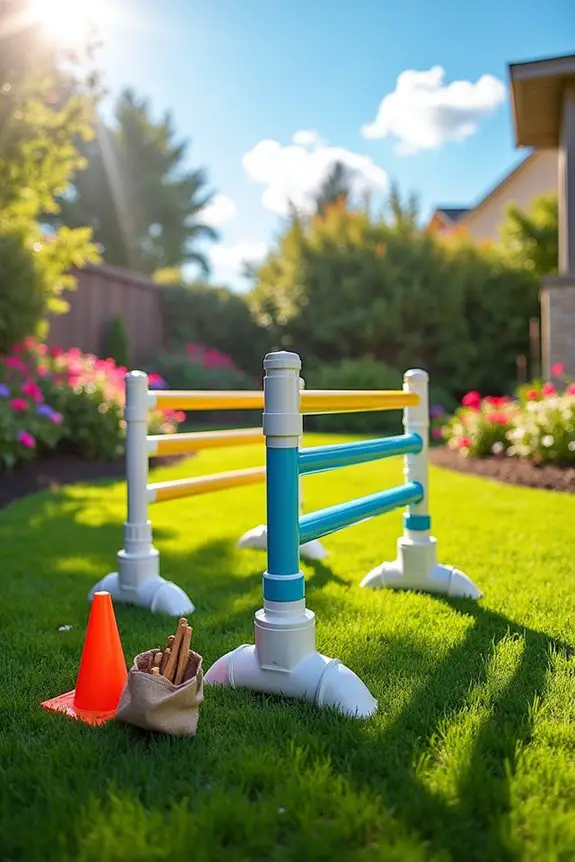
If you’re looking for an exciting way to let your dog burn off some energy and improve their agility, the Jumping Hurdles Station is the perfect DIY project for you. Not only will it keep your furry friend entertained, but it also saves you a bundle compared to buying pre-made agility equipment. Plus, you can reward them with odor-free bully sticks after a successful jumping session. Additionally, incorporating elements like electronic automatic pet doors can enhance your outdoor play experience by allowing your dog to come and go freely.
You get to enjoy quality time with your pup while working on their jumping skills. Talk about a win-win!
Materials Needed:
- PVC pipes (about 10 feet each; two or three will do)
- PVC connectors (elbows and tees)
- A saw (to cut the pipes)
- Measuring tape
- Drill with a drill bit
- Ground stakes or weights (to secure the hurdles)
- Spray paint (optional, for fun colors)
- Safety goggles
Step-by-Step Instructions:
1. Measure and Cut: Start by measuring out the lengths you want for your hurdles. A common height for jumps is about 12-18 inches—perfect for most dogs.
Cut the PVC pipes to your desired height using the saw, and trust me, don’t worry if your cuts are a little wobbly. Your dog won’t judge.
2. Assemble the Frame: Connect the base using the tees and elbows. Each hurdle will need two vertical sections and a horizontal bar. Assemble them like an upside-down “T,” with the vertical parts being the height you decided on earlier.
3. Secure the Jumps: If you’re worried about your hurdles tipping over during practice (which they probably will at least once—thanks, Murphy’s Law), use some ground stakes or weights to anchor them to the ground.
A little stability goes a long way when Fido tries to leap over.
4. Test the Height: Before letting your dog loose, do a quick test run yourself. If you can gracefully hop over (or stumble through), your pup can too.
Adjust the height if necessary—nothing too crazy unless you want a dog that can audition for the Olympics.
5. Get Your Dog Jumping: Encourage your pooch to jump over the hurdles. Use treats and plenty of praise as rewards. Start with one hurdle and gradually work up to multiple jumps to build their confidence.
Just be ready for some puppy antics; they might take the scenic route instead of leaping.
6. Add Some Flair: If you’re feeling artsy, why not paint the hurdles? A splash of color can brighten up your backyard and make jumping even more fun.
Plus, who doesn’t love a fashionable pup? Additionally, consider investing in a dog costume sewing machine for creating fun outfits to complement your dog’s performance in the obstacle course.
Optional Add-ons/Variations:
- Adjustable Heights: For a real challenge, consider adding extra PVC connectors that can allow you to easily switch up the height of the hurdles. Your little athlete will appreciate the gradual increase in difficulty (even if they act like it’s all fun and games).
- Obstacle Course Integration: Connect the jumping hurdles to other DIY projects, like weaving poles or tunnels, to create a full-on obstacle course that will tire your dog out in the best way possible.
Pro Tip:
Always keep an eye on your pup when they’re hopping around to make sure they’re enjoying the challenge and staying safe.
And remember, taking breaks lets them recharge—because happy pups are more enthusiastic jumpers. Just a heads-up, don’t be surprised if they start getting extra excited to show off after a few rounds. A natural doggie superstar in the making.
3. Balance Beam Adventure
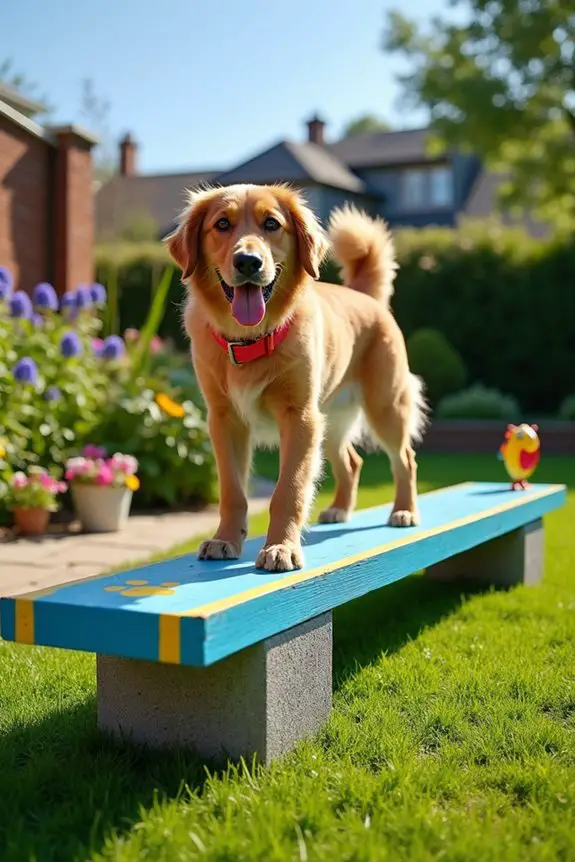
If your dog brings a bit of a clumsy charm to their agility training, building a Balance Beam is a fun and practical way to help them improve their balance and coordination.
This DIY project not only gives your pup a great workout but also enhances their confidence as they learn to navigate the beam like a pro.
And let’s be honest, nothing is cuter than watching your furry friend confidently strut their stuff. Plus, making it yourself saves you some serious cash!
Materials Needed:
- A sturdy wooden plank (about 6–8 feet long and 6 inches wide)
- Two concrete blocks or sturdy wooden supports (for stability)
- Sandpaper (for smoothing edges)
- Non-slip tape or paint (to provide grip)
- Measuring tape
- Saw (if wood needs cutting)
- Drill (if necessary, for securing the supports)
- Safety goggles
Step-by-Step Instructions:
1. Select Your Plank: Choose a wooden plank that feels solid and can hold your dog’s weight.
Aim for a length of around 6 to 8 feet for a beginner-friendly adventure. If you need to cut it down, grab your saw and make those cuts straight (or try, at least).
2. Smooth It Out: No one wants splinters—especially not your dog.
Use sandpaper to smooth out any rough edges. Trust me, your pup will appreciate the extra care when they come strutting back from their balance training.
3. Set Up the Supports: Place your concrete blocks or sturdy wooden supports at each end of the plank.
Make sure they’re level and stable, so your pup doesn’t take an unexpected plunge into the flowerbed below. The plank should be elevated at least 12 inches off the ground for a proper challenge and thrill.
4. Add Non-Slip Material: Dogs aren’t exactly known for their tap-dancing skills.
Apply non-slip tape or paint to the plank’s surface to give those little paws some traction. This step is vital for safety; you want your furry friend to stay upright through their newfound balancing act.
5. Test It Out: Before letting your dog give it a go, do a quick balance test yourself.
First, you hop on with all the grace of a baby giraffe. If you’re still standing after a few seconds, it’s safe for your pup. Maybe just refrain from trying to show-off your dance moves on the beam.
6. Encourage Your Dog: Now that the balance beam is ready, invite your pup over and get them excited with treats or their favorite toy.
Start by helping them step onto the beam, rewarding them every few steps. With a little practice and reassurance, they’ll be balancing like a pro!
Optional Add-ons/Variations:
– Decorate It: Give the balance beam a splash of personality by painting it in fun colors or adding your dog’s name.
A dash of color will brighten up the yard and motivate your pup to venture out.
– Height Adjustment: If you’re feeling adventurous, consider adding adjustable supports.
This way, you can change the height of the beam for more challenging training sessions as your dog improves.
Pro Tip:
To guarantee your balance beam stands the test of time, keep it in a sheltered area away from direct sunlight and rain.
Wood can warp, and we don’t want your pup’s playground to turn into a precarious slip-n-slide. Plus, giving it a quick check-in every few weeks will help keep it safe and stable. Happy balancing!
4. Water Fetching Zone
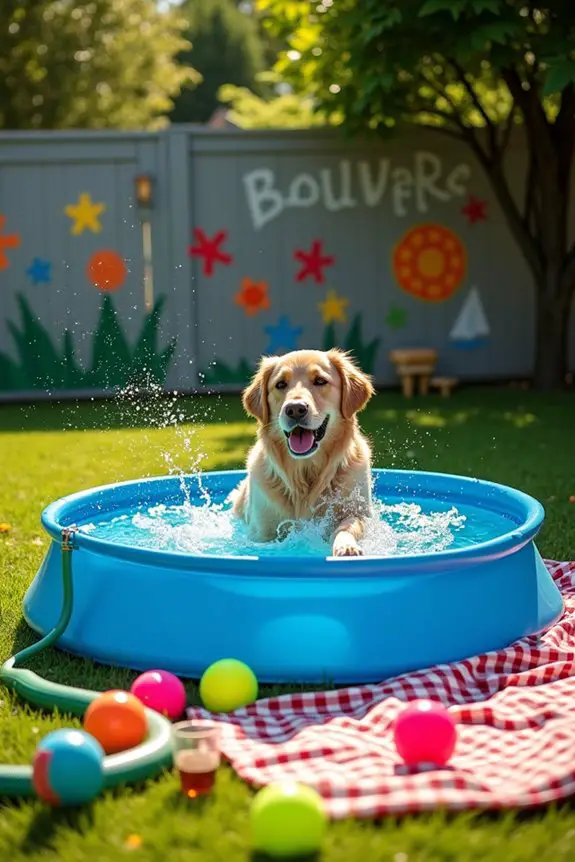
Creating a Water Fetching Zone in your backyard isn’t only a fantastic way to keep your dog entertained during those hot summer days, but it also provides a great cardio workout.
Plus, your pup gets to tap into their inner retriever, splashing around and diving for toys in the water. Who wouldn’t want to watch their furry friend gleefully bound after a frisbee or ball? The best part? This DIY project is easy on the wallet and can be set up in no time, so let’s dive right in.
Materials Needed:
- A kiddie pool (preferably large enough for your dog to comfortably swim in)
- Durable dog toys (like floating balls or frisbees)
- A garden hose (for filling the pool)
- Optional: Non-toxic pool chemicals (if you want to keep the water clean)
- A large towel (for post-swim drying)
- Sandbox toys (for added fun—who says the beach has all the fun?)
Step-by-Step Instructions:
- Pick Your Spot: Select a flat and sunny area in your yard for the kiddie pool. Your pup will want to soak up the sun while cooling off, so don’t place it under too many trees (unless you enjoy cleaning up leaves).
- Set Up the Pool: Unroll and inflate your kiddie pool (if required). Place it on the selected spot and make sure it’s stable. You want it to hold water without the risk of tipping over when your pup gets too enthusiastic.
- Fill It Up: Connect your garden hose and start filling the pool with water. You’ll want enough water for your dog to splash around in, but not so much that they feel like they’re swimming in the ocean—aim for a depth of about 6-12 inches.
- Add Fun Toys: Toss some floating dog toys into the pool. This adds an element of excitement, and it will get your dog keen to jump in and fetch them. Dog-approved floating toys are a must-have; avoid anything that could potentially break apart and be ingested.
- Optional Cleaning Ritual: If you want to maintain the water’s freshness, especially if your pup has a penchant for lazing about in muddy puddles, consider adding non-toxic pool chemicals as per the package instructions. No one wants to be the dog owner with the green pool—yikes!
- Let the Fun Begin: Now it’s time for the big reveal. Introduce your dog to the pool. A light splash or a quick toss of a toy can break the ice. Encourage them to jump in and show off their fetching skills.
Get ready to be entertained; they’ll either be a natural or a goofy splasher—both are equally enjoyable.
Optional Add-ons/Variations:
- Splash Zone Upgrade: Want to boost the fun factor? Consider adding a small water sprinkler nearby. The sight of your dog trying to dodge or jump through sprays of water is bound to create giggles.
- Personal Touch: Paint the sides of the kiddie pool with non-toxic paint to give it a unique flair. Maybe a nautical theme or your dog’s name in big, bold letters so everyone knows who the king or queen of the water is.
Pro Tip:
Always supervise your dog while they’re in the Water Fetching Zone. Even if they’re great swimmers, a watchful eye is essential.
Also, be mindful of their exposure to the sun—keep plenty of shade and fresh water available, especially on particularly hot days to keep hydration levels up.
As a bonus, consider setting up a cozy blanket under a shady tree nearby for you to relax on while your pup plays. It’s the perfect combination of fun and leisure, and who doesn’t love a good excuse for a nap?
5. Agility Weave Pole Course

If your dog has a knack for weaving through obstacles or just needs to burn off some energy, creating an Agility Weave Pole Course is the perfect DIY project for you. Not only does it provide physical exercise, but it also sharpens your dog’s focus and coordination.
Plus, building something for your furry friend strengthens that special bond between you two, and the savings you’ll make compared to buying store-bought equipment is simply a cherry on top.
Materials Needed:
- PVC pipes (around 10 pieces, 4-5 feet in length)
- PVC connectors (at least 10)
- Optional: spray paint (for a pop of color)
- A measuring tape
- A saw (for cutting pipes if needed)
- A drill (if you want to secure the poles into the ground)
- A level (to ascertain everything’s straight)
- Optional: sand or gravel (to stabilize poles if desired)
Step-by-Step Instructions:
- Lay Out Your Course: Start by deciding where you’d like to set up the weave course. It should be a flat area of your yard with enough room for your dog to run safely.
- Measure and Cut: Use your measuring tape to determine how far apart you want the poles. Generally, 2-3 feet apart works well for most dogs. Cut your PVC pipes if needed, making sure they’re all the same length for consistency.
- Assemble the Base: Connect the pieces using the PVC connectors to create a sturdy base for each pole. You want them firm but not overloaded. A swaying pole doesn’t make for happy interactions.
- Insert the Poles: Begin placing each pole into the ground at your determined width, either dug in about a foot deep or using a drill for extra stability. Make sure the poles are straight—this is where the level comes in handy.
- Secure Everything: If you’re using sand or gravel, pour some around the base of each pole for extra stability. This prevents them from wobbling as your pup darts between them.
- Optional Painting Party: If you’re feeling creative, give your poles a fun coat of spray paint. Bright colors make the course appealing and can even help your dog identify where to weave. Just be sure the paint dries completely before introducing your pup.
- Get Your Pup Involved: Now for the fun part! Introduce your dog to the weave poles. Use treats or their favorite toy to guide them through. Celebrate their successes, big or small.
Optional Add-ons/Variations:
- Height Variation: Experiment with different pole heights by cutting some longer than others. This makes it more challenging for your pup and keeps them on their toes—literally.
- Decor Elements: Around the poles, consider adding flags or ribbons for a festive look. This can help your dog pick up their speed since they might feel like they’re in an exciting competition.
Pro Tip:
Stability is key. If you’re planning on letting your dog practice frequently, consider securing the bases in a more permanent way with concrete or a similar anchoring material.
It’ll save you headaches down the road when the wind decides it wants to play!
With this Agility Weave Pole Course, you’re paving the way for countless hours of fun and exercise for your dog. So grab those materials and get started. Your pup won’t know what hit them when they see their new playground.
6. Scent Trail Discovery Area
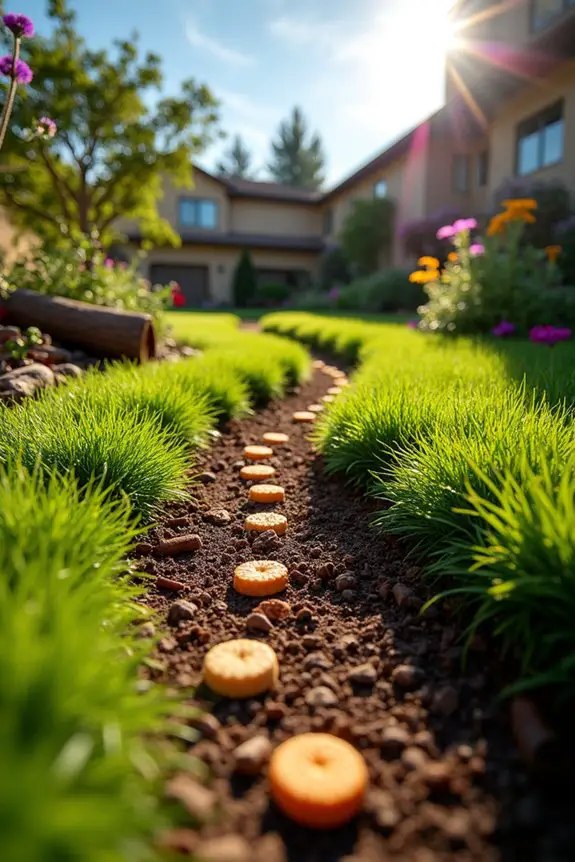
Creating a Scent Trail Discovery Area for your dog is a fantastic way to engage their natural instincts while providing mental stimulation. It’s an incredibly enriching activity that can keep your furry friend entertained for hours! Plus, you’ll save money on store-bought toys, and creating this playful area enhances your backyard’s charm. Who knew fun could also be a landscaping upgrade?
Materials Needed:
- A selection of dog-safe treats or their favorite toys
- A plastic or cloth container (like a bucket or tote)
- A shovel (for digging trenches or hiding treats)
- A measuring tape or yardstick (to mark distances)
- Natural obstacles (like logs or plants for variety)
Step-by-Step Instructions:
- Pick Your Spot: Choose a flat area in your yard or garden that’s safe and accessible for your dog. Consider adding fun features nearby, like the Agility Weave Pole Course you’ve already built.
- Create Trails: Using your shovel, dig shallow trenches or lightly scatter some dirt to create a fun pathway. Vary the depth and width—it should be challenging but not overwhelming.
- Scent It Up: Place treats or toys in the trench or strategically under leaves on the ground. It’s like hiding treasure under the earth; your pup will be none the wiser until they start sniffing around.
- Incorporate Natural Obstacles: If available, arrange some logs or plants along the trail. This adds elements for your pup to maneuver around as they discover the hidden scents.
- Guide Your Dog: Show your dog where the trail starts, giving them hints by pointing to the treats or toys. Celebrate as they find each one; trust me, the tail wagging will be worth it.
- Increase Complexity: Once your dog gets the hang of it, add more layers by hiding treats deeper or using different scents like herbs or spices. Get creative with how you conceal the goodies.
Optional Add-ons/Variations:
- Themed Scents: Instead of just regular treats, mix it up with different flavors from your kitchen—think peanut butter, pumpkin, or chicken broth! This keeps your dog guessing and maintains their interest.
- Seasonal Setups: Change the trail according to the season. In fall, you might hide treats among fallen leaves; in winter, you could make a snowy scent path with treats buried in white-fluffed decor.
Pro Tip:
Always monitor your dog during their scent discoveries, especially the first few times. You want to ascertain they’re focusing on the trail and not sniffing up something they shouldn’t!
And if you’re short on treats, crumbled up kibble can work in a pinch, plus it keeps the costs down. Who knew DIY adventure could come so easily?
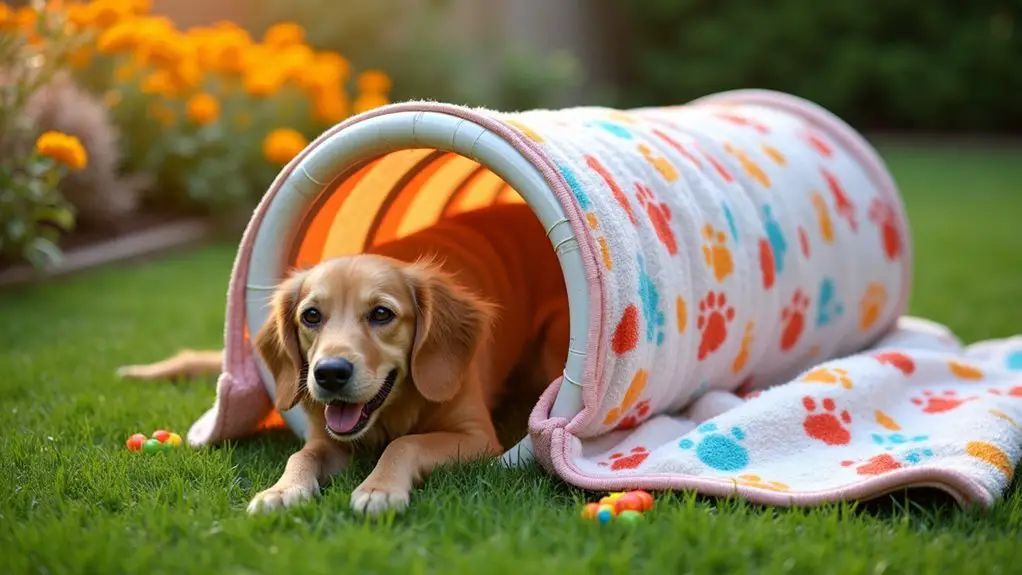
7. Crawl-Under Tunnel Challenge
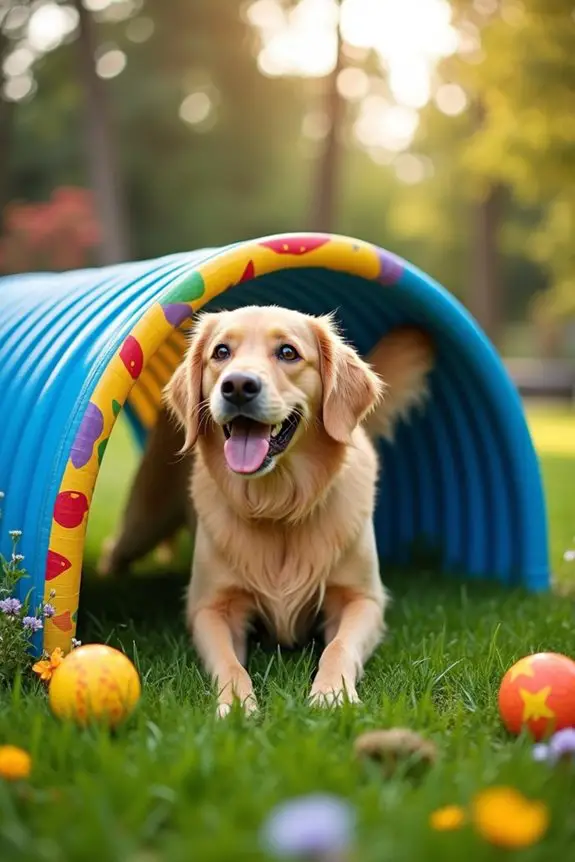
Looking for a fun way to add some excitement to your dog’s playtime? The Crawl-Under Tunnel Challenge is a brilliant DIY project that gets your furry friend moving, thinking, and having loads of fun! Not only does it save you money compared to pricey store-bought tunnels, but it’s also customizable to fit your space and your dog’s preferences. So let’s jump into building a tunnel that will have them crawling with joy!
Materials Needed:
- PVC pipes (4-inch diameter works great)
- PVC pipe elbows (90-degree, as needed)
- A flexible fabric or tarp to cover the tunnel (optional)
- Vinyl or heavy-duty fabric for added durability (if you want extra strength)
- Outdoor-safe dog-friendly adhesive or duct tape
- A saw (to cut pipes if necessary)
- Measuring tape
- Drill (for securing parts together)
Step-by-Step Instructions:
- Measure Your Space: Before you start cutting and assembling, check the area where you want your tunnel to go. Make certain it’s spacious enough for your pup to comfortably crawl through. Don’t leave them stuck like a dog in a revolving door.
- Cut the PVC Pipes: Use the saw to cut your PVC pipes to your desired lengths. A good size is around 3 to 4 feet long for a solid crawl-space. Remember, if you’re feeling like an amateur carpenter (I know I do sometimes), measure twice and cut once to avoid a DIY disaster.
- Assemble the Tunnel: Connect the cut pipes together using the elbows and straight pieces to create a tunnel shape. Secure them with outdoor-safe adhesive or duct tape to make sure it won’t wobble when your pup zips through.
- Add Fabric (Optional): If you want a soft, cozy feel or to make the tunnel look fun, cover it with that flexible fabric or tarp. Just drape it over the assembly and use duct tape to hold it in place—like a doggy blanket fort.
- Test Stability: Gently shake the tunnel after assembly to make sure it’s sturdy. You don’t want your four-legged friend discovering a collapsing tunnel ready to trap them like a superhero villain’s lair.
- Introduce Your Dog: Once everything is set up, coax your dog through the tunnel using treats or their favorite toy. Celebrate their bravery, even if they come out looking a bit confused. Tunnels can be like magic portals for pups.
Optional Add-ons/Variations:
- Creative Color Options: If you’re feeling artsy, paint the PVC pipes in fun colors or patterns. Blossom them up with removable spray paint – just make sure it’s non-toxic and safe for your pup (no point if your dog ends up looking like an art project gone wrong).
- Easy Cleanup: Consider lining the inside with a removable, washable blanket or mat for a cozy touch, which you can swap out for freshness, especially after those mud-monster days.
Pro Tip:
When setting up your tunnel, make certain it’s situated on a flat, stable ground to prevent any accidents. And as your pup gets accustomed to their new adventure, keep an eye on them to draw a line between “enthusiastic exploration” and “how did I get into this mess?”
Best of luck building your Crawl-Under Tunnel Challenge—the giggles and tail wags are about to commence!
Extra Tips & Ideas
Whether you’re a seasoned pup parent or a newbie trying to navigate the maze of dog ownership, setting up an obstacle course can be a fantastic way to bond with your furry friend while they burn off some energy.
So, here’s a tip: mix up the challenges. Your pup might ace the tunnels but struggle with jumps. Keep it interesting! Use household items like broomsticks or boxes; they’re cheaper than fancy equipment, and honestly, who needs another excuse to spend money?
And don’t forget to reward your dog with treats or praise. They’ll feel like champions!
If you’re feeling creative, add a theme to your course. Maybe a jungle or pirate adventure? Trust me, your dog will love it, and you’ll both have a blast!
Frequently Asked Questions
How Can I Incorporate Agility Training Into the Obstacle Course?
You can incorporate agility training by adding jumps, weave poles, and tunnels to your course. Use cones for directional changes and encourage your dog with treats. Together, you’ll build confidence and enhance their skills effectively.
What Is the Best Surface for a Dog Obstacle Course?
The best surface for a dog obstacle course is non-slip and cushioned material, like grass, rubber mats, or sand. These options provide traction and reduce the risk of injury while ensuring your pup feels comfortable.
Are There Age Restrictions for Dogs Participating in Obstacle Courses?
There aren’t strict age restrictions for dogs in obstacle courses, but younger dogs should have basic training first. Older dogs might need modified courses to accommodate their physical capabilities. Always prioritize your dog’s safety and health.
How Do I Measure the Success of My Dog’s Performance?
You can measure your dog’s success by evaluating their speed, accuracy, and confidence during runs. Track their progress over time, noting improvements or challenges, and celebrate each achievement to keep their motivation high.
What Should I Do if My Dog Is Scared of the Obstacles?
If your dog’s like a timid flower in a storm, gently introduce the obstacles. Use treats and praise to encourage small steps, and let them explore at their own pace, building confidence over time.
Conclusion
So there you have it—your pup’s very own doggy playground, ready to be conquered. Just remember, while you’re thinking you’re the mastermind of this course, your dog might just consider it a cleverly disguised buffet of shenanigans. Who knew jumping, digging, and fetching could be their idea of fine dining? Get creative, keep it fresh, and enjoy the belly laughs that come with the inevitable doggy antics. Happy obstacle course adventures await!