
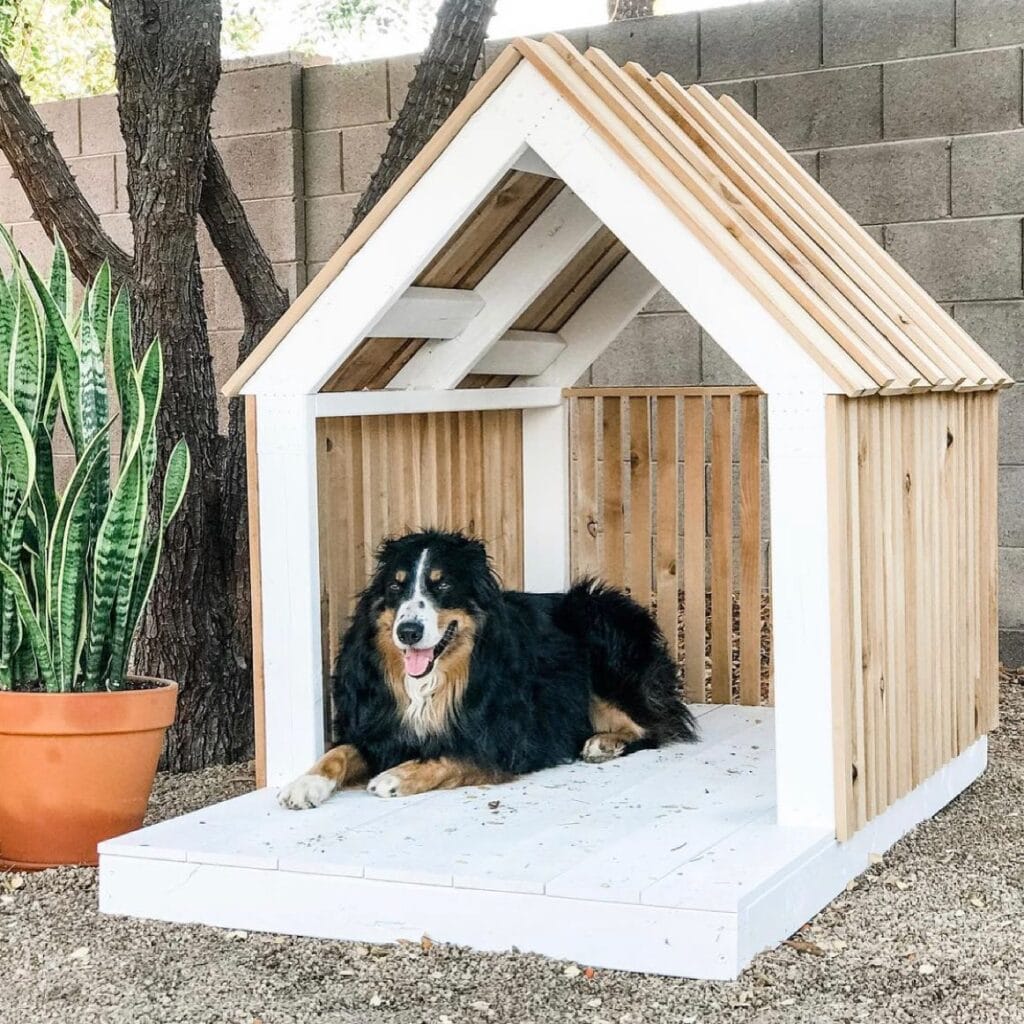
Introduction
Every dog should have a safe, warm place to relax in after a long day of playing in the yard. If you live in a colder climate or it often rains where you live, then finding the right shelter for your furry friend may be a bit of a challenge. A good outdoor dog house should keep your dog safe from rain, wind, and extreme temperatures while also providing a cozy place to curl up and call their own.
This is where our project for a DIY insulated dog house comes in handy. If you want to buy a generic plastic kennel that might not fit your dog’s needs, this project isn’t for you. If you want to customize the size, style, or insulation level of your dog’s outdoor shelter, this is the project for you. We did it and our dog thinks it is his own little mini-home.
Here is a 7 amazing dog house designs that you can make yourself. Each project is inspiring, durable and comfortable so that your dog can stay warm and dry and happy all year long.
1: Pallet-Style Insulated Outdoor Dog Shelter
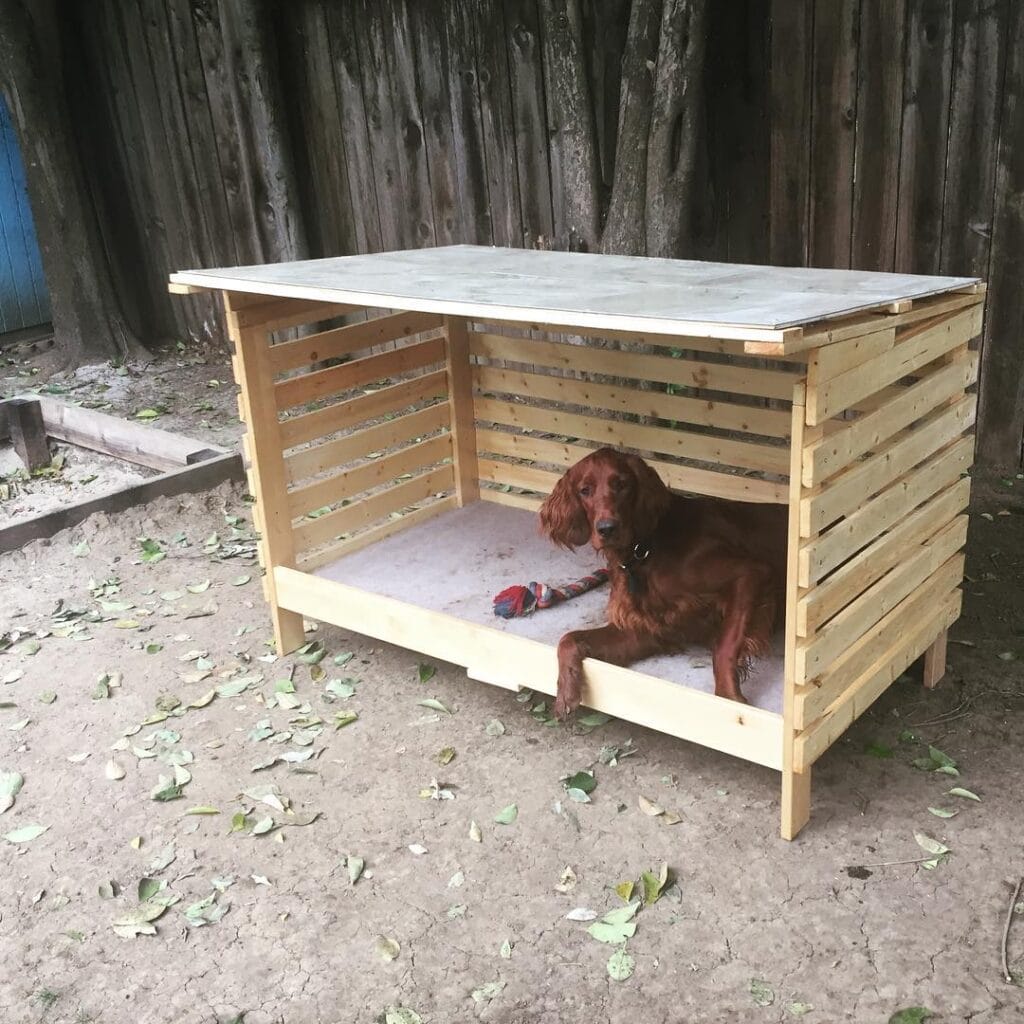
A simple wooden pallet style dog house can be surprisingly cozy for dogs who like to relax outdoors. Not only will it provide ventilation for your dog, it will also provide shade and protection from light showers.
A raised wooden dog shelter, built with slatted wood panels and a flat roof, gives dogs a comfortable shady lounge area and keeps them off the cold ground.
Materials & Tools You’ll Need
- Pressure-treated wooden boards
- Wooden pallets or slats
- Plywood sheet for roof
- Exterior wood screws
- Wood glue
- Outdoor wood sealant
- Sandpaper
Tools required:
- Drill
- Circular saw
- Measuring tape
- Carpenter square
- Clamps
Prep Time: 30 minutes | Active Project Time: 2–3 hours | Difficulty Level: Beginner
Instructions
In order to build the doghouse base, start by constructing a rectangular base frame out of the pressure-treated wooden boards. The doghouse base should be the same size as the dog so they can stretch comfortably. Attach short legs or blocks beneath the base to lift it slightly off the ground to avoid moisture from seeping inside.
Attach wooden slats to the sides of the frame. Leave enough space between them for air to flow, but they should provide a sturdy structure. Screw each slat down to the outside of the frame with exterior screws. Once the side panels are in place, place a strong plywood sheet on top to act as the roof.
Seal the entire structure with outdoor wood sealant, then put a thick dog cushion or an insulated pad inside, once the sealant dries.
I love this design to keep the dog cool in warm weather, and also keeps the dog off the damp grass or earth.
Tip: Angle the roof a little so the rain will run off instead of pooling up.
📸 Photo credit: Instagram @irishsetter_maui
2: Framed Wooden Insulated Dog House
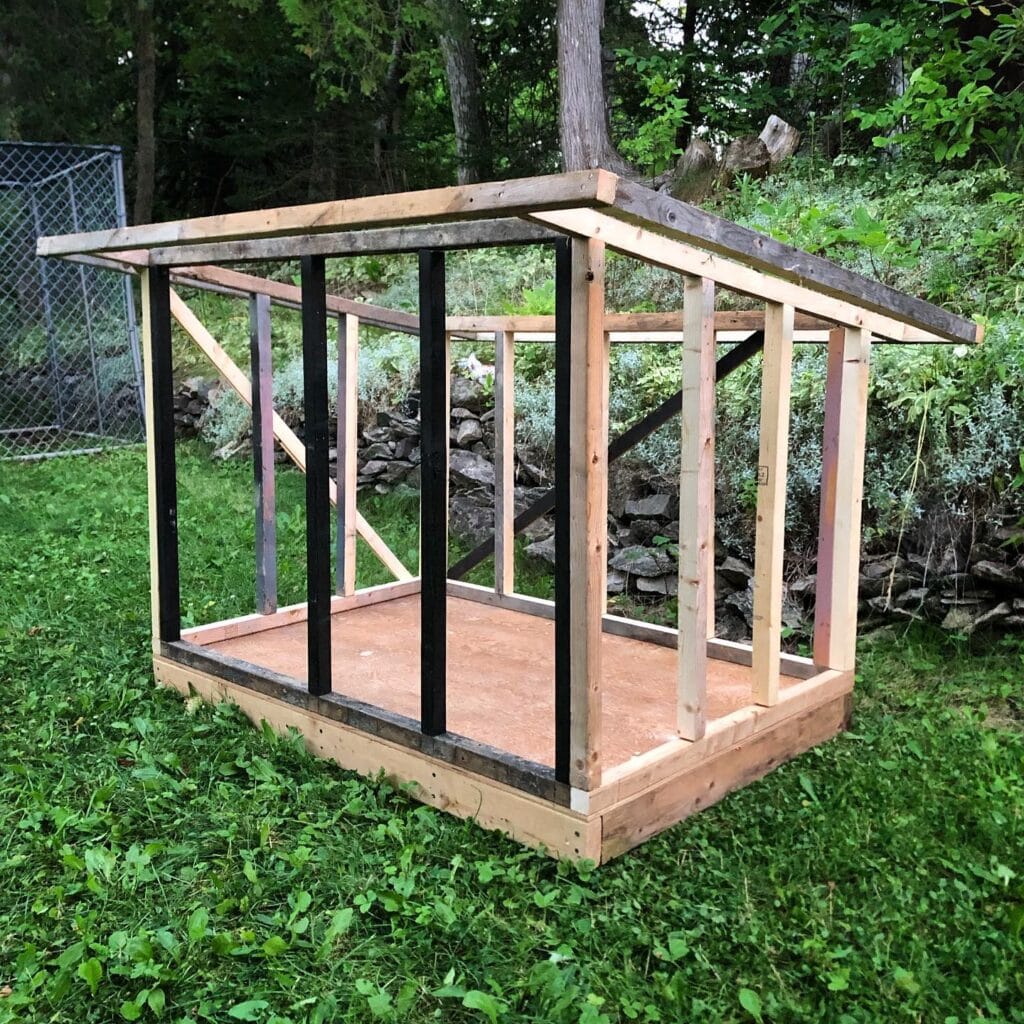
For dogs that spend more time outside, a fully framed wooden house is a much better option. This is more like a small backyard cabin for your dog, but is more structurally sound.
The picture shows a sturdy wooden frame with vertical beams and a slanted roof frame, which is ready to be enclosed with siding panels.
Materials & Tools You’ll Need
- 2×4 wooden studs
- Plywood sheets
- Insulation foam boards
- Roofing shingles
- Exterior nails or screws
- Wood primer and paint
Tools required:
- Power drill
- Circular saw
- Hammer
- Level
- Tape measure
Prep Time: 45 minutes | Active Project Time: 4–6 hours | Difficulty Level: Intermediate
Instructions
Begin by assembling the rectangular base frame using 2×4 studs. Use screws to attach the joints together. Make sure that the frame is square using a carpenter’s square.
Attach vertical studs at each corner and along the walls of your dog house. Attach angled roof beams on the top to make a sloped roof that will allow water to drain off easily.
Cut plywood panels to fit the sides of the frame. Attach these panels to the sides of the frame. Before you seal the walls, put foam insulation boards in the cavities between the studs. This helps to trap the warmth inside your tent.
Finally, you can install plywood on the roof and cover it with shingles or waterproof roofing sheets.
With this insulated design, your dog will always have somewhere warm and cosy to escape during winter!
Tip: Add a removable panel on the roof to clean the inside easier.
📸 Photo credit: Instagram @jenniferoutdoors__
3: Modern Mini Dog House with Interior Bed
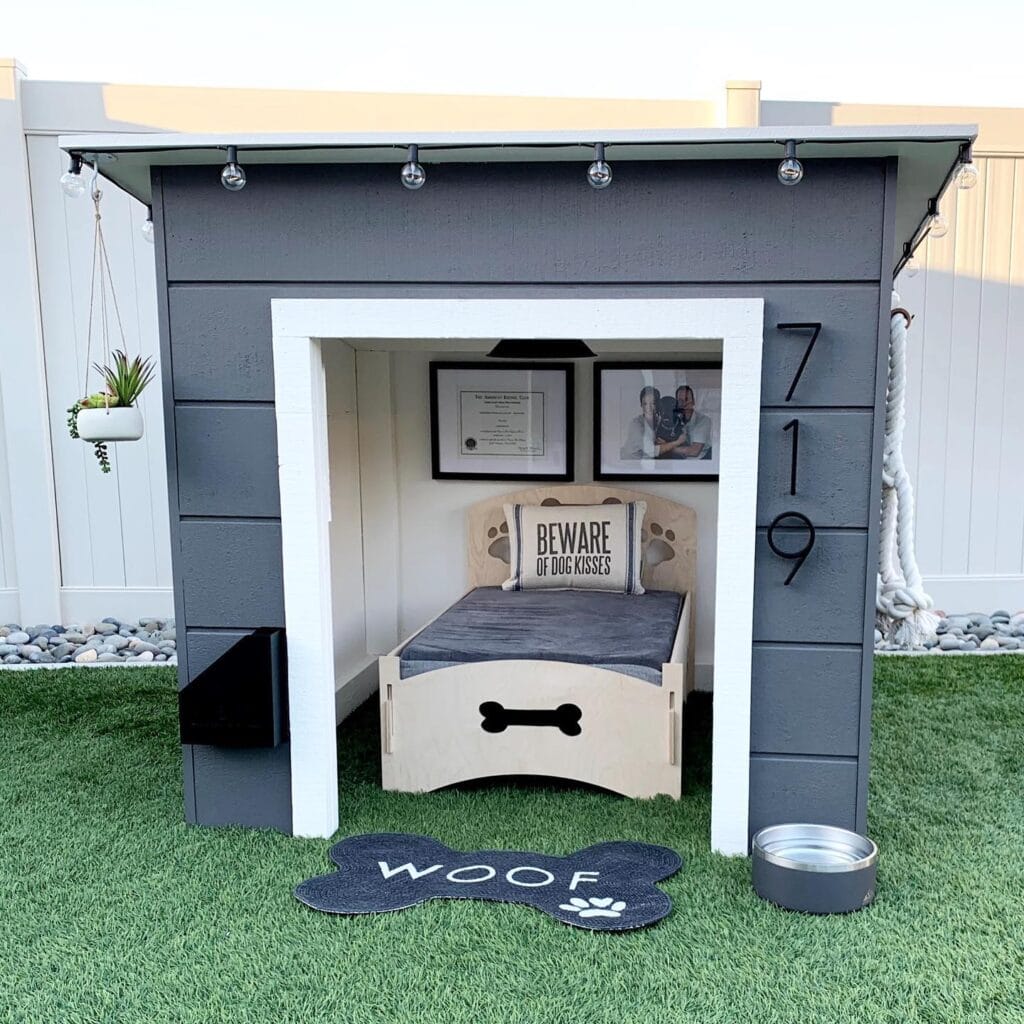
Sometimes, a dog house is more than just shelter. Sometimes it’s stylish. This modern dog house design looks more like a small bedroom with a bed and even a decoration.
This is the prettiest dog house I’ve ever seen. It has clean lines, painted siding and a nice, comfortable bed frame inside!
Materials & Tools You’ll Need
- Plywood panels
- Wooden trim boards
- Dog bed mattress
- Exterior paint
- Decorative wall frames
- Screws
Tools required:
- Drill
- Saw
- Paintbrush
- Measuring tape
Prep Time: 40 minutes | Active Project Time: 3–5 hours | Difficulty Level: Intermediate
Instructions
Build a square base from plywood, using wooden frames underneath to elevate the plywood slightly above the ground so it does not get damp. It is better for insulation and air flow to have the base slightly off the ground.
Build walls with plywood and attach decorative trim boards to the outside. Cut a large front opening so that your dog can easily get in and out.
It is best to paint the outside of your shed in weather resistant paint. Inside your shed, put a dog bed frame out of wood and put a thick mattress or cushion.
I like how this house has small wall frames or signs to make the house feel cozy and personal.
It’s a pretty nice design for a dog to lay down on and feel cozy and warm.
Tip: In a small LED light inside for at night.
📸 Photo credit: Instagram @miniplayhomes
4: Indoor Wooden Frame Dog Bed House
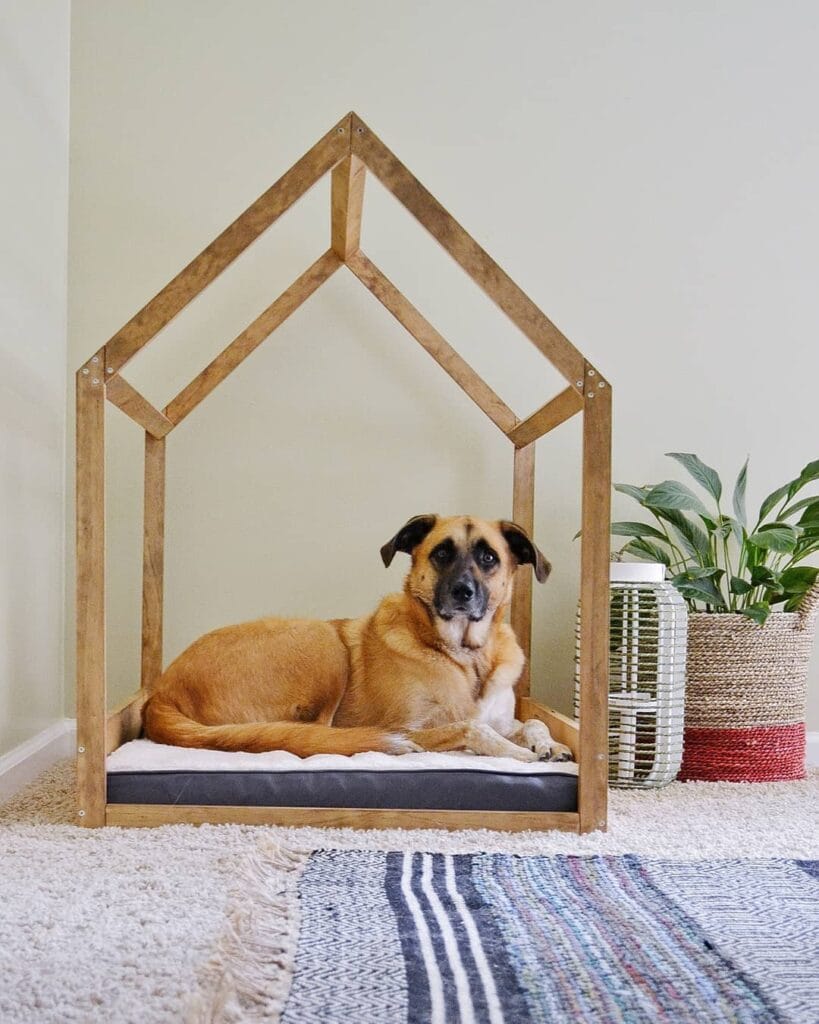
If your dog likes sleeping inside but still wants to have a personal space, this minimalist frame house can create a calm and cozy sleeping zone.
In this image a geometrical wooden frame shaped like a house is placed over a dog bed.
Materials & Tools You’ll Need
- Wooden dowels or boards
- Screws
- Wood stain or varnish
- Dog bed mattress
Tools required:
- Drill
- Saw
- Measuring tape
Prep Time: 20 minutes | Active Project Time: 1–2 hours | Difficulty Level: Beginner
Instructions
Measure the size of your dog bed and cut wooden boards to form a rectangular base frame. Attach vertical boards at each corner of the frame.
Attach the angled boards on top of the first two boards so that they meet in the center.
Screw all the joints and sand the wood to remove splinters.
Then finish the frame with wood stain or varnish, and slide the dog bed under it.
This is where your dogs can find their little den to rest.
Tip: If you wish you can add some curtains or fabric panels to make it even cozier.
📸 Photo credit: Instagram @pinchplateparty
5: Modern Black and Wood Outdoor Dog House
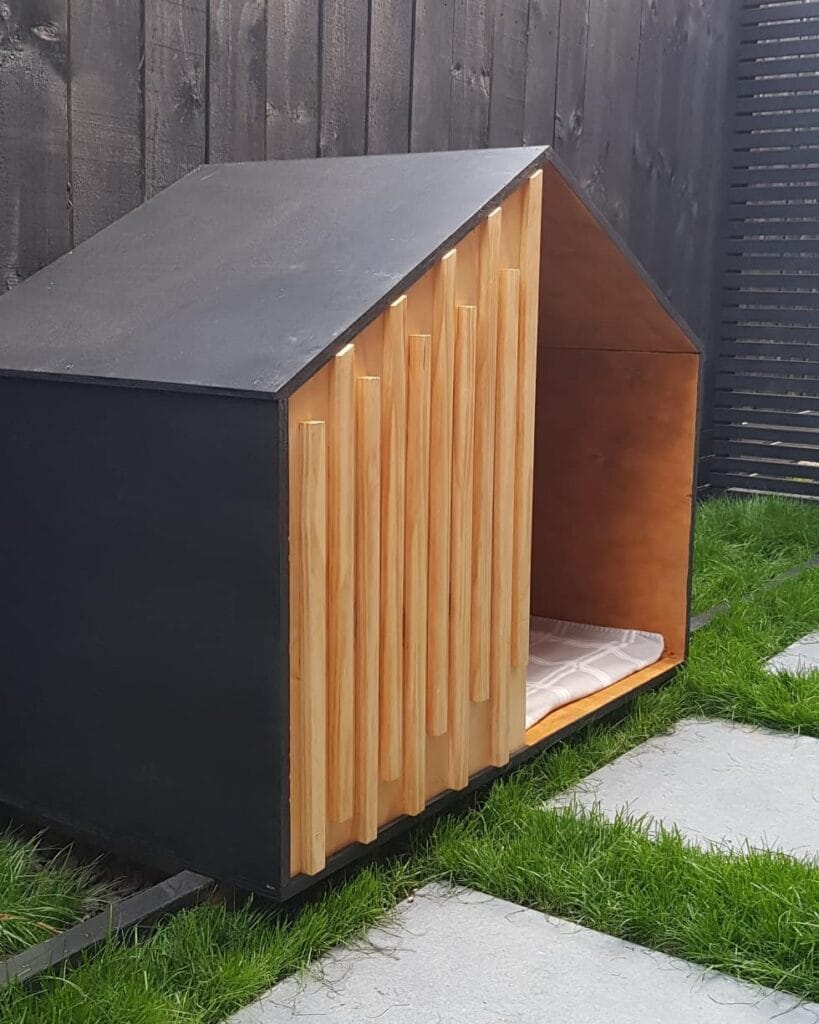
Great outside design, the dark painted panels, and natural wood slats, give a sleek look to this outdoor dining set. Perfect for protection and insulation.
This image is a dog house with a slanted roof, and vertical wooden slats.
Materials & Tools You’ll Need
- Plywood sheets
- Wooden slats
- Black exterior paint
- Screws
- Insulation foam
Tools required:
- Drill
- Saw
- Paint roller
Prep Time: 30 minutes | Active Project Time: 4 hours | Difficulty Level: Intermediate
Instructions
First build the base and wall of the frame out of wooden studs. Add plywood to the side panels.
Insert a couple of insulation boards in between the walls before sealing the interior panel.
Paint the outside of the box black and attach some wooden slats to the front side.
Very good idea to install a slanted roof panel so that the rainwater flows away from the entrance of the cabin.
This insulated box protects dogs from the wind and temperature changes.
Tip: Face the house away from the prevailing winds.
📸 Photo credit: Instagram @bankertobuilder
6: Classic Insulated Backyard Dog Cabin
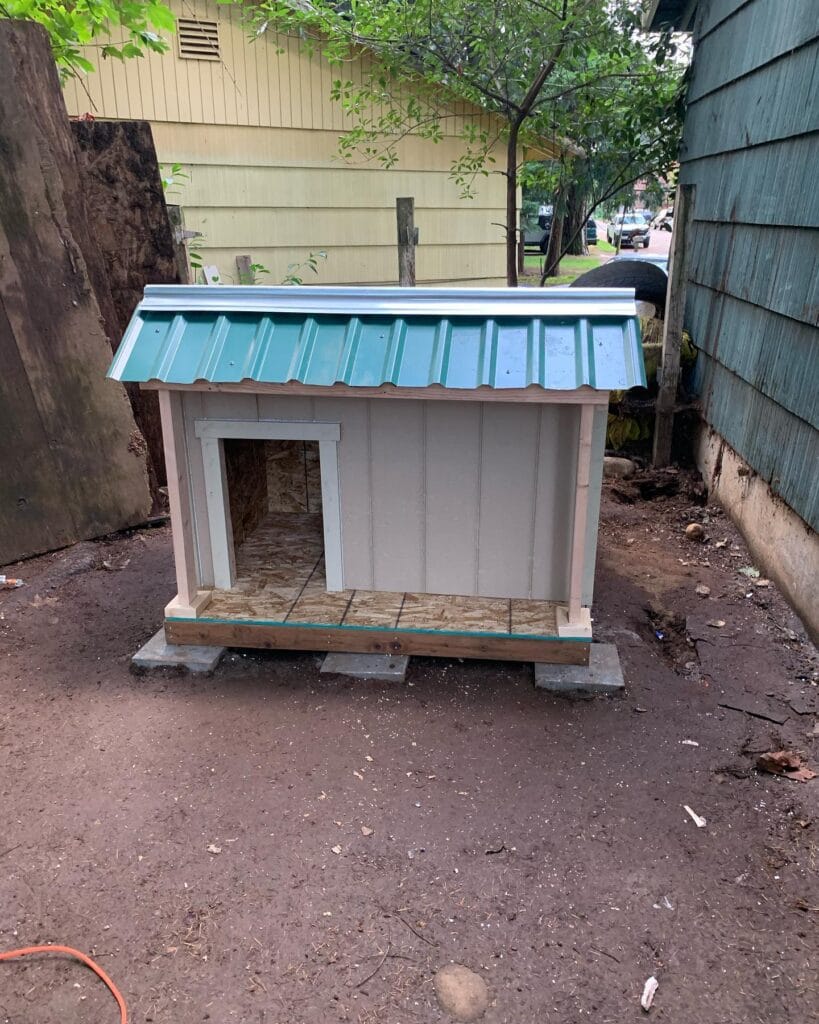
Traditional dog cabins provide the best weather protection. These dog houses are built with a raised platform and metal roofing.
This is a nice small dog house, with a pitched metal roof and raised wooden base.
Materials & Tools You’ll Need
- 2×4 lumber
- OSB panels
- Metal roofing sheet
- Foam insulation
- Screws
Tools required:
- Circular saw
- Drill
- Hammer
- Measuring tape
Prep Time: 45 minutes | Active Project Time: 5 hours | Difficulty Level: Intermediate
Instructions
Build a sturdy wooden platform on which to elevate the dog house. This will help to keep the dog house off the ground and away from the wind.
Build your wall frames with 2×4 lumber and attach the OSB panels to it.
Also, a tip for keeping the interior of the helicopter warm is to place some sort of foam between the panels.
Install a pitched roof frame and secure a metal roofing sheet over it.
This design keeps rain, snow and wind out, and warmth in.
Tip: Put a small door flap on. Cold air coming in.
📸 Photo credit: Instagram @camaraconstructionllc
7: Green Roof Insulated Dog House
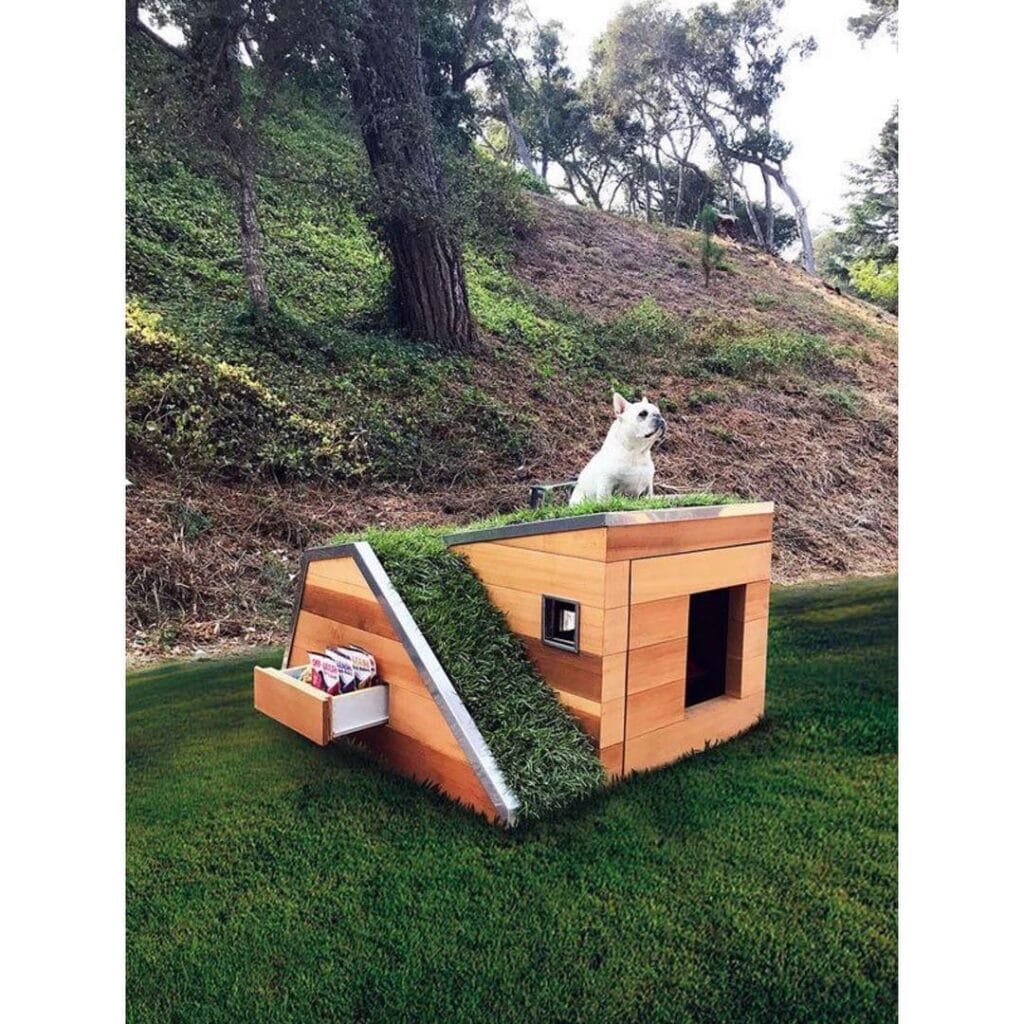
For eco-conscious dog owners, a green roof dog house adds both insulation and visual charm.
a wooden dog house with a sloped roof covered in artificial grass where a dog can sit on top.
Materials & Tools You’ll Need
- Wooden boards
- Plywood panels
- Artificial turf
- Waterproof membrane
- Screws
Tools required
- Drill
- Saw
- Staple gun
Prep Time: 40 minutes | Active Project Time: 4 hours | Difficulty Level: Intermediate
Instructions
Building the rectangular house frame with wooden boards and attach plywood panels to make walls.
Build a slanted roof panel that can handle artificial turf.
Place a waterproof membrane on top of the roof surface to prevent water damage.
Attach artificial grass using staples or outdoor adhesive.
The grass layer helps insulate the roof and is a fun lounging spot for our dogs.
Tip: Use weather-resistant turf designed for outdoor landscaping.
📸 Photo credit: Instagram @dogmombox_
Conclusion
Making a DIY insulated dog house is more than a woodworking project. It’s a way to give your dog a safe, comfortable space. Whether you choose a simple pallet dog house, a modern backyard dog house, or a cozy indoor frame bed for your dog to sleep in, each design has a unique set of benefits.
With a little creativity, you can build your dog a house to fit the dog and the yard perfectly. Your dog will appreciate the warmth, security, and comfort of their new home. Make it just right for them! 🐶🏡

Amr Mohsen is a software engineer who traded his keyboard for a leash — at least on weekends. His love for dogs inspired him to share what he learns as a dog owner and enthusiast, bringing a detail-oriented, research-driven perspective to every article he writes. If it’s about dogs, he’s probably already looked it up twice.



