
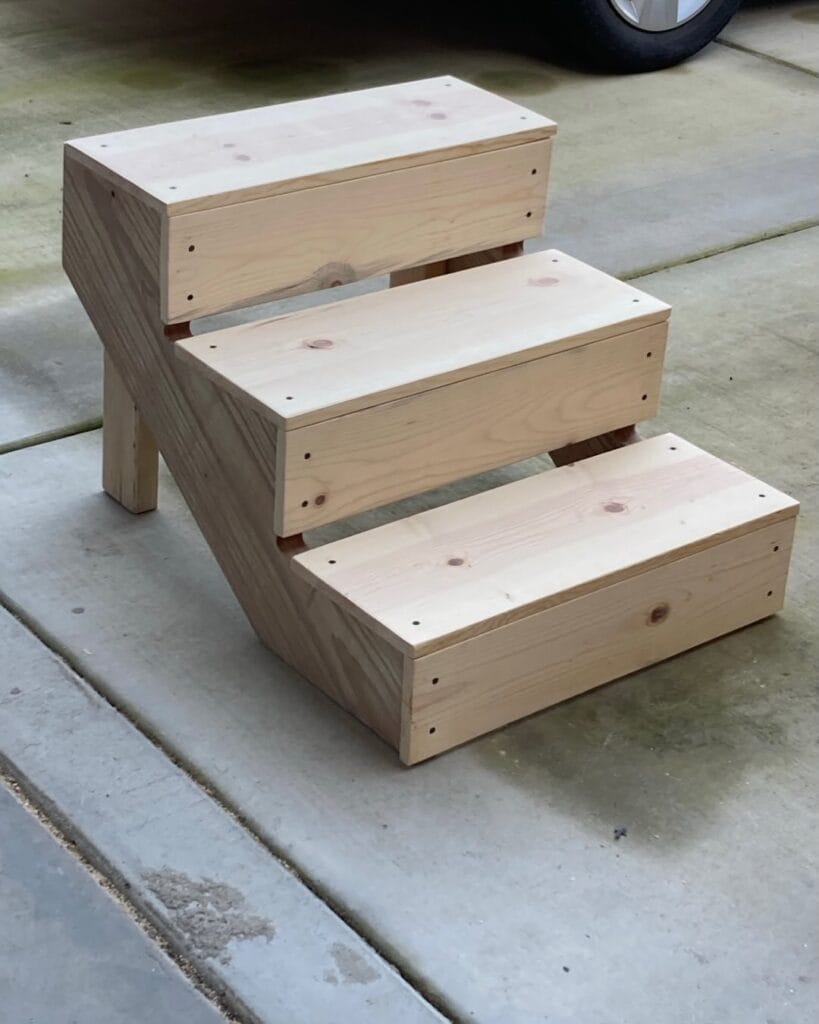
Isn’t he just making puppy dog eyes at the couch like it’s Mt Everest or something?
My dog did this too, the little hop and grunt every time he wanted up. And sadly, I saw him struggling as he got older and chunkier. All the big dogs do.
The problem was, all of the store bought options I could find looked like they belonged in a hospital, not a Pinterest worthy living room.
So I went full DIY mode.
And girl, the results were chef’s kiss.
The dog stairs DIYs I’m going to share with you today actually look really good next to your furniture! They’re seven different builds — some are really stupid-simple, but also some of them are made to look like they’re built in!
Koelphaars (dogs) get up easy. Your home still looks like yours.
#1: DIY Gray Velvet Pet Stairs (That Actually Look Like Real Furniture)

You know that moment when your golden gives you those eyes from the floor, tail wagging, front paws scratching at the couch cushion because she can’t haul herself up anymore? Yeah, my heart breaks every time.
So, these two step and three step gray velvet pet stairs from the image are actually everything. And you’re able to build a near-identical version yourself for a fraction of the price.
Materials & Tools You’ll Need:
– High-density foam (at least 2-inch thick layers), cut to stair dimensions
– Gray velvet upholstery fabric (approximately 1.5 yards per staircase unit)
– Plywood sheets (½-inch thick) for the frame base
– White fabric piping or trim for the bottom edge detail
– Strong upholstery adhesive or staple gun
– Box cutter or electric foam cutter
– Measuring tape, scissors, sewing machine (optional but helpful)
Prep Time: 30 minutes | Active Project Time: 3–4 hours | Difficulty Level: Intermediate
Instructions
Cut your plywood into a frame for the stairs. This will be two rectangles for a two-step version or three rectangles for a three-step version. If you have a small to medium dog, you will want your riser height to be around 7 inches and your tread depth to be around 10 inches.
Once you’ve assembled your frame using wood glue and corner brackets, cut your foam pieces to match each tread. Your goal is to create that plush look you see in the big furniture stores. Make sure you have a good amount of padding, and glue it directly to the plywood of each tread.
Now cut your velvet fabric so that you have an extra 3 inches on each side. Wrapping the entire tread, pull the fabric taut over the foam topped tread and staple down the underside of the plywood. This is where most people rush. Take the time to do the corners so they fold over nice like a piece of wrapping paper, so that there are no bunching spots.
What about the little bit of white trim that you see running along the base of the tray? It’s just cotton piping that I hot glued along the bottom edge to make it look a little more intentional and less like I was making something out of my bedroom.
If your old girl has a tendency to slip on smooth surfaces, cut a piece of non-slip rug pad and attach it to the bottom of her base. It’s a velvet-covered foam surface and gives her paws a little extra grip on each step, which is especially important when she’s going up or down steps to protect her joints.
I made these for my friends dachshund after watching how much he struggled on the sofa, the day after she texted me to say he uses them every single morning without being coaxed, I felt like a celebrity, well worth the time spent laying on the floor and every staple!
Do you love making things for your dog? If so, you’ll definitely want to check out 13 Genius DIY Dog Stuff Every Pet Parent Needs to Try Today! for some great inspiration!
Keep this in mind: Velvet shows lint fast. So, choose a shade of gray close to your dog’s fur color it will help to hide the shedding between washes.
📸 Photo credit: Instagram @chiot_official
#2: DIY Wooden Dog Stairs That Actually Match Your Bedroom (No Joke)
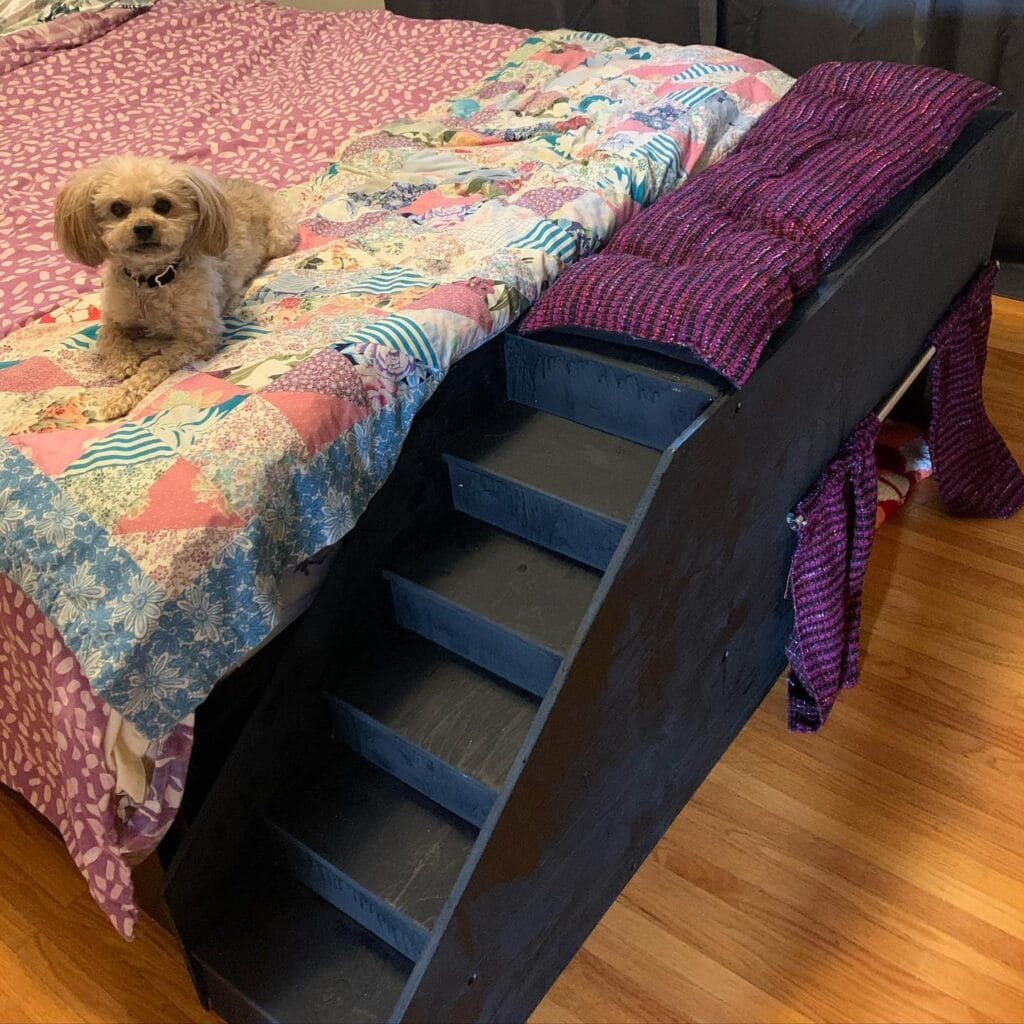
Been there right? My dog stares at her bed, she does the little whimper hop, and I feel like the worst dog mom in the world. I’m sure you know the feeling. It haunts me.
This dark navy, solid wood pet staircase is the move.
Prep Time: 30 min | Active Project Time: 3–4 hours | Difficulty Level: Intermediate
Materials & Tools:
– 3/4-inch plywood (one 4×8 ft sheet covers the full build)
– Dark navy/charcoal wood paint (2 coats minimum)
– Wood glue + 2-inch wood screws
– Sandpaper (120-grit then 220-grit)
– Jigsaw or circular saw
– Measuring tape, pencil, clamps
– Optional: non-slip stair nosing strips for grip
### Instructions
In this build I cut my plywood into two identical side panels, which are roughy 24 inches tall by 30 inches long. I cut the slope along the top edge, which gives it that diagonal staircase look, rather than a boxy ramp.
Cut your four stair treads (they should be equal in length) to about 5 inches apart from the bottom, if you have dogs that are shorter legged (so they don’t have to bend their legs so much to get up the stairs) then cut it to a bit less than 5 inches. Glue and screw the tread in between the 2 side panels, it will be important to make sure that all joints are flush with each other before the glue sets.
Sand the entire thing with 120-grit and then finish with 220-grit. Once it’s smooth, the paint will be more absorbed and your two coats of dark navy paint will look rich and intentional instead of patchy. Trust me, you’ll be thankful! This is the whole reason I went to the trouble of sanding the whole thing – a well-sanded and properly painted piece of furniture (as opposed to something I’ve made in a craft class) will blend into the room instead of screaming “I have a dog”.
The flat top platform in this build is wide enough to be used as a mini shelf. I put a cushion on top so that my dogs can lounge before jumping on the bed.
If you golden tends to slip on smooth surfaces, you might want to stick adhesive non-slip strips onto each tread. One afternoon, I watched my friend’s dog just rocket off a smooth stair and land in a pile of laundry. Adorable, but not safe.
If you like this project, take a look at 12 Heartfelt Designs for DIY Dog Accessories for some beautiful builds.
Paint the inside of the stair cavities, too, while you’re at it. You’ll notice how much more intentional it looks when the dog is partway up the stairs.
📸 Photo credit: Instagram @heatherrforeverr
#3: How to Build a Foldable Plastic Pet Staircase (That Looks Like You Bought It)
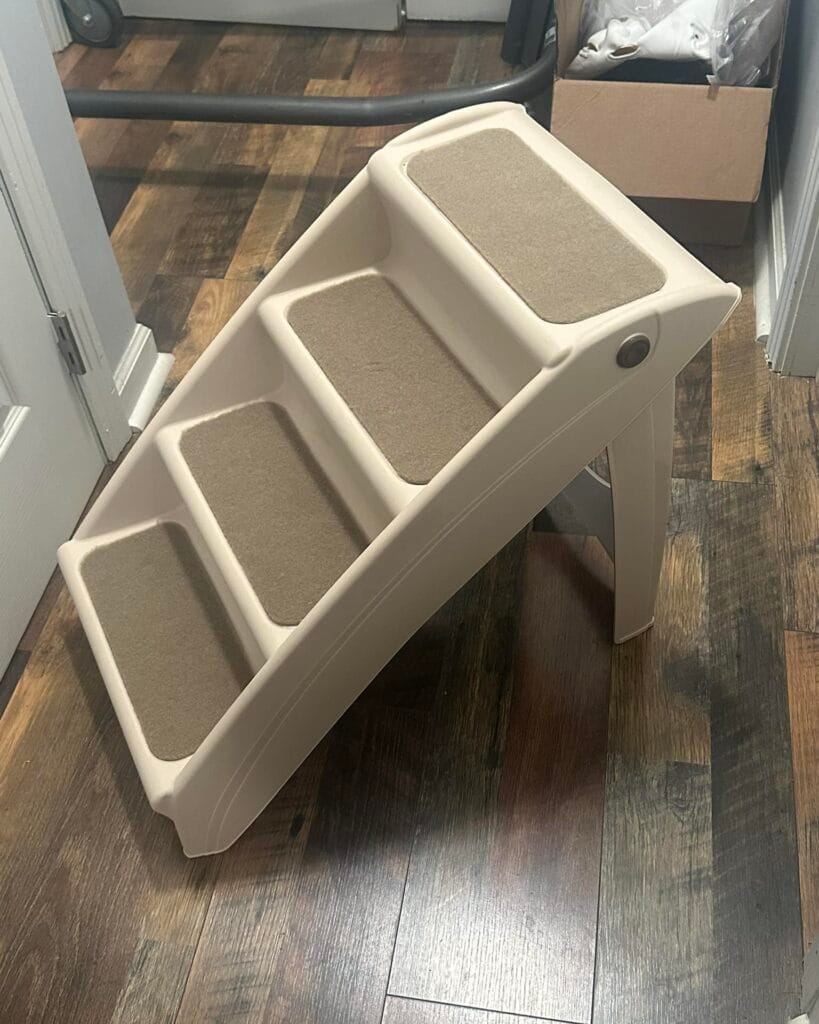
You know that moment where your golden is just standing there at the edge of the bed, doing that sad little whine with its front paws up, back legs not committing? Yeah. My heart breaks every time.
In this build, we recreate that cream-colored, 4-step foldable pet staircase here, made from rigid plastic sheeting, or from HDPE cutting board material, with tan anti-slip carpet pads cut to fit each step tread.
Materials & Tools:
– HDPE plastic sheets (½ inch thick, white or cream)
– Tan low-pile carpet remnant (cut into 4 rectangles, approx. 6″ x 9″ each)
– Spray adhesive
– Plastic welder or heavy-duty PVC glue
– Four L-bracket legs (plastic or ABS)
– One metal hinge bolt (for the fold mechanism — you can see the gray button on the right side of the unit)
– Sandpaper (220 grit)
– Jigsaw or circular saw
Prep Time: 30 min | Active Project Time: 3–4 hours | Difficulty Level: Intermediate
Instructions
The first step in the process is to cut your HDPE sheets into four, stepped platforms. Each platform should be slightly wider and taller than the previous one. My staircase ended up being about 24 inches tall at its highest point, so I cut my steps roughly 6 inches apart.
Sand every cut edge, because the sharp plastic edges can catch in their fur or on their paws.
Once you’ve made the steps and shaped them, dry fit them together before gluing. Using the plastic welder or pvc adhesive, bond the side walls to the tread and hold for 60 seconds. The side walls make the look of a “molded” step. See picture.
Attach your L-bracket legs to the underside of the top platform (this is where the fold function lies). Secure your metal hinge bolt though the leg panel and the side wall so that the unit can fold flat for storage. Note that the silver dot on the right side of the staircase is your bolt head. Try and keep it accessible.
Once you’re finished with the frame, cut out your tan carpet rectangles. Spray them onto the treads and press hard to adhere them and let them dry for 20 minutes before letting your dog test it.
The carpet grips my golden’s paws when she walks up on it so she slips and strains her hips less. And thank goodness, no more 6am “help me up” whines. It folds so I can tuck it under the bed when I have guests so my living room can remain Pinterest-worthy.
If you are obsessed with functional pet builds that look good in your space, then 14 Stylish DIY Dog Crate Furniture Ideas You’ll Love has some pretty awesome inspo!
Cut the carpet pieces a little bit smaller than each tread, all around. I found that if you cut them the exact same size as the treads, the edges can peel up.
📸 Photo credit: Instagram @chiot_official
#4: Carpeted 4-Step Dog Stairs with Side Panel Walls
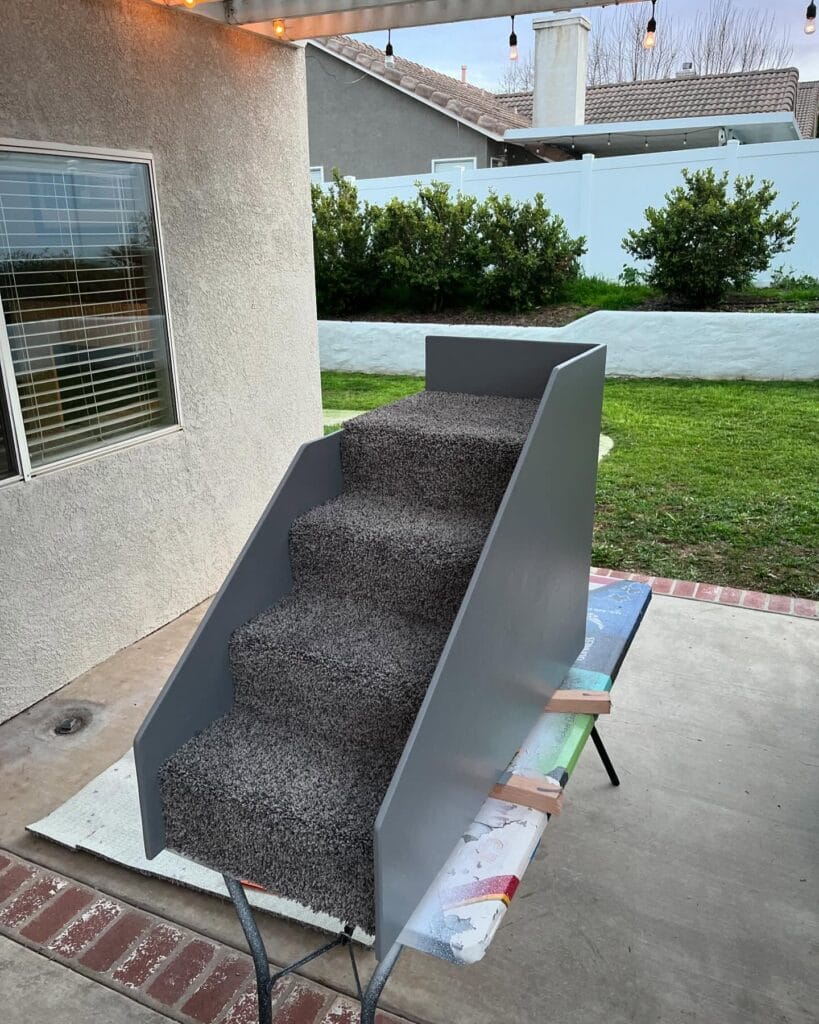
Your golden is eyeing the couch. She backs up and gets a running start but still barely manages to jump up onto it, claws scraping the cushion and her whole body flopping sideways on top of it. You hold your breath until she lands, fearing one wrong landing and a trip to the vet.
These stairs are the answer.
Materials & Tools You’ll Need:
– 3/4-inch plywood (for the frame and side panels)
– Gray spray paint or exterior-grade paint in a neutral tone
– Dark gray carpet remnant (cut to fit each step)
– Carpet adhesive or staple gun
– Jigsaw or circular saw
– Sandpaper (120-grit)
– Wood screws (1.5-inch)
– Measuring tape and pencil
Instructions
Cut your plywood into 4 stair treads, 4 risers and 2 identical side panels. The staircase profile should have already been traced and cut out on these. Sand every edge after cutting to remove any rough spots (rough edges will catch on the carpet).
Attach the screw-in risers to the treads first. Build each step as a little box. Then put the boxes together in a stack. Then slide the side panels on last and screw them flush. The side panels give the dog a wall to lean on when going up the stairs, which relieves joint stress in older dogs.
Paint all exposed wood with two coats of white paint. Allow to dry before cutting your carpet to fit each tread. You can glue or staple your carpet pieces down.
Prep Time: 30 min | Active Project Time: 3–4 hours | Difficulty Level: Intermediate
The carpet-covered steps help her paws and the enclosed sides give her a sense of confidence. Plus, the stairs look intentional when next to your furniture instead of an eyesore you have to cover with a throw blanket.
i would cut my carpet slightly larger than needed, then cut the excess after gluing the carpet. I think you’ll get a better edge by doing that.
📸 Photo credit: Instagram @bensfield_creations
#5: DIY Foldable Pet Stairs Using a Funny Fuzzy Storage Step Stool
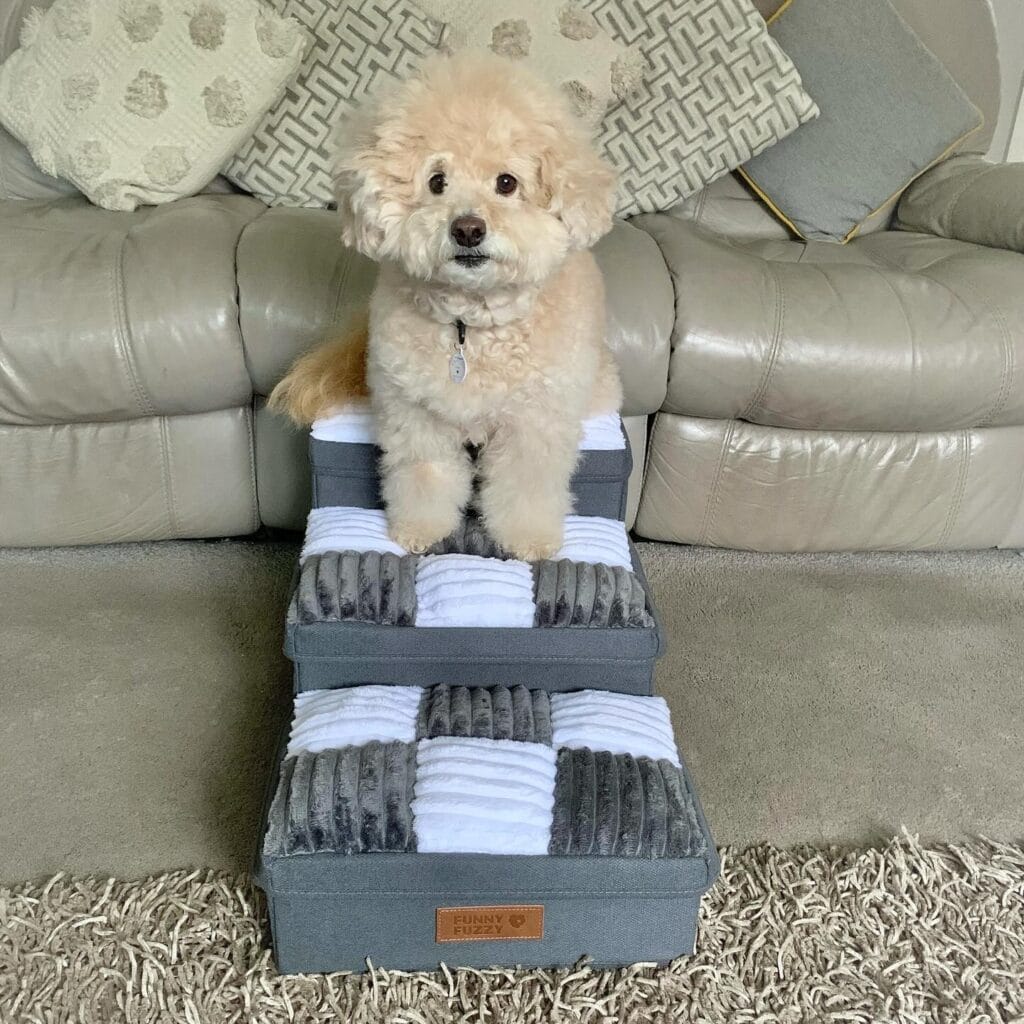
Golden retriever looking at you with her puppy dog eyes because she just can’t get up on the couch anymore? Yeah, that moment hits a little different when you realize she’s been trying to jump up but failing.
This one is so good and I hardly even consider it a DIY…it’s more of a genius hack.
Materials & Tools You’ll Need:
– Funny Fuzzy 2-step foldable pet stool (gray canvas exterior)
– White plush fabric (cut into squares, roughly 4″ x 4″)
– Gray ribbed minky fabric (same size squares)
– Fabric glue or hot glue gun
– Scissors
– A ruler
Prep Time: 20 minutes | Active Project Time: 45 minutes | Difficulty Level: Beginner
### Instructions
Lay your stool flat and measure the top of each step. I’m cutting mine like a checker board using alternating white plush and gray ribbed minky squares. Cut yours out BEFORE you touch the glue gun.
Add a line of fabric glue down the back of each square and press firmly onto the steps. Make sure you alternate your colors. This is where the ribbed grey fabric comes in handy, it will really grip the dog’s paws so that they don’t slip on the steps.
Another advantage of the concept is the use of non-slip textured fabric panels on the steps to keep small paws stable when using each step, allowing your dog to climb the stairs, instead of avoiding them, which protects the joints.
Allow everything to dry flat for at least 30 minutes before turning the stool upright.
I think this checkerboard look could be cute next to a light leather sofa too…my cousin did something similar in her living room and I thought it was store bought!
For dogs that need a little more help feeling at home, 7 Cozy DIY Dog Beds for Large Dogs has some pretty cute ideas that pair really well with this setup!
Worth it because: it can fold flat when your guests come over and your living room doesn’t scream “I have a dog!”
One suggestion is to cut your squares out a half-inch larger than what you measured and then you can fold those edges under before gluing, giving the finished project a cleaner look.
📸 Photo credit: Instagram @milochon1
#6: Stacked Wood Crate Ottoman Stairs With Cushion Tops
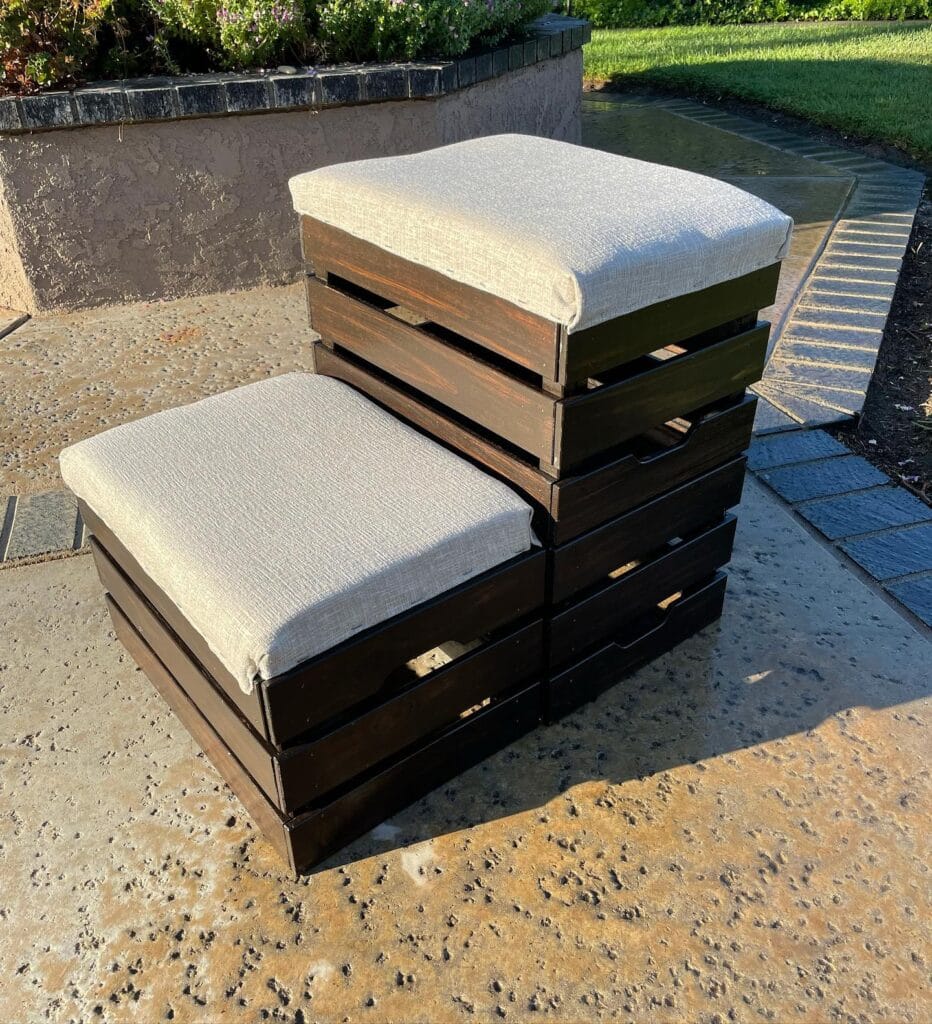
Your golden is standing at the edge of the couch again. No, not sitting. He or she is standing. That hop and scramble, and suddenly your stomach lurches.
Love these stack wood crate stairs? These kind of stairs look like you have bought it from the boutique patio store but actually only costs you a Saturday afternoon and a like thirty bucks.
Materials & Tools:
– 4–6 wooden crates (unfinished pine, roughly 12″ x 16″ x 7″)
– Dark espresso wood stain (I used Varathane in “Dark Walnut”)
– Foam padding cut to each crate top — about 2″ thick
– Natural linen or beige upholstery fabric (enough to wrap each cushion)
– A staple gun + staples
– Wood screws (1.5″ coarse thread)
– Sandpaper (120-grit)
– Paintbrush for stain application
– Measuring tape + scissors
Prep Time: 30 minutes | Active Project Time: 3–4 hours | Difficulty Level: Beginner-Friendly
Instructions
Sand every single surface and edge of each piece thoroughly (and I mean every nook and cranny!) I do not skip this step as it’s the step that people often do and then regret when they stain the wood as it will look patchy when not done properly. Make sure to sand along the grain of the wood.
Once everything feels smooth, brush on a dark espresso stain in long strokes, and let it dry a full hour before applying another coat. You can go with just one coat for a warm brown, or two coats for a darker finish.
If your dog has two steps on each back leg, stack two crates for the taller back step, and one crate for the lower front step. Screw the crates together through the interior walls so they don’t shift under the weight of your dog.
cut the foam to fit the top of the crate cut the backing you will be using into two pieces that are big enough to cover the top of the crate with a couple of inches to spare put the backing on the table with the right side up (facing you) lay the foam on top of the backing, make sure the foam fits into the sides of the crate then lay the front of the fabric on top of the foam and pull it tight like you are wrapping a gift. you can staple every two inches on the underside of the fabric, the fabric will be on top of the foam. tuck the corners like the corner of a hospital bed and staple them tight so they will not come loose.
Then, go ahead and drop the finished cushion pads onto each step. The weight of your dog should be enough to keep them in place.
Another reason to try this approach is the “two-step” height change. Because the dog is getting down from the couch, she will build confidence on the lower step before jumping on it. And, because of the height difference, she is not pounding her hips and knees as much on the way down as she was on the way up. As the result, your knee will stop quivering every time the dog tries to jump on the couch.
Place your finished piece of art flush against your sofa and you’re golden figure it out in ten minutes. Mine sat on the stairs instead of the couch the first day, so no big deal.
If you will be using the pieces outdoors on a patio, it is a good idea to seal the stained wood with a waterproof polyurethane coat before you assemble them.
📸 Photo credit: Instagram @kathleen_jolliff
#7: DIY Foam Pet Stairs With Bouclé-Style Fabric Cover
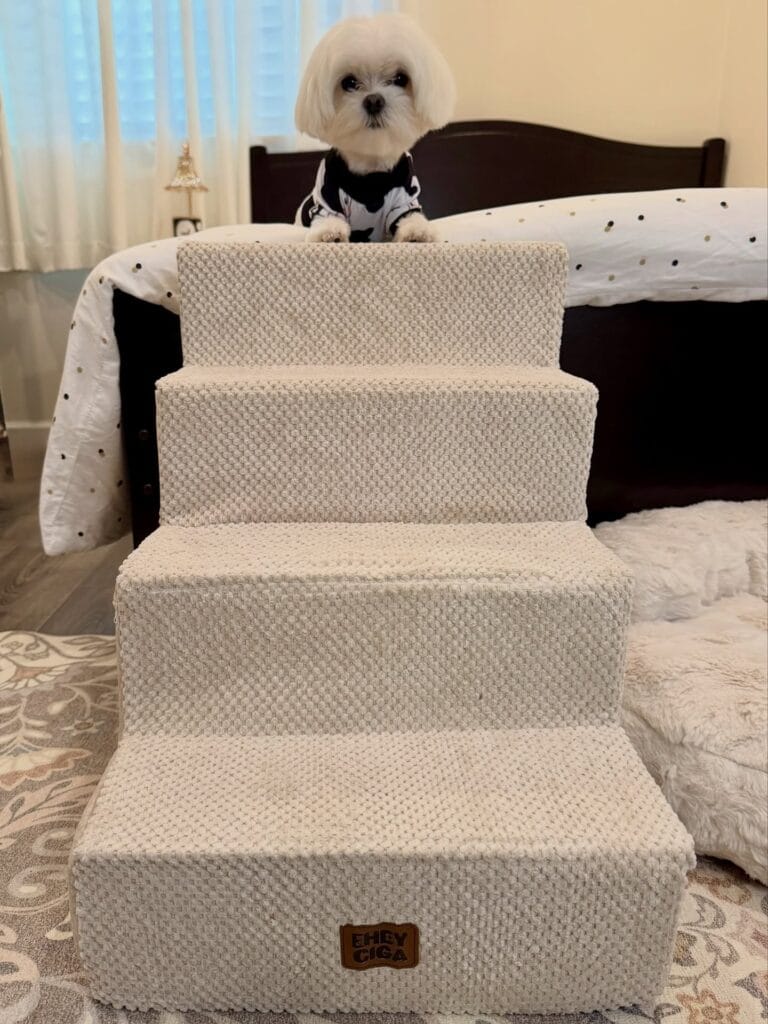
Your dog’s probably hit the side of the bed every single morning. That thud. The scramble. The little whimper. You’re lying there thinking “I cannot keep lifting 60 pounds at 7am.”
Same here. My aunt’s maltese, Chico, uses these stairs. I’m a little jealous, they look much better in her bedroom than mine.
Materials & Tools:
– 4 blocks of high-density foam (sizes: 18″W x 12″D x 4″H, 18″W x 12″D x 6″H, 18″W x 12″D x 8″H, 18″W x 12″D x 10″H)
– 1.5 yards of cream bouclé-textured fabric
– Electric foam cutter or sharp serrated knife
– Heavy-duty spray adhesive
– Upholstery staple gun
– Leather brand label (optional, like the “EHEYCIGA”-style tag visible here)
– Non-slip rubber shelf liner for the base
Prep Time: 20 min | Active Project Time: 2 hours | Difficulty Level: Beginner-Friendly
### Instructions
Start by stacking the four foam blocks from largest to smallest, forming a pyramid. Make sure each block is 2 inches shallower than the one below it. Spray adhesive between each layer and press down firmly for 30 seconds.
Once the foam structure feels solid to you, cut your bouclé fabric into panels (one for each step face and each tread). Bouclé is not just pretty, it also grips your dog’s paws, thus reducing slip, and makes the whole thing feel like furniture (rather than a pet item!). The payoff is worth it, when your dog is able to walk up to it confidently, without skidding.
Wrap each piece of foam individually before you stack them. I wrapped the back of mine and stapled it to the front using my upholstery gun. I wrapped the corners like you would a gift box. Do not bunch up the fabric.
This detail is what makes it look expensive. I sewed the seams of the front to the back and bottom of each block so they are completely hidden when viewed from the front. That way it looks like one clean, sculptural piece.
A better way: Lastly, glue the non-slip rubber liner to the entire base. It will not move on hardwood or tile when your stairs are assembled.
Attach a piece of leather to the front bottom step with two small staples for a Pinterest-worthy touch with zero effort.
If your dog is on the heavier side, check out these 7 Heartwarming DIY Dog Ramp Ideas for Your Pup. Sometimes ramps work better for dogs over 30 pounds.
Cut your fabric panels about 3 inches larger on every side than your foam face. That way you will have enough to pull and staple without the fabric going thin over the edges of the foam.
📸 Photo credit: Instagram @maltesechico
The One Mistake That’ll Make Your Dog Stairs Wobble (And How to Skip It Entirely)
The biggest mistake that I see people making is building the whole dog stairs and then realizing that they want the surface to be something other than what they built. By the time they decide on the surface, it is usually too late to adjust the angle of each of the steps.
This measurement is taken by measuring the length of the stride that your dog uses to go up the stairs without cutting a single piece of wood. Instead of using the height of the stairs, the length of the stride is used as it is the distance between the floor and the top of your dog’s foot. So once you have established the length of your dog’s stride, measure the length in inches between each paw placement.
I’ve built dog stairs before, but my girl refuses to use them. She just jumps over them, but I recently discovered why. The treads are too shallow for her stride and it feels unstable under her paws.
Also, underneath your grip fabric (where you have tape) you need to staple it from underneath the tread before you assemble it. Once you have dogs bouncing up and down, that fabric will shift.
Good news: I think I’ve got the measurement right so my pup actually uses the stairs instead of looking at them as expensive furniture.
Your Golden Deserves a Clean Home Too
Good girl! You have everything you need to make this work. You just need to pick ONE idea this weekend. Just one. Try that one idea out and see how your pup responds. Build from there.
Your home can still feel put-together even with a golden retriever ruling every inch of it. I promise you this.
And if you want to keep up the good vibes, check out these DIY dog shampoo recipes. They’re the perfect way to keep that fuzzy coat soft without the chemical smell.
Which one of those hacks are you going to try first? Does your golden have a favorite spot you are trying to protect? 🙂

Amr Mohsen is a software engineer who traded his keyboard for a leash — at least on weekends. His love for dogs inspired him to share what he learns as a dog owner and enthusiast, bringing a detail-oriented, research-driven perspective to every article he writes. If it’s about dogs, he’s probably already looked it up twice.



