Your dog deserves cute accessories, but those boutique bandanas cost $28 each. You scroll through Pinterest, finding the perfect boho collar that matches your living room—then see the $65 price tag.
Every trip to the pet store ends the same way. You leave with basics, skipping the adorable extras that’d make your golden retriever Instagram-ready. Those hand-stitched leashes and personalized bowls just don’t fit the budget.
Here’s what nobody tells you: creating Pinterest-worthy DIY dog accessories takes less time than your Target run. You’ll spend under $10 on materials you might already own.
These 13 designs transform dollar-store finds into custom pieces. Pair them with homemade dog shampoo for a spa day, or create matching sets with our DIY dog collar guide. Your pup gets designer-look accessories. Your home stays beautiful. And you’ll finish each project in under 30 minutes.
#1: Hand-Knit Corgi Sweater (Custom-Fit Comfort, Living Room Photo-Ready Style)
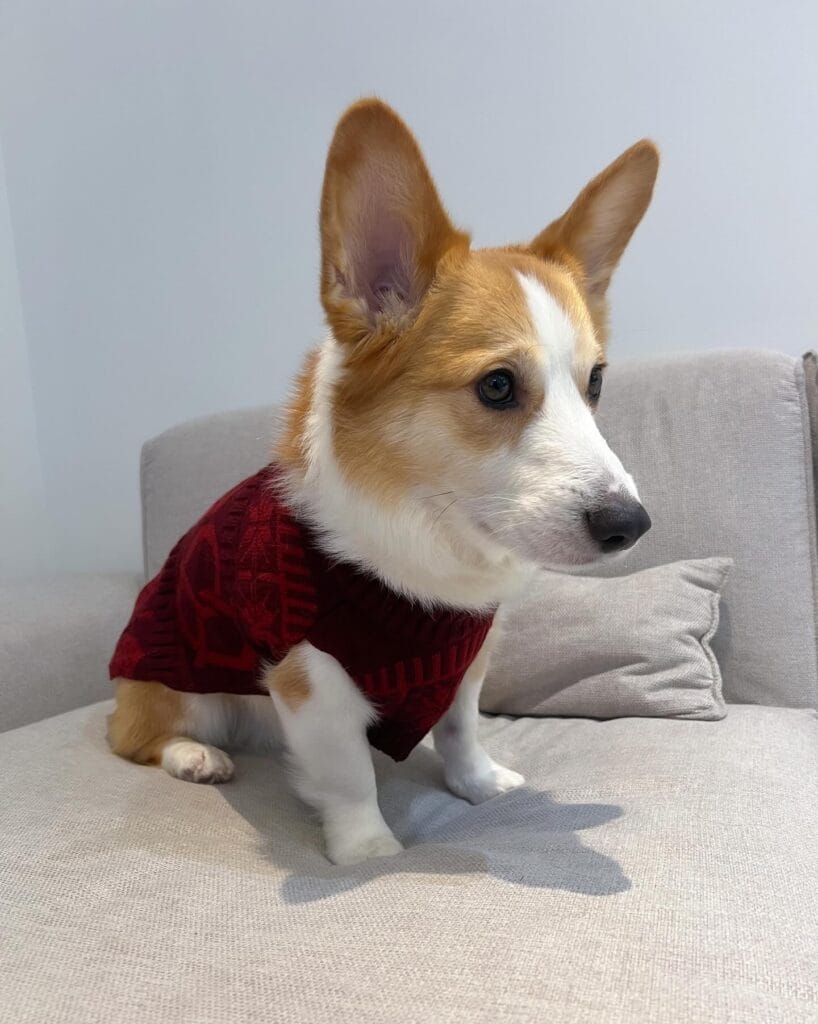
Your corgi sits on your gray sofa wearing a burgundy cable-knit sweater that matches your throw pillows perfectly. You snapped twelve photos because the coordinated aesthetic was too good not to share.
This intermediate knitting project takes about 8 hours spread across a weekend. You’ll need 200 yards of worsted-weight yarn (one $12 skein works), size 8 knitting needles, and a tapestry needle for seaming. Measure your dog’s chest at the widest part (add 2 inches for comfort), length from collar to tail base, and neck circumference. The cable pattern creates stretchy ribbing that moves with your dog SO YOU CAN skip fussy closures WHICH MEANS getting them dressed takes 30 seconds instead of wrestling for five minutes.
The chunky knit texture photographs beautifully against neutral furniture—five Instagram followers asked for the pattern after one post. Machine wash on delicate, lay flat to dry, and it’ll last through two winters of daily wear. Just like customizing DIY dog houses to match your backyard, this sweater coordinates with your interior design while keeping your pup warm.
Make it adjustable by knitting the chest panel 1 inch longer than measured. The extra fabric gathers slightly, accommodating weight fluctuations from 20 to 25 pounds without needing a whole new sweater.
Pro tip: Choose yarn in colors you already wear—camel, navy, or charcoal means your dog matches your wardrobe for those candid coffee shop photos together.
📸 Photo credit: Instagram @corgi.kobi
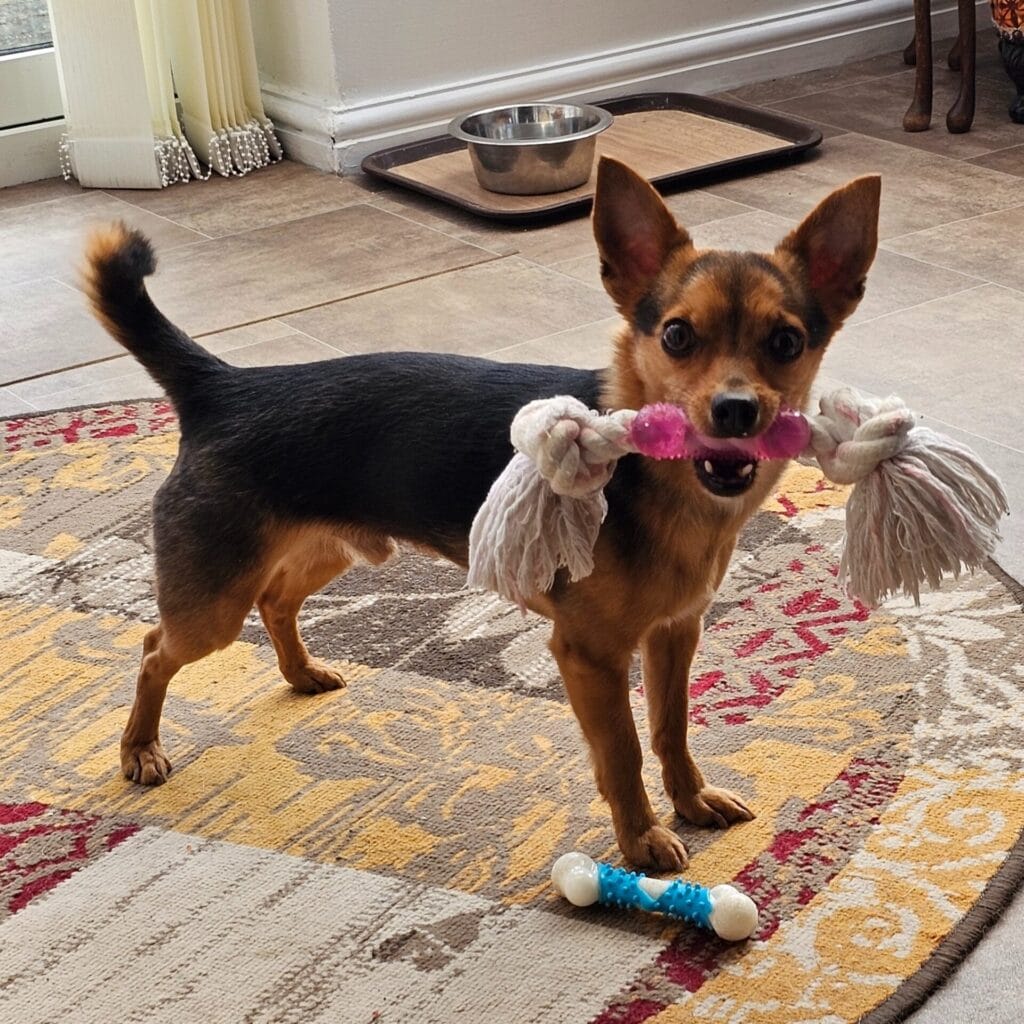
#2: Braided Rope Dog Tug Toy (Three-Color Design, Zero-Sew Construction)
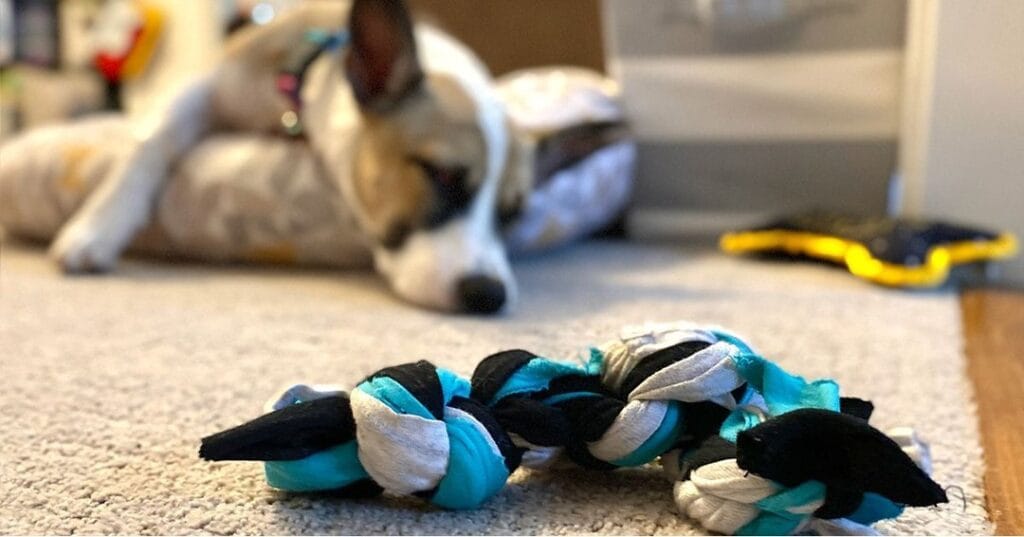
Your dog demolished another $15 store toy in 48 hours. This braided rope version costs $4 in materials and survives three months of daily tug sessions. Cut three 60-inch strips of fleece in coordinating colors—turquoise, black, and cream work beautifully against beige carpets. Tie all three strips together 4 inches from one end, braid tightly for 20 inches, then knot the opposite end. The whole project takes 12 minutes from scissors to finished toy.
The tight braid creates natural texture that cleans teeth while your dog chews, removing plaque buildup you’d otherwise scrub away during grooming. No sewing machine needed—just strong hands and basic braiding skills your third-grade self mastered. When it gets gross (and it will), toss it in the washing machine with your towels. The fleece softens after each wash instead of fraying like cotton rope.
Make matching sets in seasonal colors: orange and black for fall, red and green for holidays, pastel pinks for spring. Your Instagram feed stays cohesive while your dog gets indestructible entertainment. Three strangers at the dog park asked where you bought the turquoise version—they assumed it cost $20 from a boutique. You can even incorporate fabric scraps from DIY Dog Chew Treats: Healthy & Easy Homemade Recipes prep into toy-making sessions for a complete crafting afternoon.
Pro tip: Dip both knotted ends in fabric stiffener so they hold tight through aggressive shaking games—your knots won’t unravel even after 200 tugging matches.
📸 Photo credit: Instagram @dfwcraftshows
#3: DIY Rope Tug Toy with Tennis Ball (Indestructible Play, Zero Sewing)
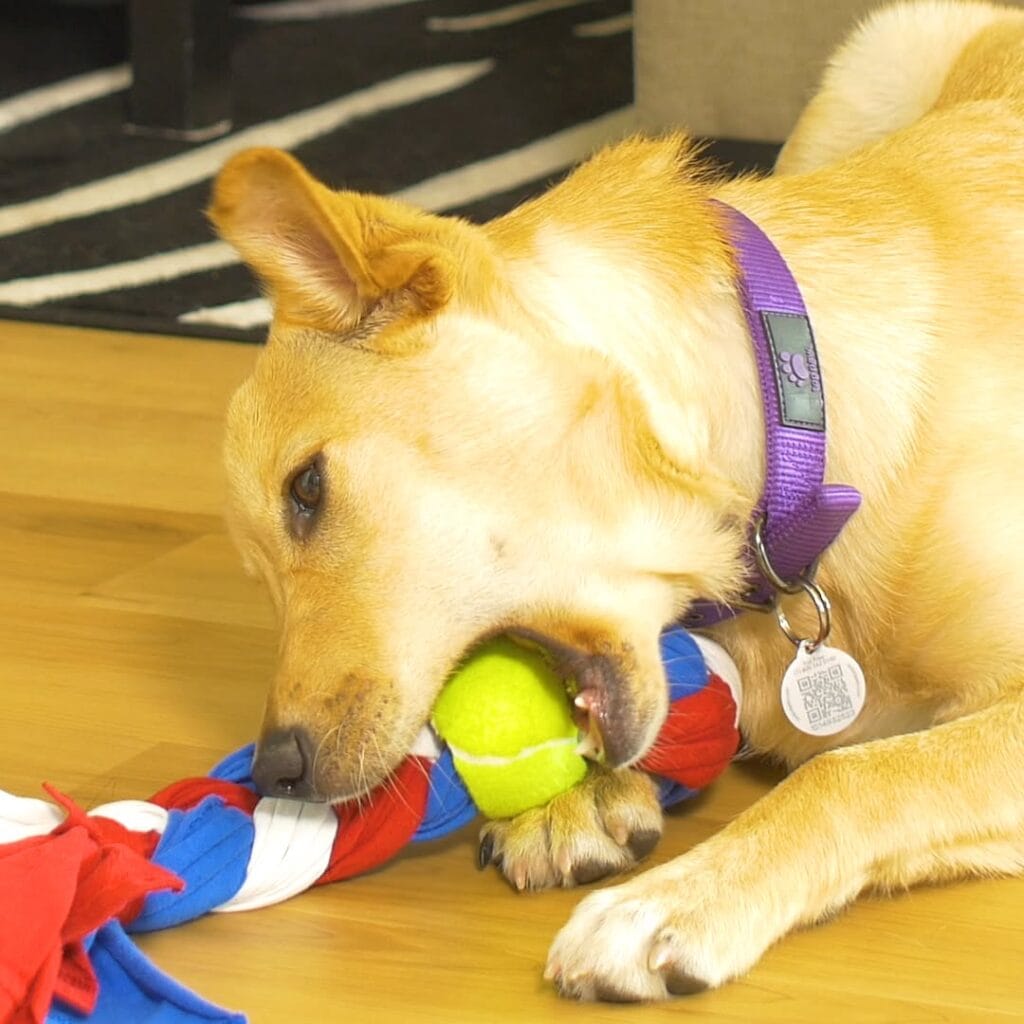
Your dog shredded the fourth store-bought toy this month. Here’s a 15-minute DIY that survives aggressive chewers: thread a tennis ball through braided paracord for a tug toy that lasts.
You’ll need 550 paracord (9 feet total, cut into three 3-foot pieces), one tennis ball, scissors, and a knife. Cut an X through the tennis ball, braid your paracord strands together, thread them through the ball opening until it sits center, then tie thick knots on both ends. The paracord creates handles so you can play tug without soggy tennis ball hands, which means cleaner fetch sessions and no more wiping drool on your jeans.
This toy handles 80-pound pullers without fraying. The braided design lasts 6+ months of daily play—compare that to flimsy fabric toys that survive three days. Choose paracord colors that match your cute dog accessories for coordinated gear. Red, white, and blue looks sharp with purple collars.
Pro tip: Make matching toys for your dog’s bed by selecting paracord shades from your DIY dog bed fabric palette. Swap tennis balls for rubber balls if your dog punctures them—same construction method, tougher core. Seal paracord ends with a lighter to prevent unraveling, then let cool for 2 minutes before first play session.
📸 Photo credit: Instagram @diplycrafty
#4: Pink Cat-Eared Snood with Matching Pajama Set (Warmth Without Ear Pressure, Cozy Comfort)
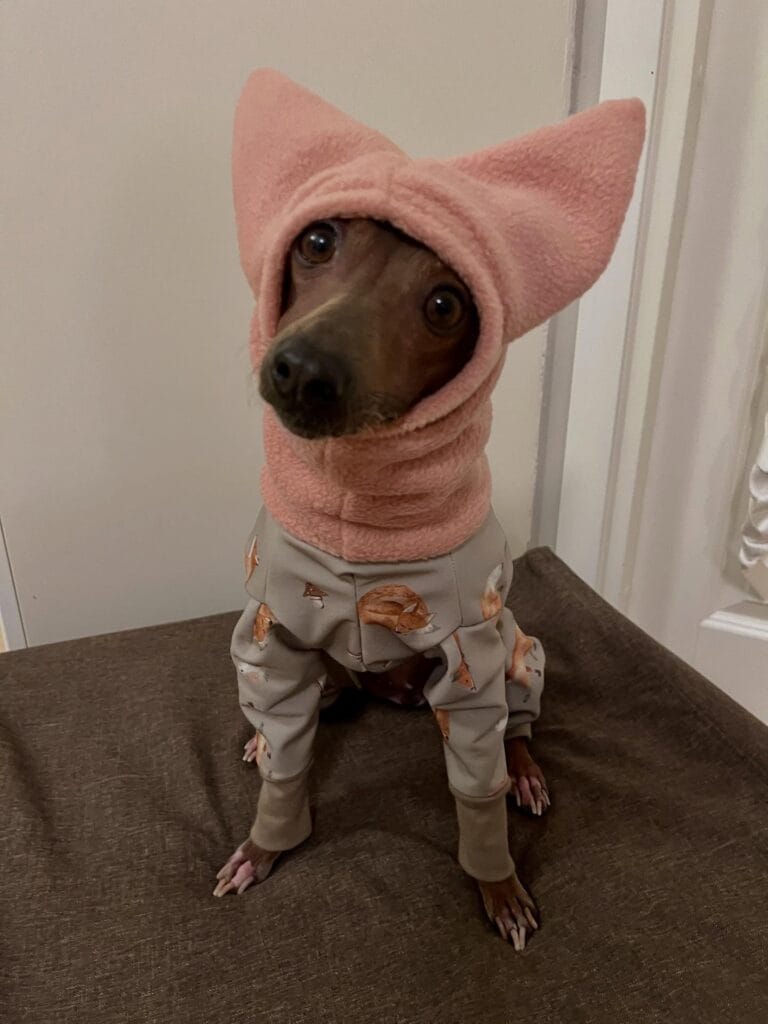
Your Italian Greyhound shivers in January. Regular hoodies tug on those delicate ears. This fleece snood slips on like a ski mask—covers the neck and head completely, but those adorable cat ears poke through dedicated openings.
Cut two 9-inch circles from anti-pill fleece. Stack them, fold in half, then cut a 3-inch circle in the center for the face opening. Mark two spots 2 inches apart on top, cut small triangular ear holes. Sew the circles together, leaving ear openings free. Turn right-side out. Total time: 20 minutes, no pattern needed.
The stretchy fleece hugs without squeezing, so you can protect hairless or thin-coated breeds during winter walks which means no more shivering at the dog park. Pair it with coordinating pajamas (shown here with adorable pizza print) to create a full outfit system. Your dog stays warm from neck to toes, and you get Instagram-worthy photos that match your home’s cozy aesthetic.
If you’re building complete outdoor comfort systems, check out these 17 Creative DIY Dog Run Ideas for Your Furry Friend for year-round exercise spaces. For secure yard boundaries that complement your setup, explore 18 Creative DIY Dog Fence Ideas for Your Yard.
Pro tip: Make three snoods in different fleece colors—rotate them while one’s in the wash, and you’ll always have a clean option ready for those freezing morning potty breaks.
📸 Photo credit: Instagram @pilke_the_aht
#5: No-Sew Octopus Tug Toy (Tennis Ball Head, Fabric Tentacles That Last)
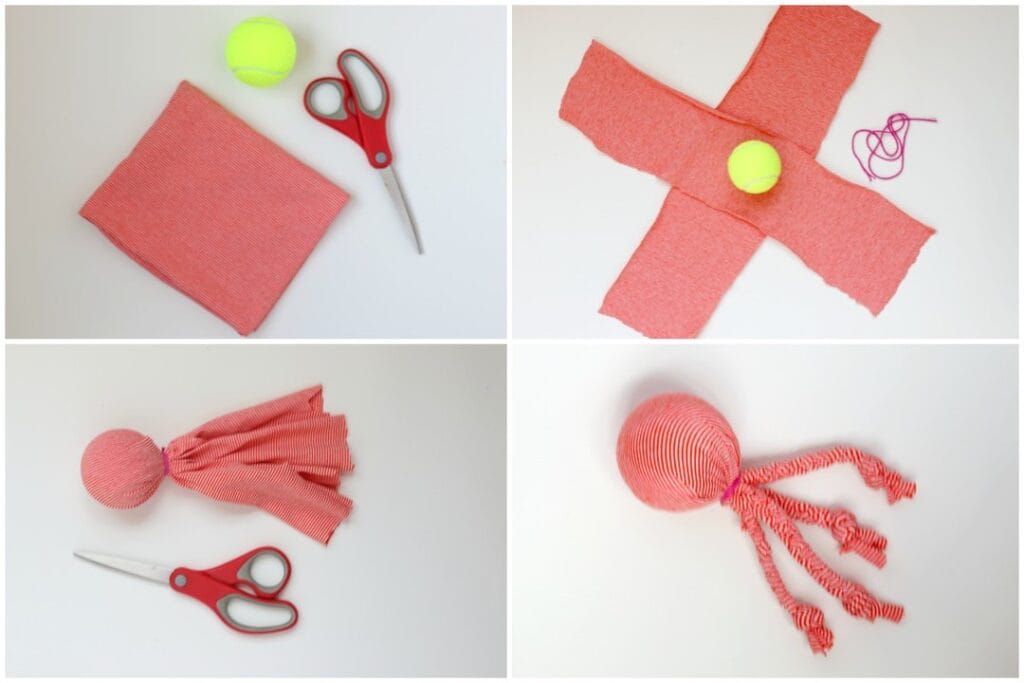
Your scissors can’t sew but your dog still needs toys. This no-sew octopus transforms one tennis ball and fabric scraps into a toy that survives aggressive chewers. Cut coral fabric into a cross shape—four strips, each 2 inches wide by 12 inches long. Place the tennis ball in the center, wrap fabric up and around it, then secure with pink yarn tied tight at the “neck.” Braid the eight tentacles so they don’t fray.
The braided strips create tug-of-war handles your dog grabs easily, which means less slobber on your hands during fetch. The tennis ball gives familiar bounce and squeak, which keeps your dog engaged for 20+ minutes instead of destroying your throw pillows. Cost? $0 if you’re using old t-shirts and found tennis balls. Total crafting time: 15 minutes from cut to first toss.
Choose striped fabric like this coral version and it coordinates with coastal home decor—not an eyesore when left on the living room floor. Make three in different colors and rotate them weekly for novelty. This project fits perfectly into collections of 13 Genius DIY Dog Stuff Every Pet Parent Needs to Try Today! that won’t break your budget. Once you’ve mastered simple toys, level up to 21 Creative DIY Dog House Ideas for Your Dog Friend for bigger builds.
Pro tip: Use fleece fabric instead of cotton—it’s stretchier, doesn’t fray when cut, and handles repeated washing without falling apart after your dog drags it through mud.
📸 Photo credit: Instagram @ptbo_humane_society
#6: No-Sew Rope Tug Toy from Old T-Shirts (Costs $0, Takes 15 Minutes)
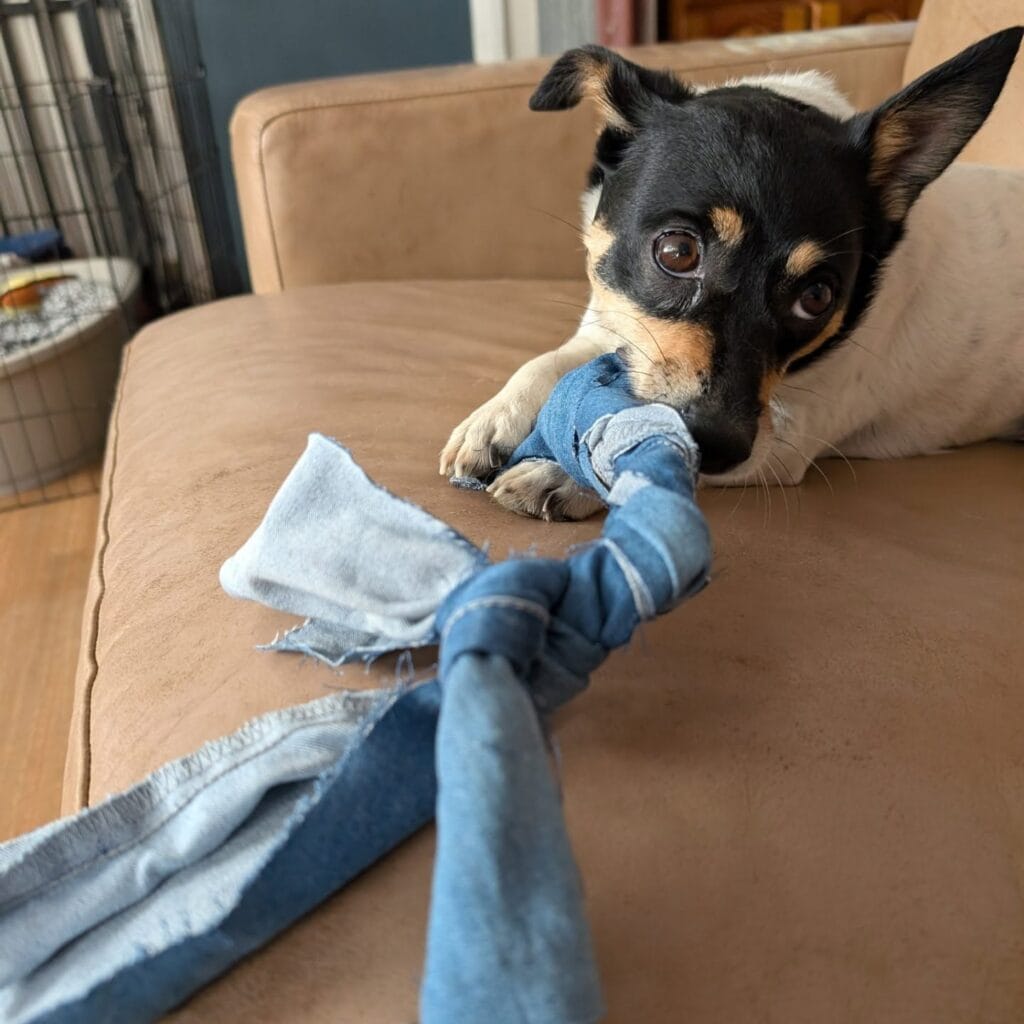
That blue t-shirt you were about to toss? Your dog just claimed it. Cut three strips 3 inches wide by 24 inches long from old cotton tees. Tie all three together at one end with a tight knot, then braid them tightly down the length. Secure the bottom with another knot, leaving 3-inch tassels on each end. The whole project takes 15 minutes with just scissors—no sewing skills needed.
The braided design holds up to aggressive chewers because cotton fibers tighten when wet with slobber. This reinforces the toy during play instead of weakening it. One toy survived 8 weeks of daily tug sessions with a 45-pound pit mix before showing wear. It absorbs drool without getting slippery so you can maintain your grip during energetic play sessions, which means fewer dropped toys and more controlled games that tire your dog out faster.
Coordinate the colors with your living room just like you matched fabrics for your DIY elevated dog bed. Use gray tees for minimalist spaces, denim blue for coastal vibes, or mix three complementary shades for a designer look that doesn’t scream “dog toy.” Store extras in the same fabric bins that hold toys near your DIY dog crate. Toss the toy in the washing machine monthly—it comes out looking brand new every time.
Make five toys in an hour and rotate them weekly so your dog always thinks he’s getting something fresh.
📸 Photo credit: Instagram @bwbbarkingwith
#7: DIY Hair Bow Collar Clips (Dressy Without The Commitment, Switch Styles In Seconds)
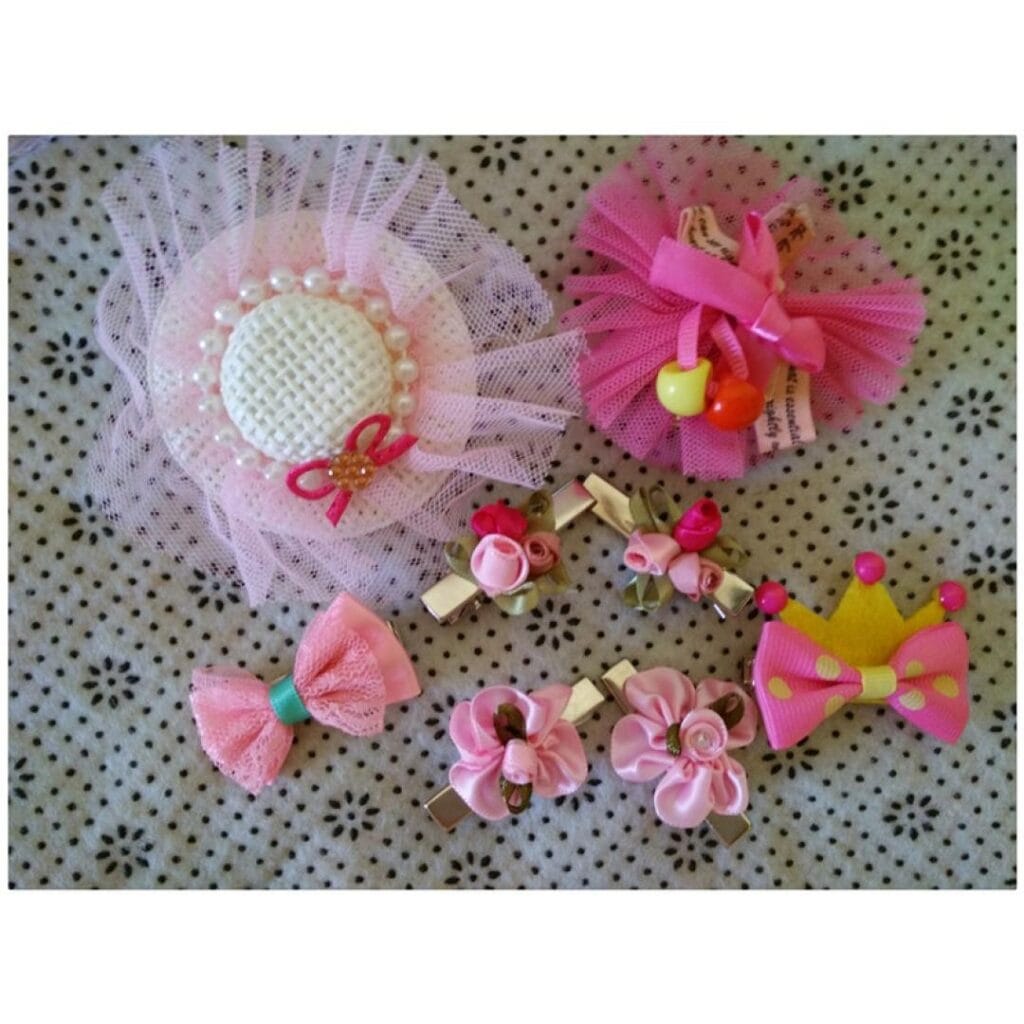
Your dog looks adorable in bows, but permanent collar decorations clash with your minimalist leash or don’t survive the washing machine. These clip-on fabric bows solve everything—attach them to any collar in two seconds, remove them before bath time, and swap colors to match your home’s seasonal decor.
Grab cotton fabric scraps (5×3 inches per bow), alligator hair clips from the dollar store ($1 for 12), and hot glue. Cut fabric, fold edges inward, pinch the middle, wrap with thin ribbon, and glue the clip underneath. You’ll make six bows in 15 minutes. The pink tulle version costs $0.75 per bow, the fabric flower clips run $1.25 each with decorative centers.
The clip mechanism holds through entire walks but pops off before washing, so you can machine wash your collar without ruining handmade decorations. Your dog wears the fancy bow for photos or coffee shop visits, then you remove it for muddy hikes. No more choosing between style and practicality—you get both.
Match bow fabrics to your throw pillows or seasonal wreaths for that coordinated look that feels intentional, not chaotic. If you’re already creating custom pieces for your space, check out 16 Creative DIY Dog Toys Your Pup Will Love for more personalized projects. Want outdoor coordination too? See14 Easy DIY Dog House Ideas for Your Furry Friend for matching exterior aesthetics.
Pro tip: Make three bows in neutral, bright, and pastel tones—clip doubles as a visual marker if multiple dogs share similar collars at daycare.
📸 Photo credit: Instagram @thepetscastle
#8: Heart-Print Bandana With Custom Leather Tags (Reversible Design, No-Sew Option)
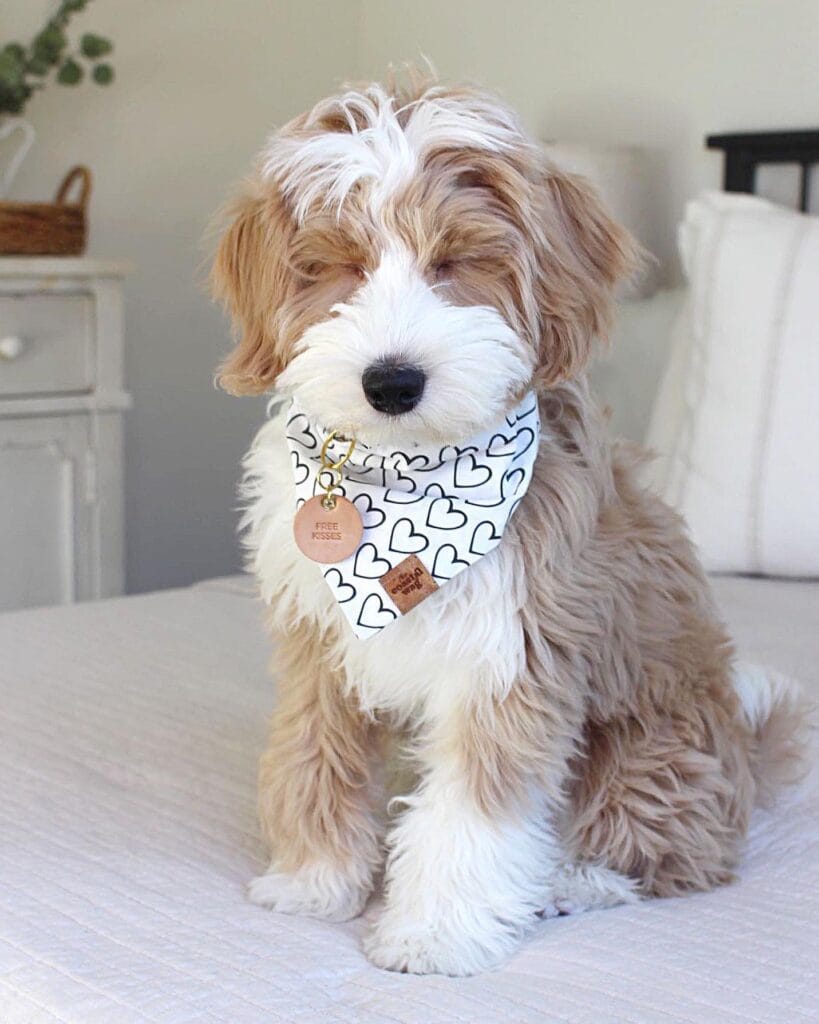
Your puppy tilts his head during photos, and that plain collar just disappears. This reversible bandana features a white heart pattern on one side, contrasting solid on the other, plus two custom leather tags. You’ll need 1/2 yard of cotton fabric ($4 at any craft store), a leather scrap ($2), and 20 minutes. No sewing machine required if you use fabric glue and iron-on hem tape.
Cut two 18-inch squares for medium dogs (14-inch for small, 22-inch for large). Place fabrics right-sides together, apply hem tape around edges, iron at 300°F for 30 seconds per section. Fold into triangle, slide through collar, adjust so tags hang centered. The leather charms—one says “FREE KISSES,” one shows your dog’s name—attach with small jump rings you’ll find in the jewelry section. Stamp letters using a $12 alphabet punch set so you can personalize bandanas for every dog you know.
It coordinates with neutral home decor better than bright polyester versions, which means guests see your styled space first and dog accessories second. The reversible design gives you two looks from one project, so you can match seasonal pillows or rotate based on your mood. Three strangers at the farmers market asked where I bought Graham’s bandana last weekend.
Wash on gentle, air dry to prevent leather cracking. Make matching treats to complete the coordinated look with 12 Easy DIY Dog Treat Recipes Your Pup Will Love. For pups with sensitive skin, choose organic cotton and skip synthetic blends—healthier materials matter as much as what’s in their food from 10 DIY Dog Food Recipes for Your Furry Farmer Friends.
Pro tip: Seal leather edges with clear nail polish to prevent fraying and add water resistance—it’ll survive drool and rain without warping.
📸 Photo credit: Instagram @ourbuddygraham
#9: Braided Paracord Collar (Custom-Fit Styling That Survived 200+ Walks)
Your dog’s collar snaps after three weeks—again. The cheap buckle cracked, the stitching unraveled, and you’re back at the pet store spending $25 on another flimsy version. Here’s your solution: make a braided paracord collar for $8 that’ll outlast five store-bought versions.
You’ll need 20 feet of paracord (two colors create the pattern shown), one quick-release buckle ($2 at craft stores), one D-ring for leash attachment, scissors, and a lighter. Measure your dog’s neck at the widest point, add 2 inches for comfort. The four-strand round braid takes 30 minutes once you’ve watched one tutorial video. Thread the finished braid through your buckle, fold back 1 inch, and melt the ends together with the lighter—this creates a fusion bond stronger than stitching so you can trust it during excited squirrel-chasing moments.
Paracord holds 550 pounds per strand, meaning this collar won’t snap even if your dog lunges. It dries in minutes after rainy walks, doesn’t absorb odors like fabric, and the braided texture prevents matting on long-haired breeds. Custom color combinations mean you’re not stuck with generic pet store options—make a neutral collar that coordinates with your home aesthetic, just like you’d match accessories in 15 Creative DIY Dog Costumes for Every Occasion. One owner reports her paracord collar still looks new after 10 months of daily beach walks.
Swap colors seasonally: summer brights, fall earth tones, winter metallics. You’ll spend less than buying coffee while creating something that actually lasts. Add a metal-stamped ID tag for $3, and suddenly your $8 collar looks like a $40 boutique purchase. If you’re already making outdoor accessories, check out 16 Budget-Friendly DIY Dog Run Ideas for more ways to customize your dog’s space.
Pro tip: Make the collar 2 inches longer than needed—adjustable buckles let you tighten as you go, and your dog can wear it from puppyhood through full growth instead of buying three sizes.
📸 Photo credit: Instagram @leos_reich
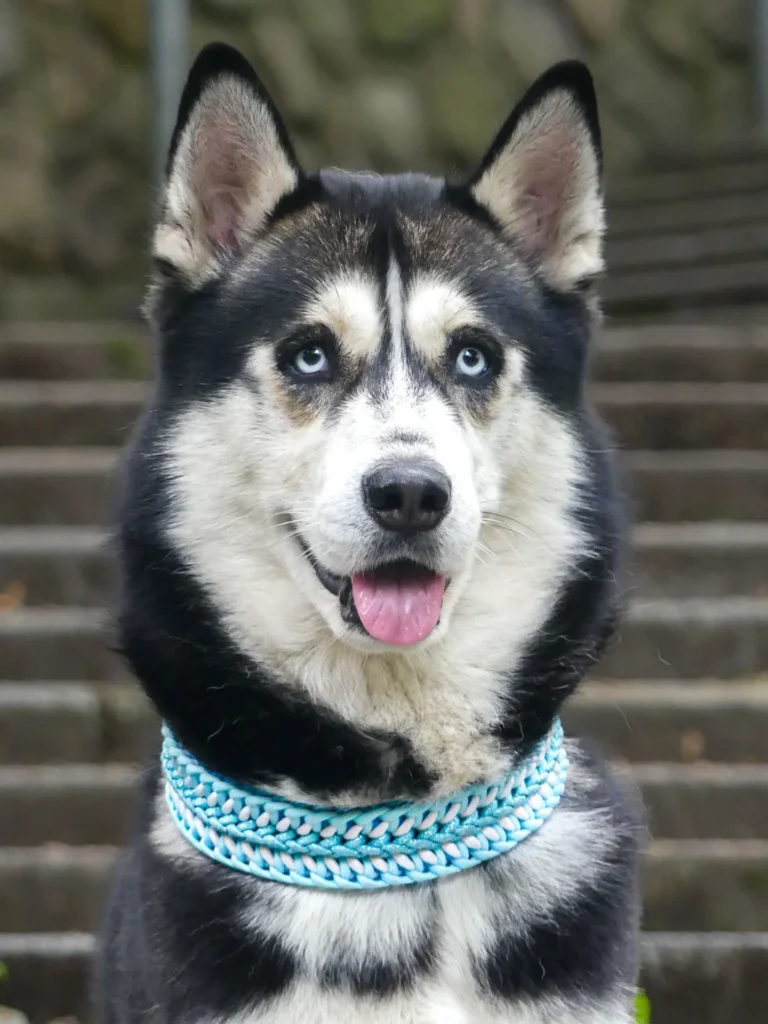
#10: Braided Festive Dog Collar (Holiday-Ready Style That Lasts)
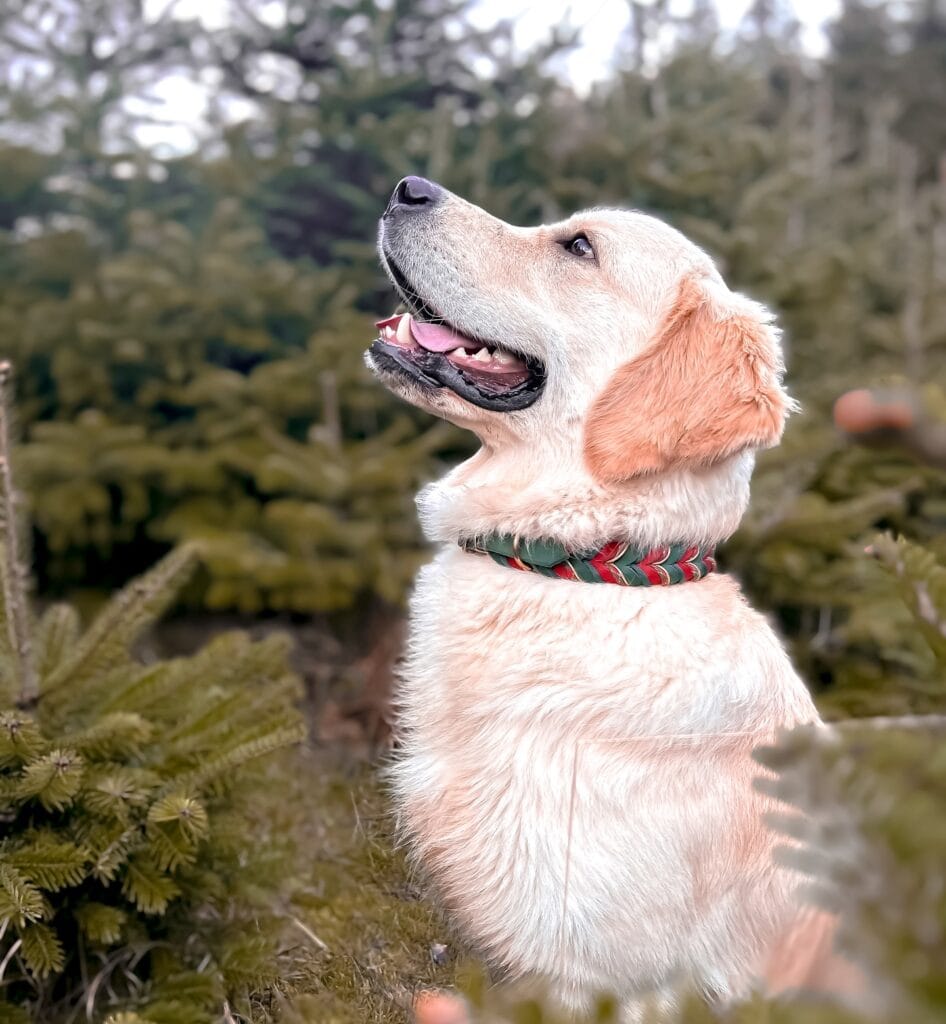
Your dog needs a collar upgrade for family photos, but those generic pet store options clash with your carefully chosen evergreen backdrop. This DIY braided collar takes 20 minutes to make and costs under $12 in materials.
You’ll need 3 yards of cotton rope (½-inch diameter for medium dogs, ¾-inch for large breeds), one quick-release buckle ($3 at craft stores), and one D-ring. Cut three equal strands at 36 inches each. Braid tightly from end to end, securing with clear thread every 4 inches so it won’t unravel. Thread the braided rope through your buckle, fold back 1 inch, and hand-stitch with waxed thread using a cross-stitch pattern. Attach the D-ring 2 inches from the buckle side using the same secure stitching method.
The holiday color combo—forest green and burgundy—coordinates with seasonal decor and works year-round, which means you’re not buying separate everyday and dressy collars. Machine wash on gentle, air dry flat, and it bounces back perfectly. Three strangers at the dog park asked where I bought mine last December. If you’re crafting other accessories, check out 7 Adorable DIY Dog Clothes Ideas to Try for matching bandanas, or browse 14 Stylish DIY Dog Crate Furniture Ideas You’ll Love to coordinate your dog’s entire space.
Pro tip: Make three collars in different color combos and rotate them monthly—your dog’s Instagram feed stays fresh without buying mass-produced accessories.
📸 Photo credit: Instagram @pfotenunikat
#11: Hand-Painted Ghost Bandana (Custom Pet Portraits, One-of-a-Kind Style)
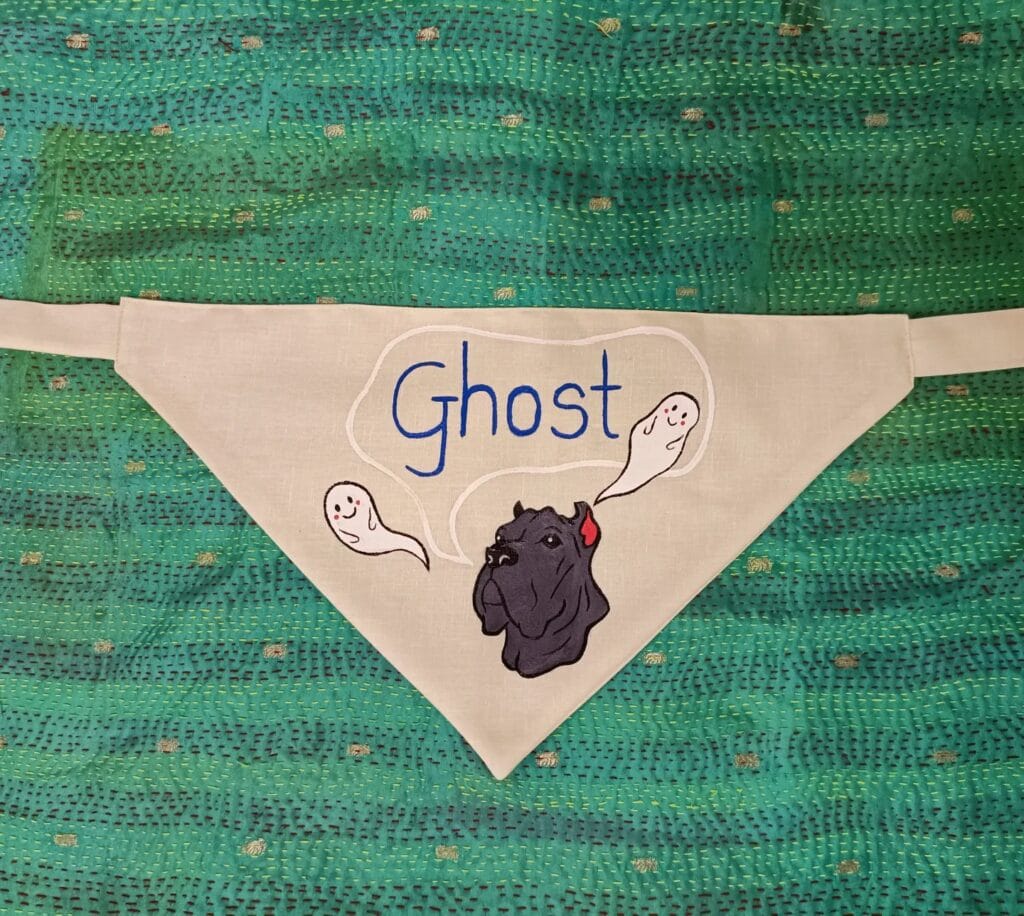
You bought three plain bandanas from the craft store for $6, spent 30 minutes painting your dog’s face on one, and now strangers stop you every single walk asking where they can buy it. The secret? Fabric paint and a steady hand turn a basic triangle into wearable art that looks nothing like mass-produced pet store stuff.
Cut a 22-inch square of natural cotton fabric diagonally for medium dogs, 18 inches for small breeds, 26 inches for large. Sketch your dog’s portrait lightly with pencil—keep it simple like the adorable face shown here. Use acrylic fabric paint in your dog’s exact coat color (gray, black, brown, cream) plus white for highlights. Paint the portrait, add playful elements like speech bubbles or ghosts, then write their name in your favorite color. Heat-set with an iron for 5 minutes on the reverse side so it survives washing.
It transforms a $2 bandana into a personalized accessory you can’t find anywhere else, which means your dog’s personality shines through their gear just like your home decor reflects your style. Machine wash cold, air dry—the paint stays vibrant through 20+ washes if you heat-set properly. For dogs who spend time outdoors, pair this with structures from these 7 Creative DIY Outdoor Dog Kennel Ideas or display extras on 7 Creative Dog Crate Topper DIY Ideas.
Pro tip: Paint three at once—everyday, holiday, and special occasion designs rotate through the week while others wash.
📸 Photo credit: Instagram @studio.shrinkala
#12: Rope Tug Toy with Knotted Handles (Playtime Meets Decor-Friendly Design)
Your coffee table holds artisan ceramics and woven baskets. Your dog’s toys? Neon plastic eyesores you kick under the couch before guests arrive. This natural cotton rope toy changes that dynamic completely—three chunky knots on cream rope with a dusty pink center barrel, sitting pretty on your vintage rug like intentional decor.
You’ll need 6 feet of 3/4-inch natural cotton rope ($4 at hardware stores), one 3-inch rubber chew tube in muted pink ($3), scissors, and 10 minutes. Cut rope in half. Thread both pieces through the tube so it sits center. Tie three knots on each side, spacing them 2 inches apart. Trim ends into frayed tassels. The cotton fibers clean teeth while your dog tugs, which means fresher breath without another product cluttering your bathroom. The weight—about 8 ounces—works for 10 to 40-pound dogs without overwhelming small jaws.
Make three in coordinating colors: cream, blush, sage. Toss them in a basket near your DIY indoor dog kennel where they blend with throw blankets. When guests compliment your “boho decor,” you don’t have to explain they’re chew toys. The rope survives machine washing every two weeks—just air dry to prevent shrinkage.
Pro tip: Freeze a dampened rope toy for teething puppies, then display it in a ceramic bowl on your DIY dog bed setup like you meant for it to be there.
📸 Photo credit: Instagram @wadarsanimalrescue
Your Turn to Create Something Amazing
You’ve got ten stylish DIY dog accessories at your fingertips. Start with the easiest one this weekend. Your home doesn’t have to look like a pet store to keep your pup happy and comfortable.
Want more fun projects? Try making 7 Creative DIY Dog Bandanas Your Pup Will Love for instant style upgrades. Build 7 Charming DIY Dog Houses for Your Outdoor Pup if your furry friend loves backyard time. Set up 7 DIY Dog Agility Course Ideas for Fun to keep them mentally sharp.
Pin your favorite design now so you don’t lose it. Your handmade creation will mean more to you than anything store-bought. Which DIY dog accessory are you making first?

Amr Mohsen is a software engineer who traded his keyboard for a leash — at least on weekends. His love for dogs inspired him to share what he learns as a dog owner and enthusiast, bringing a detail-oriented, research-driven perspective to every article he writes. If it’s about dogs, he’s probably already looked it up twice.

