
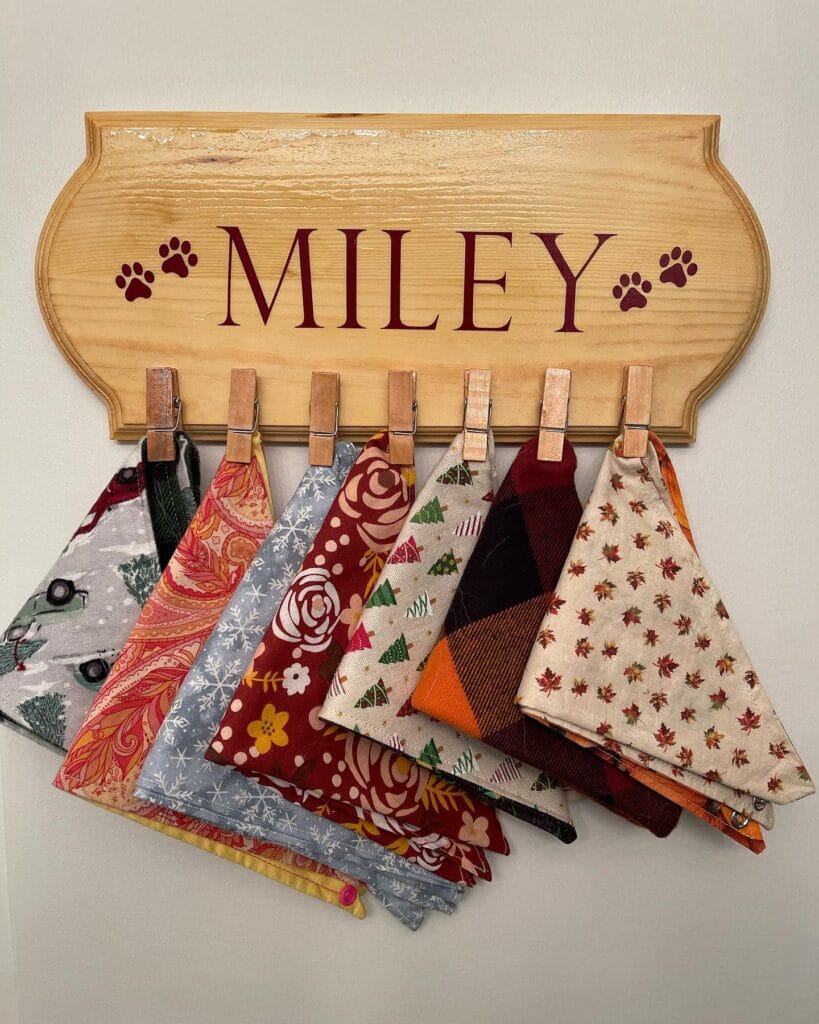
I have to tell you guys about last Tuesday. It was quite an experience.
My little golden was covered in mud. His paws, his chest, etc. I’m just standing there looking at him thinking… “Why does he still look so cute?”
That is the golden retriever curse. They are a mess and yet still the most photogenic thing in the house.
See, you have the most Pinterest-worthy living room. And your throw pillows are coordinated. And your coffee table is amazing. And then your dog just wanders into the middle of it, drooling on the couch with no accessories to coordinate with the aesthetic.
That bothered me for longer than I’ll admit.
I have started making my own diy dog bandanas – and they are fantastic!
The 7 ideas I have for you are so easy, they cost next to nothing, and your pup is going to look so good you’ll want to photograph him every day.
#1: DIY Green Plaid Dog Bandana (The Over-the-Collar Style)
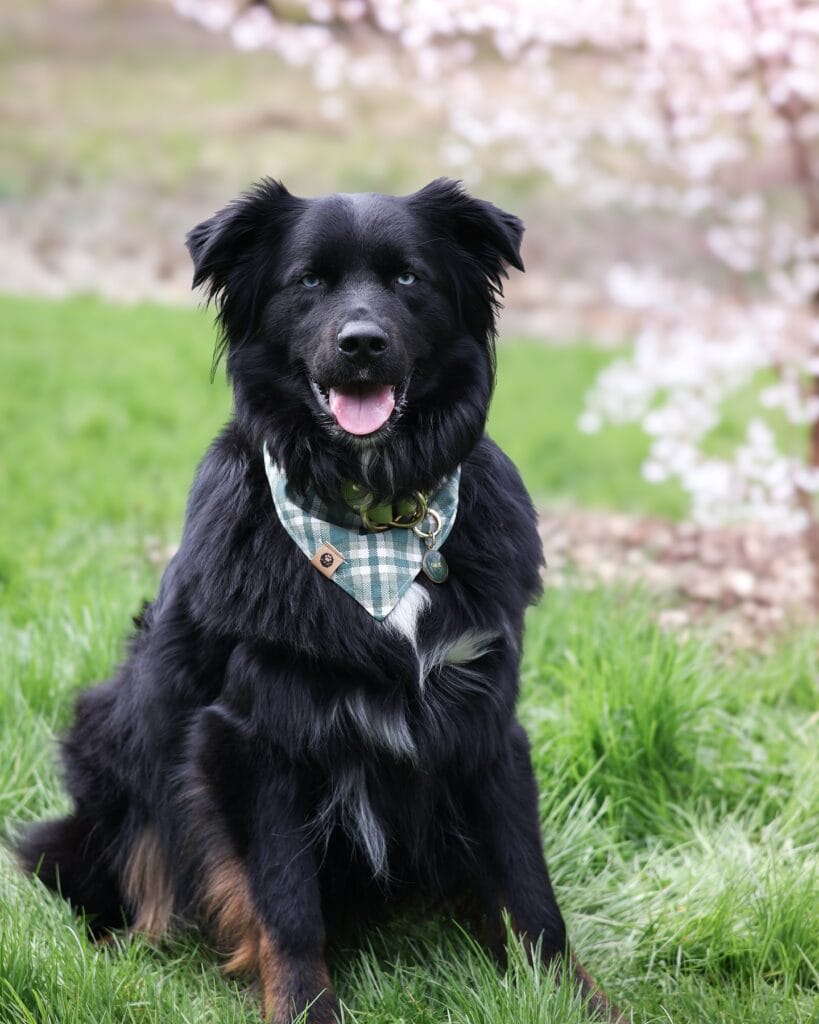
Your golden retriever just rolled in something, and somehow that raggedy old bandana is still hanging on. Yeah, we’ve been there.
Check out this black beauty! She’s wearing a green and white plaid over-the-collar bandana and it looks like something out of a Pinterest board!
– ¼ yard cotton plaid fabric (green/white) – Scissors or rotary cutter – Ruler and fabric chalk – Sewing machine or fabric glue – Iron.
### Instructions
Cut your fabric into a triangle shape – roughly 18″ x 18″ x 25″ (for a medium dog) and fold in the raw edges ½ inch and press with a hot iron for a clean edge your dog will not chew.
Stitch along all three sides with a straight stitch at 2.5mm. Fold the top edge down 2 inches to create the collar sleeve. Simply slide your dog’s collar right through the slot and you’re done!
Keep this in mind: pre washing your fabric prevents shrinkage after the first REAL mud situation.
Put on a matching leather collar tag (such as the one featured in these Best DIY Dog Collars: A Comprehensive Guide) for an even more pulled together look!
Prep Time: 5 min | Active Time: 20 min | Difficulty: Beginner
📸 Photo credit: Instagram @oaktheaussie
#2: Tie-Dye Paw Print Bandana (The One That’ll Make Your Dog Look Like a Pinterest Star)
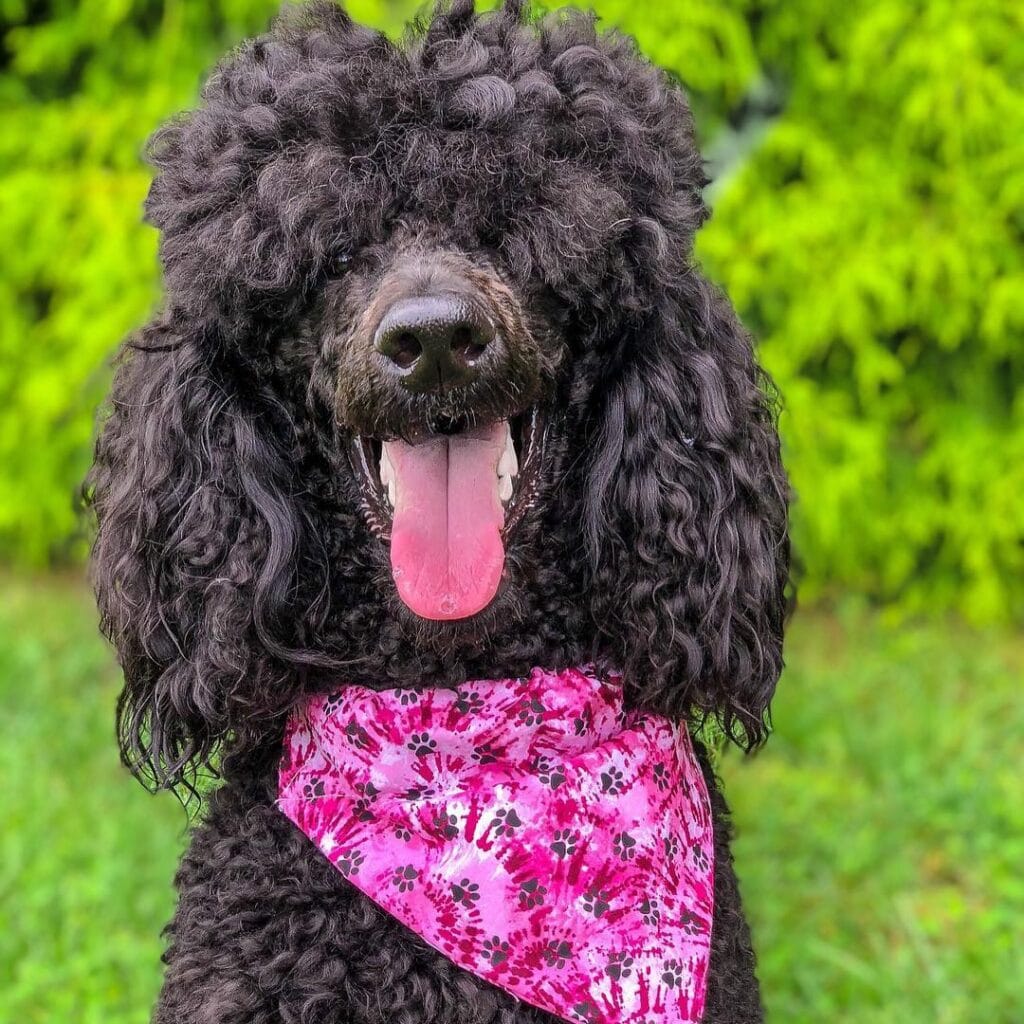
this is for those days when you finally have your golden looking clean and fluffy hair and you just need that one cute finishing touch.
What you will need: – White cotton bandana (22″ x 22″) – Magenta/hot pink fiber-reactive dye – Rubber bands – Squeeze bottles – Black fabric paint + paw print stamp – Plastic gloves + plastic wrap
### Instructions
Fold your bandana in half accordion style, and twist it into a spiral. Hold it tight with 4-6 rubber bands, to create the swirls you see here.
Mix the dye and soak every section of hair, then wrap it in plastic and let it sit for at least 8 hours.
Then I rinsed the fabric, then gently washed it in the washing machine, and dried it. Then I stamped the paw prints on it with my black fabric paint, and let it cure for 24 hours.
Fold over the top and tie loosely around your pup’s neck. The cotton fabric allows your pup to stay cool, comfy and is so pretty against their dark fur!
Click here to see other posts like this one: 13 Genius DIY Dog Stuff Every Pet Parent Needs to Try Today!
If you’re wanting to keep the magenta color bright and popping for as long as possible, then you will want to wash it in cold water.
Prep Time: 10 min | Active Project Time: 30 min + dye setting | Difficulty: Easy
📸 Photo credit: Instagram @caliandmav_
#3: Colorful Crochet Snood Bandana (The “Too Cute to Handle” Collar)
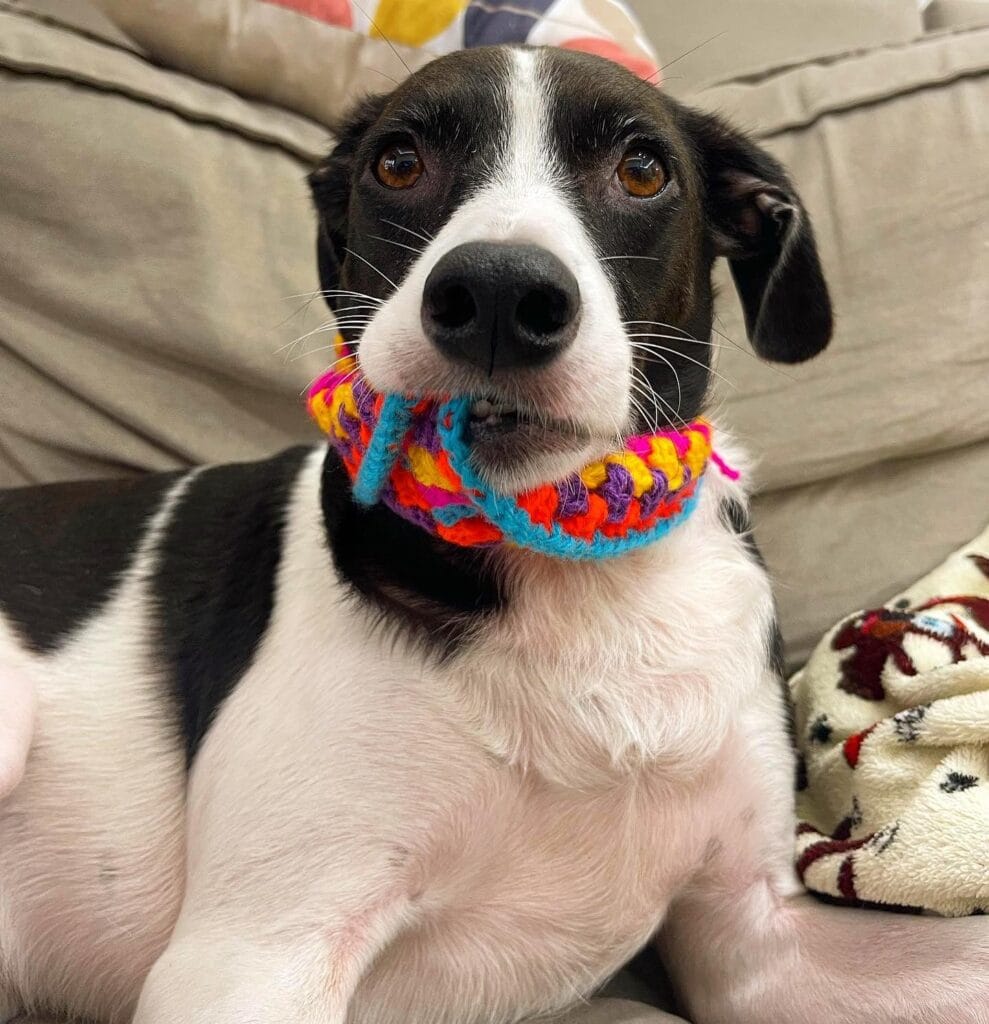
Your golden probably shakes her whole body when she gets excited. Mine does too and she always manages to end up with her collar twisted sideways.
Prep Time: 15 min | Active Project Time: 2–3 hours | Difficulty: Intermediate
-MATERIALS & TOOLS: -worsted weight yarn in turquoise, orange, red, purple, and yellow -size 5mm crochet hook -scissors + yarn needle
Instructions
Start your foundation chain sized to fit your dog’s neck. If you’re not sure, measure twice. I worked granny square clusters in rotating colors, making sure to keep the tension fairly loose.
One thing to watch for with too-tight stitches is that the resulting snood will be stiff and uncomfortable to wear against the neck.
Join rows with slip stitches in the other color. Fasten off and weave in the ends.
The stretchy crochet structure is oh so soft against your dog’s skin so your dog will be comfortable, and look ridiculously adorable in these photographs.
Every two rows, I change the color of my yarn. It creates a strip of 2 colors without any extra work.
📸 Photo credit: Instagram @cintianicolaucraft
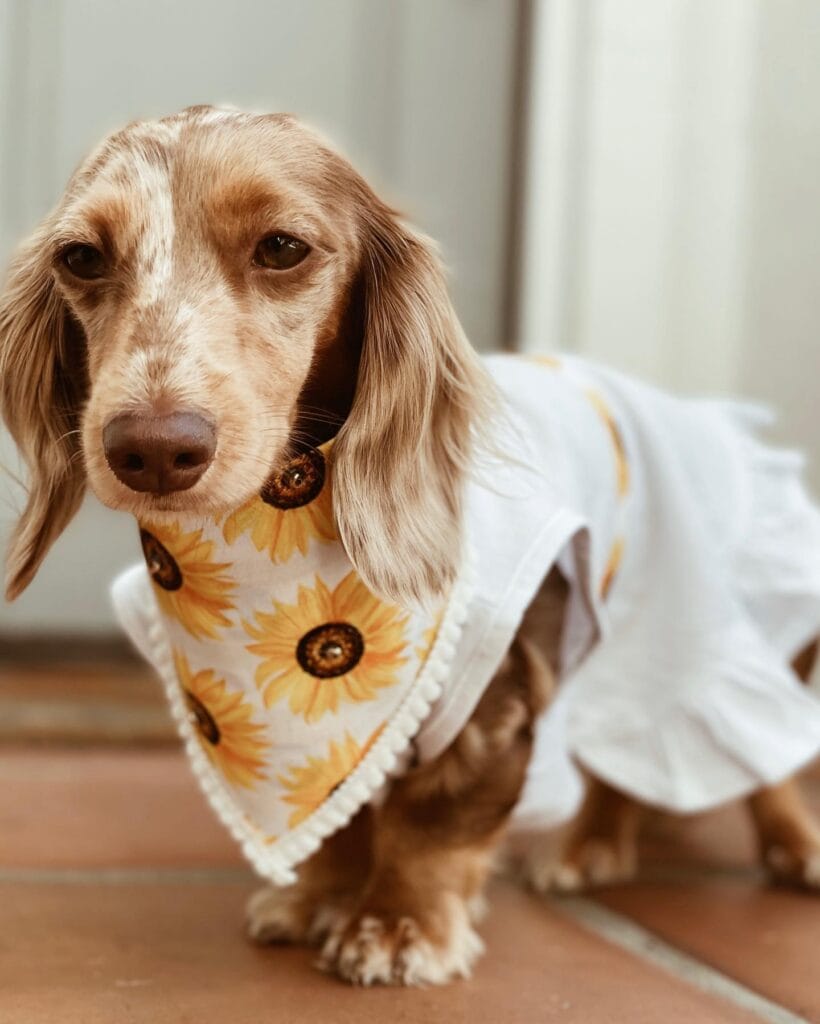
#4: Sunflower Dog Bandana with Ruffle Dress Combo (Dachshund-Approved!)
Prep Time: 10 min | Active Project Time: 25 min | Difficulty: Beginner
You know that moment when your pup is just being absolutely adorable and you think… She needs an outfit for this energy! right!?
Same. And this sunflower bandana is everything.
– ½ yard white cotton quilting fabric – Sunflower iron-on fabric print (yellow + brown tones) – White pom-pom trim ribbon (⅜ inch wide) – Fabric scissors, pins, iron – Sewing machine or fabric glue
Instructions
Cut your fabric into a 14×14 inch square. Fold in half and then corner to corner to form a triangle. Press the sunflower print on the front face. Pin the pom-pom trim on the longest edge and either sew or glue it down.
Fold the top two inches over so that you have a slip channel for the ribbon tie. Then slide the bandana right on the top of your chest, so it’s snug, but not too tight.
And of course, the pom-pom is what makes this cute outfit Pinterest-worthy!
Just wear it with a simple ruffle shirt (white muslin works fine) and you’ve got a full look. Because it’s made of natural fabric it also breathes better on your skin, and your dog stays comfortable too.
I check the bandana to the width of my dog’s chest before cutting it so it will be slightly bigger and can always cut it down.
📸 Photo credit: Instagram @hazel.the.minidoxie
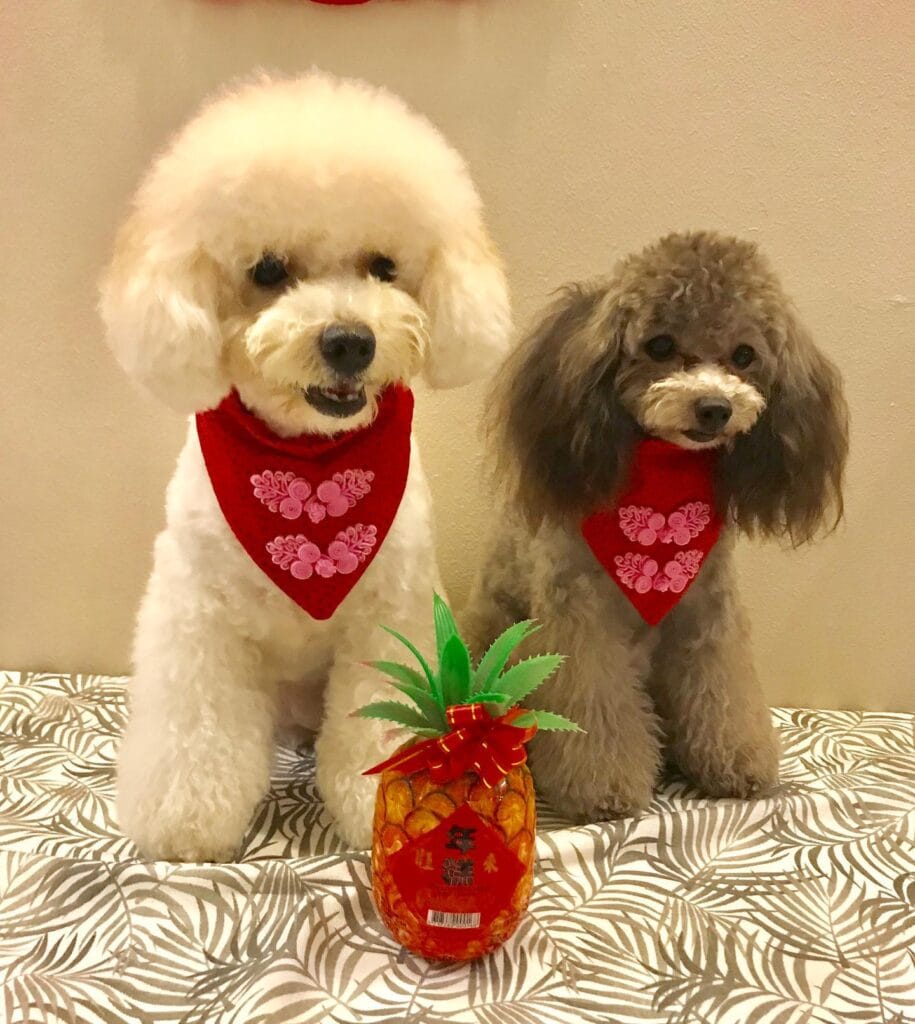
#5: Chinese New Year Red Bandana with Embroidered Floral Heart
Prep Time: 10 min | Active Project Time: 25 min | Difficulty Level: Beginner
There’s nothing like when the holidays hit and your doggy is just sitting there looking completely unbothered while everyone else is all dressed up! That’s when I start making bandanas! And this one became one of my favorites!
* Red felt fabric (at least 12×12 inches) * Pink embroidery thread * Embroidery needle * Fabric scissors * Water-soluble fabric marker * Ruler
Instructions
Cut felt in the shape of a triangle. Make it about 12 inches wide at the top. Trace a heart shape on it with a fabric marker. Stitch with a satin stitch a cluster of pink flowers around the heart (this type of stitching is more dense and does not fray).
Yay for felt! No hemming! No raw edges to unravel and expose yourself to whatever is lurking under your bed.
Make sure that the collar is not too tight, but that two of your fingers can fit under the collar with your dog’s neck. Tie the collar loosely around the dog’s neck.
the red against a white or golden coat is "unreal" in pictures. You’ll start pinning it to your boards.
Press with a warm iron (just to take out the creases) and press lightly with the iron to smooth out the felt.
📸 Photo credit: Instagram @its4bpudelg
#6: DIY Embroidered Dog Bandana (The “Bones” Bandana)
Have you ever been looking at your golden sitting pretty and you wished she had something to match your style? Well this forest green bandana (shown in the photo) is giving me life and guess what — you can make this at home too!
Materials & Tools: – % yard of green suede or velvet fabric – White embroidery thread + needle – Fabric scissors – Water-soluble fabric marker – Ruler
Instructions
Cut your fabric into a 20×20 inch square. Fold the square corner to corner so that it becomes a triangle. Draw a design for your dog’s name in a bold, gothic-style font with your fabric marker. Make sure to leave about ½ inch between each letter along the bottom edge.
Embroider each letter with a tight satin stitch. It will stay raised enough to read well in photos and won’t snag or pull loose in the wash so that you don’t have to re-stitch each letter every week.
Wrap it snugly enough so that two fingers can slide underneath it comfortably.
Keep a few bandanas in different colors, so that you can switch it up every now and then.
Prep Time: 10 min | Active Project Time: 45 min | Difficulty: Intermediate
📸 Photo credit: Instagram @pushki.bear
#7: The Ikat Zigzag Dog Bandana (No-Sew Slide-On Style)
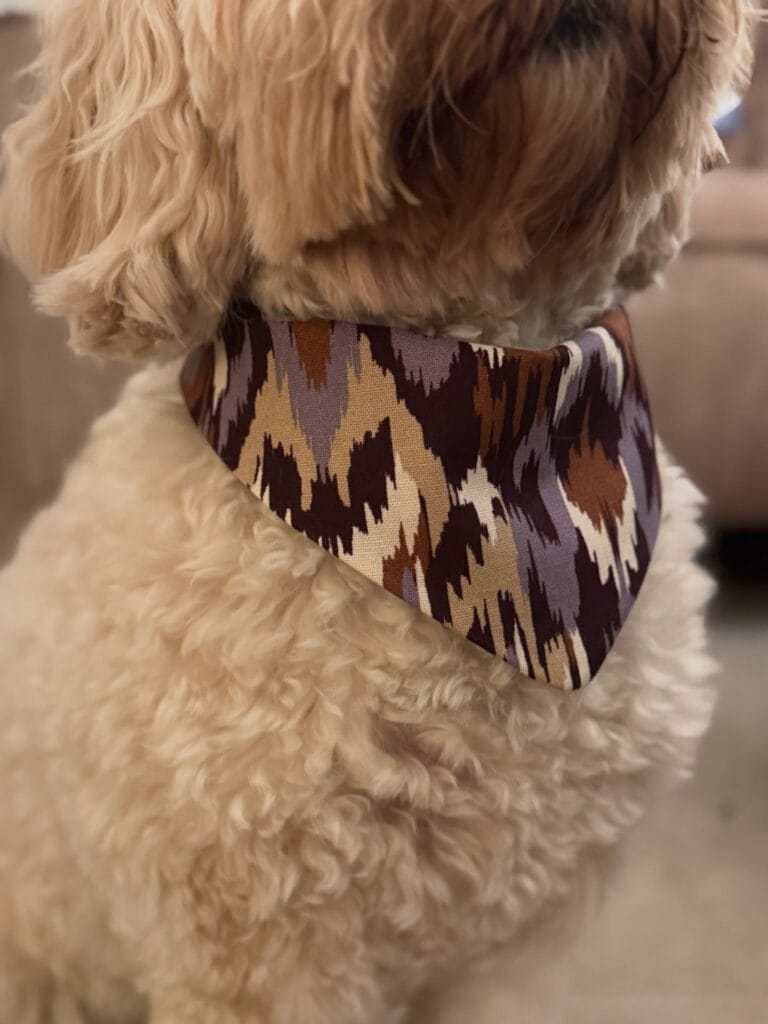
I think it’s about time we upgrade our golden’s plain ol’ collars to something a little more fabulous. When I saw this collar, I stopped mid-scroll (just as I was in the midst of scrolling past hundreds of Instagram photos). It has the most moody ikat print in deep plum, lavender, warm tan, and chocolate brown.
Prep Time: 5 min | Active Project Time: 15 min | Difficulty: Beginner
– ½ yard ikat-print cotton fabric in purple/brown/tan colorway (see above) Fabric scissors Fabric glue or iron-on hem tape Ruler or measuring tape
### Instructions
Cut a 22” x 22” square from your fabric of choice. Then fold it corner to corner to form a triangle. Fold the long straight edge down 2-3 times toward the point to create a 3” wide band. Slide the folded band directly under your dog’s collar, no sewing required!
The cotton weave keeps the bandana lightweight and breathable so your dog won’t scratch at it and feel uncomfortable.
Cut a second bandana slightly smaller than the first, so you always have a fresh one ready on wash day.
📸 Photo credit: Instagram @woofitsguusjee
The Sneaky Fabric Secret That Makes Your Bandana Actually Stay Put
If there is one thing I see with DIY dog bandanas that I feel people need to learn, it’s to pre-wash the fabric.
I have yet to learn this lesson the hard way. A little while back, I made the cutest bandana for my cousin’s lab and gave it to him, but after one wash it had shrunk so much it looked more like a chihuahua collar.
Tip: Always pre-wash and pre-dry your fabric before you cut your first piece of fabric. Cotton can shrink up to 10% on its first wash. Cut first and the measurements you take on your fabric are basically useless.
The best part: Once your fabric is pre-washed the bandana will hold it’s shape wash after wash even after rolling around in the mud with your golden retriever.
Also, my friend, use a rotary cutter instead of scissors. The fabric scissors will stretch and drag the material as you cut and make the angle not even with the bandana. Then you dog looks like an idiot.
If you are already in DIY mode for your dog, 7 Creative Slinky Dog Costume DIY Ideas will send you down a fun rabbit hole. [via: luvstoblog]
Your Golden Deserves a Clean Home Too
You’ve already put so much love into your space; you don’t want some muddy paws to undo all of that.
Pick one product from the list below and try it this week. Just one product. Try it and see how it feels to stay ahead of the mess.
And if you’re the type of girl that loves a good DIY project, these natural DIY dog shampoos are sure to keep your dog’s fur and your furniture cleaner between baths.
Well, which one are you picking up first??

Amr Mohsen is a software engineer who traded his keyboard for a leash — at least on weekends. His love for dogs inspired him to share what he learns as a dog owner and enthusiast, bringing a detail-oriented, research-driven perspective to every article he writes. If it’s about dogs, he’s probably already looked it up twice.



