Your dog just had surgery and the vet sends you home with that giant plastic cone, your golden loses her mind!
She’s running into walls. Knocking over her water bowl. Giving you those sad puppy eyes like it’s your fault she’s miserable. And you? You’re stress-Googling at 1 a.m. to see if there’s anything – anything at all – better than this miserable lampshade situation.
I’ve been there. My dog Scout had to wear a cone after his neuter surgery and those were the saddest, most chaotic two weeks of my life.
Well, that’s good. You don’t have to do that to her.
These 7 DIY dog cone ideas are comfy, Pinterest-worthy and actually work so your dog heals happy and your house stays in one piece.
#1: DIY Soft Fabric E-Collar (The Cone Your Dog Won’t Hate)
Have you ever had that moment where you’re dog just got home from the vet, they’re wearing that awful plastic cone around their neck, bumping into every wall and knocking over their water bowl, giving you those puppy dog eyes? Well, my heart gets broken every time that happens.
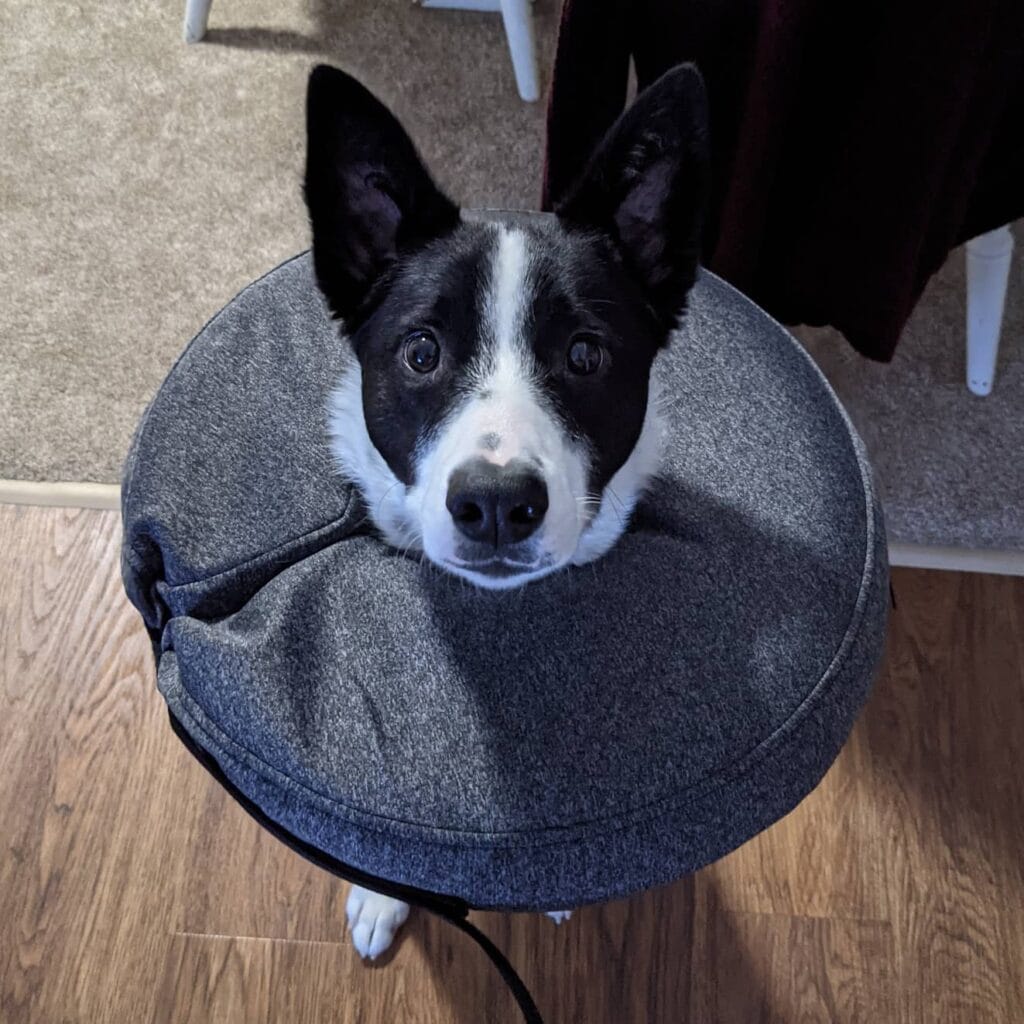
This soft gray jersey-knit fabric cone works like an inflatable style donut to prevent your dog from reaching their stitches without making them miserable.
Materials & Tools: 1. Half yard of gray heathered jersey fabric 2. Polyester fiberfill stuffing 3. Sewing machine + thread 4. 1-inch wide Velcro strip 5. Fabric scissors + pins
Instructions
Cut two large donut shapes from your fabric. Sew these together, leaving a small gap at the top. Stuff firmly with fibrefill. It is important that it is a very firm stuffing to keep the collar on shape so that your dog cannot flatten it and give it a lick. Sew the gap closed. Attach Velcro to the inside of the inner neck opening.
The soft fabric lets your dog sleep comfortably against it…no more crashing into your night stand at 3am.
Keep the stuffing a little tighter near the outer edge of the dog and a little looser near the neck.
Prep Time: 10 min | Active Time: 45 min | Difficulty: Beginner
📸 Photo credit: Instagram @lilcoopthecollie
#2: DIY Clear Plastic Dog Cone (The “See-Through” Cone That Actually Works)
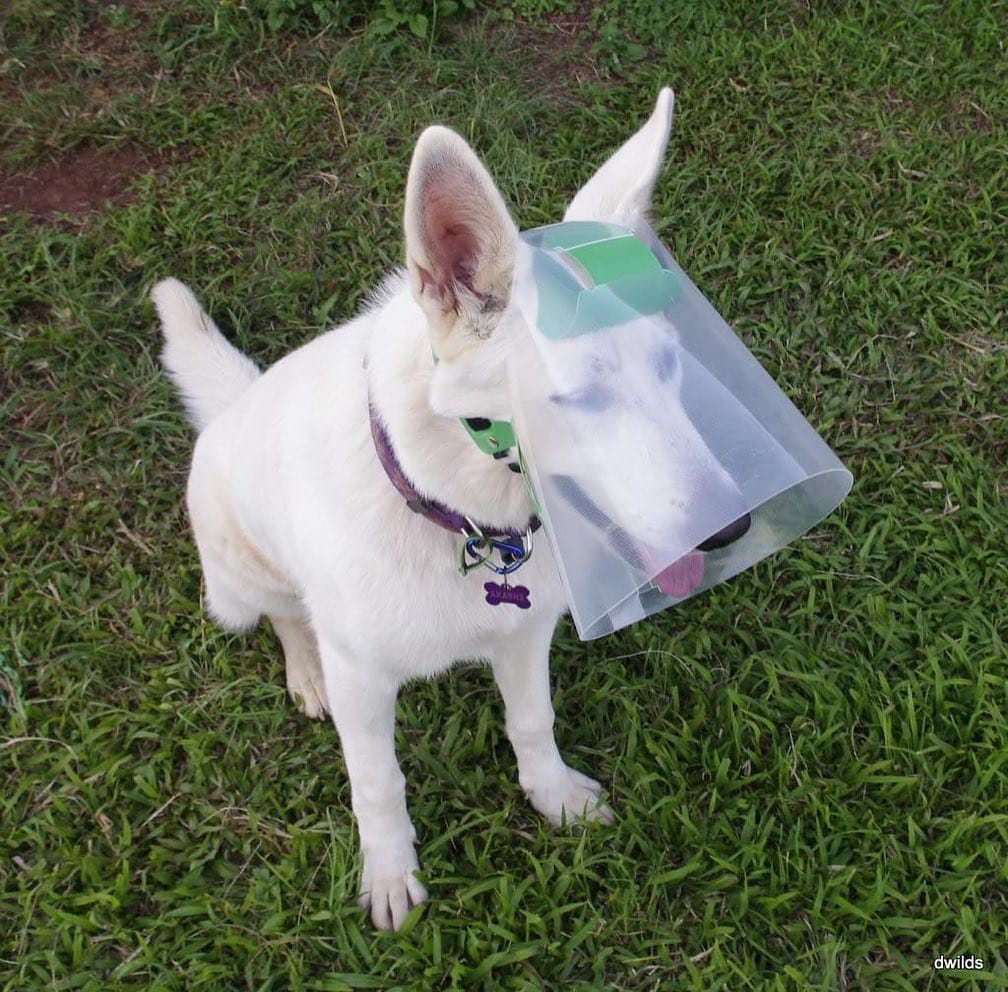
Or perhaps it’s as simple as, your dog just had a visit to the vet, you slap a giant cardboard cone on their head and immediately it’s like, “let’s try and bulldoze this coffee table!” You’ve done that too?
– clear flexible plastic sheet (transparency film or report cover, ~8×10 inches) – green craft foam or duct tape for the top edge – purple ribbon or paracord for the neck attachment – Dog’s existing collar Scissors, hole punch, stapler or strong adhesive.
Instructions
Cut the plastic into a fan shape, wider end is the front. Make the opening just big enough for your dog’s snout so she can breathe freely. Roll the edges of the plastic to form a cone, and secure with green craft tape along the top ridge. Cut two holes on each side near the base, thread your ribbon through, and tie it to the collar loops. The clear plastic allows your dog to see around her, which will help her avoid panicking and knocking over lamps.
I highly recommend that you soak the plastic in warm water if it feels too stiff to shape. It will soften without becoming too soft.
Prep Time: 5 min | Active Project Time: 15 min | Difficulty Level: Easy
📸 Photo credit: Instagram @dwilds
#3: The Donut Cone — A Soft, Fluffy Alternative Your Dog Will Actually Tolerate
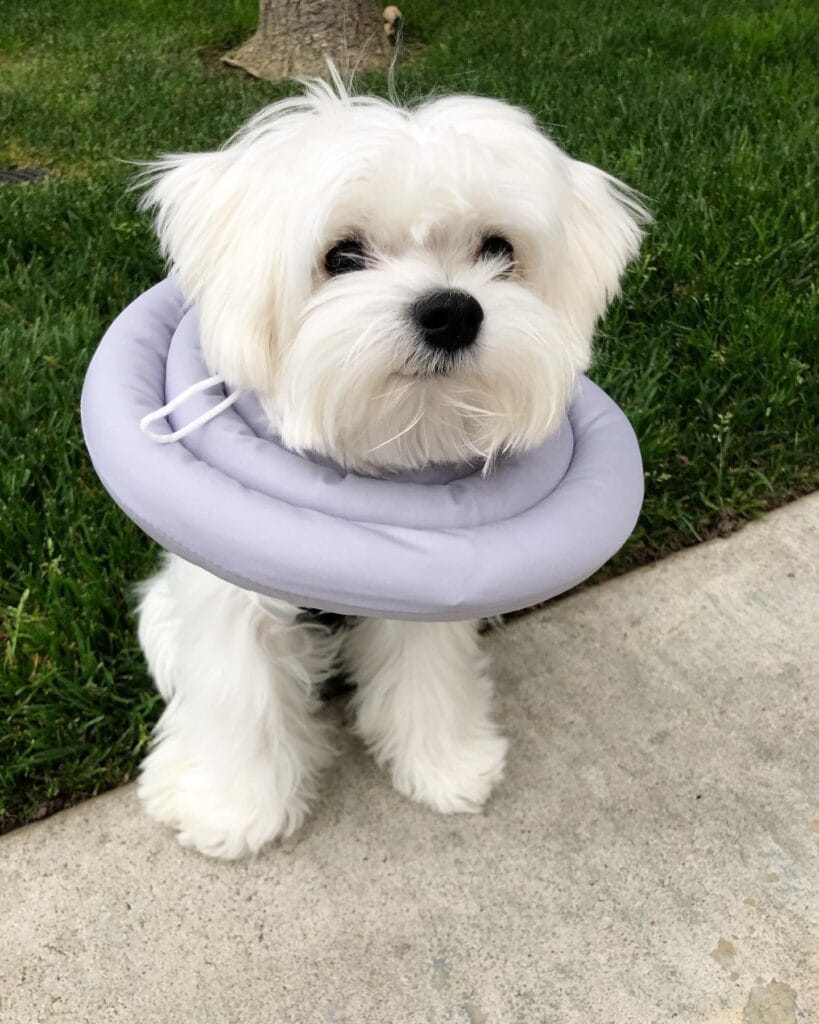
Prep Time: 20 min | Active Project Time: 1.5 hours | Difficulty Level: Beginner-Friendly
—
It’s happened to us. We’ve all had one of “those” dogs. The dog that’s just had surgery and keeps scooting across your freshly vacuumed rug trying to reach the incision site. That’s why we created this pad.
This is a very sweet little Maltese, and she has a cone on. She doesn’t have the drama of a plastic cone, though, because she has one of these: the “soft donut cone.” It’s a product that keeps dogs from licking their wounds without a traditional plastic cone.
Materials & Tools:
– ¾ yard of soft cotton fabric (lavender or grey works beautifully)
– Polyester fiberfill stuffing
– Needle, thread, sewing machine
– 1 yard white rope or cord
– Fabric scissors + pins
Instructions
Cut out two donut shapes from fabric, then sew them together inside out, leaving a small gap. Stuff firmly with fiberfill, but not too firmly (you still want to be able to squish it a bit). Close the gap in sewing. Run the white cord through both sides so it can be tied snugly beneath your dog’s chin.
With the soft padding, your dog will be more comfortable and be less likely to try and take the cone off, so you can skip the meltdown that happens when your dog tries to get the vet cone off.
The fabric absorbs zero sound (no plastic clunking against your furniture or your hardwood floors at 2am).
📸 Photo credit: Instagram @mochifloof
#4: The Inflatable Fabric Cone That’s Actually Cute Enough for Instagram
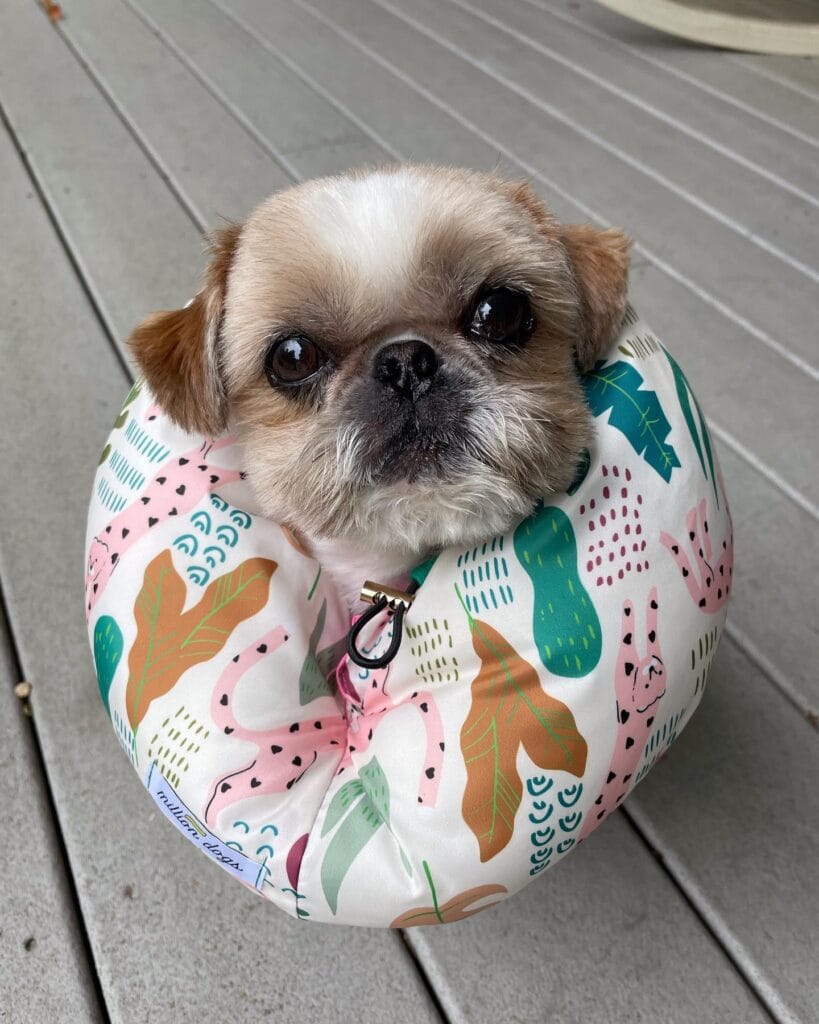
Prep Time: 30 min | Active Project Time: 1.5 hours | Difficulty Level: Intermediate
You know the moment when your golden comes home from the vet and you slap the awful plastic cone on her head, and she just stands there, looking utterly defeated? Yep, we’ve all been there.
This adorable inflatable dog cone is easy to slip over your pup’s neck like a travel pillow made from cotton canvas fabric with white base and white plush abstract leaf prints in teal, blush pink, and golden brown. It’s puffy and donut shaped and absolutely adorable.
Materials & Tools:
– ½ yard cotton canvas (abstract botanical print)
– Polyester fiberfill stuffing
– 1-inch velcro strip (8 inches long)
– Sewing machine + matching thread
– D-ring clip (gold hardware)
– Fabric scissors + pins
Instructions
Cut out two identically sized donut-shaped fabric pieces that are big enough to fit around your dog’s neck, plus an extra 2 inches on each end for seam allowance. Pin the two pieces right sides together and sew around the outside with a ½-inch seam. Turn it right-side out through one end (here’s where most people rush and end up with a lumpy edge, so take a deep breath).
stuff it firm (not rock hard), but not full of fibre fill. Hand stitch the opening closed and attach the velcro strip to the inside of the opening to fasten snugly around the neck without pulling on the fur. then attach the gold D-ring clip to the front so it attaches to the dogs collar, the clip helps to keep the toy centered on the dogs head so he or she does not shake it to one side every five minutes.
It is made of soft fabric so your dog can lie on it and sleep comfortably instead of a plastic cone that only allows for lying down, not sleeping. Healing is made easier when they are not miserable.
3. Sew a small brand label on the bottom edge – it gives it a finished look, and makes it look intentional.
The label on the bag in the picture reads, “million dogs,” so we know this style is already making its rounds in the pet boutique world. But you can make it yourself at home for a fraction of the price.
📸 Photo credit: Instagram @ollieallday
#5: The Soft Fleece Cone That Actually Lets Your Dog Rest
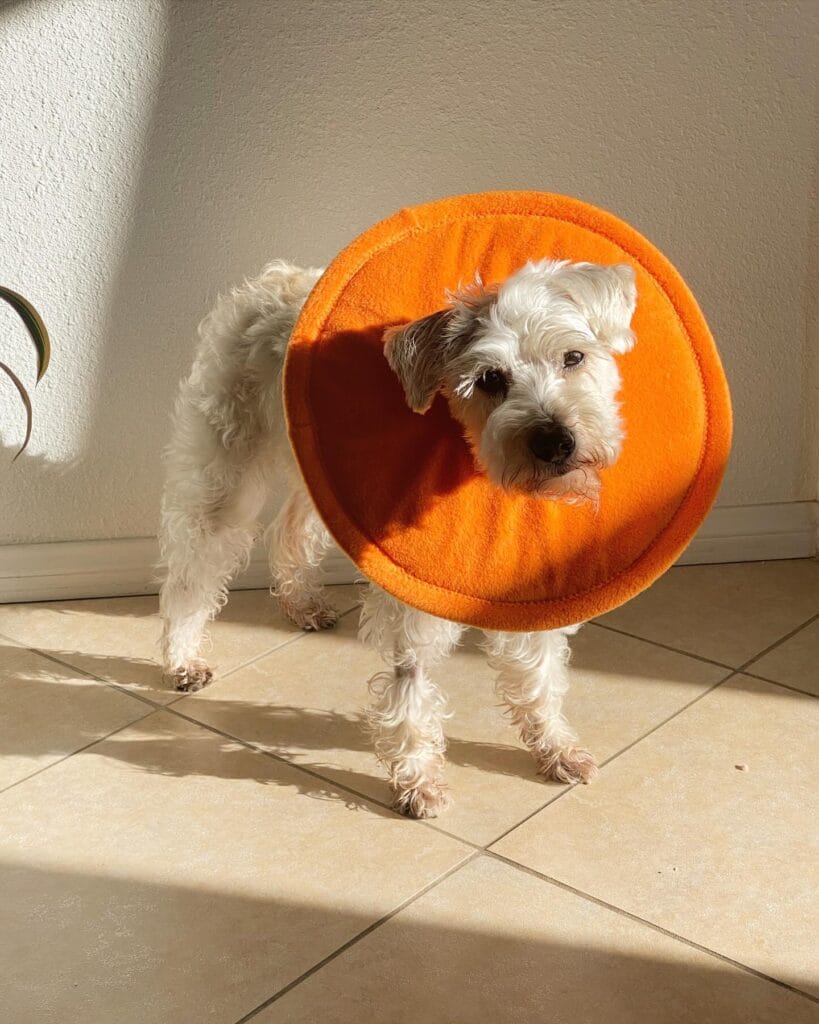
Your golden is home from surgery, and miserable. He keeps bumping into your coffee table with his stiff plastic cone. There is a new scuff mark on every wall in your house.
This orange fleece e-collar is the fix. It’s a padded donut-shaped cone that’s made out of soft fleece fabric so it’s gentler on the fur. Plus, it’s flexible enough so that your dog can lie down without that awful plastic clunking sound.
– 1/2 yard orange fleece fabric – Polyester fiberfill stuffing Fabric scissors Sewing machine or needle and thread Measuring tape Velcro strip (6 inches)
Instructions
Cut two, identical donut-shaped pieces of fabric that are big enough to cover your dog’s neck in width, plus an additional 6 inches in length. Sew the two pieces together, leaving a 3-inch gap at the bottom to stuff with fiberfill. You want it packed firm, but not stiff. Sew the gap closed. Then attach the Velcro strip to the inner opening so it will fasten around the dog’s neck.
This fleece provides even pressure and will help to take pressure off of the neck of your dog. It will help keep him calm and quiet during his recovery.
Wash the injury on cold and let it air dry so the fleece will stay soft for the entire healing process.
Prep Time: 10 min | Active Project Time: 45 min | Difficulty Level: Beginner
📸 Photo credit: Instagram @pippintheschnau
#6: The “Cone of Shame” Makeover — VeltAST-Style Clear Cone with Yellow Edge Trim
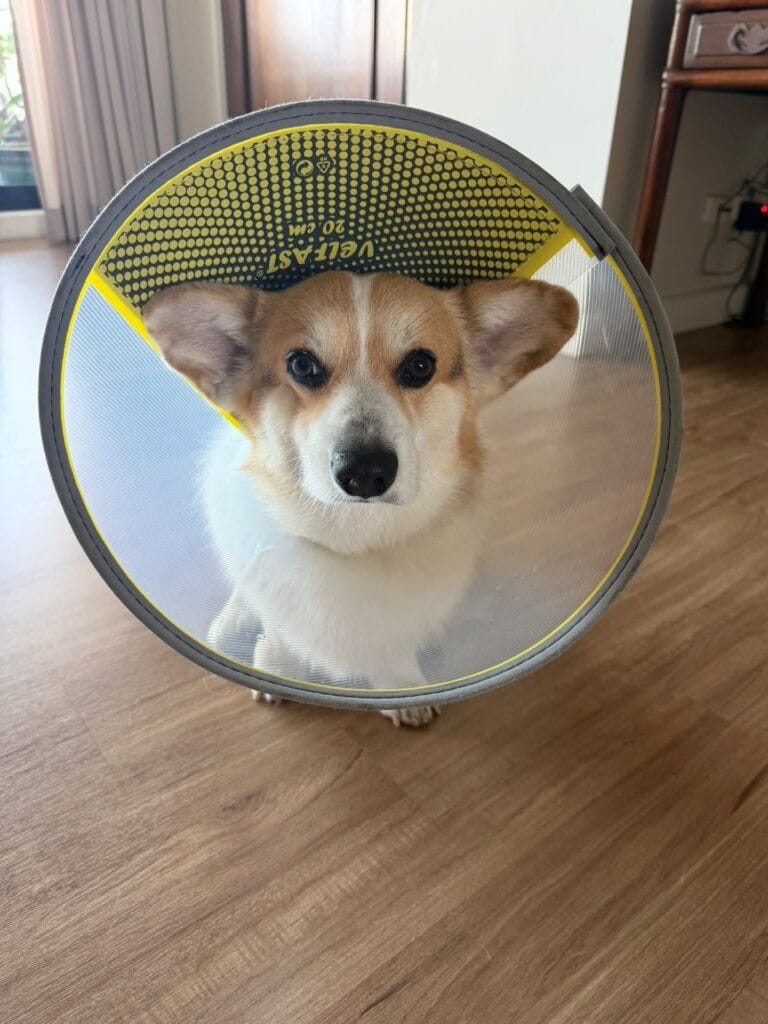
My dog came home from the vet and just stared at me through that plastic tunnel and I was like, “how could you?” She scratched up the baseboards and knocked over my water bowl decor and it just looks depressing.
This DIY version gives that cone a glow-up.
Prep Time: 10 min | Active Project Time: 25 min | Difficulty: Easy
Materials & Tools:
– 20 cm clear polypropylene sheet (flexible, not rigid)
– Yellow craft foam border strip (1 inch wide)
– Gray binding tape
– Hook-and-loop fastener strip (6 inches)
– Dot-pattern fabric or adhesive vinyl (black/yellow)
– Scissors, ruler, hole punch, binder clips
### Instructions
Cut your polypropylene sheet into a cone shape (the neck opening should be roughly 8-10 inches, depending on the size of your dog), then gently roll it into shape. The flexibility of the polypropylene helps prevent cracking around your dog’s neck.
Attach the yellow strip of foam along the outside of the rim using the gray binding tape. Press firmly. Add the dot patterned vinyl to the top section of the rim.
Make small holes on the edge of the overlapping part, then thread a strip of fastener material through so it stays attached, but can be pulled apart easily when you need to take a break.
Because the material is clear, your dog keeps full peripheral vision, lessening anxiety and furniture crashes when she wakes up.
If your dog has a thick neck you should consider size up one inch. It is better to be a little loose than tight against the skin.
📸 Photo credit: Instagram @codycrazycorgi
#7: The “Cone of Shame” Makeover — DIY Adjustable E-Collar With a Polka Dot Accent Flap
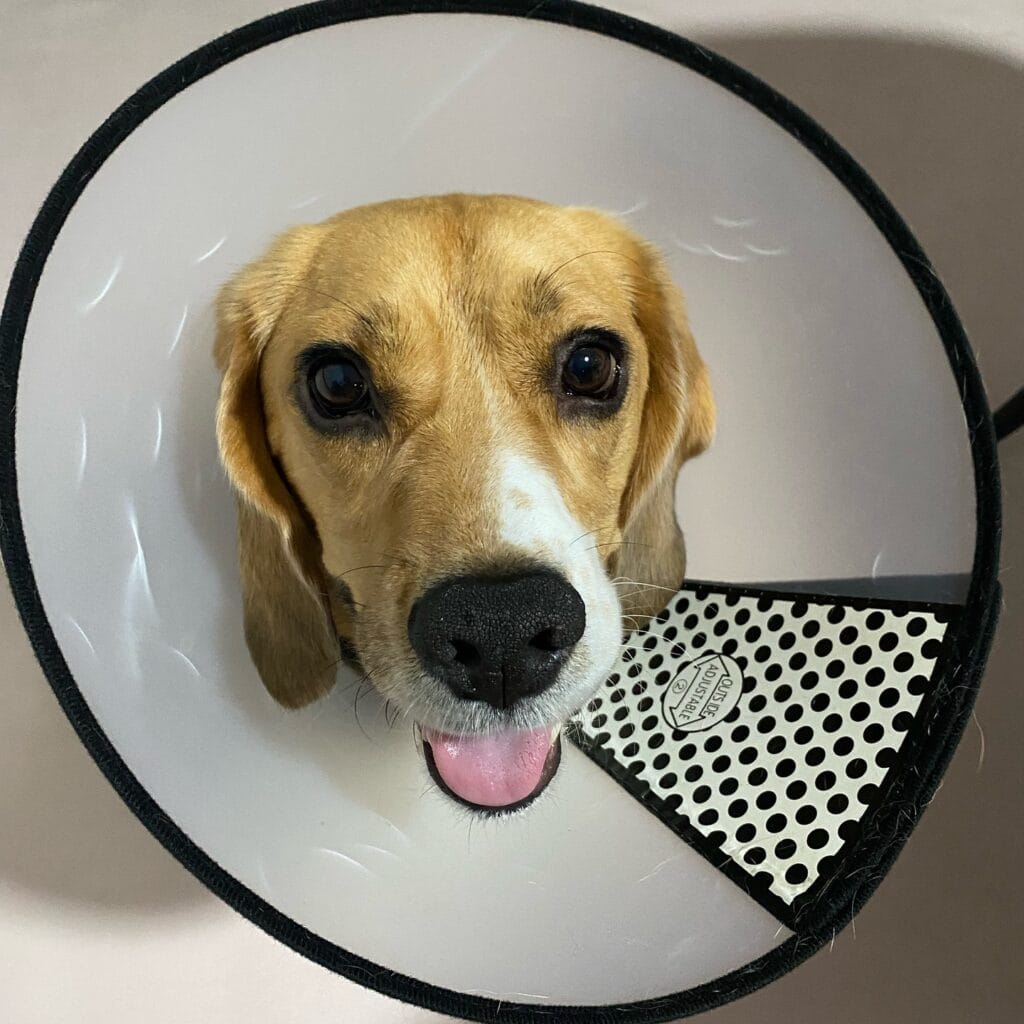
your golden just got home from the vet and she will not stop giving you those eyes. the plastic cone is loud clunky and really sad.
This one? Way cuter.
– Clear plastic sheeting (12″ diameter circle) – Black cotton fabric with polka dot print – Black nylon binding tape (1″ wide) – Velcro strips for the adjustable closure – Scissors, hole punch, sewing needle or fabric glue.
Instructions
Cut out the plastic in a cone shape, leaving a 4 inch neck opening. Fold and glue your polka dot fabric into a triangular piece on top (this covers the closure) and stitch Velcro to the inside of the closure. Punch small holes along the edge of the neck opening. Feed your binding tape through the holes. Stitch the binding tape around the top of the cone in black. Add Velcro to the closure point so it stays snug but gentle.
Because the cone has an adjustable Velcro closure, it stays in place and won’t slip off. No more escape artist situations or stressing your dog out even more.
And she would probably look adorable in it.
Prep Time: 10 min | Active Project Time: 30 min | Difficulty: Beginner
Cut your plastic slightly larger than you will need them to be. You can always cut them down, but you can’t add extra back on later.
📸 Photo credit: Instagram @kobibeagle
The One DIY Dog Cone Mistake That’ll Send You Back to the Vet
Having recently gone through this with my cousin’s lab mix after a neuter surgery, I can tell you what I wish I knew then, not as a vet but as the pet parent.
The most common mistake is that people make the cone too short. They start at the neck and stop at the snout. The cone needs to extend past the nose at least an inch to prevent them from twisting and getting to the incision.
Pro tip: I use a flexible folder instead of cardboard. The cardboard collapses when it gets wet or drool on it. With a Golden Retriever I need something that can be wiped clean and stays in a cone shape. This folder is great for this.
Place your holes before shaping the cone. Trying to punch holes in a cone that has already been shaped is a nightmare.
Also, make sure to always line the edge of the neck with fleece or felt (not felted wool, regular fleece, something fuzzy will work!). The raw edge will rub the dog raw in hours (it will probably be an uncomfortable dog anyway, and restless).
The biggest reason your dog doesn’t need a bed is because they’re going to get smushed under one. But that’s totally doable.
Your Golden’s Paws Deserve This — Start Today
Please pick one idea from the list below and try it out this weekend. You don’t need to change your whole home, just try one thing. I promise it will change your Monday morning to a whole different experience.
We started off simple with a basket and hook, and now I have an entryway that would look at home on a Pinterest board! No more gross, damp towels shoved behind the door for us.
You can have a beautiful home and it can be dog-proof. It’s not a fantasy, it’s just planning. So which of these two ideas are you going to try first?

Amr Mohsen is a software engineer who traded his keyboard for a leash — at least on weekends. His love for dogs inspired him to share what he learns as a dog owner and enthusiast, bringing a detail-oriented, research-driven perspective to every article he writes. If it’s about dogs, he’s probably already looked it up twice.