Your golden retriever turns your Pinterest-perfect backyard into a muddy disaster zone every single day. Those store-bought agility sets? They cost $300+ and look like an eyesore next to your carefully planned landscaping.
You’ve scrolled through basic DIY dog playground ideas but they’re either too complicated or don’t match your aesthetic. Your pup needs mental stimulation—without that, he’s digging up your flower beds and chewing your patio furniture.
Here’s the thing: a beautiful backyard and a happy dog aren’t mutually exclusive. You don’t need expensive equipment that clashes with your outdoor design vision.
These 15 DIY dog playground ideas transform your backyard into a space that looks Instagram-worthy while keeping your pup entertained for hours. Each project costs under $100 and takes less than a weekend to build. They complement your existing backyard setup instead of ruining it.
Whether you’re expanding your current playground setup or starting fresh, you’ll find options that fit your style and your dog’s energy level. No more choosing between aesthetics and your pup’s happiness.
#1: Multi-Level Adventure Playground (Small Breed Paradise, Zero Boring Days)
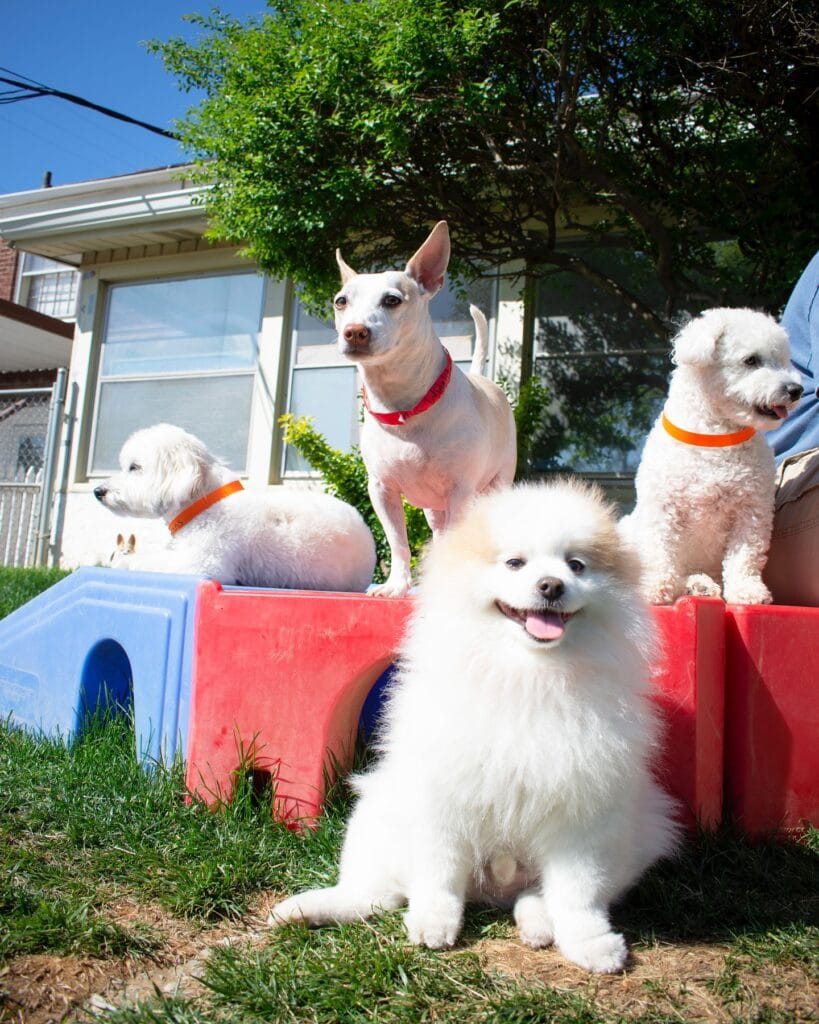
Your hairless terrier stands proud on a red platform. Three fluffy friends explore different zones. Each dog found their favorite spot in 15 minutes flat.
Small breed playground fits in 15×15 space. Build low obstacles using 2×4 lumber for platforms. Add blue tunnel from kiddie pool cut in half. Red ramps cost $18 in paint plus scrap wood.
Height variety keeps different personalities engaged. Platform lets shy dogs survey their kingdom from 12 inches high. Ground-level tunnel suits confident explorers. Open grass area handles zoomies and sprinting.
You’ll need three zones: climbing, hiding, running. Place platform near fence so you can watch from windows. Position tunnel under tree shade for summer cooling. Leave 8-foot straightaway for sprinting.
Surface combo prevents boredom. Grass feels soft on bare paws. Platform wood gives grippy texture. Tunnel darkness creates mystery adventure. Different textures stimulate paws and brain simultaneously.
Check stability daily before play starts. Hose platforms weekly to remove dirt buildup. Replace painted surfaces yearly when colors fade. Rotate hidden treats under tunnel to maintain interest.
Multi-dog households need spacing rules. Put water bowls at opposite corners. Small dogs need their own zone away from jumpers. Separate but visible keeps everyone comfortable.
Add personality with DIY touches like homemade accessories for photo shoots. Paint platforms bright colors that match your fence. String solar lights for evening play sessions.
Action tip: Start with one platform and one tunnel. Add obstacles monthly as confidence builds.
📸 Photo credit: Instagram @misskittysdogresort
#2: Beach Paradise Play Zone (Indoor Pool Deck Setup, Year-Round Active Fun)

Bailey’s owner transformed their basement into a tropical beach retreat. The setup includes sand surface, striped lounge chairs, and blue umbrella. Cost? Under $400 total.
The layout covers 15×15 feet. Pour 8 bags of play sand for the base surface. It cushions joints during zoomies. Set up two mini beach chairs ($25 each at craft stores). Add a kids’ beach umbrella ($35) for visual interest. The pool backdrop? Removable mural decals at $60.
Your dog gets mental stimulation from new textures and scents. The sand feels different under paws than carpet. This triggers natural digging instincts. It burns energy indoors during winter storms. No muddy yard cleanup needed.
Water stations anchor each corner. Stainless bowls weigh 2 pounds when filled. They won’t tip during play sessions. Refresh water twice daily. For summer cooling ideas, check out these frozen dog treats to pair with pool time.
The striped chairs double as photo props. Your Instagram posts look vacation-ready. Neighbors think you hired a designer. Reality? You built it Saturday afternoon.
Rotate toys buried in sand weekly. Hide treats 3 inches deep. He’ll dig and sniff for 20 minutes straight. Perfect for rainy days. Want outdoor options too? These DIY dog houses extend your backyard play zones.
Quick tip: Vacuum sand borders daily with shop vac. Keeps beach contained to play zone. Takes 5 minutes max.
📸 Photo credit: Instagram @ricco_red_coccapoo
#3: Multi-Level Platform Playground (Rustic Wood Design, Confidence-Building Course)
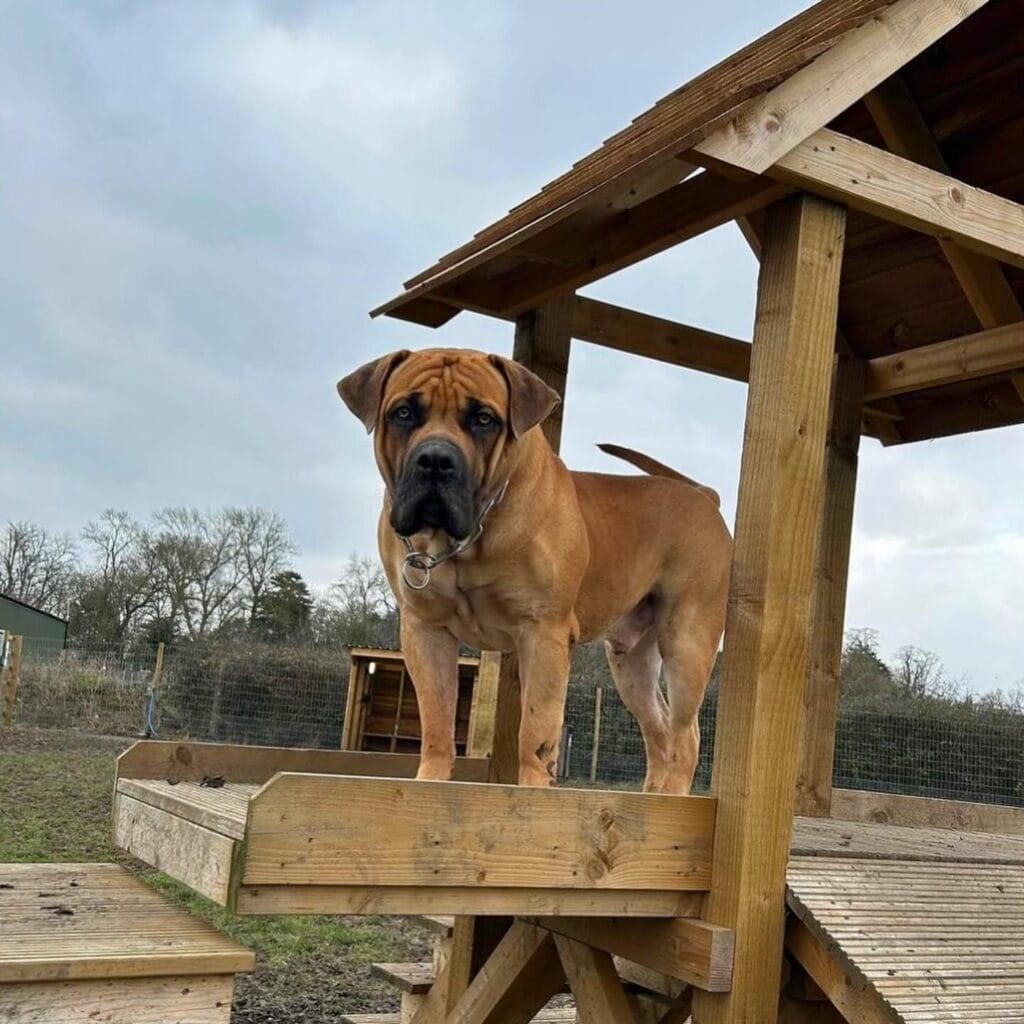
Your dog stands on that elevated platform like he’s conquered Everest. This multi-level playground uses natural wood structures to create climbing challenges that build muscle and confidence. The main platform sits 18 inches high with ramp access. A roof overhead provides shade during sprint sessions.
Here’s your complete layout: Start with a 20×20 foot zone in your yard corner. Build a 4×6 foot elevated platform using pressure-treated 2×6 boards. Add a 3-foot-wide ramp at 30-degree angle for safe climbing. Install support posts every 4 feet with concrete footings 12 inches deep so the structure won’t wobble. Total material cost runs about $180 from your local lumber yard.
The platform serves triple duty. He climbs for leg strength. Jumps down for agility practice. Rests in the shade underneath between rounds. You’ll watch him sprint 30 feet, hit the ramp, survey his kingdom from the top, then leap off for another lap. It burns energy so you can enjoy calm evenings inside, which means no destroyed couch cushions. These backyard enrichment ideas pair perfectly with training treats after course completion.
Surface the ramp with horizontal wood slats spaced 3 inches apart. This gives traction in rain and prevents slipping. Paint with outdoor stain matching your fence color every 2 years.
Add digging pit beside the platform using a 3×3 foot sandbox filled with play sand. Bury rope toys 6 inches deep weekly to rotate interest. He’ll dig, climb, rest, repeat. The routine becomes his favorite daily ritual. Combine with homemade training rewards to reinforce good behavior on obstacles.
Pro tip: Install solar stake lights around the platform perimeter. He can use the course until 8 PM during summer evenings without stumbling.
📸 Photo credit: Instagram @topguard_kennels
#4: PVC Pipe Adventure Course (Colorful Ball Pit Finale, Full Agility Training)
Your dog sprints through the tunnel. Leaps the hurdle. Lands in a rainbow ball pit. That’s how you make exercise feel like pure joy.
Build the complete setup in a 20×20 space. Start with three jumps using PVC pipes. Add weave poles from wood stakes. Include a tunnel made from kiddie pool tubes. Finish with a ball pit using plastic play balls. Total cost runs $150 for materials. You’ll spend one weekend building everything.
The obstacle sequence teaches real agility skills so you can train competition moves which means your dog learns focus and discipline. The ball pit creates a reward zone at the course end. She associates hard work with fun play. Check out these agility training tips for proper obstacle spacing.
Surface the area with rubber playground mats. They cushion landings under jumps. Place them over grass for drainage. Each 2×2 mat costs $8 at hardware stores. You’ll need 25 mats for full coverage.
Rotate obstacles weekly to maintain interest. Move the tunnel entrance left. Shift jump heights up. Rearrange weave poles wider. Same space feels brand new. For more outdoor play areas, explore these creative dog run ideas that complement agility courses.
Try this: Paint obstacle numbers bright colors. Your dog learns sequence order. Makes training sessions way easier.
📸 Photo credit: Instagram @millie_spicy_chihuahua
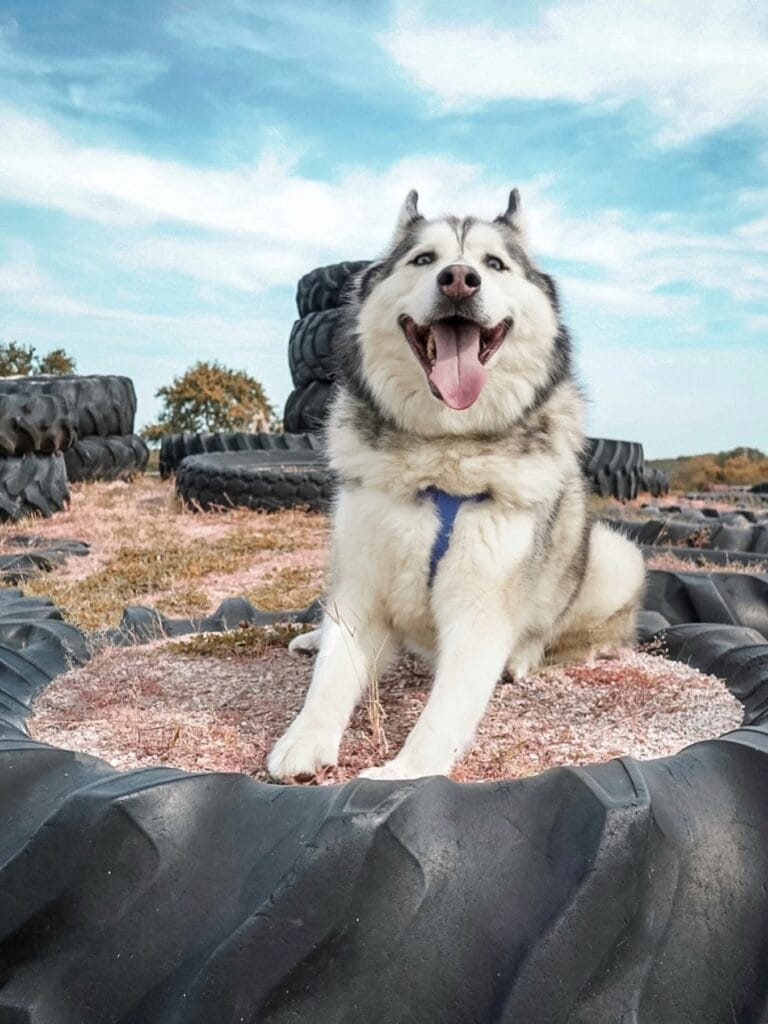
#5: Grass-Topped Tire Bridge Playground (Budget Agility Station That Doubles as Garden Art)
Your dog sniffs the tire steps once. Bounds to the top. Plants four paws on the grass platform and surveys the yard like royalty.
This DIY tire bridge uses 6 stacked tires with turf-topped platforms. Total cost: $45 for artificial grass remnants from home stores. The tires? Free from tire shops. Stack two tires per column, connect with 2×6 wood planks secured by 3-inch deck screws. Top each with grass pieces cut to fit.
Space requirement: 8 feet long, 3 feet wide. Perfect for medium to large dogs. Small breeds master it too with lower tire stacks. Position it near your fence for backyard dog enrichment that looks intentional.
The grass surface gives traction so your dog won’t slip. No raw wood splinters. Tires absorb impact when he leaps down. Your neighbors see landscape art, not dog equipment.
He climbs up for the view. Practices balance walking the beam. Burns energy without digging holes elsewhere. Meanwhile, you watch from the kitchen window while sipping coffee.
Pair this with simple DIY fence ideas to contain the play zone. Add PVC weave poles alongside for variety. Rotate which obstacles you set up weekly. Same space, fresh challenges each time.
Pro tip: Drill drainage holes in tire bottoms. Rain drains through instead of pooling. No mosquito breeding grounds.
📸 Photo credit: Instagram @jokerthemittelspitz
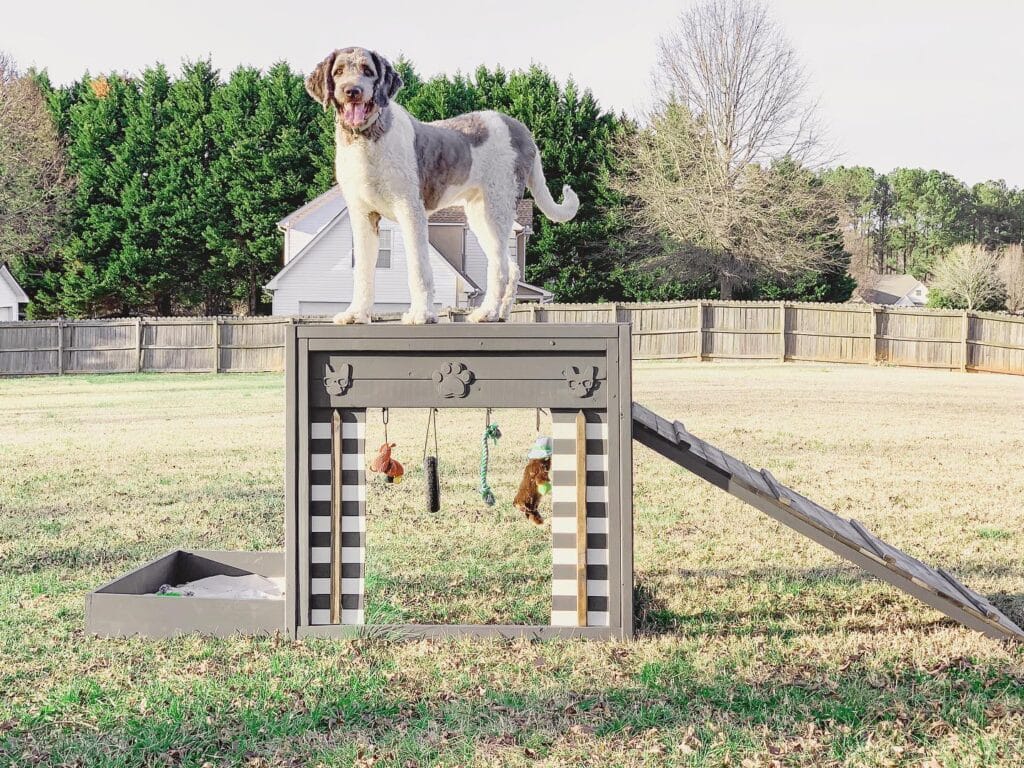
#6: Natural Wood Agility Training House (Backyard Centerpiece, Built-In Obstacle Course)
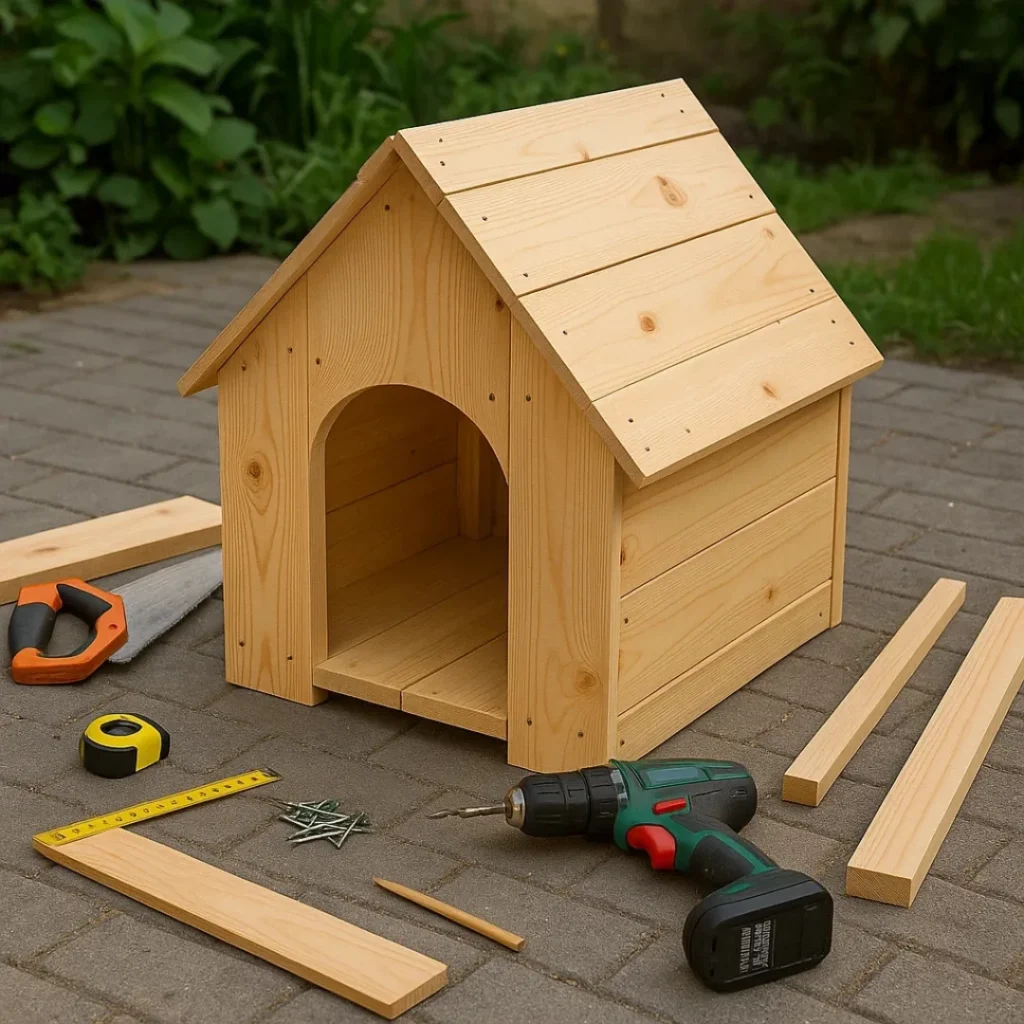
Your Lab sprints through the 2-foot arch. She loops around the back wall for weave practice. Then collapses inside for shade rest.
This 15×20-inch wood playground house anchors your entire backyard agility setup. The arched entry doubles as a jump-through obstacle. The sloped roof creates a natural tunnel effect around sides. Three horizontal planks on each wall work as weave-pole targets. You’ll train jumps, focus, and rest zones all in one structure.
Build it from 3/4-inch pine boards in 4 hours. Six wall planks per side cost $24 at Home Depot. The A-frame roof uses four 18-inch boards at $16 total. Secure with 2-inch screws every 6 inches. No paint needed—natural wood blends with yard landscaping like these 21 Creative DIY Dog House Ideas for Your Dog Friend show perfectly.
Place it on pea gravel for drainage and traction. The 12-inch clearance keeps small breeds cool underneath. Medium dogs rest inside the 14-inch tall interior. Add a removable floor pad using 14 Creative DIY Elevated Dog Bed Ideas You’ll Love techniques for summer cooling.
The arched entry trains hesitation-free jumping. Call from opposite side for recall drills. Hide treats inside for scent-work games.
Pro tip: Drill drainage holes in floor corners so rain doesn’t pool inside during storms.
📸 Photo credit: Instagram @woodworkingmylove
#7: Rustic Lean-To Balance Beam (Weathered Wood Agility, Zero-Cost Training)
Your neighbor’s old fence came down last month. Three vertical posts became your dog’s favorite balance challenge for $0.
The structure uses three weathered wood posts arranged in lean-to formation. One vertical support at 6 feet tall. Two diagonal beams cross at different angles. A tire swing hangs at the base. Total footprint: 4×6 feet.
Secure the vertical post 18 inches deep in concrete. Bolt diagonal beams at top and midpoint connections. Add the tire 3 feet off ground for climbing practice. Paint-free rustic look blends into natural yards.
He walks the angled beam 8 times daily. Balances on narrow edges building core strength. Then swings through the tire opening. Complete confidence workout in 5 minutes.
Place it near your dog house setup for integrated play zones. Works perfectly alongside crate training areas for puppies learning boundaries. The multi-angle design challenges different muscle groups each session.
Inspect bolt tightness monthly. Replace rope loops yearly. Hose down after rain removes slippery algae. Weathered wood grips paws better than painted surfaces.
Shy rescues start walking the low diagonal beam. Graduate to vertical climbing within 3 weeks. Confidence transforms from ground-level to tire-height achievements.
Try this: Spread peanut butter at the top connection point. He’ll master the climb chasing that reward.
📸 Photo credit: Instagram @moirabuchanan
#8: PVC Ball Pit Play Zone (Mental Stimulation Meets Agility Training)
Max’s owner built a 4-foot kiddie pool ball pit in her 20×20 yard corner. He spends 15 minutes digging for treats every morning. Zero boredom behaviors since installation.
The setup takes one afternoon. Fill a hard plastic kiddie pool with hollow PVC balls. Bury treats or favorite toys underneath. Add low jump hurdles around the perimeter. Your dog searches, climbs, and leaps in one compact zone.
This works for rainy days when you can’t walk. Sniffing through 200 balls burns mental energy fast. Physical climbing adds muscle work. He crashes for 2 hours after just 20 minutes of play.
Position the ball pit near your fence for stability. Add a 2×4 balance beam leading into it. Place water bowls 5 feet away on concrete pads. Rotate hidden toys weekly using these DIY dog toy ideas to keep interest high.
Multi-dog homes need two pits spaced 10 feet apart. Small dogs get 6-inch balls. Large breeds handle 8-inch sizes better. Winter? Move the whole pit into your garage.
Hide frozen treats from these easy recipes for summer cooling. Shy rescues gain confidence searching safely. Hyperactive pups focus their energy perfectly.
Quick win: Bury three treats tonight. Watch your dog’s problem-solving skills activate instantly.
📸 Photo credit: Instagram @woofdriver2
#9: Natural Log Obstacle Course (Multi-Level Adventure Play, Full-Yard Transformation)
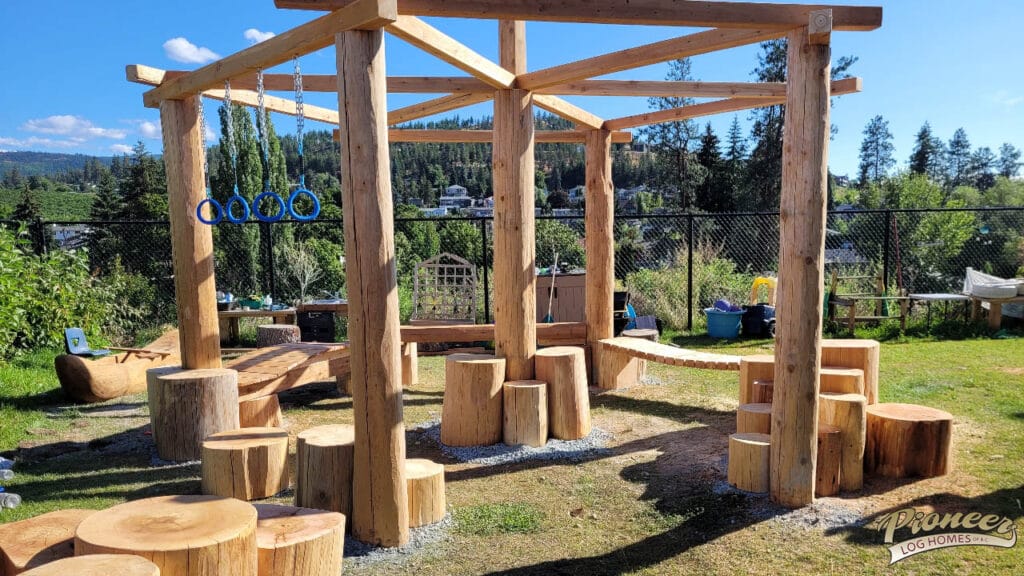
Your dog circles the house 40 times daily. That energy needs a job. This log-frame playground turns a 30×40-foot space into an agility gym, climbing zone, and sprint track combined.
The pergola frame uses 8-inch diameter cedar posts set 3 feet deep. Crossbeams span 12 feet, creating shade for summer sprints. Blue rings hang on chains for jumping challenges—adjust heights from 12 to 36 inches as skills improve. Natural log stumps in varying heights (6, 12, and 18 inches) form stepping platforms that build coordination and confidence.
Three main zones flow together: entrance warm-up (flat gravel sprint), center obstacle area (logs, rings, balance beams), and far-end rest station (shaded seating). A 25-foot straightaway lets your dog hit top speed before tackling jumps. Chain-link fencing with 6-foot height keeps even jumpers contained so you can watch safely from indoors.
Gravel surfacing drains instantly after rain. No mud tracks in your house. Spread 3 inches deep with monthly raking. Wood platforms need yearly sealing against weather. Check bolts quarterly—nothing wobbles, nothing tips. The natural wood blends with 10 DIY dog food recipes for your furry farmer friends when you’re creating a complete homestead vibe, or pairs with 15 creative DIY dog costumes for every occasion for backyard training photo ops.
She mastered the ring sequence in 2 weeks. Now completes laps in 30 seconds flat. Neighbors think you built a kid’s playset.
Pro tip: Start with ground-level logs only. Add height obstacles after your dog navigates flat courses confidently for 10 days straight.
📸 Photo credit: Instagram @pioneerloghomes
#10: Tire Obstacle Course Adventure Zone (Natural Training Ground, Zero-Cost Setup)
Max bounds across salvaged tractor tires in 8 seconds flat. He climbs the stacked pyramid. Leaps from tire to tire. Then collapses in his shaded rest spot. Your old gym membership? Never used. His backyard obstacle course? Daily workout.
You’ll need 12-15 large tires for a complete zone. Stack three tires into a climbing pyramid. Lay six flat for jumping practice. Position three upright for weave training. The entire setup costs $0 if you grab free tires from repair shops. Paint them black to match your fence. Arrange them in a 20×15-foot section of your yard.
Fill tire centers with pea gravel so they drain after rain. Anchor bottom tires with 6-inch landscape stakes. No mud puddles means no dirty paw prints tracking through your house. The textured rubber surface grips wet paws better than grass. Your dog runs the course rain or shine.
Create three zones: flat tire jumps near your house, stacked climbing tires in the middle, upright weave tires at the far end. This layout works perfectly with 16 budget-friendly DIY dog run ideas that extend your training area. Add 12 creative DIY dog gate ideas for your home to control access during training sessions.
Bella gained confidence climbing low stacked tires first. Now she scales the three-tier pyramid. Her shy rescue behavior disappeared in two weeks. Neighbors think you built an art installation. You know it’s a full-body workout station that keeps her exercised and mentally sharp.
Start with five flat tires arranged in a straight jumping line. Add one tire weekly as your dog masters each level. Rotate the course layout monthly to maintain excitement.
📸 Photo credit: Instagram @athenanares
#11: Multi-Level Platform Playground (Adventure Heights Meet Ground Play)
Your dog stands on the platform roof like she conquered Everest. Tail wagging. Tongue out. Pure joy.
This elevated platform design combines climbing, jumping, and rest zones in 12×15 feet. The top deck sits 30 inches high with a ramp leading up. Underneath features storage hooks for toys plus shaded rest space. A 24-inch jump hurdle sits beside it. Total material cost runs about $180 for pressure-treated lumber and deck screws.
The multi-level approach burns energy fast so you can enjoy calm evenings. Your dog climbs the ramp 15 times. Leaps the hurdle. Crashes underneath in the shade. Which means no destroyed shoes or chewed furniture inside your house.
Build the platform with 2×4 framing and 3/4-inch plywood top. Anchor with concrete footings buried 12 inches deep. Sand all edges smooth for paw safety. Apply exterior stain matching your fence color so it looks like stylish backyard furniture rather than dog equipment.
The shaded underneath space works year-round. Summer cooling retreat. Winter wind block. Add an elevated bed underneath for ultimate comfort during rest breaks.
One neighbor thought it was play equipment for kids. Nope. Just a very spoiled golden retriever.
Start with the platform base before adding obstacles. Master one element first. Add complexity weekly as confidence builds.
📸 Photo credit: Instagram @_ashleighlaurn
# #12: Multi-Zone Adventure Playground (Compact Footprint, Maximum Play)

Your dog sees a yellow ball on lush turf. You see 400 square feet of endless entertainment. This 20×20 medium playground design fits most suburban yards perfectly.
Start with three distinct zones: sprint track along the fence line, obstacle course in the center, cool-down station near the house. The grass provides natural cushioning while draining water quickly. Add a 30-foot straightaway for zoomies and recall practice using these agility training tips. He’ll sprint from fence to patio in 8 seconds flat.
Build simple obstacles with $200 in materials from hardware stores. PVC pipe jumps adjust from 6 to 18 inches high. A-frame ramps use plywood sheets on 2×4 frames. Weave poles stand 3 feet apart in concrete bases. She mastered the full course in 3 weeks. Now runs it in 45 seconds without treats.
Place water stations at both ends to prevent dehydration. Stainless steel bowls anchored with concrete pavers won’t tip during play. The shaded tree near your back wall creates a natural rest zone. Similar setups work great in outdoor kennel designs too. Summer mornings he does 20 laps then crashes in the shade for 2 hours.
Maintenance takes 15 minutes weekly: rake surfaces, hose obstacles, rotate buried toys. Weather-resistant materials last 5+ years without replacement.
Start small: one jump, one tunnel, one straightaway. Add obstacles monthly as confidence builds.
📸 Photo credit: Instagram @montyonstage
#13: Multi-Level Adventure Playhouse (Climbing Ramps, Slide Platform, Built-In Agility Course)
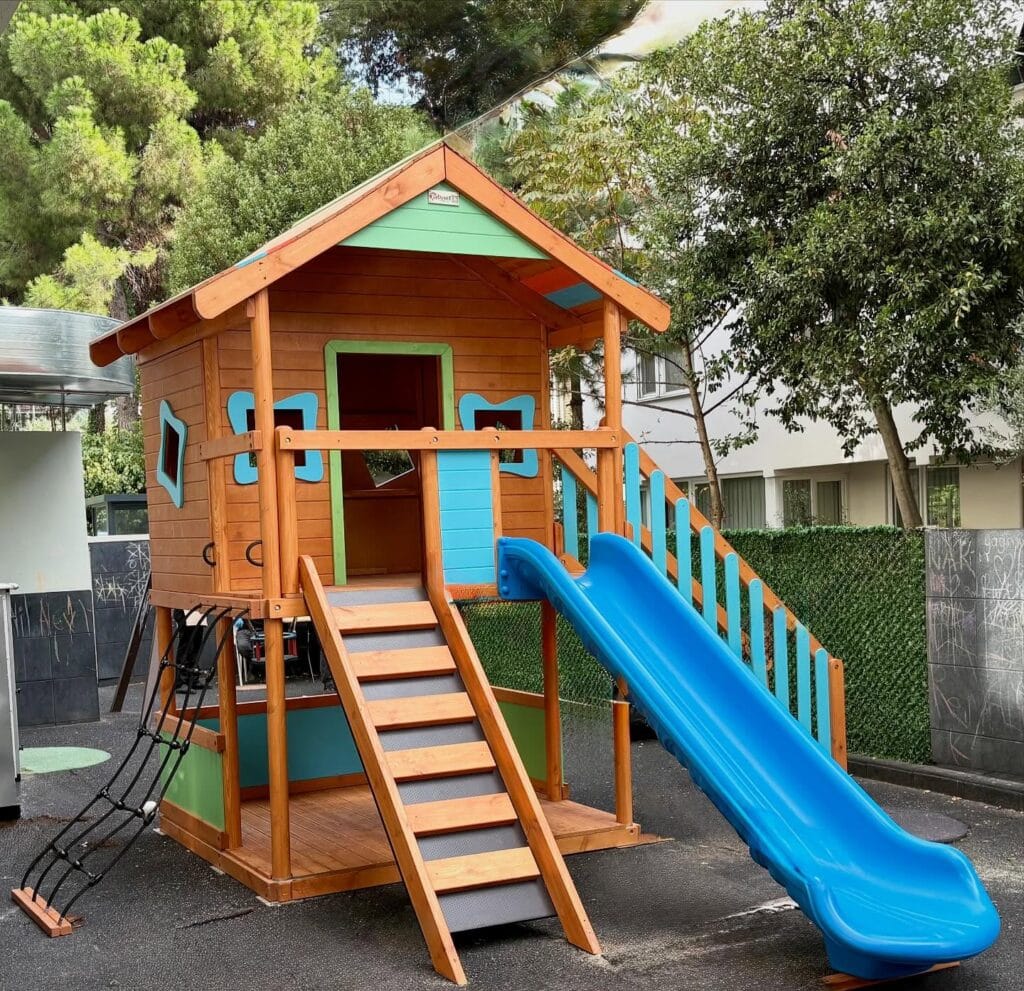
Your dog sprints up the 6-step ramp in 4 seconds flat. Pauses on the covered platform to survey the yard. Then leaps down the opposite side to start another lap.
This elevated playhouse design measures roughly 12×8 feet with a 7-foot tall peaked roof. The main platform sits 4 feet off the ground, accessible by non-slip ramps on both sides. Heart-shaped window cutouts (8 inches wide) provide ventilation and visual interest. The green and turquoise trim pops against natural wood stain—it looks like a garden feature, not dog equipment.
The slide attachment extends 8 feet from the platform at a gentle 30-degree angle. Most dogs need 2-3 weeks to master sliding. Start by tossing treats halfway down. Your pup gains confidence climbing elevated spaces, which translates to real-world skills like jumping into cars or navigating stairs. Similar training principles apply when building these cozy indoor kennel setups for year-round comfort.
Install the structure on level ground with 4-inch rubber mulch underneath. Anchor corner posts with concrete footings (8 inches deep) so it won’t tip during enthusiastic zoomies. The covered roof provides shade during 2-3 PM peak heat—your dog can rest on the platform between play sessions.
Pair this with ground-level obstacles below the deck. Weave poles made from 1-inch PVC pipes spaced 24 inches apart. A tunnel entrance beneath the platform creates a natural agility sequence: climb, slide, weave, tunnel, repeat. For more structured training ideas, check out these creative crate topper designs that double as indoor agility practice.
He mastered the full circuit in 3 weeks. Now completes 10 laps before breakfast. Your neighbors think you built a playhouse for kids—don’t realize it’s your dog’s personal gym.
Start small: Teach platform climbing first using treats every 2 steps, then add slide training once he’s comfortable at height.
📸 Photo credit: Instagram @elyseeplaygrounds
#14: Natural Canopy Adventure Platform (Multi-Level Treehouse Play, Year-Round Backyard Escape)
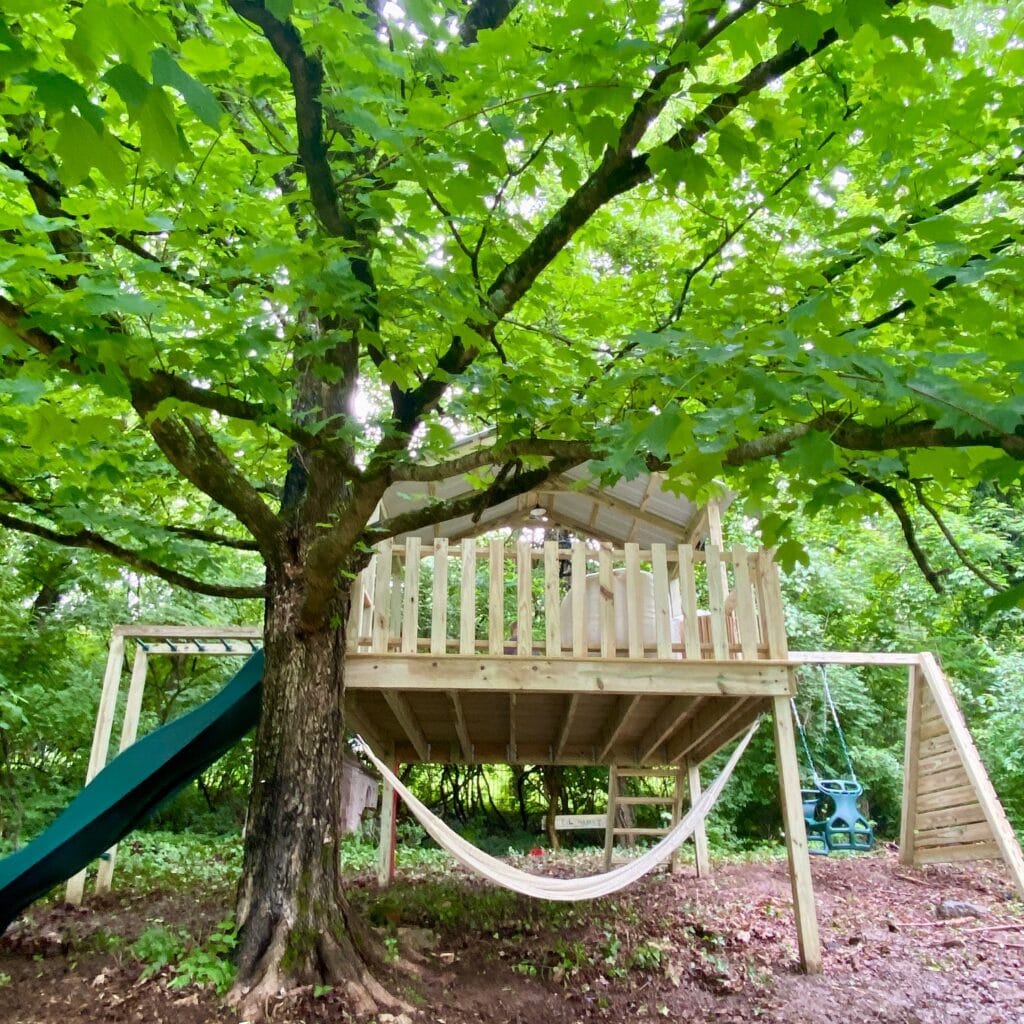
Your dog completes the obstacle course in 45 seconds. Climbs the stairs. Sprints across the elevated platform. Slides down to start again.
This medium-size 25×25 natural rustic design transforms your backyard into an adventure park. The elevated platform sits 4 feet high with wooden railing protection. A slide on one side for quick exits. Stairs on the other for controlled climbing. The hammock underneath creates shaded rest zones where your dog crashes after sprinting laps. Budget $800 for lumber, hardware, and surface materials.
The traffic flow works perfectly. Your dog exits through the back door into a 30-foot straightaway for zoomies. Hits the platform for climbing challenges. Drops down for tunnel runs. Returns to the shaded hammock when tired. It burns energy through vertical play SO YOU CAN avoid destructive boredom behaviors WHICH MEANS your furniture stays intact and your dog stays happy.
Surface the ground with 6 inches of cushioning mulch around the platform base. This protects joints during jumps. The tree canopy provides natural shade year-round. No extra pergola costs. Plant safe herbs like mint near the platform for sniffing enrichment. Check out these backyard enrichment ideas for rest stations.
Install weighted stainless steel water bowls at two spots. One near the house entrance. One by the platform. This prevents dehydration during 20-minute play sessions. Anchor the platform with concrete footings so it won’t tip during rough play. For multi-dog households, the elevated platform naturally separates high-energy climbers from ground-level sniffers.
Weekly maintenance takes 15 minutes. Rake the mulch. Inspect platform stability. Rotate buried toys in the base area. Rainy days? The slide drains water naturally. Your dog still plays without turning into a mud monster. Winter snow creates new climbing challenges on the same structure.
The platform doubles as outdoor relaxation for humans too. Kids watch from the top deck. Adults hang in the hammock. Neighbors think it’s backyard garden art. They don’t realize it’s your dog’s personal gym. Learn more creative outdoor setups for style integration.
Try this: Start with low platform height for puppies. Raise it 6 inches yearly as confidence builds.
📸 Photo credit: Instagram @tinyhavenspaces
#15: Natural Treehouse Play Platform (Multi-Level Adventure Zone, Built-In Climbing)
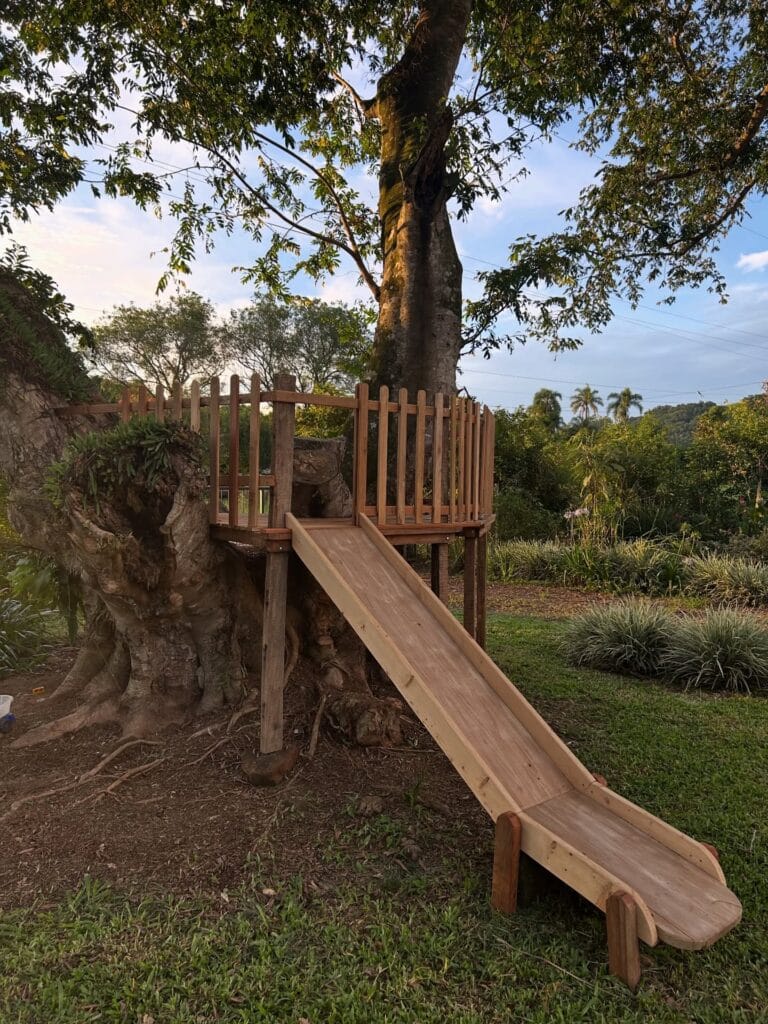
Your dog watches squirrels from ground level while trees offer all the fun. This wooden platform wraps around existing trees so climbing becomes daily entertainment.
The platform measures about 6×8 feet and sits 3 feet high. A slide adds exit variety—he climbs stairs up, slides down for laughs. Vertical wood railings prevent falls while giving peeking spots toward the yard. Cost runs $400 for lumber, $80 for slide, plus 2 weekend days building.
Position it under mature tree canopy for built-in shade coverage. The elevated deck keeps paws dry during rain and offers cooling breezes in summer. Your dog gets vertical territory without you sacrificing yard space. Combine this with 7 DIY Dog Agility Course Ideas for Fun using the ground area surrounding the platform—weave poles on one side, tunnel underneath creates multi-level challenges.
Build stairs with 6-inch rise for easy joint access. Anchor posts with concrete footings 18 inches deep so nothing wobbles. Seal wood yearly to prevent splinters. If you need a shaded rest station nearby, check out 7 Charming DIY Houses for Your Outdoor Pup that complement adventure zones perfectly.
She conquered the stairs in 2 days. Now slides down 20 times each morning. Neighbors think you built a kid’s playground—joke’s on them.
Tip: Scatter treats on the platform during training. He’ll associate climbing with rewards and master stairs faster.
📸 Photo credit: Instagram @umagurianamarcenaria
Your Dream Dog Paradise Awaits
You’ve got 15 amazing ideas to transform your backyard into the ultimate pup playground. Start with one project this weekend and build from there.
Your dog-friendly yard makeover doesn’t stop here. Check out these DIY dog ramp ideas for older pups who need easier access. Add a DIY outdoor washing station to rinse off muddy paws after playtime. Complete your space with budget-friendly fence ideas to keep your furry friend safe.
Pin your favorite playground setup so you don’t lose it. Your pup’s happy barks and zoomies will make every minute of building totally worth it. Which DIY dog playground idea are you tackling first?

Amr Mohsen is a software engineer who traded his keyboard for a leash — at least on weekends. His love for dogs inspired him to share what he learns as a dog owner and enthusiast, bringing a detail-oriented, research-driven perspective to every article he writes. If it’s about dogs, he’s probably already looked it up twice.

