Okay so, your cat has been giving you that look again — the one where she stares you down while you’re eating and makes you feel genuinely guilty.
Girl, I’ve been there. My aunt’s tabby, Mochi, used to knock things off the counter at 2am until somebody paid attention to his snack situation. We finally started making his treats at home and honestly? The chaos stopped. Mostly.
Here’s the thing — store-bought treats are full of stuff you can’t even pronounce, and your cat deserves better than that mystery ingredient list.
Good news: making homemade cat treats is way easier than it sounds. No fancy equipment, no culinary degree, nothing intimidating. Just simple ingredients your cat will actually go crazy for.
These 12 recipes are beginner-friendly, budget-friendly, and your feline is going to be obsessed.
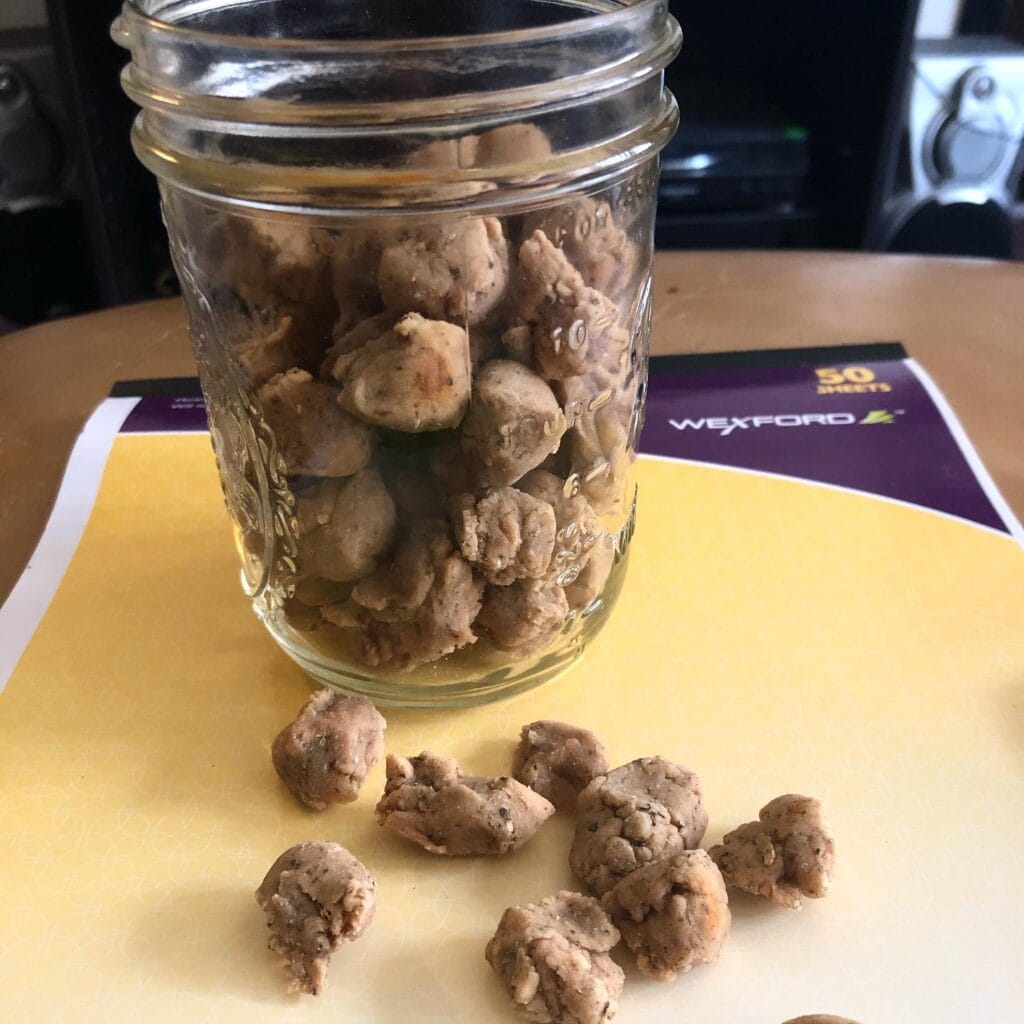
#1: Homemade Cinnamon Peanut Butter Cat Treats (Crunchy Bites Your Cat Will Go Crazy For)
Okay so you know how your golden retriever gets that look when you’re eating something and she just… stares? My cat does the same thing every time I open a treat bag. The crinkling sound alone sends her into full chaos mode, knocking things off my counter like it’s her job.
These little nuggets you’re seeing in that mason jar? Game changer.
They’re crunchy, nutty, and honestly smell so good I almost tried one myself. The jar keeps them fresh for weeks, and the ones scattered on that yellow paper? That’s just me doing a quality check. Obviously.
Prep Time: 10 minutes | Cooking Time: 20 minutes | Serving Size: Approx. 60 small treats
Ingredients:
1. 1 cup whole wheat flour
2. ¼ cup natural peanut butter (unsalted, xylitol-free)
3. ¼ cup unsweetened applesauce
4. 1 teaspoon cinnamon
5. 2 tablespoons water (add more if dough feels dry)
6. 1 egg
Instructions
Preheat your oven to 350°F. Mix the peanut butter, applesauce, and egg together first in a bowl until smooth. Add the flour and cinnamon, then stir until a thick dough forms. Add water one tablespoon at a time if it feels too stiff to roll.
Roll the dough into a ¼-inch thick sheet on a lightly floured surface. Cut or pinch small ½-inch nugget shapes by hand — just like you see in the photo, rough and rustic is totally fine. Cats don’t care about Pinterest perfection, trust me.
Place them on a parchment-lined baking sheet and bake for 18-22 minutes until golden and firm. Let them cool completely before storing in a glass mason jar — that airtight seal keeps them crunchy for up to 3 weeks.
And here’s the thing about the mason jar storage — whole wheat flour gives these treats structure, which means they stay crunchy longer, which means zero soggy, weird-smelling treat situations in your cabinet.
Making treats in bulk and storing them in labeled jars also doubles as the most adorable counter decor, just saying.
Keep the nuggets small — roughly pea-sized — so your cat can crunch through them easily without biting off more than she can chew. Literally.
📸 Photo credit: Instagram @budget_banquet
#2: Pumpkin & Salmon Cat-Shaped Homemade Treats
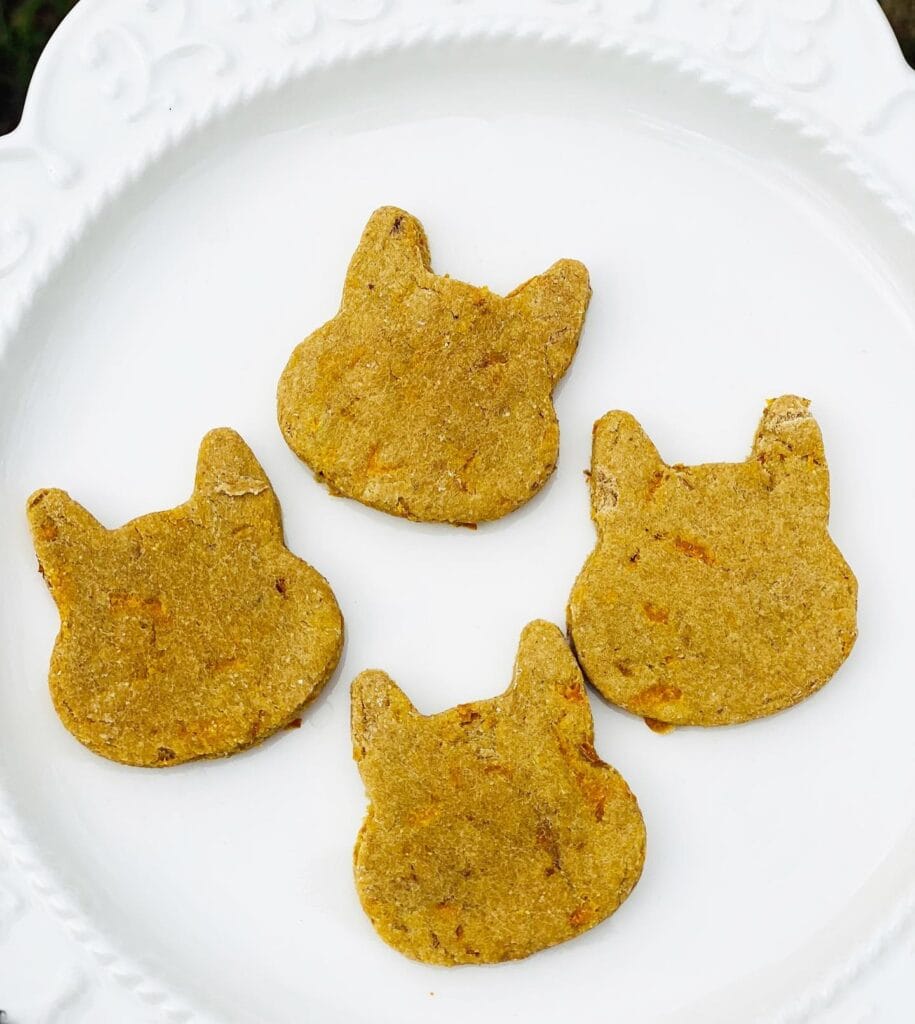
Okay so real talk — your golden probably gets all the homemade treat love, but what about the cat sitting on the counter judging you? My aunt’s tabby, Fry, used to swipe treats right off the baking sheet. That’s when I knew cats needed their own thing.
These little cat-head shaped treats are exactly what you see on the plate — golden-brown, crisp-edged biscuits pressed with a cat face cookie cutter and baked until firm. The orange flecks inside? That’s real pumpkin, and your cat is going to lose their mind over the salmon smell alone.
Ingredients:
1. 1 cup whole wheat flour
2. 1/4 cup canned pumpkin puree (plain, not pie filling)
3. 1 can (2.5 oz) boneless salmon, drained
4. 1 egg
5. 1 tablespoon olive oil
Instructions
Preheat your oven to 350°F. Mash the salmon completely — no chunks — then mix it with the pumpkin, egg, and olive oil until it forms a paste. Fold in the flour gradually until a firm dough forms. Roll it out to 1/4 inch thickness on a floured surface. Press your cat-face cookie cutter through the dough and place each piece on a parchment-lined baking sheet. Bake for 18-20 minutes until golden and dry to the touch. Let them cool completely on a rack before serving. Pumpkin adds fiber that supports digestion — meaning fewer hairball surprises on your rug.
Store leftovers in an airtight container in the fridge for up to one week, or freeze them for up to 3 months.
Prep Time: 10 minutes | Cook Time: 20 minutes | Serving Size: About 20 treats
📸 Photo credit: Instagram @cuddlesdogbakery
#3: Flaxseed & Oat Crunchy Cat Crackers
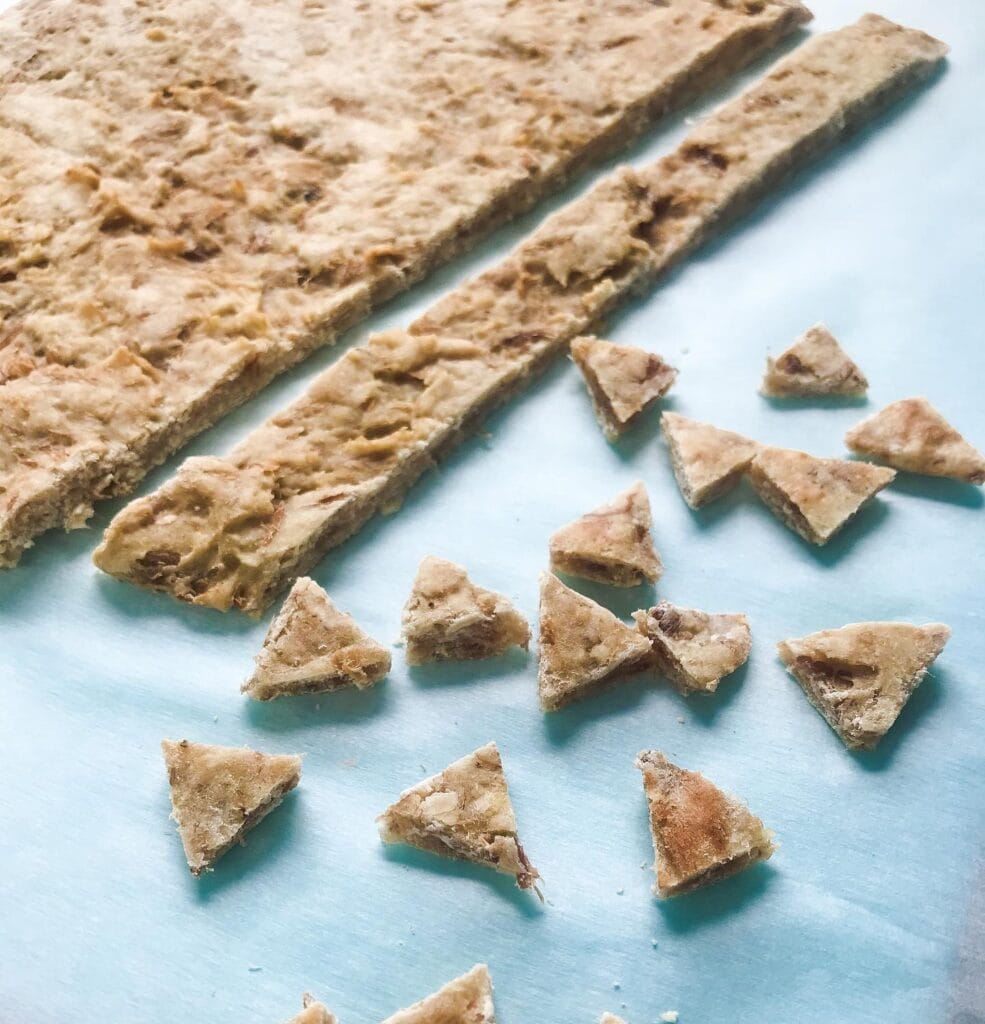
Okay, so you know how your golden leaves crumbs everywhere after stealing food off the counter? Cats do their own version — they’ll sniff around your kitchen the second something crunchy hits the baking sheet. And honestly, these little triangle crackers smell so good coming out of the oven, I don’t blame them.
These are the tan, rustic-looking bites you’re seeing in the image — whole wheat flour base with visible flaxseed and oat bits pressed throughout, cut into small triangles and laid out on a light blue surface. They look exactly like something you’d find in a boutique pet shop.
Ingredients:
1. 1 cup whole wheat flour
2. ¼ cup ground flaxseed
3. ½ cup rolled oats
4. 1 egg
5. 3 tablespoons olive oil
6. ¼ cup low-sodium chicken broth
Instructions
Preheat your oven to 350°F. Mix the dry ingredients first — flour, flaxseed, and oats together in one bowl. Add the egg, olive oil, and broth, then stir until a stiff dough forms. Roll it out to about ¼ inch thickness on a lightly floured surface. Cut into small triangles using a knife or pizza cutter — smaller than you think, cats have tiny mouths. Arrange on a parchment-lined baking sheet and bake for 20-25 minutes until golden and firm.
Flaxseed adds omega-3 fatty acids, which support coat health, so your cat gets a crunchy snack and a glossy coat — that’s the payoff your vet would actually approve of.
Let them cool on the pan completely before storing. These firm up more as they cool, which gives them that satisfying crunch cats go nuts for. Store in an airtight glass jar for up to two weeks.
Prep Time: 10 minutes | Cooking Time: 25 minutes | Serving Size: Approx. 40 small treats
📸 Photo credit: Instagram @fromunderapalmtree
#4: Dehydrated Chickpea Cat Treats (Crunchy, High-Protein Bites Your Cat Will Go Crazy For)
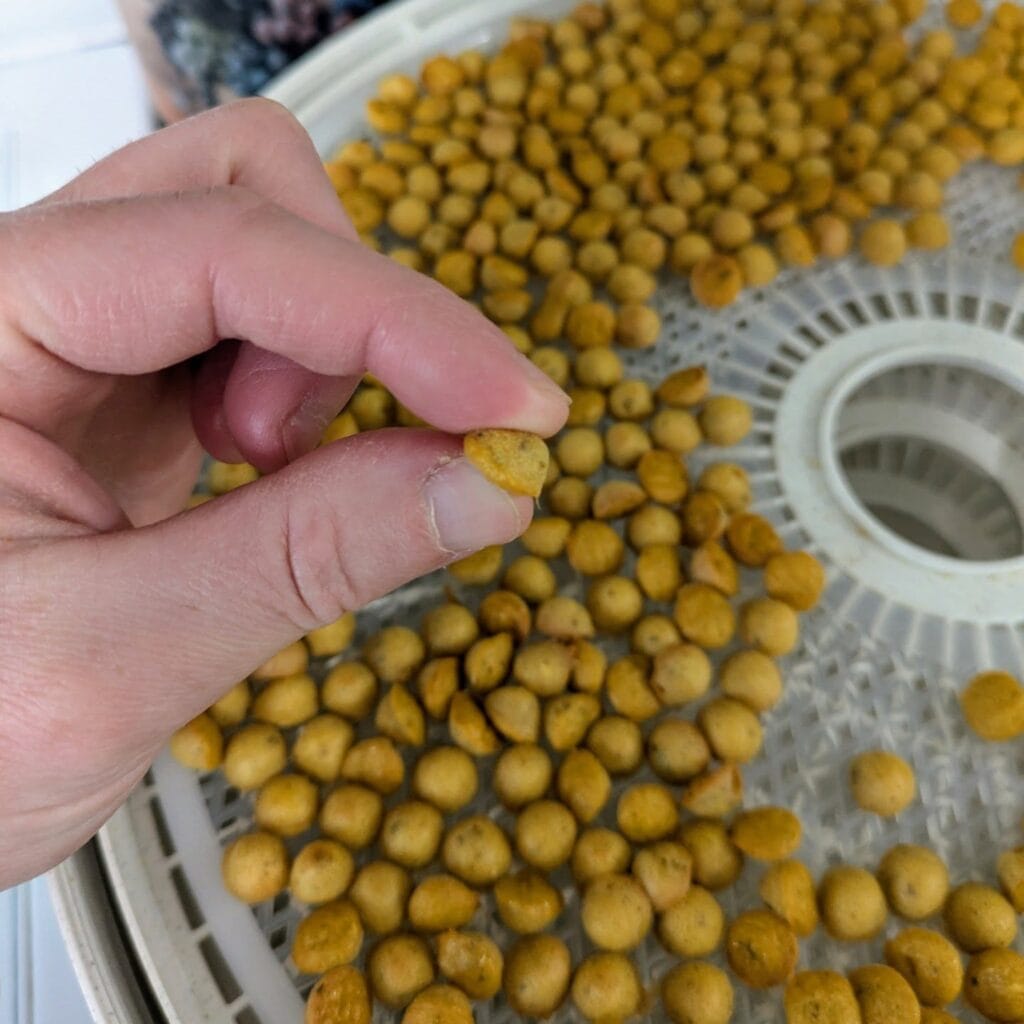
Okay so you know how your golden is always sneaking bites of whatever your cat is eating? Yeah, mine too. But honestly, watching my cat lose her mind over these little golden chickpea bites made me want to make a second batch just for her.
These dehydrated chickpea treats are exactly what they look like — tiny, round, golden-brown bites loaded with plant-based protein. And the texture is perfect for cats who like that satisfying crunch.
Prep Time: 10 minutes | Cooking Time: 8–10 hours (dehydrator) | Serving Size: About 2–3 bites per treat session
Ingredients:
1. 1 can (15 oz) chickpeas, drained and rinsed
2. 1 teaspoon turmeric powder
3. ½ teaspoon ground cumin
4. 1 tablespoon olive oil
5. ¼ teaspoon dried parsley
Instructions
Pat your chickpeas bone-dry with a paper towel first — moisture is the enemy of a crunchy treat. Toss them in a bowl with the olive oil, turmeric, and cumin until every single one is coated in that deep golden color you see in the photo.
Spread them across your dehydrator tray in a single layer, leaving small gaps between each piece. Set your dehydrator to 125°F and let them run for 8–10 hours.
The high-protein chickpea base means your cat gets a nutrient-dense snack without fillers — that’s the feature. The benefit? Fewer empty-calorie treats. The payoff? A cat who actually thrives on snack time.
Pull one out around hour 8 and press it between your fingers. It should feel completely hard with zero give. If it still has any softness, give it another hour.
Store in a glass jar at room temperature for up to 2 weeks.
📸 Photo credit: Instagram @millyandmepetproducts
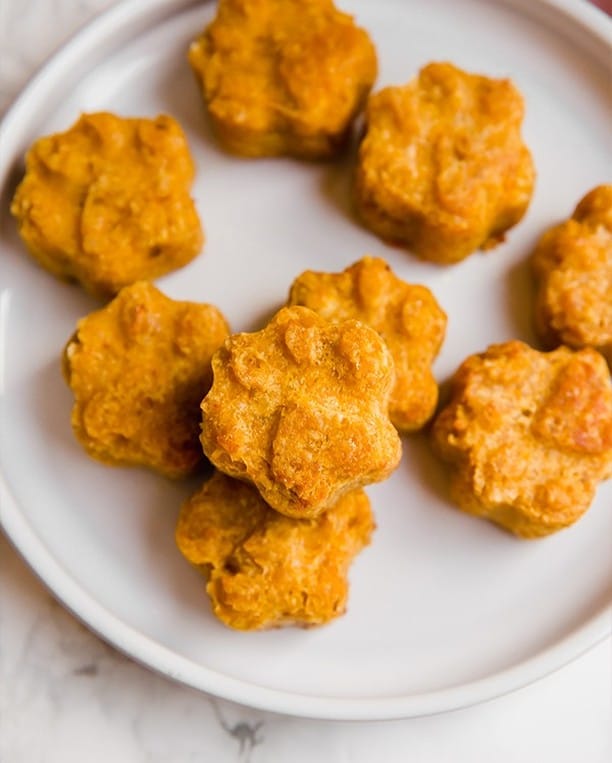
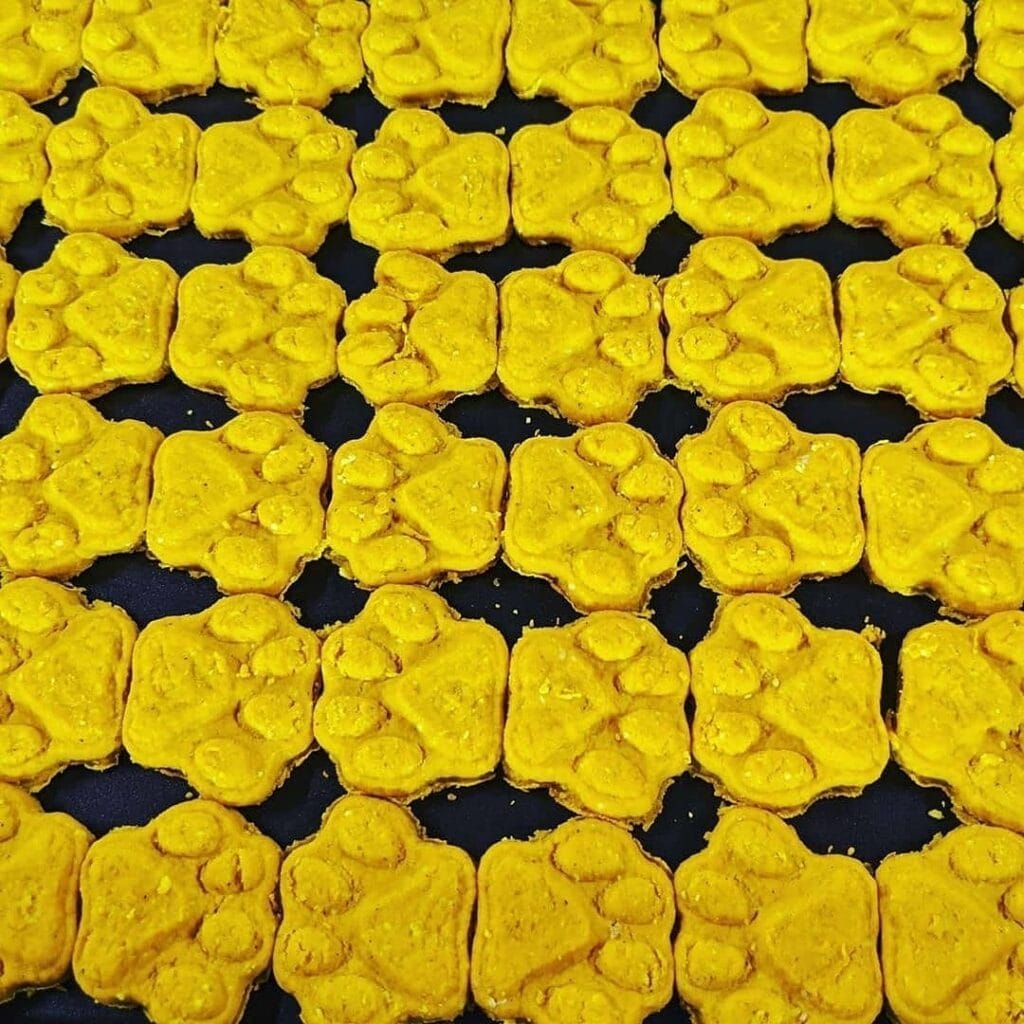
#5: Turmeric Paw Print Cat Treats (Golden & Gut-Friendly!)
Okay so you know that moment when your golden gives you those big puppy eyes while you’re baking? Your cat is literally doing the same thing from the counter, judging your every move.
These sunshine-yellow paw print treats are made with turmeric, and honestly they look straight off a Pinterest board. That golden color isn’t food dye — it’s pure anti-inflammatory goodness baked right in.
Ingredients:
1. 2 cups whole wheat flour
2. 1 teaspoon turmeric powder
3. ½ cup plain pumpkin purée
4. 2 tablespoons olive oil
5. 1 egg
6. ¼ cup water (add slowly)
Instructions
Mix your dry ingredients first — flour and turmeric together until that color looks even throughout. Add pumpkin purée, olive oil, and egg. Stir until a dough forms, then add water one tablespoon at a time. You want firm dough, not sticky.
Roll it to ¼ inch thickness on a lightly floured surface. Press your paw print silicone mold firmly down — these molds give you those adorable raised toe beans you see in the photo. Pop them onto a dark baking sheet (helps conduct heat evenly) and bake at 350°F for 18-20 minutes.
Turmeric contains curcumin, which supports joint health — meaning your older cat gets a treat and relief in one bite.
Prep Time: 15 min | Cook Time: 20 min | Serving Size: 30-35 treats
Store in an airtight container up to two weeks, or freeze batches for three months.
📸 Photo credit: Instagram @hudsandtoke
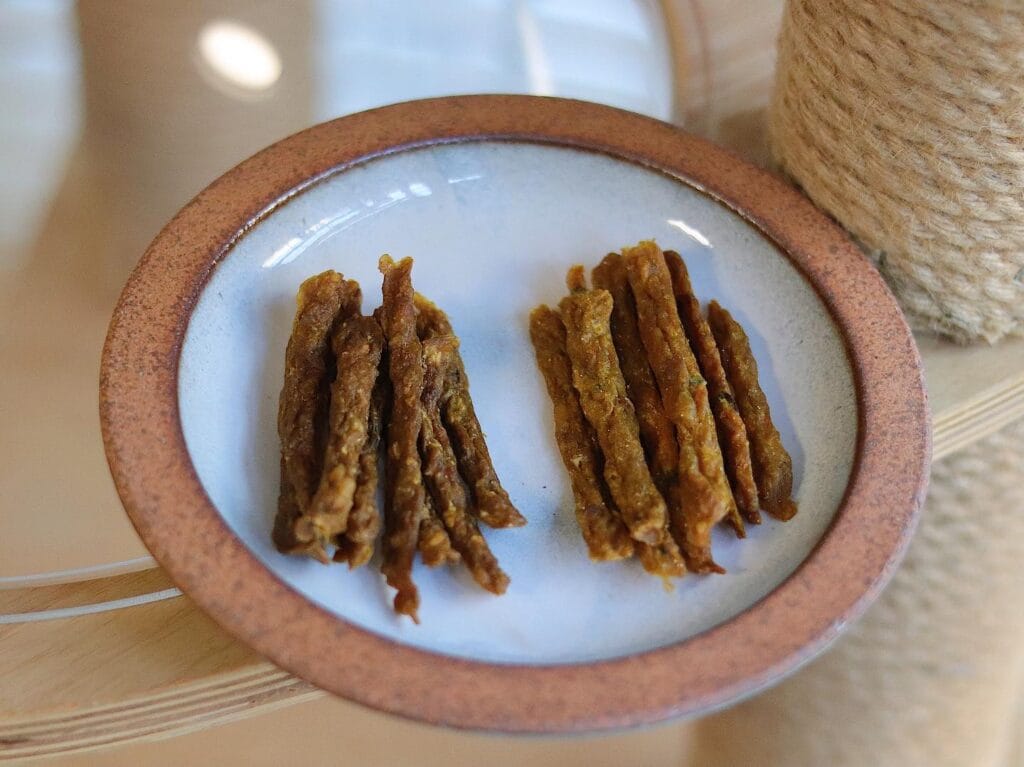
#6: Tuna & Chicken Soft Cat Treat Sticks
Okay so you know how your golden is always sneaking around trying to steal the cat’s food? That’s because cats get all the good stuff, honestly.
These little treat sticks in the photo — those dark brown and golden-tan twisted strips — are exactly what I started making after my cat Wren refused every single store bag I brought home. Two weeks of rejected treats later, I caved and made my own.
They look like tiny jerky twists, chewy but soft enough to break apart with your fingers. Two small stacks, two different batches — one darker (tuna-forward) and one lighter (more chicken).
Prep Time: 15 minutes | Cooking Time: 2 hours | Serving Size: ~30 treat sticks
Ingredients:
1. 1 cup canned tuna in water, drained
2. ½ cup cooked chicken breast, shredded fine
3. 1 egg
4. 2 tablespoons whole wheat flour
5. 1 teaspoon dried catnip (optional but wildly popular)
6. 1 tablespoon plain pureed pumpkin
Instructions
Blend the tuna, chicken, and egg together until you get a thick paste — no big chunks. Mix in the flour and pumpkin until the dough holds its shape without sticking to your hands. If it’s too wet, add flour one teaspoon at a time.
Load the dough into a piping bag fitted with a small round tip (or a zip-lock bag with the corner snipped). Pipe long thin strips onto a parchment-lined baking sheet, keeping each strip about 3–4 inches long.
Bake at 250°F for 2 hours until they’re firm, dry, and slightly twisted-looking — just like in the photo. The low-and-slow bake pulls out moisture without burning the protein, which keeps the treats chewy instead of rock-hard.
Real talk: letting them cool on a wire rack for a full 30 minutes makes a huge difference in texture. They firm up even more as they cool.
Store in an airtight glass jar in the fridge for up to one week, or freeze batches in a silicone tray for up to two months.
The high-protein formula means fewer fillers, which keeps your cat’s digestion happy — and you stop finding mystery messes on your Pinterest-perfect rug.
And if your dog keeps circling the kitchen while you bake these? You might want to check out 10 Irresistible Homemade Soft Dog Treats Your Pup Will Love so everybody gets a snack.
📸 Photo credit: Instagram @pika.pikachu.0522
#7: Tuna Fish & Paw Print Shaped Cat Treats
Okay so you know how your golden leaves drool puddles on the couch and you’re constantly buying her fancy treats? My cat Maisie is the exact same way with tuna — she will knock things off the counter until I pay attention.
These treats are made with canned tuna, whole wheat flour, and eggs — that’s basically it. Look at the image — you can see those adorable fish and paw print shapes pressed right into each piece. Brown, dense, and just the right size for a little paw swipe.
Ingredients:
1. 1 can (5 oz) tuna in water, drained
2. 1 cup whole wheat flour
3. 1 egg
4. 1 tablespoon dried catnip (optional but they go feral for it)
Instructions
Preheat your oven to 350°F. Mash the drained tuna in a bowl until it’s mostly smooth — some texture is totally fine. Mix in the egg and flour until a firm dough forms. Roll it out to about ¼ inch thick on a lightly floured surface. Press your fish or paw-shaped cookie cutters down firmly. Space them on a parchment-lined baking sheet and bake 12-15 minutes until they turn that deep golden-brown color you see in the photo. Let them cool completely before serving — warm treats crumble fast.
Whole wheat flour adds fiber, which supports digestion, so your cat gets a snack that actually does something good.
Store extras in an airtight container in the fridge for up to one week.
Prep Time: 10 min | Cook Time: 15 min | Serving Size: ~30 small treats
📸 Photo credit: Instagram @awepawsllc
#8: Mini Pumpkin & Peanut Butter Cat Bites (The Cutest Party Favor Ever)
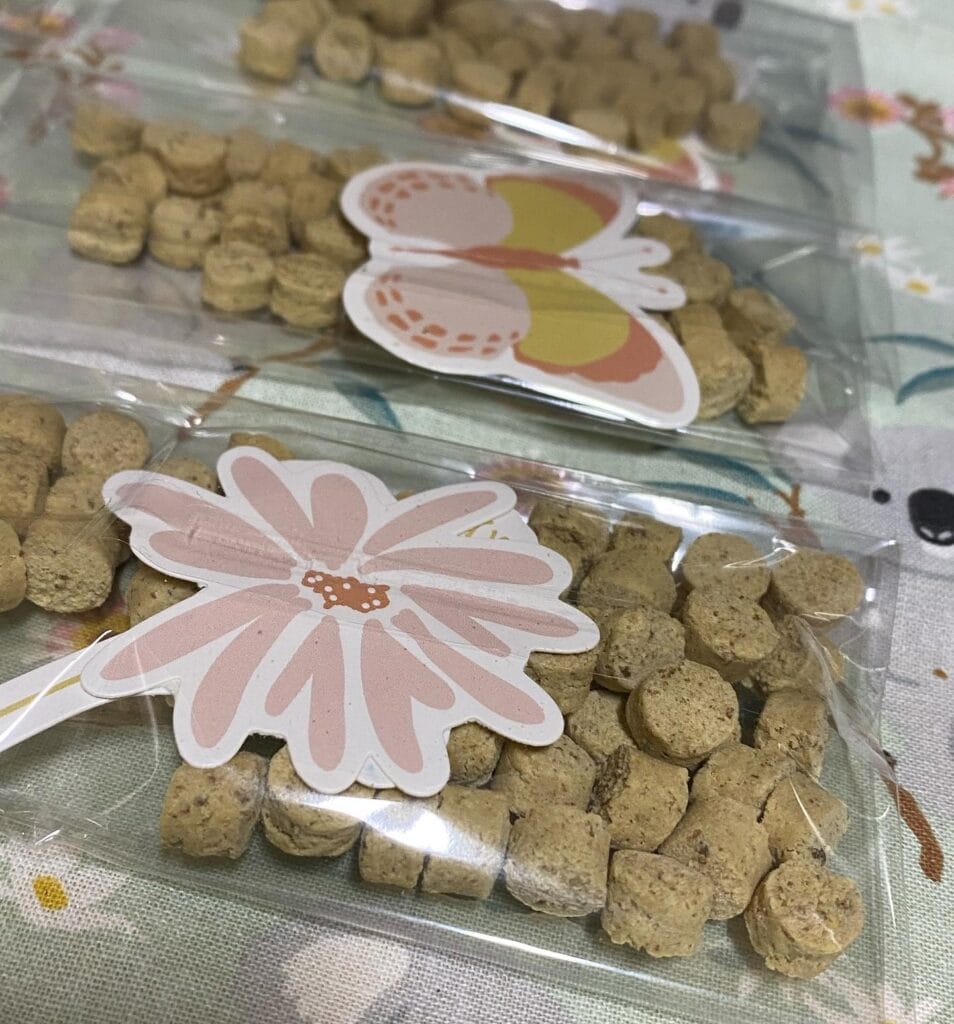
Okay so you know how you’re always making those adorable little treat bags for your golden’s birthday parties? These are exactly that — but for your cat, and honestly? Way cuter.
These little bites are packed into clear cellophane bags and sealed with the most Pinterest-worthy flower and butterfly toppers. The treats themselves are small, round, golden-brown puffs — think mini coin-sized bites with a slightly rough, airy texture that just crumbles at the touch.
Prep Time: 15 minutes | Cooking Time: 20 minutes | Serving Size: Approx. 60–70 mini bites
Ingredients:
1. 1 cup whole wheat flour
2. ¼ cup canned pure pumpkin puree
3. 2 tablespoons unsalted peanut butter
4. 1 egg
5. ¼ teaspoon ground cinnamon
6. 2–3 tablespoons water (to adjust dough consistency)
Instructions
Mix the pumpkin, peanut butter, and egg together first in a bowl until smooth. Add the flour and cinnamon, then work in water one tablespoon at a time until the dough holds together without sticking to your hands.
Roll the dough to about ¼ inch thickness on a lightly floured surface. Use a small round cutter — roughly ¾ inch diameter — to punch out those little coin shapes you see in the image. The small size matters here: smaller bites bake more evenly and stay crisp longer, which means they store well in those cellophane bags without getting soft or sticky.
Bake at 350°F on a parchment-lined sheet for 18–20 minutes until they turn that deep golden-brown color. Let them cool completely before bagging — even slight warmth creates condensation inside the bag and ruins the crunch.
Once cooled, portion about 20–25 bites per bag, seal the top, and clip your printed topper through the seal. The flower and butterfly designs in the image are cut from cardstock and stapled right over the bag’s folded top edge — no fancy equipment needed.
Store finished bags at room temperature for up to 5 days, or freeze ungifted portions in an airtight container for up to 2 months.
📸 Photo credit: Instagram @pets_for_wildlife
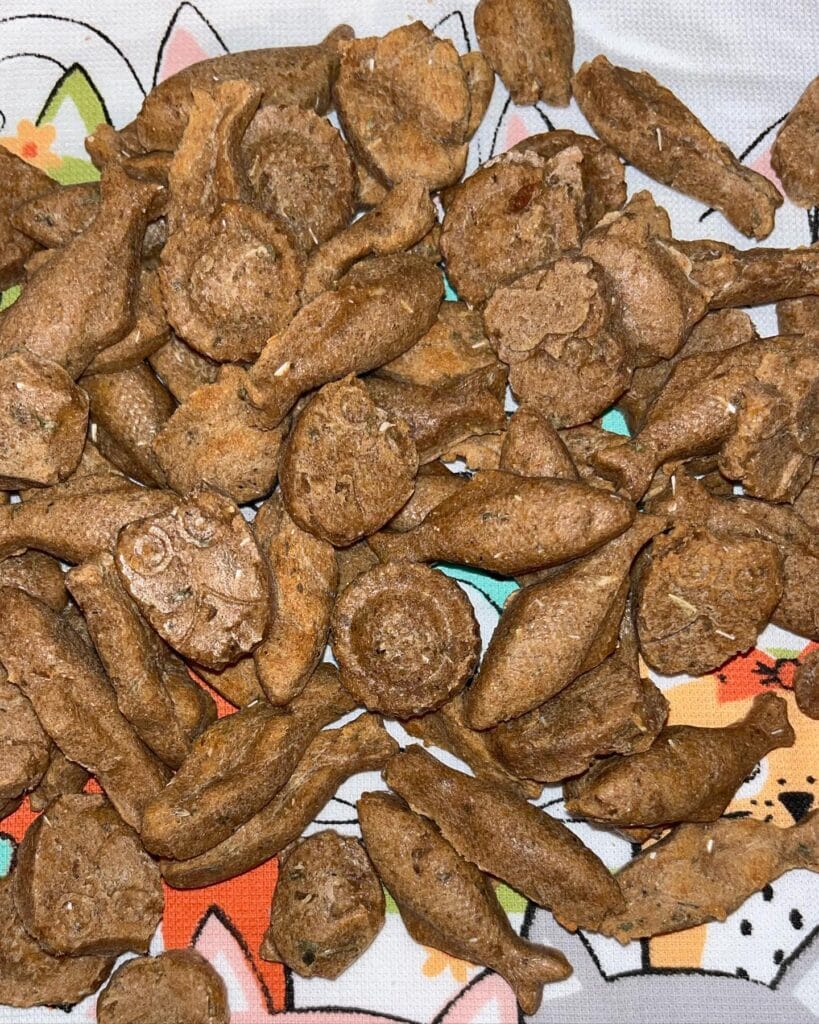
#9: Crunchy Chickpea Cat Treats (The Sneaky-Good Snack Your Cat Will Go Feral For)
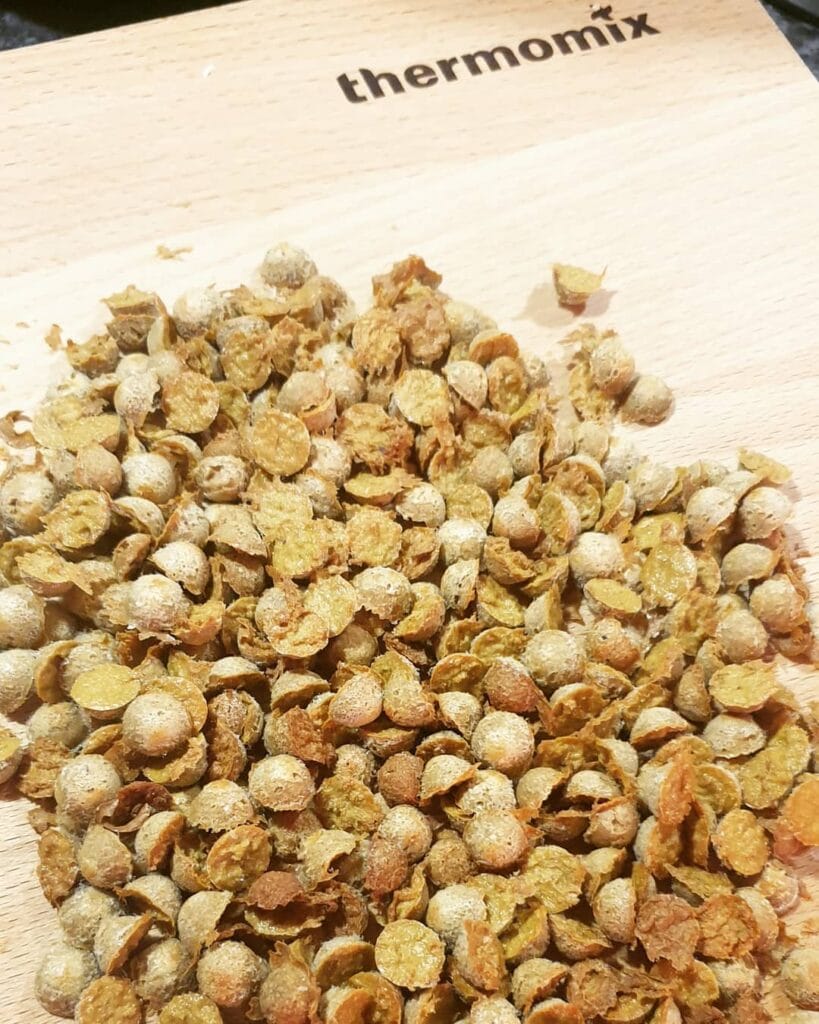
Okay so you know how your golden retriever has that look when you’re eating something and she just… stares? Cats do the same thing, except way more judgmental. My cat literally knocked a whole bowl off the counter last week just to get my attention at snack time. These crunchy roasted chickpea treats are the answer.
What you’re seeing in the image are split, roasted chickpeas — golden-brown, papery-skinned little rounds spread across a Thermomix wooden prep board. The skins curl and separate during roasting, creating that light, airy crunch cats go absolutely wild for.
Ingredients:
1. 1 cup (200g) dried chickpeas, soaked overnight
2. 1 tablespoon olive oil
3. ¼ teaspoon dried catnip
4. ¼ teaspoon ground turmeric
5. 1 pinch sea salt (tiny — cats need minimal sodium)
Instructions
Drain and rinse your soaked chickpeas, then pat them completely dry with a kitchen towel — this is the step most people skip, and it’s why their treats turn out chewy instead of crunchy. Spread them in a single layer on a baking sheet. Toss with olive oil, turmeric, and catnip. Roast at 375°F (190°C) for 40-45 minutes, shaking the pan every 15 minutes. The skins will split and peel back — that’s exactly what you want. Pull them when they’re deep amber and feel hollow when you press one.
The chickpea base delivers plant protein, the crunchy texture supports dental health, and your cat gets a treat that doesn’t read like a chemistry textbook — that’s the payoff.
Store in a glass jar at room temperature for up to one week.
Let them cool on the board before storing — trapping steam makes them go soft fast.
Prep Time: 8 hours (soaking) + 10 min active | Cooking Time: 45 minutes | Serving Size: 2-3 chickpeas per treat session
📸 Photo credit: Instagram @schmankerlhex
#10: Homemade Salmon Bites for Cats (The One Treat My Cat Goes Absolutely Feral For)
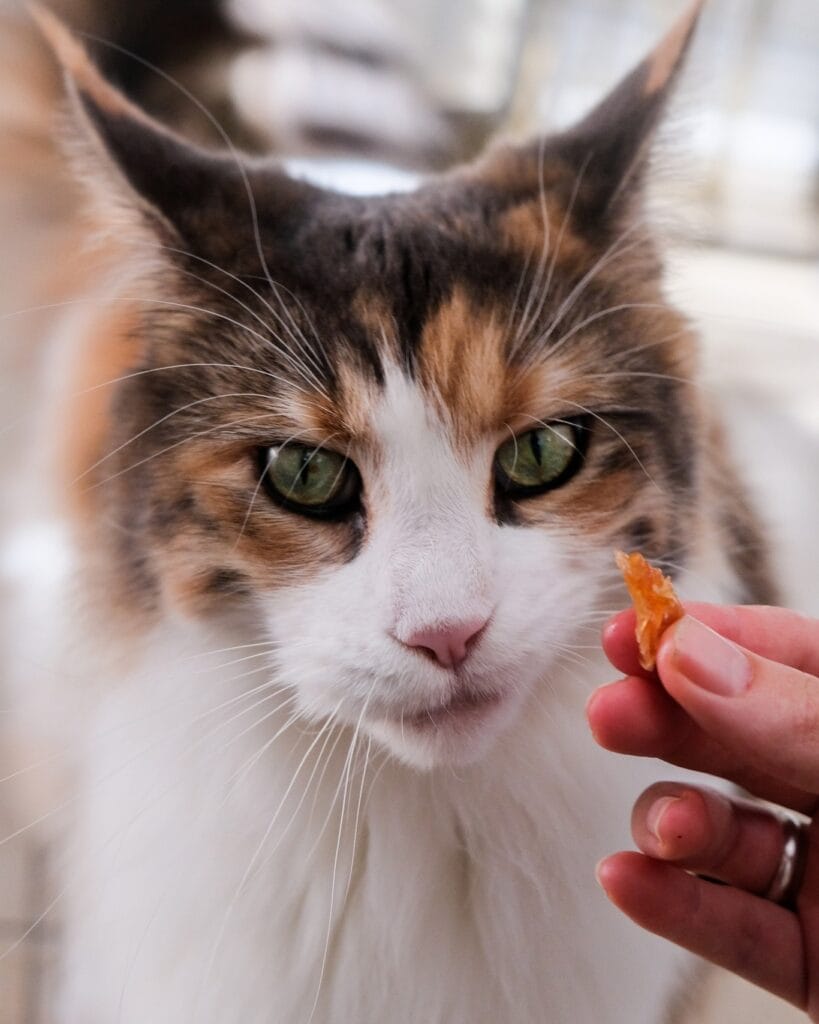
Okay, so you know that look your golden gives you when you open a bag of treats? My cat does the exact same thing with these salmon bites — like full-on laser-eye contact, sitting perfectly still, doing her best “I am a well-behaved angel” impression.
This calico in the photo? That’s basically my cat Winona every single time.
Prep Time: 10 minutes | Cooking Time: 20 minutes | Serving Size: 30–35 small bites
Ingredients:
1. 4 oz fresh or canned salmon (boneless, skinless)
2. 1 large egg
3. ½ cup whole wheat flour (or oat flour for grain-sensitive cats)
4. 1 tablespoon salmon oil
Instructions
Preheat your oven to 350°F and line a baking sheet with parchment paper. Drain and mash your salmon in a bowl until it’s fine and flaky — no large chunks. Crack in one egg and mix it through completely. Add the flour and salmon oil, then stir until a soft, slightly sticky dough forms.
Roll the dough into pea-size balls and press them gently flat. Bake for 18–20 minutes until golden and firm.
Let them cool on the rack fully before serving. Warm treats can harbor bacteria — patience here matters.
Salmon delivers omega-3 fatty acids that support coat health, which means fewer dull-fur moments and more of that glossy, gorgeous coat your cat deserves.
Store in an airtight container in the fridge for up to 5 days, or freeze batches in a zip-lock bag for up to one month.
📸 Photo credit: Instagram @rawfedpetsstore
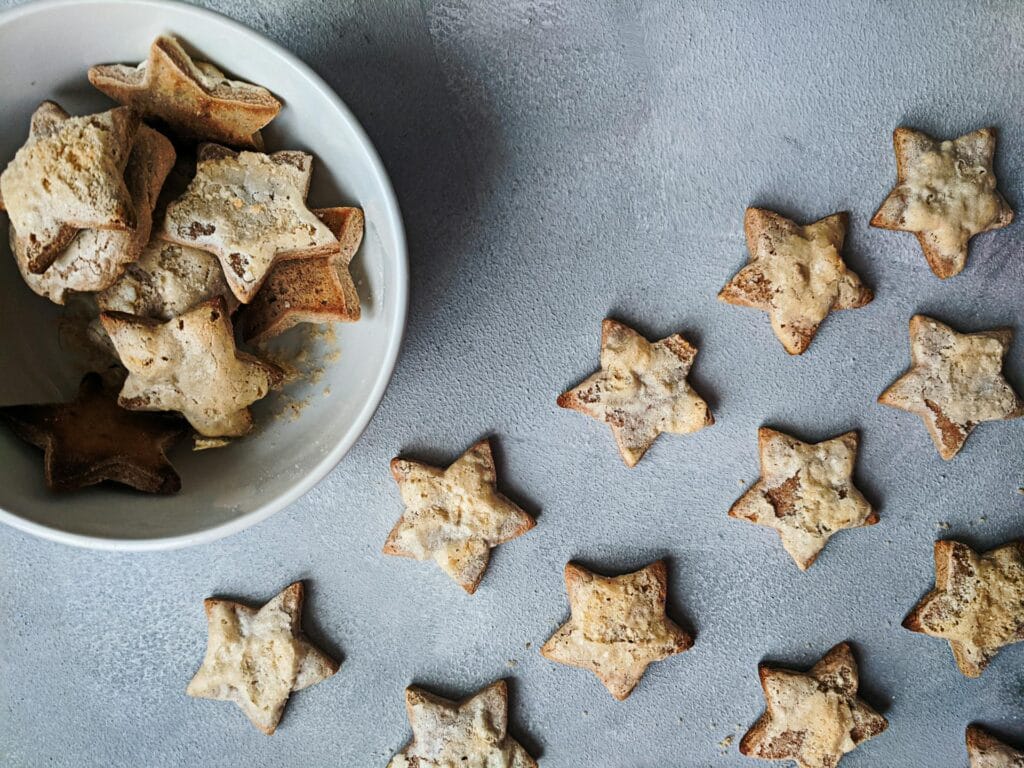
#11: Star-Shaped Cinnamon & Oat Cat Treats
Okay so hear me out — I know your golden retriever is always trying to sneak whatever you’re making in the kitchen, but these little star-shaped beauties? They’re actually for the cat.
And honestly, the first time I made these, my cat Mochi went absolutely feral over them. Like, pacing-the-counter, meowing-at-my-ankles feral.
Here’s what you’ll need:
1. 1 cup whole wheat flour
2. ¼ cup rolled oats
3. ½ teaspoon cinnamon (cat-safe, small amounts only)
4. 1 egg
5. 2 tablespoons plain, unsweetened applesauce
6. 2 tablespoons water (add more if dough feels dry)
Prep Time: 10 minutes | Cooking Time: 15 minutes | Serving Size: ~30 small stars
Instructions
Preheat your oven to 350°F. Mix the dry ingredients first — flour, oats, and cinnamon together in a bowl. Add the egg and applesauce, then stir until a firm dough forms. Add water one tablespoon at a time until the dough holds its shape without sticking to your hands.
Roll the dough out to about ¼ inch thickness on a lightly floured surface. Use a small star-shaped cookie cutter (around 1.5 inches) to press out your shapes. The dough is firm enough to hold crisp edges — that’s what gives you those clean, Instagram-worthy star points you see in the photo.
Arrange them on a parchment-lined baking sheet and bake for 12-15 minutes until the edges turn a warm golden brown. The oats in the dough add fiber and texture, which supports digestion, so your cat gets a treat that actually does something good for them.
Cool completely before serving. Firm treats = longer shelf life, so bake them until they’re fully dried out, not just set.
Store in an airtight glass jar at room temperature for up to one week, or freeze for up to three months.
📸 Photo credit: pexels
#12: Carrot & Herb Frozen Cat Treats (The Sneaky Veggie Win)
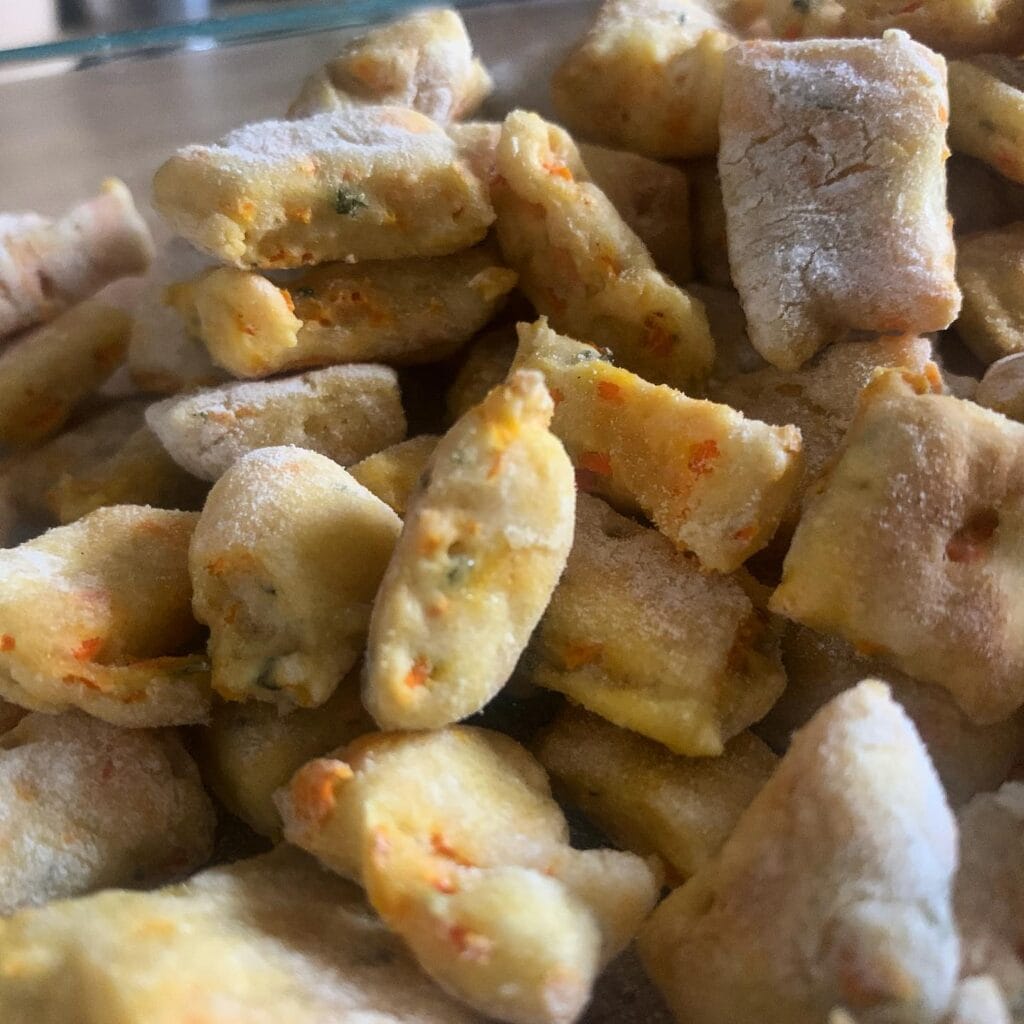
Okay so you know how your golden will eat literally anything off the floor, but your cat will stare at a bowl of food like it personally offended her? Yeah. These little frozen bites are the workaround nobody talks about.
The treats in this image are carrot and herb gnocchi-style bites — pale golden, lightly dusted with flour, with those little flecks of shredded orange carrot and green herb running through each piece. They’re exactly the kind of thing that looks cute in a glass bowl on your kitchen counter.
Ingredients:
1. 1 cup whole wheat flour
2. ½ cup finely grated carrot
3. 1 tablespoon fresh parsley, minced
4. 1 egg yolk
5. 2 tablespoons plain pumpkin purée
6. 1-2 tablespoons water (just enough to bind)
Instructions
Mix your flour, grated carrot, and parsley in a bowl first. Add the egg yolk and pumpkin purée, then work everything together with your hands until a soft dough forms. Add water one tablespoon at a time — you want it firm, not sticky. Roll the dough into a log about ¾ inch thick, slice into small pillows or pinch into oval shapes like you see here. Arrange them on a parchment-lined baking sheet and freeze for 2 hours before transferring to a container. Skipping the bake keeps nutrients intact, which means the carrot stays bioavailable for your cat’s digestion.
Carrot acts as a natural fiber source — it supports digestion, keeps treats low-calorie, and gives you that pretty orange speckle payoff in every bite.
Keep these in a freezer-safe glass container for up to 3 weeks. Let one thaw for about 5 minutes before serving so it’s not rock solid.
Prep Time: 10 mins | Freeze Time: 2 hours | Serving Size: 2-3 small pieces per cat
📸 Photo credit: Instagram @spsully712
The One Ingredient Swap That Makes Homemade Cat Treats Actually Work
Okay, real talk — most homemade cat treat recipes online are low-key setting you up to fail.
Here’s the thing nobody mentions: cats are obligate carnivores, which means their bodies can’t process plant-based binders the way dogs can. So when you see a recipe using oat flour or flaxseed to hold treats together? Your cat’s digestive system is going to hate you for it.
My pro secret? Use canned sardines in water as your binder instead of any grain or flour. The natural fish oils hold everything together, and cats go absolutely feral for the smell.
I made a batch last spring for my neighbor’s two cats — they ignored every store treat she’d ever bought, but these? Gone in seconds. She texted me a voice memo of them losing their minds over the bowl.
One more thing — skip tuna as your base protein. Regular canned tuna has mercury levels that build up fast in small bodies with repeated exposure.
Sardines, egg yolk, and a little cooked chicken. That’s your holy trinity for treats cats actually eat.
Your Dog’s Muddy Paws Don’t Have to Win
Okay, so here’s the thing — you’ve already done the hard part. You found rugs that can actually handle golden retriever life without looking like a crime scene.
Pick one rug. Order it. See how it feels under your feet and under those big poofy paws.
I promise your living room can look Pinterest-worthy and survive zoomies, muddy Tuesday walks, and that one time your girl dragged her soggy tennis ball across the whole floor. Both things are true.
So tell me — which rug style are you actually going with? The cozy neutral or the bold pattern? Drop it below, I genuinely want to know! 🐾

Amr Mohsen is a software engineer who traded his keyboard for a leash — at least on weekends. His love for dogs inspired him to share what he learns as a dog owner and enthusiast, bringing a detail-oriented, research-driven perspective to every article he writes. If it’s about dogs, he’s probably already looked it up twice.