Making my own dog treats. My golden retriever Koda could eat every store bought treat I gave her in one sitting. One day I flipped the bag over and actually read the ingredients. Not so great.
If your girl is doing the same thing, you know that feeling of low-key guilt that creeps up on you. She trusts you completely, and you’re giving her a drink with a bunch of ingredients you can’t pronounce.
That’s why we started to make our own dog treats. And these pumpkin and oat dog treats are what our dogs love.
These cookies smell like fall candles while they bake up, and your kitchen will thank you for it! They are soft and easy, and your golden will lose her mind for these!
No weird additives, no guilt. Simply, real ingredients that you may already have in your pantry.
#1: Golden Oat Pumpkin Dog Cookies Fresh Off the Rack
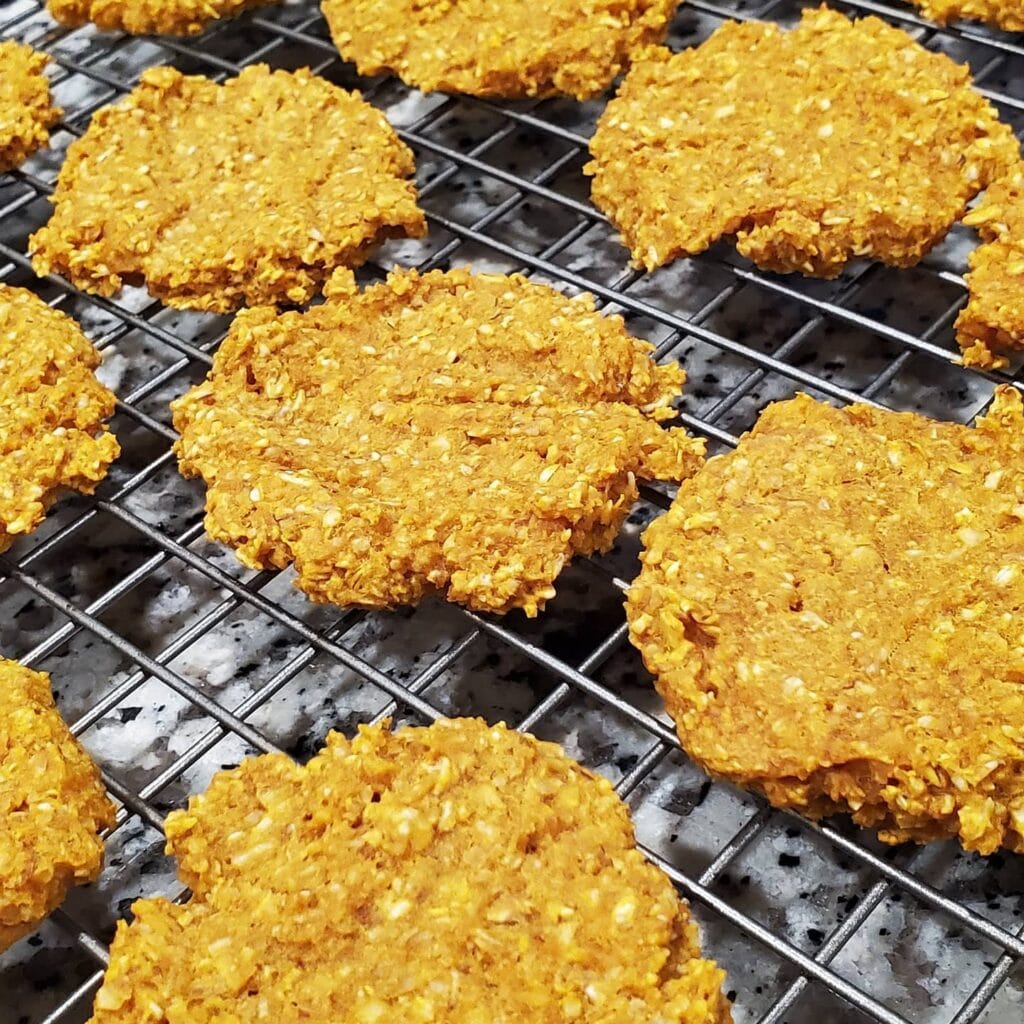
You know that look your golden gives you where her nose is on your knee, big eyes staring at you, and you just cave and give her whatever it is she wants? Yeah, me too. Last fall I made a batch of these for my neighbor’s dog, Maple, and the whole kitchen smelled like a cozy pumpkin candle. I kept sneaking a sniff to make sure it was as good as I remembered it!
These cookies are oat and pumpkin-based, and baked flat into palm-sized rounds. They turn out golden-orange and warm and Pinterest-worthy on a cooling rack.
Let’s Make These Cookies
Prep Time: 10 mins | Cook Time: 25 mins | Serving Size: 18–20 cookies
Ingredients:
1. 2 cups rolled oats
2. 1/2 cup pure pumpkin puree (not pie filling)
3. 1 egg
4. 1 tablespoon sesame seeds (optional but adds a nice crunch)
5. 1/4 teaspoon cinnamon
Preheat oven to 350°F. In a large bowl, mix all the ingredients until a thick dough forms. It should hold its shape when pressed. Form small balls of dough, about a tablespoon’s worth, onto a parchment paper-lined baking sheet and flatten with your palm. Bake 22–25 minutes or until edges are a deep golden brown. Let cookies cool on a wire rack so they crisp up properly. If you skip the cooling step they will be soft and chewy.
The oats give your pup a slow release of fibre. So, your pup will feel fuller longer (and less likely to beg at dinner).
Store in an airtight container for up to a week. For more tasty treats like this, check out Homemade Dog Biscuits Recipes: Healthy and Delicious Treats for Your Pup.
You can make your dough thinner or thicker. The thicker dough will make a softer cookie inside. That’s great if you’re baking for a dog with sensitive teeth. Thinner dough will make a crunchier cookie.
📸 Photo credit: Instagram @a_readsbooks
#2: Heart-Shaped Pumpkin Dog Cookies (Baked on Parchment)
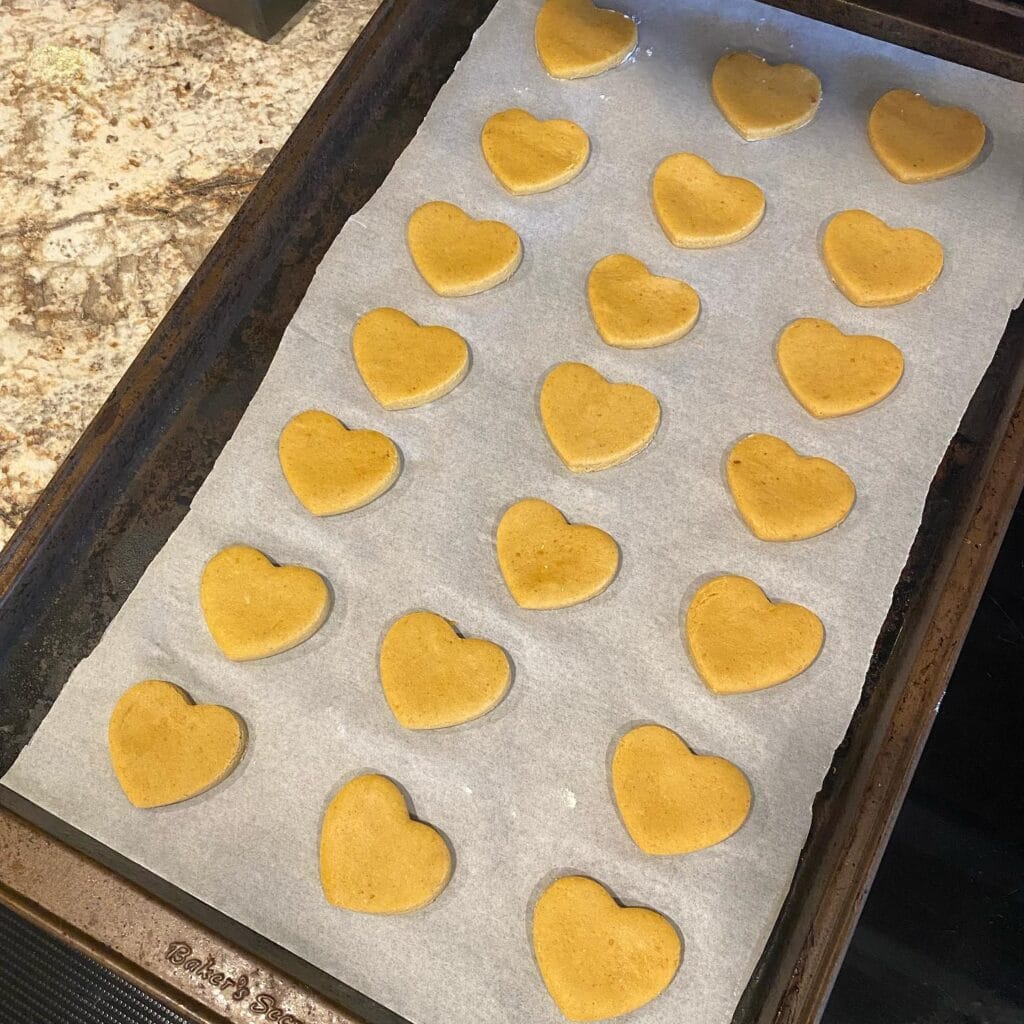
That dog of yours is sitting on my feet again, and with his chin on my knee, and with his big brown eyes on whatever it is that I am eating. You know that look.
These heart shaped pumpkin cookies are just the cutest thing I’ve ever pulled out of an oven and your girl deserves them.
Ingredients:
1. 2 cups whole wheat flour
2. ½ cup pure pumpkin purée (not pie filling)
3. 2 eggs
4. 3 tablespoons natural peanut butter (xylitol-free)
Let’s Bake These Little Hearts
You want to preheat your oven to 350 F. Mix your pumpkin, eggs and peanut butter together until smooth. Then start adding in your flour a bit at a time, until it feels firm but not too crumbly. If it is sticky add a bit more flour.
Roll out the dough to about 1/4 inch thickness on a floured surface. Place the heart shaped cookie cutter down, and lay out cookies on a parchment lined baking sheet leaving a little room in between each cookie. Bake for 20-25 minutes until the edges look set and a little golden. Cool completely on the sheet. Warm cookies will easily crumble and your girl will inhale them before you can say wait.
The pumpkin will give him fiber, which means fewer tummy issues on your morning walk.
Let the dough chill for 15 minutes before rolling out. The heart shapes will stay nice and crisp.
Prep Time: 15 min | Cook Time: 25 min | Makes: ~24 cookies
📸 Photo credit: Instagram @adventuresofpennyandjack
#3: Pumpkin Peanut Butter Fork-Press Cookies
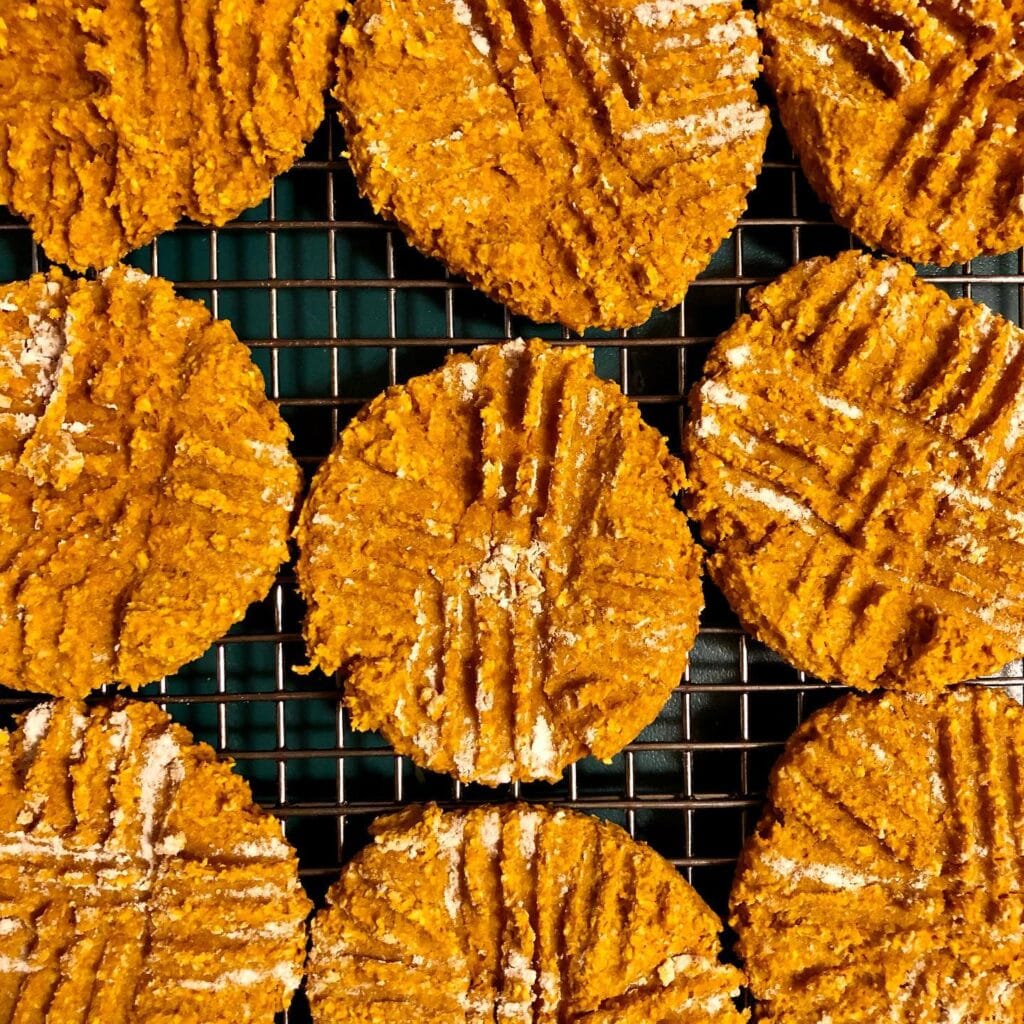
You know the moment when your golden gives you the “I’ve been so good today” eyes and you just need to come through with something worthy of that faithfulness?
These cookies are it.
Pumpkin Peanut Butter Fork-Press Cookies
Here’s what you’ll need:
1. 1 cup pure pumpkin purée (not pie filling)
2. ½ cup natural peanut butter (no xylitol — check the label)
3. 2 cups whole wheat flour
4. 1 teaspoon cinnamon
Let’s Make These
Mix together your pumpkin and peanut butter until it’s one thick, orange-y paste. Add in the flour and cinnamon and stir until you get a firm dough that does not stick to the side of the bowl. Roll the dough into 1.5 inch balls, place on a parchment paper lined baking sheet, and then press each ball down with a fork 2 times in a crosshatch pattern. This helps them bake all the way through so they’re not doughy in the center. Bake at 350° for 20-22 minutes until firm.
Let it cool on a wire rack before handing it over to them.
Prep Time: 10 mins | Cook Time: 22 mins | Serving Size: About 24 cookies
The pumpkin keeps them soft, but not mushy — and the peanut butter adds protein, to boot. Your dog gets a treat that won’t crumble all over your rug.
Store the leftovers in an airtight container for up to one week, or store in the freezer for up to three months. These are especially great on a warm day, if you like, you could include this in your homemade dog ice cream recipe as a treat spread.
📸 Photo credit: Instagram @andrajean10
#4: Peanut Butter Oat & Pumpkin Dog Biscuits
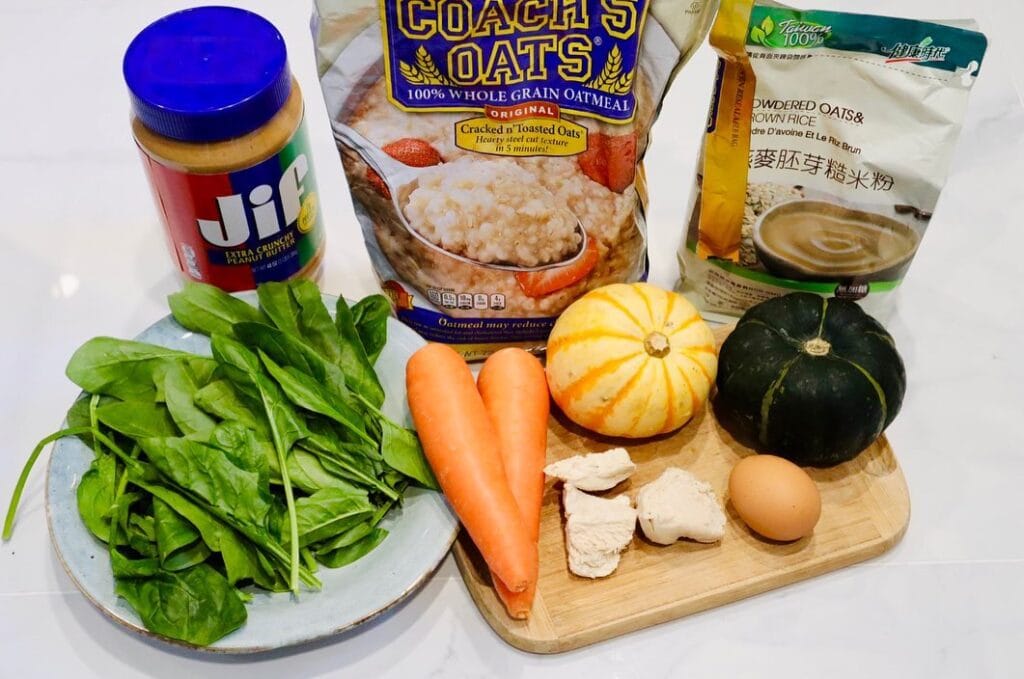
Your golden is staring at you from across the kitchen. She’s got that heavy-pawed look. She’s hoping you’ll share something so delicious that it’s not worth letting her know about. These smell so good, even you can’t resist.
Here’s what you need:
1. 1 cup Coach’s Oats whole grain oatmeal
2. ½ cup powdered oats and brown rice flour
3. 2 tablespoons Jif extra crunchy peanut butter
4. ½ cup mashed yellow pumpkin
5. 1 egg
6. Small piece of ginger, grated
Let’s Bake These Up
Put the oven on 350°F. Mix the mashed pumpkin, peanut butter and egg together first to make sure everything is combined. This helps to prevent the dough from being too sticky. Add the oats and mix well. Add both oat types, and fold until the dough starts to form and is not too sticky. If the dough feels too wet, add a little more oat flour, one tablespoon at a time.
Roll the dough out to about 1/4 inch thick on a lightly floured surface. Cut out shapes and place on a parchment lined baking sheet. Bake for 25 minutes until golden and firm.
Prep Time: 10 min | Cook Time: 25 min | Serves: ~20 biscuits
The cookies are crunchy because of the double oat base, so she gets something to crunch on that keeps her busy long enough for you to finish your coffee. finally.
Alternatively, allow to cool completely in the oven (heat off, door cracked), which makes them extra hard without overbaking.
📸 Photo credit: Instagram @bob_the_chocolatelabrador
#5: Mini Pumpkin Pie Bites with Whipped Cream Topping
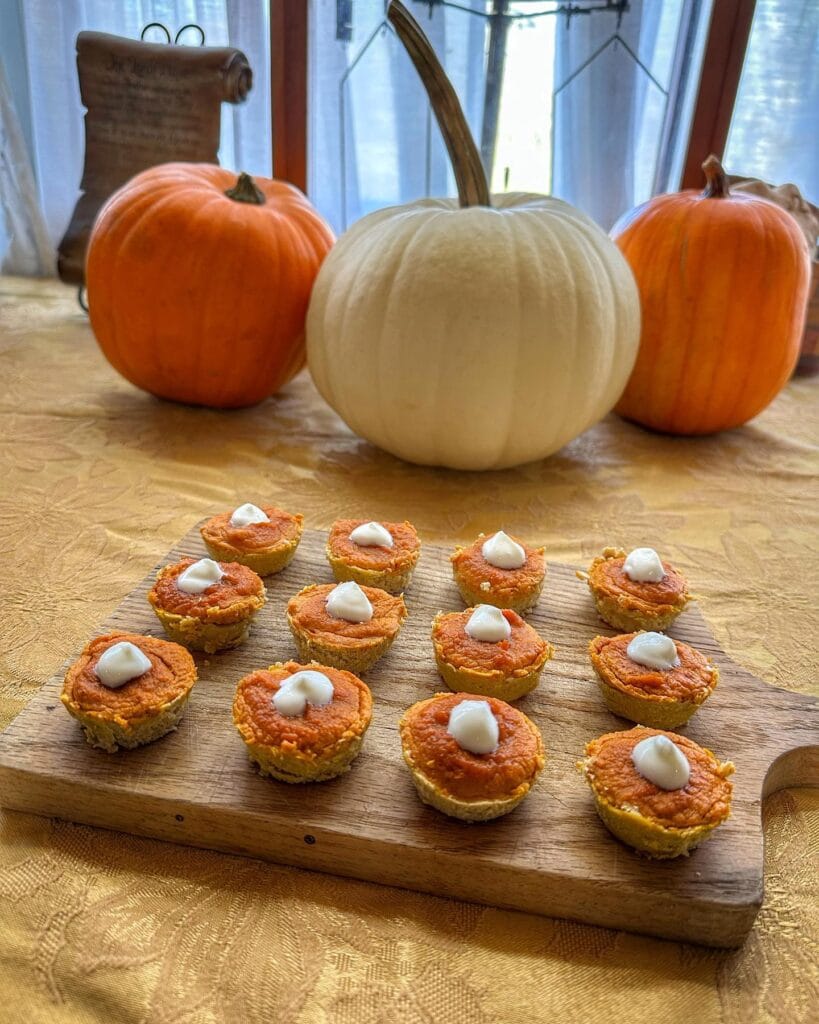
Needless to say this was made the day I had my golden barking at me in the kitchen while it smelled like pumpkin spice. This recipe was made for an afternoon like that.
I bet if you are looking for something good and easy to make, you have heard of these little bites. They are so cute! Mini tart shells filled with a smooth pumpkin filling, then topped with a small whipped cream dollop. Orange and golden. And Pinterest board worthy, without trying!
Ingredients:
1. 1 cup oat flour
2. 3 tbsp coconut oil, melted
3. 2 tbsp maple syrup
4. 1 cup pumpkin puree (plain, not pie mix)
5. 2 eggs
6. ¼ cup full-fat coconut cream
7. 1 tsp cinnamon
8. ½ tsp ginger
9. Whipped cream for topping
How to Make These Beauties
Preheat the oven to 350°F. In a medium bowl, combine oat flour, coconut oil, and maple syrup. It will be a slightly sticky ball. Press into a greased mini muffin tin and bake for 8 minutes. While the shells are baking, whisk together the pumpkin, eggs, coconut cream, cinnamon, and ginger. Pour the filling into each shell and bake for 18-20 minutes, until set. The edges should be firm but the center will still have a slight jiggle. Remove the mini tarts from the oven and let cool completely before adding a dollop of whipped cream. A wooden cutting board makes for a great presentation.
Prep Time: 15 min | Cook Time: 28 min | Serves: 12
I love coconut cream so much that I don’t mind having a rich dessert, and the end result of these is so good that guests will not realize they have eaten 3 or more before you stop them.
Plus, if your golden’s sniffing around the table, you may want to make Sweet Potato Dog Treats – A Healthy, Tasty Option for Your Pup and make them a different batch so no one feels left out.
i’ve found that chilling these overnight actually makes the filling set better and the flavors to deepen. just put the whipped cream on just before serving so it stays pretty.
📸 Photo credit: Instagram @doggonedriven
#6: Bone-Shaped Peanut Butter Dog Biscuits
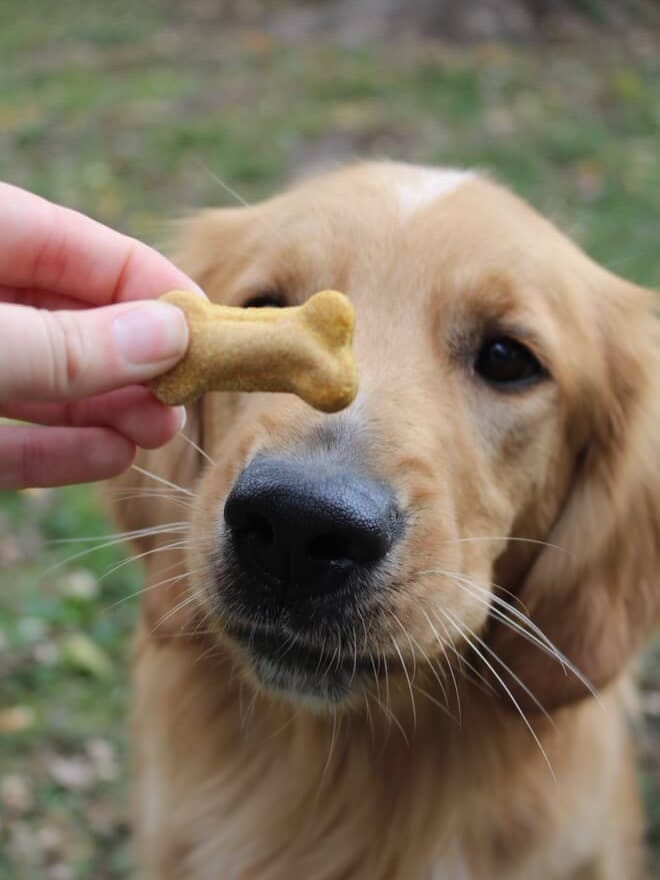
Your dog gives you that look – you know the one – his nose twitches and his eyes are locked on your hand as though it is the greatest moment of his life.
They are so easy to make and smell so nice coming out of the oven. The smell of the nuts is heavenly. Your kitchen will thank you.
Ingredients:
1. 2 cups whole wheat flour
2. 1 tablespoon baking powder
3. 1 cup natural peanut butter (unsalted, xylitol-free)
4. 1 cup low-sodium chicken broth
5. 1 egg
How to Bake These Bad Boys
PREHEAT your oven to 350 degrees F. Line a baking sheet with parchment paper. In a medium bowl, whisk the flour and baking powder together so it doesn’t clump. Stir in the peanut butter, broth, and egg, and stir just until a firm dough forms. The dough will be quite thick. Don’t over stir.
Roll out the dough until it is about 1/4 inch thick on a floured surface. Use a bone-shaped cookie cutter and place the cookies on the prepared baking sheet. Bake the cookies for 25-30 minutes or until they are golden brown and firm. Let the cookies cool completely before handing one over — they will harden a bit as they cool.
Real talk: I also love this soup on a cold day. If my dog has an upset stomach I will just use pumpkin puree instead of chicken broth and she doesn’t get an upset stomach.
These freeze well in an airtight container for up to two weeks (longer if you refrigerate).
Prep Time: 15 min | Cook Time: 30 min | Serving Size: ~24 biscuits
📸 Photo credit: Instagram @jagerhundantlers
#7: Classic Peanut Butter Dog Cookies (Two Sheet Pan Batch)
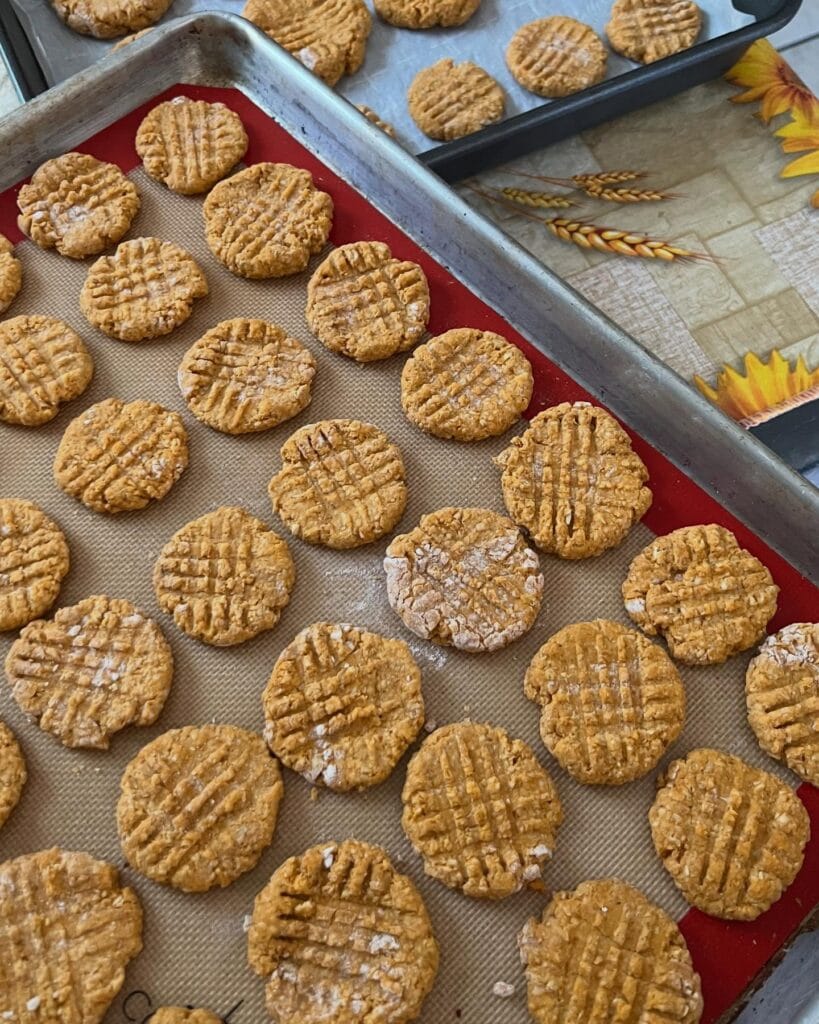
Have you ever been snacking and caught your dog watching you? Mine will do it too. I started making these homemade peanut butter cookies for dogs when I caught myself actually feeling guilty for eating a cookie in front of her.
These little golden, cross-hatched rounds of goodness bake up on a silicone baking mat over a standard half-sheet aluminum pan and look so Pinterest-y adorable when they’re done!
Ingredients:
1. 2 cups whole wheat flour
2. ½ cup natural peanut butter (xylitol-free, always)
3. 2 eggs
4. ½ cup water or low-sodium chicken broth
Let’s Bake These
Preheat oven to 350°F. In a bowl, beat peanut butter, eggs, and water together until smooth. Fold in flour, a little at a time, to avoid making the dough too tough. Roll out dough to about 1/4 inch thick. Using a round cookie cutter, cut out cookies. Press a fork into each cookie twice, crossing it over itself, to make a cross-hatch pattern. Bake 12-15 minutes or until golden. Let cookies cool completely before serving so that they do not crumble.
They are perfect to serve with any other homemade batch from Dog Cookies Recipes: Easy & Healthy Homemade Treats for Your Pup.
Store in an airtight container for up to two weeks, or freeze a batch for later use.
Prep Time: 15 min | Cook Time: 15 min | Serving Size: ~36 cookies
📸 Photo credit: Instagram @jaicee_creates
#8: Bone-Shaped Dog Treat Maker With Pumpkin Biscuits
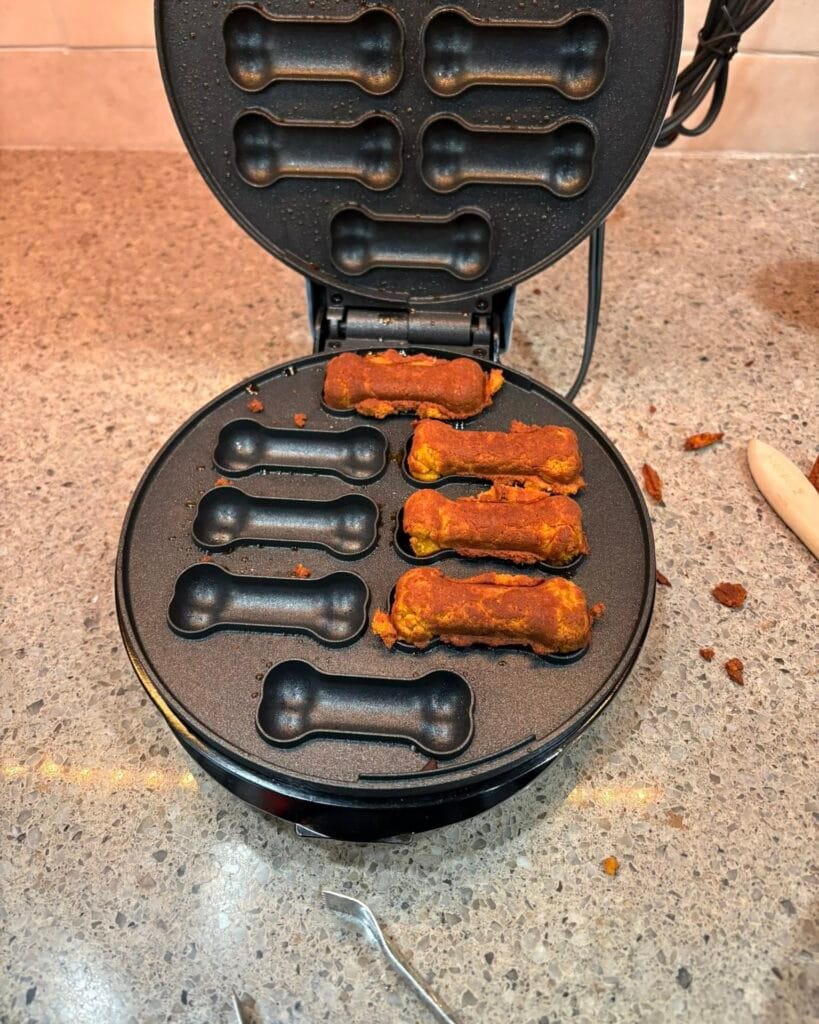
Anyone that owns a dog knows that moment, when your dog gives you those eyes that say “I know you love me, make me something good”. That is how this dog treat waffle maker ended up in my kitchen.
Non-stick cast plates shaped like dog bones? Yes, please. And the batter coming out is a warm golden orange from the pumpkin – and it smells like fall. Your dog will lose her mind.
Pumpkin Dog Biscuit Ingredients:
1. 1 cup whole wheat flour
2. ½ cup pure pumpkin purée (not pie filling)
3. 1 egg
4. 2 tablespoons natural peanut butter
How To Make Them
Preheat your bone-shaped waffle maker for about 3 minutes. The light will turn green when it’s ready. Mix together the flour, pumpkin, egg and peanut butter until you get a thick dough (about the consistency of Play-Doh). Place about a tablespoon of dough in each mold. Place the lid on and gently press down. Cook the biscuits for 4-5 minutes until you can remove them from the plate cleanly. Let them cool on a wire rack for at least 10 minutes before serving. The biscuits will firm up a bit as they cool.
I’ve noticed that the bone shape controls the portion size. My girl is not a big eater, so this is perfect, but if you have a huge eater or an aggressive eater you might want to cut it a little.
Prep Time: 5 min | Cook Time: 5 min | Serving Size: 8 bones
Store leftover biscuits in an airtight container for up to 5 days or freeze for up to a month.
📸 Photo credit: Instagram @lofthouse811
#9: Pumpkin-Shaped Dog Treats for Your Little Halloween Cutie
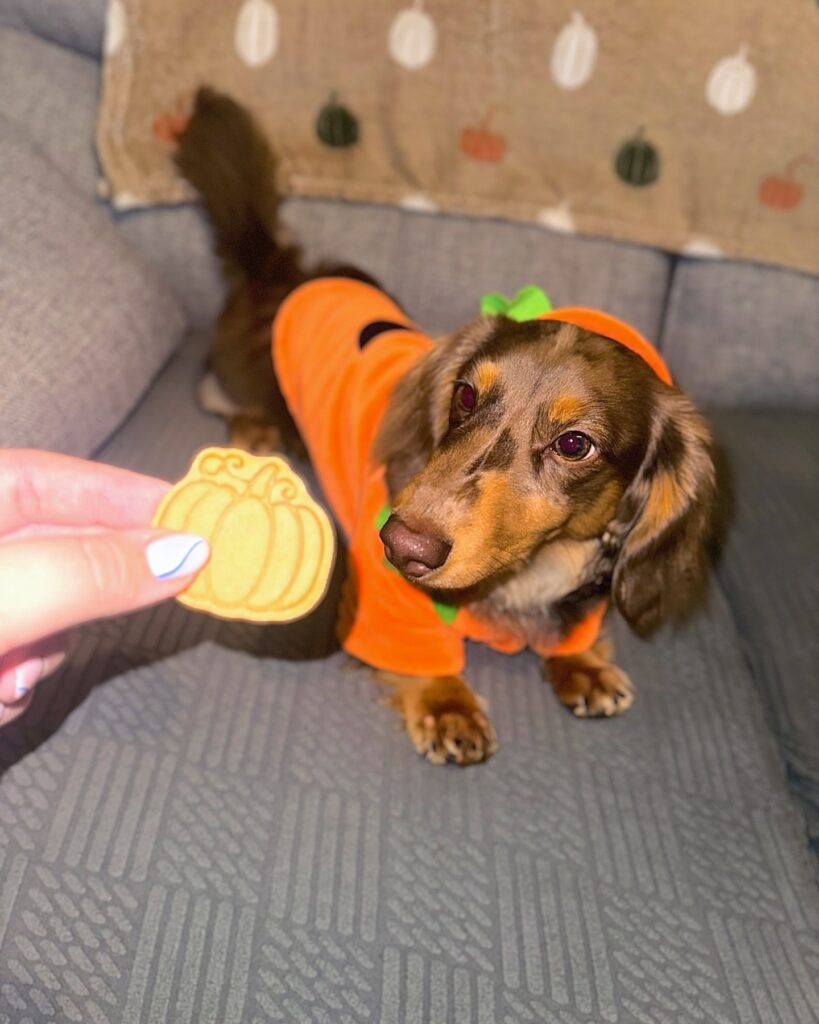
Your golden retriever is staring at you with that look — the one where he knows you’re holding something in your hand and his whole body starts to wobble. This treat is perfect for that moment.
These pumpkin shaped dog biscuits are super easy to make and look like they just jumped off a Halloween Pinterest board.
Ingredients:
1. 2 cups whole wheat flour
2. ½ cup pure pumpkin purée (not pie filling)
3. 2 tablespoons peanut butter (xylitol-free)
4. 1 egg
5. ¼ cup water
How to Make Your Dog’s Favorite Fall Treat
Preheat the oven to 350°F. Mix the pumpkin purée, peanut butter, and egg in a large bowl until combined. Add flour, slowly, and then add enough water so that it forms a firm dough. Roll the dough out to about 1/4 inch thick on a floured surface. Using your pumpkin-shaped cookie cutter, press down firmly and evenly on top of the dough. Lay your cutouts on a parchment-lined baking sheet and bake for 20-25 minutes until golden.
Using whole wheat flour for the dough gives them a little more structure, so they hold their adorable pumpkin shape — which means your photos will look exactly like the ones you pinned.
Prep Time: 15 min | Cook Time: 25 min | Makes: ~24 treats
Let the brownies cool completely before serving. Otherwise, they’ll get all crumbly.
📸 Photo credit: Instagram @mini.dach.charlie.h
#10: Pumpkin Oat Muffins with Cream Cheese Frosting
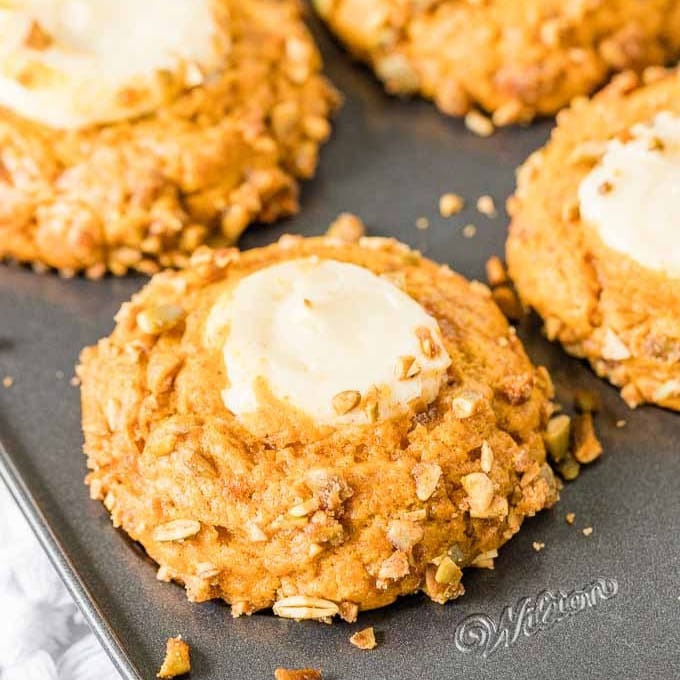
We’ve all had those mornings where we’re sitting on the couch, Goldie is head in our lap, and we just need something warm and cozy coming out of the oven. Well, these muffins definitely fill that need.
They’re beautiful golden-orange with chopped oats and nuts pressed all over the outside of the dough – and that little swirl of cream cheese frosting on top is a chef’s kiss. I made these last October when my cousin was visiting and she asked me for the recipe before she was even finished with the first one.
Ingredients:
1. 2 cups all-purpose flour
2. 1 cup old-fashioned rolled oats (plus extra for topping)
3. 1 teaspoon baking soda
4. 1 teaspoon baking powder
5. 1½ teaspoons pumpkin pie spice
6. ½ teaspoon cinnamon
7. ½ teaspoon salt
8. 1 cup pumpkin puree (not pumpkin pie filling)
9. ¾ cup brown sugar, packed
10. 2 large eggs
11. ½ cup vegetable oil
12. 1 teaspoon vanilla extract
13. ½ cup chopped walnuts or pecans (for topping)
For the Cream Cheese Frosting:
1. 8 oz cream cheese, softened
2. 1½ cups powdered sugar
3. 2 tablespoons heavy cream
4. ½ teaspoon vanilla extract
How to Make These Beauties
Preheat your oven to 375°F. Grease a 12-cup muffin tin. I use this Wilton pan just like the one in the photo, and it gives me that perfect edge every time.
Combine the flour, oats, baking soda, baking powder, pumpkin pie spice, cinnamon, and salt in a large bowl. In another bowl, beat together the pumpkin puree, brown sugar, eggs, oil, and vanilla until smooth and combined. Pour the wet ingredients into the dry and fold them just until they’re combined, stopping as soon as the dry ingredients are just no longer visible. Overmixing your muffins is what makes them tough, so take it easy!
Scoop the batter into your muffin tin filling each cup about ¾ full. In a small bowl, mix your extra oats and chopped walnuts together, and then press a generous handful on top of each muffin. The crunchy oat-nut crust on the outside is what makes these look like they are from a fancy bakery. Bake for 18-22 minutes until a toothpick comes out clean.
While the muffins are cooling, beat your cream cheese until it’s fluffy. Then mix in your powdered sugar, heavy cream and vanilla. Make sure to not frost the muffins until they are completely cool. Warm muffins are not good friends to warm frosting. I don’t have to tell you how I know that.
Pipe or spoon a dollop of frosting right in the center of each muffin, then swirl the frosting around in the center.
Prep Time: 15 minutes | Cook Time: 22 minutes | Serving Size: 12 muffins
These muffins use the pumpkin puree to keep them moist without using extra butter so they stay soft for days! This is another “fresh baked” feature that keeps me interested and eating muffins for days! The oat crust on the outside gives you that little crunch that makes each bite interesting.
Store leftovers in an airtight container in the fridge for up to 4 days. For best taste, remove frosting from the fridge about 20 minutes before you plan to eat it, so it will be at room temperature.
📸 Photo credit: Instagram @platedcravings
#11: Golden Turmeric Pumpkin Dog Biscuits
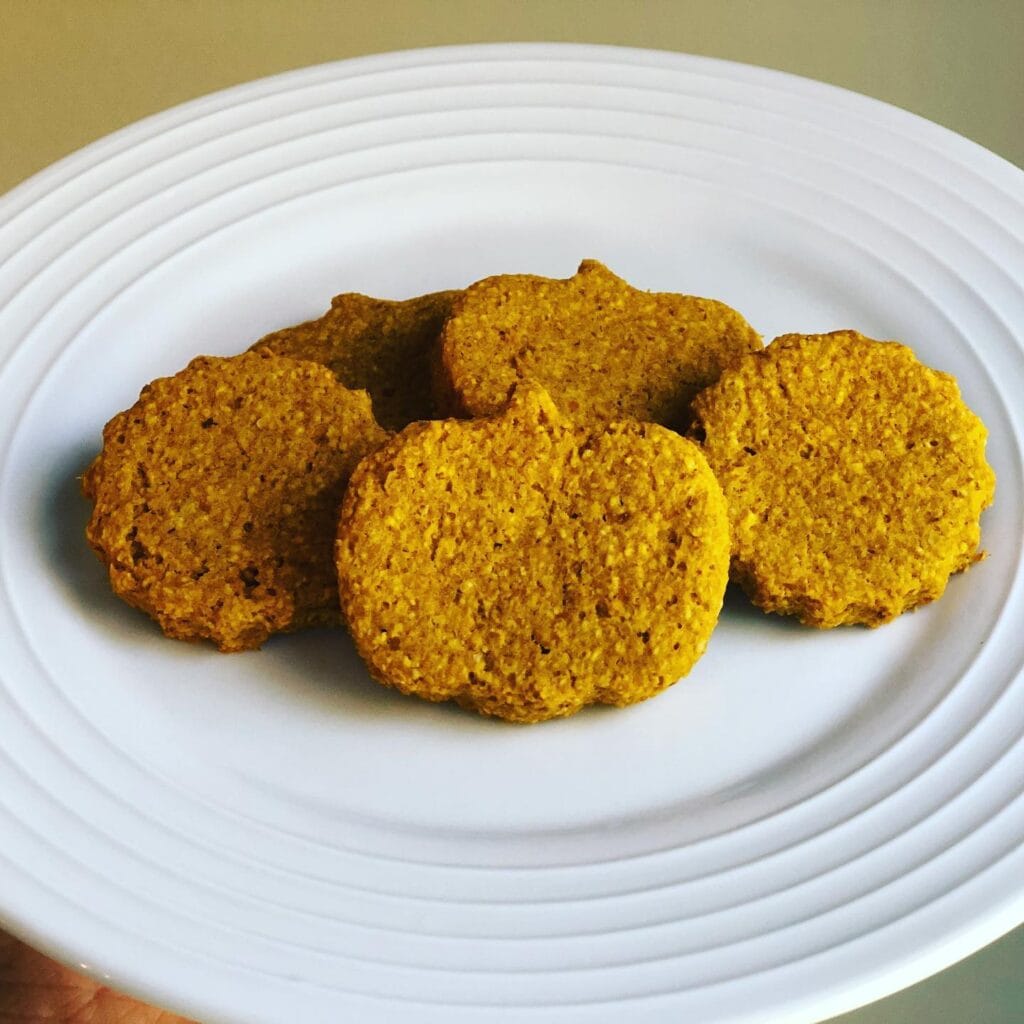
You know that moment when your doggie gives you the “I deserve a treat” look, ears back, big eyes, full of commitment? Mine does that too and I can never say no.
These little turmeric pumpkin biscuits are what I make when I want to say yes and actually feel good about it.
Ingredients:
1. 1 cup pumpkin purée (plain, not pie filling)
2. 2 cups whole wheat flour
3. 1 teaspoon ground turmeric
4. 1 teaspoon ground cinnamon
5. 1 egg
6. 2 tablespoons coconut oil
Let’s Bake These Little Beauties
Heat oven to 350°F. Mix pumpkin, egg and coconut oil together until well combined. Add flour, turmeric and cinnamon. Stir until combined and a stiff dough forms. Add more flour if necessary to avoid sticky dough. Roll out to about 1/4 inch thick on a floured surface. Use a 2-inch cookie cutter to cut out biscuits. Place on a lightly greased or lined cookie sheet. Bake for 25-30 minutes until firm and dry through the center. Allow to cool slightly on a rack before serving to your dog so warm biscuits do not upset his stomach.
Prep Time: 10 mins | Cook Time: 30 mins | Makes: ~20 biscuits
Turmeric has anti-inflammatory properties, which means your golden girl will stay chasing balls for longer as she gets older. Finally, a treat that works as hard as she does.
So save them in an air-tight glass jar and they will last up to two weeks! Or freeze a batch for later use. If your girl has a sensitive tummy try changing the whole wheat flour to oat flour. It works beautifully and she will not even know the difference.
📸 Photo credit: Instagram @rachelsmarketmacarons
#12: Pumpkin Oat Dog Treats (Baked Golden Bites)
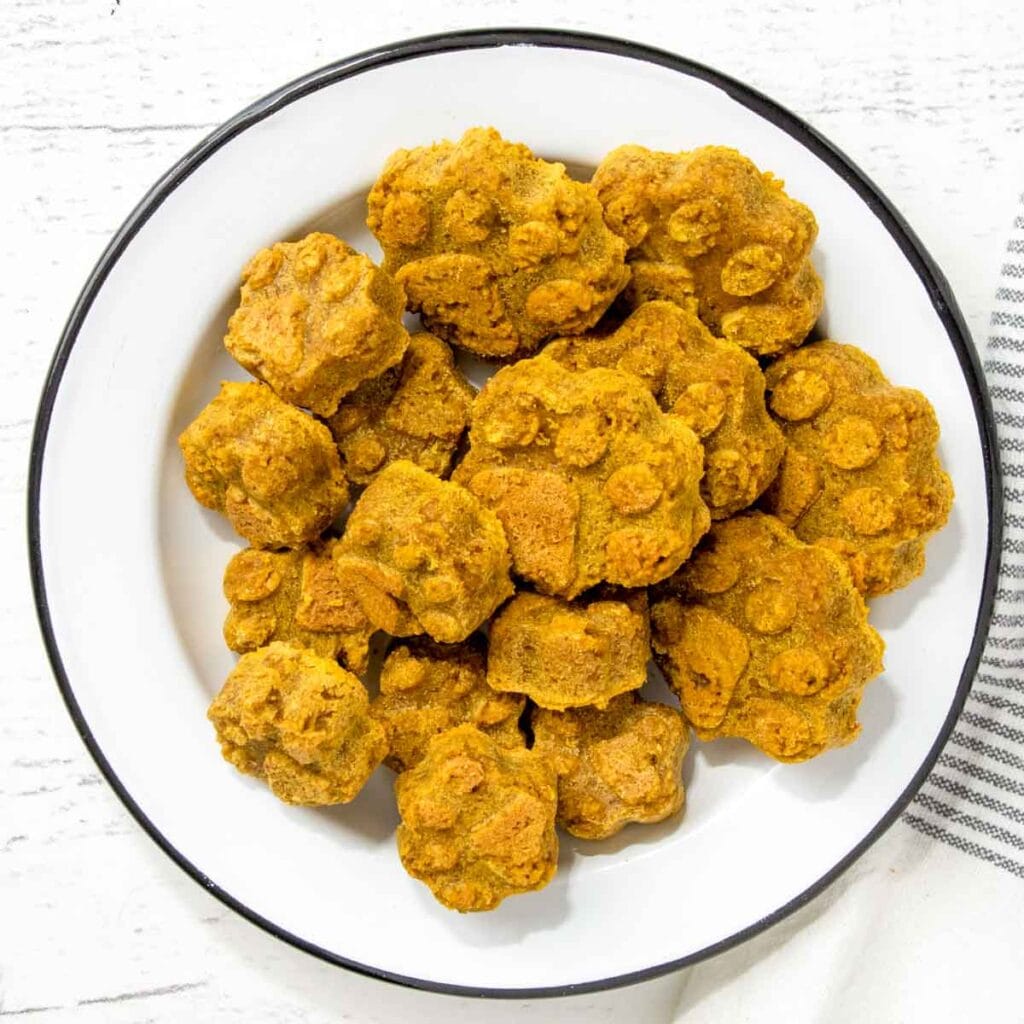
Anyone else’s dog give them those “look at me” eyes right before they open a snack bag? My golden does, and last fall I caved and started making them myself. It’s cheaper than buying them from the boutique pet store, and she goes absolutely feral over them!
These treats are that bright golden orange colour in the picture. The texture is kind of lumpy and rustic but they look a little like candied nuts, so they’re very “Pinterest-worthy” and “I’ve got my life together”.
Ingredients:
1. 1 cup pumpkin purée (not pie filling)
2. 2 cups whole wheat flour
3. ½ cup rolled oats
4. 2 tablespoons peanut butter (unsalted, xylitol-free)
5. 1 egg
6. 1 teaspoon cinnamon
Let’s Bake These Things
Preheat oven to 350° F. Mix pumpkin, egg and peanut butter together, then add the flour, oats and cinnamon and stir until a thick dough forms. Form into rough balls, 1 inch, and press onto a parchment-lined baking sheet. Bake for 25 minutes until firm. Cool completely before feeding (warm centers can upset a sensitive stomach).
Enjoy the oats and fiber. I have fewer “issues” in my rugs…
Store in an airtight container for up to 1 week, or freeze for up to 3 months.
Prep Time: 10 min | Cook Time: 25 min | Serves: ~30 treats
📸 Photo credit: Instagram @spoiledhounds
#13: Frozen Pumpkin Peanut Butter Oat Balls — The No-Bake Dog Treat Your Golden Will Lose Her Mind Over
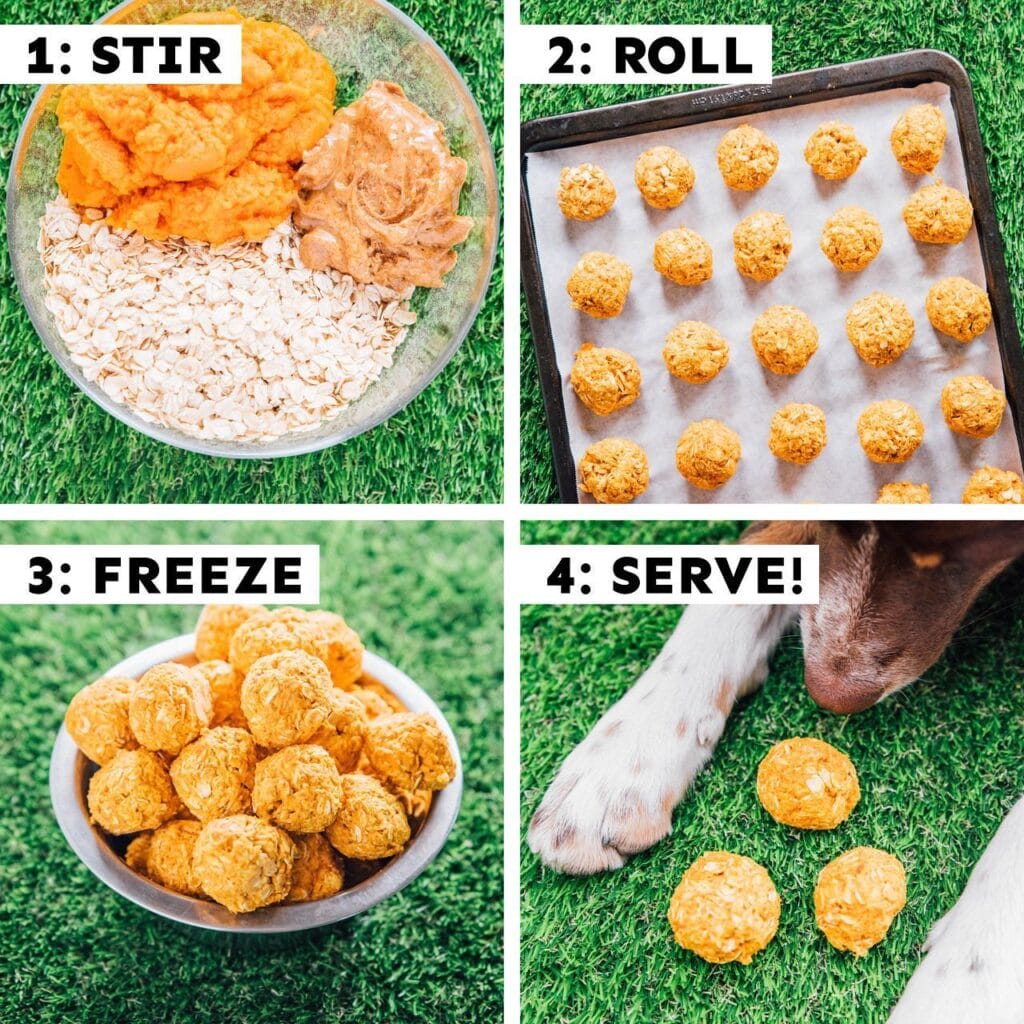
Every time I sit down to eat, my dog will just stare at me. It’s like she’s looking into my soul. I started making these frozen treat balls for my cousins lab last summer and now I can’t stop making them.
Ingredients:
1. 1 cup pumpkin purée (plain, not pie filling)
2. ½ cup natural peanut butter (xylitol-free — non-negotiable)
3. 2 cups rolled oats
How to Make These Little Guys
Stir the pumpkin, peanut butter, and oats together in one bowl until the dough holds together. Roll into 1-inch balls and I like to use a cookie scoop so they are all the same size. Line a dark metal baking sheet with parchment paper and place the dough balls on it with space between each one. Put the sheet in the freezer for at least 2 hours and then move to a bowl. They keep for up to 3 weeks frozen.
Prep Time: 10 min | Freeze Time: 2 hours | Makes: ~24 balls
The rolled oats give the cookies a little texture, and keep my child busy slow chewing them. That is just what you need for a hot afternoon snack.
I store them in a metal bowl in the freezer so they’re always ready to go. And if your girl has a sensitive stomach, these are a great complement to my post about 5 Best Dog Foods for Allergies: Finding the Right Diet for Your Allergic Dog.
Make a double batch. I swear it will get finished very fast.
📸 Photo credit: Instagram @yourdogsfavoritefoodblog
The One Baking Mistake That Ruins Every Batch (And How to Dodge It)
I think the biggest mistake people make with pumpkin oat treats is using the canned pumpkin pie filling. I did this the first time I made it for Rosie and she had the worst tummy ache the next day. The spices and extra sugar in the pumpkin pie filling makes it a lot rougher on a dogs tummy-especially if your golden already has a sensitive tummy.
One more pro-secret no one mentions is that after you’ve baked them, leave the cookies in the oven with the door ajar for about 15-20 minutes. This will dry out the cookies and make them nice and crunchy so that they stay fresh for 2 weeks in the jar, instead of going soft after a few days.
Thickness is more important than shape. Try to roll the dough out so that it is ¼ inch thick. If it’s too thick the inside will always stay slightly gummy, if it’s too thin they will burn before the outside even browns.
If your pup already has a sensitive stomach, it might be worth adding our guide to the best dog food for sensitive stomachs to your treat-time routine.
Your Golden Deserves a Clean Home Too
In case you’re worried about your dog’s bad habits, you don’t have to make a choice between loving your dog or loving your space. Both can coexist.
Pick one product from this list and just try it. No big deal. The first time you use it you will feel the difference. You won’t want to buy your dog’s treats elsewhere after the first muddy paw day.
Your home can still be your cozy Pinterest dream home just with a happy golden running through it. That’s the goal. Enjoy!
What is the one mess that your dog makes that just drives you crazy? What is it?

Amr Mohsen is a software engineer who traded his keyboard for a leash — at least on weekends. His love for dogs inspired him to share what he learns as a dog owner and enthusiast, bringing a detail-oriented, research-driven perspective to every article he writes. If it’s about dogs, he’s probably already looked it up twice.