
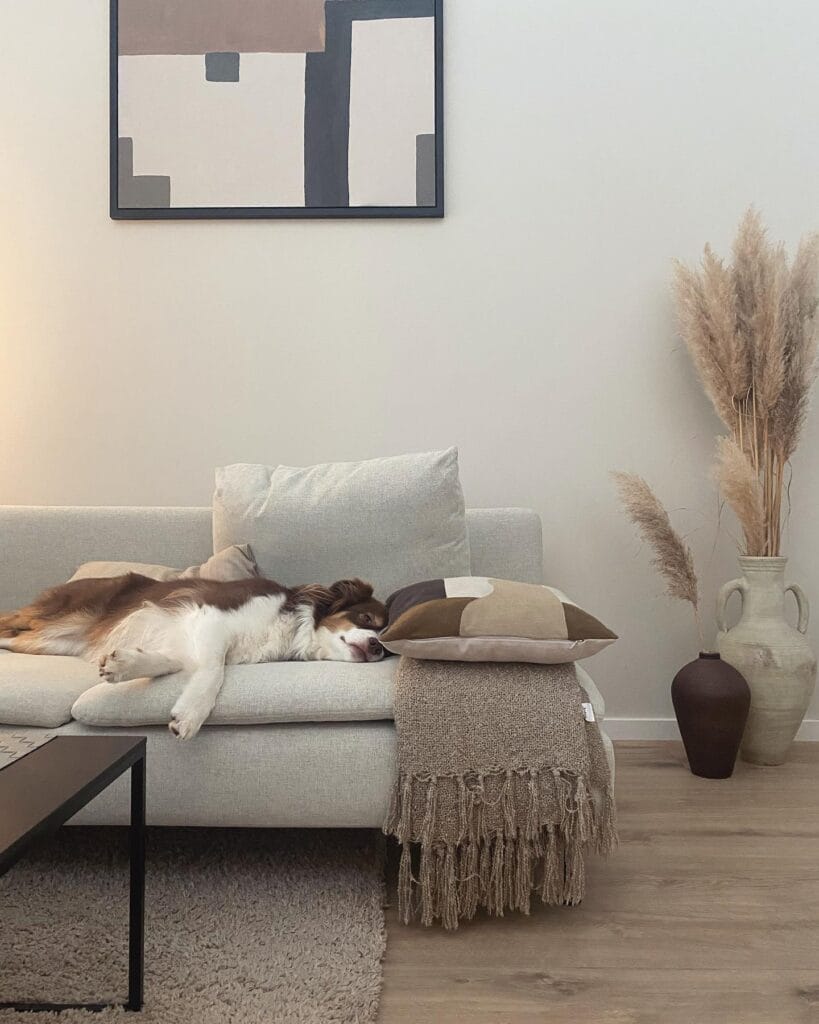
Does your dog seem to always be lounging on your couch? Do you turn around for just two seconds and see that he’s lounging around on the couch, giving off a cloud of fur and that distinctive dog smell on your favorite cushion?
Girl, I’ve been there. My dog Maple had this one spot on my cream sofa that I just…gave up on entirely. Her territory now.
Anyway, I wouldn’t try to fight it. But I’ve found that having him build him his own spot does help.
These 7 DIY dog couch ideas will help you give your golden a nice place to call home, while giving your couch a much needed break. Plus, we all know that watching him curl up somewhere you built with your own two hands is the best feeling in the world!
#1: DIY Sectional Dog Couch — Give Your Pup Their Own Grey Linen Corner
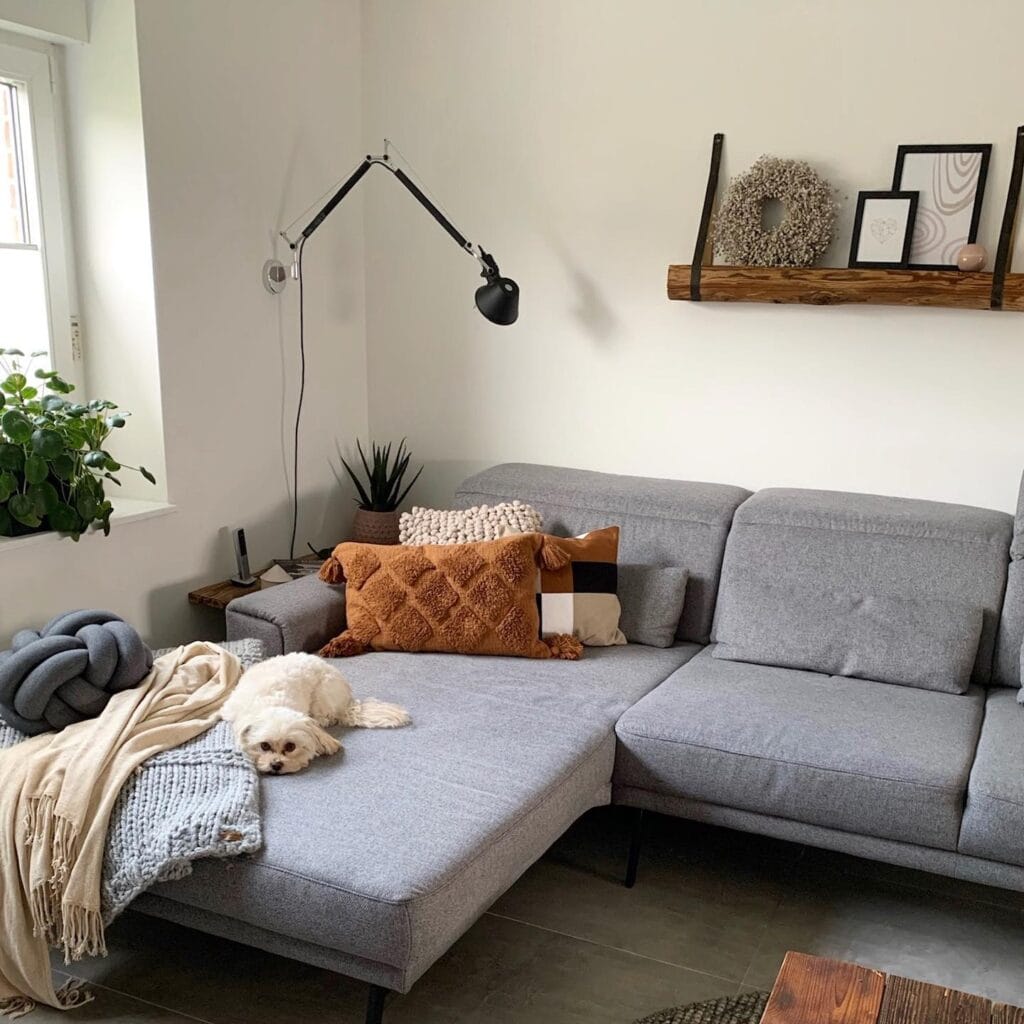
Anyone else have a dog that when you walk into your living room your dog is already laid out on the chaise getting the drool all over your favourite throw blanket? That’s me every morning!
But this is basically just a mini version of that grey couch you’re in love with in the picture and your dog will have already claimed it before you’re even finished building it.
Materials & Tools:
– Grey linen-blend fabric (approximately 2 yards)
– High-density foam block — 24″ x 36″ x 4″
– Plywood base sheet — ¾ inch thick
– 4 black metal hairpin legs — 6 inches
– Staple gun + ½ inch staples
– Drill + screws
– Scissors and measuring tape
Instructions
Cut the plywood to 24″x36″. Screw in the four hairpin legs at each corner to lift the bed off the floor (like the sofa in the picture). This will allow air to circulate under the dog and keep them cooler.
Lay the foam on top and the grey fabric over the top of both. I pulled the fabric underneath the board tight and stapled every 3 inches along the 4 edges. This is easy to do but you want to have tight neat corners or the fabric will just bunch up under the heavy dog.
And last but not least, throw a chunky knit blanket over one end of the chair. The blanket gives your cat a place to dig and nest. The foam gives your cat something to sit on, while the throw gives the throw cushion some texture.
I also recommend you have a washable slip cover over the fabric, just in case your dog has a “muddy paw” day.
Prep Time: 20 min | Active Project Time: 1.5 hours | Difficulty Level: Beginner
With the raised legs, wiping the floor underneath is a breeze, which means less pet hair sticking on top, and it looks like a real furniture.
📸 Photo credit: Instagram @cookies_zuhause
#2: DIY Wooden Dog Bed Frame (The Pinterest-Worthy One Your Pup Will Actually Use)
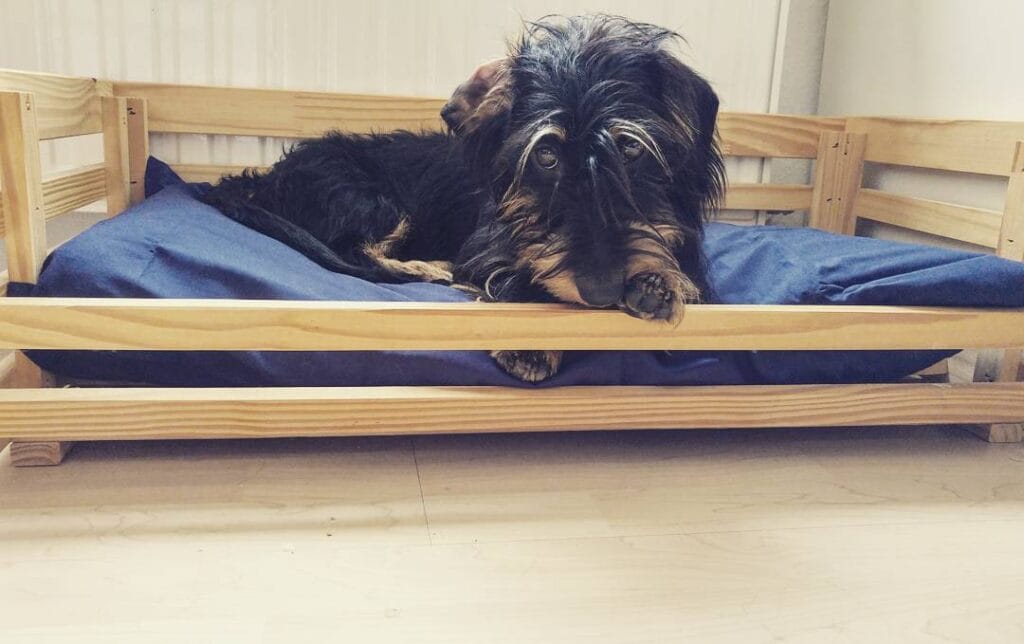
Anyone with a golden retriever knows that moment when they drug their soggy, flat bed across the living room floor, once again, and you are just standing there holding your coffee, wondering… really?
yeah. this pine wood dog bed frame with navy blue cushion will fix that for you.
– 4 pine wood planks: 2 long side rails and 2 short end rails – 4 small wooden legs, approximately 3-4 inches tall – 2 horizontal slats for the front bar detail – 1 navy blue dog cushion sized to fit your frame – Wood screws, sandpaper (120-grit), wood glue and a drill.
Instructions
Sand every plank before you touch the drill. Rough edges are a nightmare on the dog’s paws. Attach your four legs to the corners of the base with wood screws and a little dab of wood glue for extra hold. Build the frame by connecting the side rails and end rails. Secure the two front horizontal slats low across the front opening. Drop the cushion in.
That’s it.
The raised frame keeps the cushion off the cold floor, which allows your dog to keep his joints off the cold surface. The raised frame also keeps the bed in place!
If you like this kind of stuff then you’ll want to check out 13 Genius DIY Dog Stuff Every Pet Parent Needs to Try Today!
If your dog is a chewer, then seal the wood with a non-toxic finish.
Prep Time: 20 min | Active Project Time: 2–3 hours | Difficulty Level: Beginner-Friendly
📸 Photo credit: Instagram @freddy_frechdachs
#3: DIY Outdoor Aluminum Sofa With Cushions (That Your Dog Will Absolutely Claim)
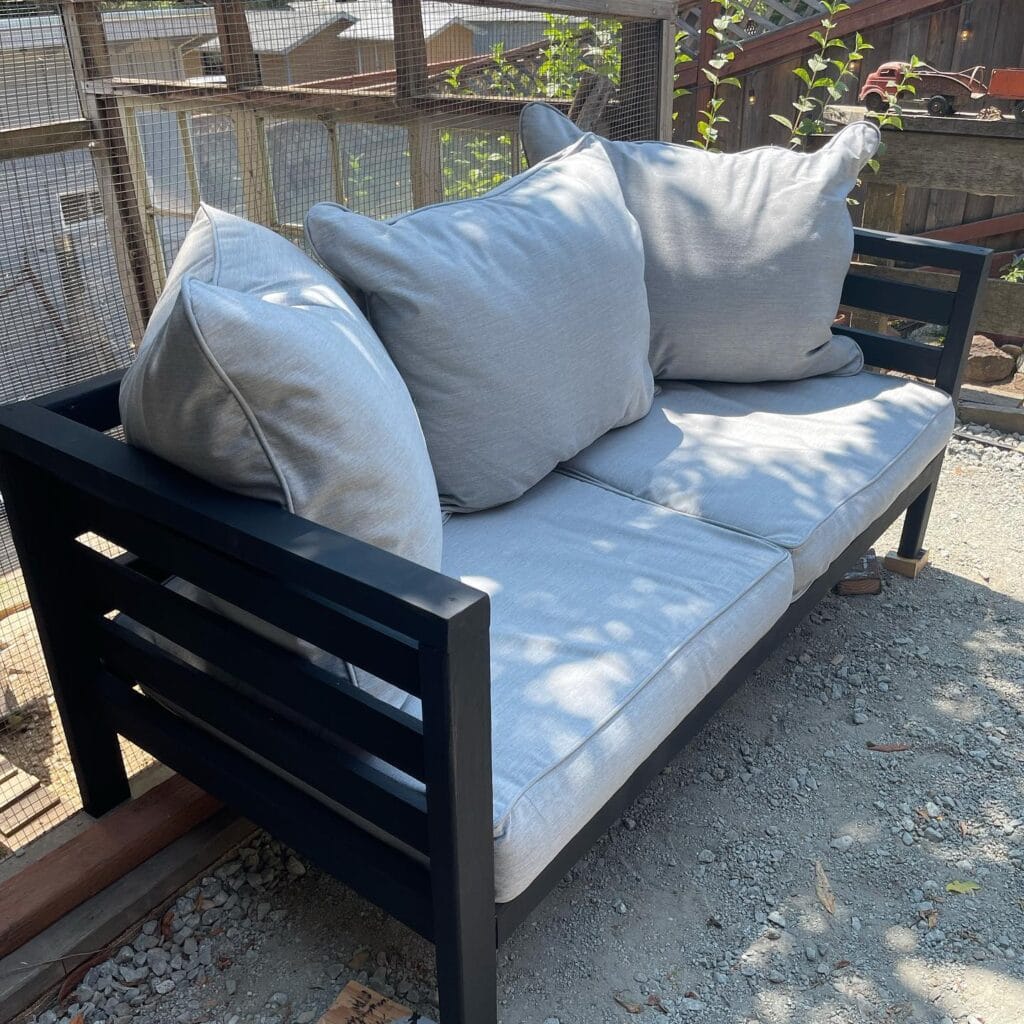
I mean, you have that moment where you finally get all your beautiful new patio furniture together and set up and step back to admire your hard work and then you turn around and your golden is sprawled out on it, right? Well, that happened to me last summer and I literally laughed and cried at the same time.
My outdoor sofa build is giving me the feels right now because it’s meant to survive the life!
Materials & Tools You’ll Need:
– 2-inch square aluminum tubing (matte black powder-coated finish)
– Metal cutting saw or angle grinder
– Drill with metal drill bits
– Stainless steel screws and corner brackets
– Outdoor foam cushions (3-inch thick) — enough for seat and back
– Water-resistant fabric in light gray (Sunbrella or similar)
– Staple gun with heavy-duty staples
– Sandpaper (220 grit)
– Black spray paint (rust-resistant, outdoor rated)
– Measuring tape and square ruler
– Sewing machine (for cushion covers)
– Velcro strips (to secure cushion covers)
Prep Time: 1 hour | Active Project Time: 6–8 hours | Difficulty Level: Intermediate
### Instructions
Cut your aluminum tubing into frame pieces. You will need two 72-inch side rails, four 24-inch leg pieces, and several pieces for the crossbar at 30 inches for the seat and back support. Any edge that has been cut needs to be sanded to smooth as rough aluminum will tear your cushion fabric over time, no one wants to spend a Sunday afternoon re-sewing cushion covers.
Drill pilot holes for every connection point. Aluminum will crack if it is forced. Use your stainless steel corner brackets to join the legs to the rails. Build two identical side frames by connecting the legs to the rails. Then connect both sides frames with your crossbars both front and back, checking for square every step of the way.
Once the frame is solid, spray every exposed surface with your rust-resistant black spray paint. You’ll probably want to do this in two light coats, allowing for a cure time of up to 24 hours before handling. By the way, the powder-coated finish used here is moisture and UV resistant and will keep your sofa looking sharp through rain, sun, and dog naps.
For the cushions: cut your 3-inch outdoor foam to the same size as the seat (or slightly larger), and wrap with your light gray water resistant fabric. Tack the underside down so it is taut, and staple. I sewed zip covers on for ease of removal if they got dirty (with golden retriever drool on my light gray fabric… eeeek!).
Sew your back pillows really large and fluffy, just like the one in the picture. Not only is it soft and cushy for the dog, but it’s big enough for you, too.
It’s OK, you can attach Velcro strips under each cushion for when your dog does that spinning-before-lying-down thing.
[dtComputed] [dtQuotes wide=”30″]If you love to build pet-friendly outdoor spaces like this, 14 Creative DIY Elevated Dog Bed Ideas You’ll Love has some great inspo for your next weekend project.
I have the gravel underneath, like you see in the picture. It drains fast, and the mud is not splashing up onto my cushions every time it rains.
📸 Photo credit: Instagram @cwhite_001
#4: Mountain Peak Throw Pillow Couch Nook (A.K.A. The Dog Lounge)
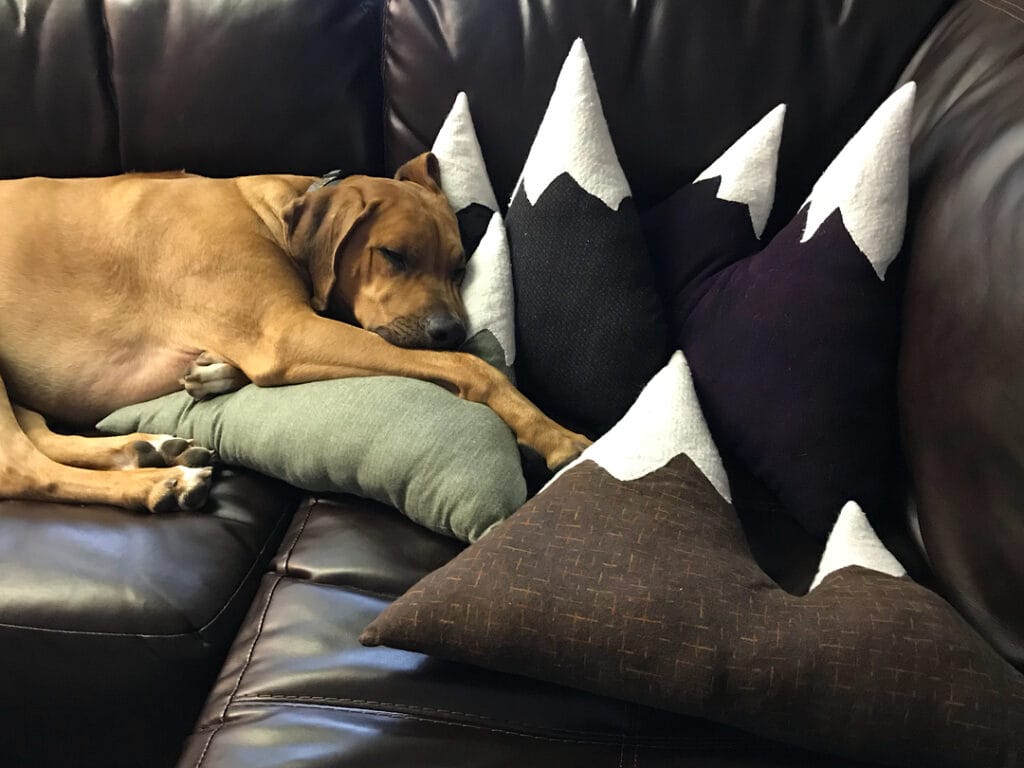
You know what I’m talking about, don’t you? That moment when you walk into the living room and you see your golden has claimed every single one of the throw pillows on the couch and they are now covered in fur and drool and you just stare?
girl, same, my cousins lab did this for years and she just finally gave in to it.
This set-up creates a cozy little pillow nook just for your dog so the rest of your couch can stay yours.
Materials & Tools:
– 2-3 mountain peak throw pillows (black and deep plum fabric, 18×18 inches)
– White felt fabric for the snow-cap peaks
– 1 green linen pillow (14×20 inches) as the base resting pad
– 1 dark brown textured pillow (16×16 inches) as a floor anchor
– Fabric glue or a basic sewing kit
– Scissors
Instructions
Cut out felt pieces for the mountains – it’s best to make them jagged and scary looking. Glue or stitch the peaks onto the dark pillow covers. Do two or three peaks per pillow. Let them dry flat for two hours.
Stack the mountain pillows upright against the back of the leather couch. Put the green linen pillow flat as the “bed layer”. Place the brown, textured pillow at the bottom. Now your dog has his own corner and feels happy to be up high, the felt peaks can be wiped clean. The height of the pillows provide enough support for your medium-large dog to sleep comfortably without having to shift around.
Real talk: leather couches and claws do not make a good combination. this pillow wall takes the scratching pressure off the back rest.
On average, I rotate my pillow covers once a week, so that the fur does not build up and saturate the fabric.
Prep Time: 15 min | Active Project Time: 45 min | Difficulty Level: Beginner
📸 Photo credit: Instagram @eriksijgers
#5: The White Tufted Sofa With Cowhide Cushion (Yes, For Your Dog)
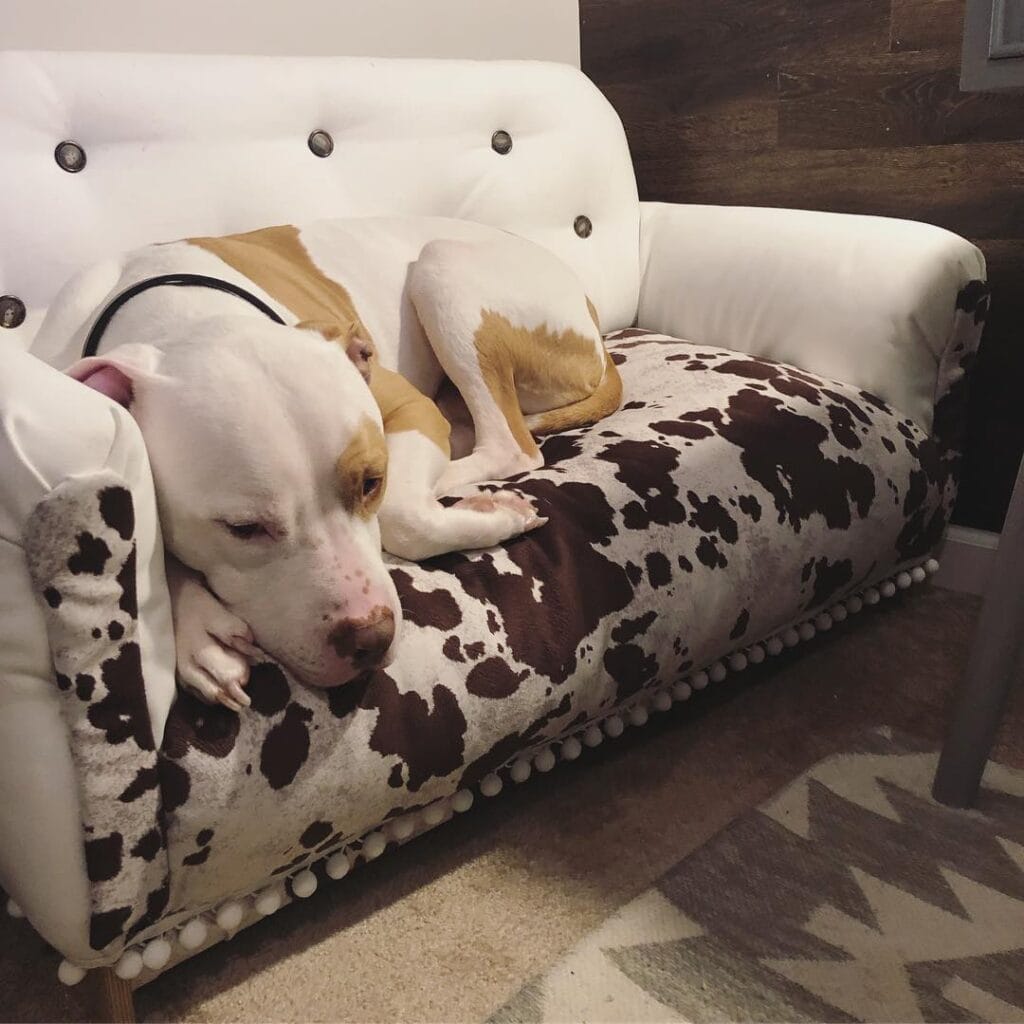
It is so great to have a cute kitten on the couch with you, and your cat on the floor? Well, this build fixes that. And it is cute enough to have in your living room without hiding it under a blanket.
Prep Time: 30 min | Active Project Time: 4–6 hours | Difficulty Level: Intermediate
Materials & Tools:
– Mini loveseat frame (thrifted or flat-pack, roughly 36″ wide x 20″ deep)
– White faux leather fabric — at least 2 yards
– Cowhide-print fabric (brown and white) — 1.5 yards for the seat cushion
– High-density foam, 4 inches thick, cut to seat size
– Tufting buttons (gunmetal or antique brass finish) — 8–10 buttons
– Pom-pom trim, white, 2 yards
– Staple gun + staples, upholstery needle, heavy thread
– Fabric glue or hot glue gun
– Four tapered wood legs, pre-stained
Instructions
Start with your thrifted loveseat frame and strip it down to the bare wood. You’ll want to sand any rough edges because your dog will rub against it.
Cut your white faux leather to wrap the backrest and armrests. Make sure that it is taut when you staple it every 3 inches on the underside of it, otherwise it will start to bunch up.
If you’re doing the tufting, mark your buttons with a chalk pencil. Make a grid of three buttons in a row, two rows in all. Push your upholstery needle through the fabric and foam, pull the thread back until it loops around the gunmetal button, and pull it tight again to make a dimple in the back of your pillow.
Now to make the seat cushion. Wrap the 4-inch foam in the cowhide-print fabric. Fold the corners in and staple underneath. I like the cowhide-print fabric because it is a wipeable upholstery weave which means I can just wipe off dog drool.
Hot glue the white pom-pom trim along the front edge of the cushion. Hold each section for at least 30 seconds so it really bonds well.
Lastly you have to attach your pre-stained tapered legs to the base corners. You can use L-brackets to attach the legs to the base. Just flip the table over and place the cushion on it.
One thing to remember: To find the minimum seat length you need to measure your dog when it’s stretched out. So measure your dog from the nose to the tip of the tail. A frame that’s 36 inches should fit most medium large dogs and have enough room for them to stretch out and curl up.
With the legs off the couch, there is air flow underneath keeping them cool and the tufted back will give them something to lean against so the couch will not tip over.
If you love to build dog furniture, here’s 7 Cozy DIY Indoor Dog Kennel Ideas to go with it.
Seal any raw wood edges with clear polyurethane before putting it together (it helps keep the moisture from warping the frame once the dog drools all over it).
📸 Photo credit: Instagram @morgan__skye
#6: DIY Velvet Dog Couch That Looks Like a Pinterest Dream (Because It Basically Is)
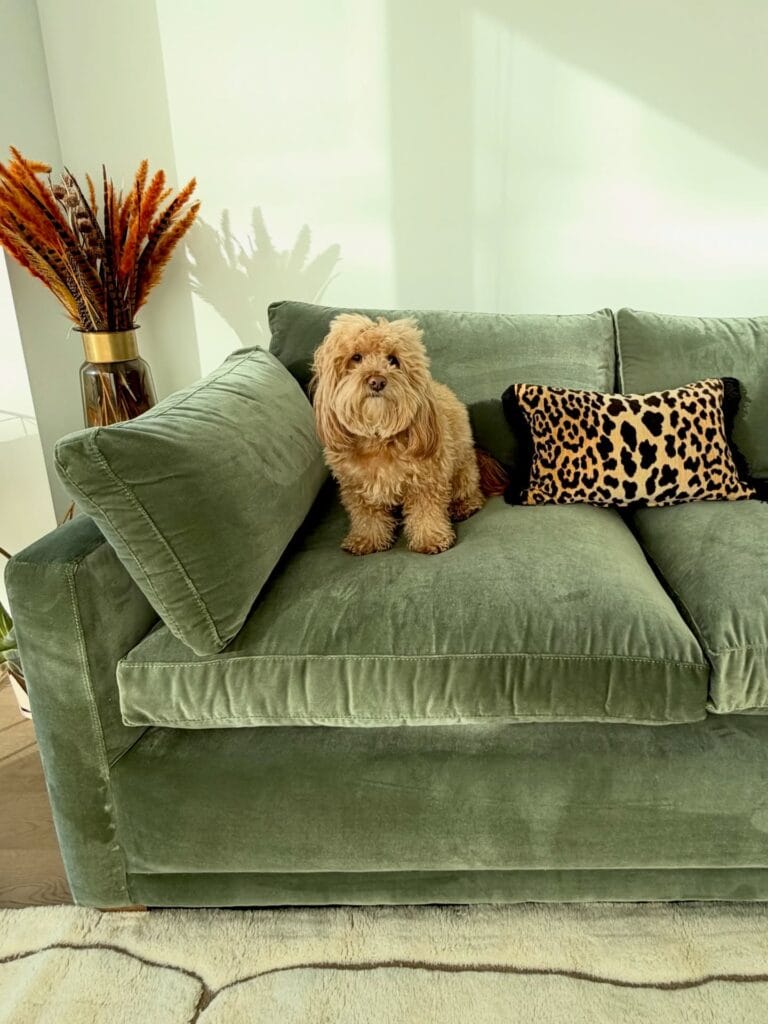
I mean that moment when you’re Golden flops onto your couch, drags their muddy paws across the cushions, and just…stares at you like they own the place? My dog does the exact same thing and at this point I stopped fighting it.
That’s why this one got me. A sage green velvet mini couch built just for your dog so they get their throne, but your actual furniture survives.
Materials & Tools:
– ¾-inch plywood (cut to 24″W x 18″D x 12″H for the frame)
– High-density foam (4-inch thick, cut to seat dimensions)
– Green velvet upholstery fabric (at least 2 yards)
– Staple gun + ½-inch staples
– Leopard print accent pillow (thrifted or handmade)
– Wood screws, sandpaper (120-grit), and a drill
– Optional: brass furniture legs for that elevated look
Instructions
Saw the plywood into 5 panels – seat, back, two arm pieces and base. I sanded all the edges until there was no roughness left, especially the arm pieces that my dog would rub against.
Assembling the frame with wood screws. Drive two wood screws into each joint so that the thing will hold even if a 30 pound dog rockets into it full speed ahead. Then I wrapped the foam with a thin layer of quilt batting and stapled the velvet over it (to give it the look of a deep squishy seat you see in the picture).
Pull the velvet tight from opposite sides as you staple, working from corner to corner. The loose fabric will wrinkle fast and it will bug you every time you look at it.
We attached the back panel at a 100 degree angle, so that our dog can lounge around on it instead of sitting upright and looking like she’s in a meeting. Screw in your brass legs last, then throw a leopard print pillow against the back corner. I mean, I’m not even joking, that pillow is doing a lot of work.
In the same vein, the velvet fabric captures dog hair and will not scatter it all over the place like on an ordinary couch. So, instead of having to use the vacuum (the one on your couch) to pick up all of the hair on your dog couch, one roll with the lint roller will do the trick.
If you like the above energy and having all these pet beds, this one is for you and here is 7 Cozy DIY Dog Beds for Large Dogs .
Cut your velvet pieces bigger than you think you need, maybe 2 inches extra on each side, so you have enough to pull taut without the fabric splitting at the staples after a few weeks of use.
Prep Time: 30 min | Active Project Time: 3–4 hours | Difficulty Level: Intermediate
📸 Photo credit: Instagram @onelove.ziggy
#7: The Rustic Wood Crate Dog Bed That Looks Like It Belongs in a Pottery Barn Catalog
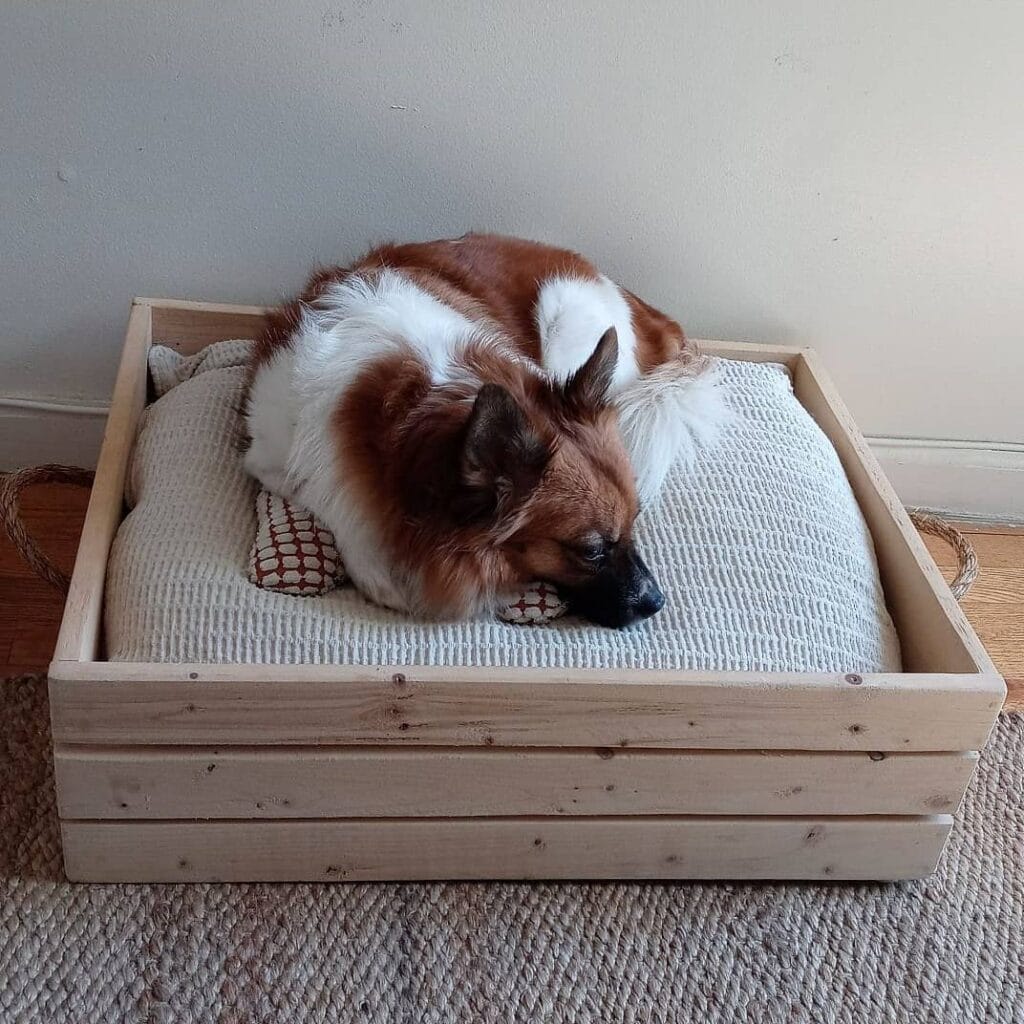
And I know that moment of my life where I watch my golden retriever spin and flop down on my living room rug, and I’m just like “girl, you deserve better than the floor.” I thought of that when I read your question because my cousin’s dog used to sleep on a folded blanket shoved in the corner of her living room. It always made me nervous when I visited.
A natural pine wood crate bed is just what your space needs.
Prep Time: 30 min | Active Project Time: 2–3 hours | Difficulty Level: Beginner-Friendly
Materials & Tools:
– 4 pine planks (1″ x 6″ x 24″) for the side walls
– 4 pine planks (1″ x 4″ x 24″) for the slatted base
– Wood screws (1.5″) and wood glue
– Sandpaper (120-grit and 220-grit)
– 2 thick rope handles (natural jute, cut to 14″ each)
– Drill with 3/8″ drill bit
– A waffle-knit blanket or cushion in light grey or cream
### Instructions
Sand all your pine planks with 120 grit sandpaper in the direction of the grain. It’s more important than you think and rough edges are never ok, especially on a dog bed for a golden that likes to press her face into the sides.
Screw the four side planks into a rectangular frame using wood glue. Screw every corner with two 1.5″ screws per joint. Allow glue to sit for at least 20 minutes before drilling so the joints don’t shift.
Start by laying your slats on the bottom of the frame with about a half-inch between each slat. This will allow for airflow under the pup, which will keep your dog cooler and less stinky. The airflow feature helps to pull heat away from the pup’s body, which means that they are more likely to sleep deeply and be a happy pup on hot days.
To continue, drill two holes on each short side about 2 inches from the top edge and thread your jute rope through the holes and knot it tight on the inside. The handles on the rope make the whole piece look like you bought it at the expensive store.
Finish with 220-grit sandpaper for a silky surface. Leave it raw for that warm honey-tone, or seal with a clear matte wax if you want it to last.
Then drop in a folded waffle-knit blanket and you’re done.
The best part: Pine is a light weight wood so you can slide this bed between rooms without scratching the floor.
Sand a little extra around the hole that the rope goes through as the edges there tend to stay a little rough and fray the rope faster than you may think.
📸 Photo credit: Instagram @tiya.darahshay
The One Mistake That’ll Ruin Your DIY Dog Couch (And How to Skip It)
most people build the couch first and then think about the fabric (why do i always have the best ideas first?).
Choose your material first and then you can sketch your measurements. For example, when my dog curls up on one of my couches, the fur will weave itself into the material as if it’s trying to stay there. Microfiber, canvas and outdoor upholstery fabric are the most pet hair resistant. Don’t pick velvet or chenille!
I once made the mistake of buying a chenille couch. Three weeks later I was basically vacuuming it daily and still finding tufts of fur in my coffee.
And speaking of cushion pressure… nobody told you, but you need to buy 2″ more of foam density than feels right in the store. It’s a dog couch, it gets squished by a dog. In a month, your “medium-firm” couch cushion feels like a deflated pool float.
Also, as a dog, measure sprawled out, not sitting. Golden Retriever sleep like they are auditioning for a mattress commercial.
Build it right the first time. Your floors will thank you for it, too.
Your Home Deserves to Stay Pretty — Even With a Golden
I hope this was inspiring! Make sure you pick one thing off this list and go grab it this week. Make sure you really go for one thing, because I know we have all pinned 47 things and then didn’t do any of them. Don’t do that! 🙂
Your golden will never leave you (and you wouldn’t want him to anyway), but those mud, drool and tumbleweed of fur, you can do without.
Don’t be fooled; you can still have your Pinterest board looking home.
So tell me, what’s the biggest mess your dog makes that you’re so over dealing with?

Amr Mohsen is a software engineer who traded his keyboard for a leash — at least on weekends. His love for dogs inspired him to share what he learns as a dog owner and enthusiast, bringing a detail-oriented, research-driven perspective to every article he writes. If it’s about dogs, he’s probably already looked it up twice.



